```
### Account-level security enforcement
An account-level setting is available to enforce authentication on all webhooks. When enabled:
* All existing webhooks without an associated service account will be automatically disabled.
* New webhooks must be created with an associated service account.
* Existing webhooks must be updated to include a service account before they can be re-enabled.
### Azure Event Grid subscriptions
Prefect Cloud webhooks support [Azure Event Grid webhook event handlers](https://learn.microsoft.com/en-us/azure/event-grid/handler-webhooks), including handling the [endpoint validation steps](https://learn.microsoft.com/en-us/azure/event-grid/receive-events?source=recommendations#endpoint-validation). When Event Grid sends a validation request to Prefect Cloud, the webhook automatically responds with the necessary validation code, confirming endpoint ownership and validity.
## Webhook Templates
The purpose of a webhook is to accept an HTTP request from another system and produce a Prefect event from it. You often have little control over the format of those requests, so Prefect's webhook system gives you full configuration on how you turn those notifications from other systems into meaningful events in your Prefect Cloud workspace. The template you define for each webhook determines how individual components of the incoming HTTP request become the event name and resource labels of the resulting Prefect event.
When creating a webhook, you write this template in [Jinja2](https://jinja.palletsprojects.com/en/3.1.x/templates/). All of the built-in Jinja2 blocks and filters are available, as well as the filters from the [`jinja2-humanize-extensions` package](https://pypi.org/project/jinja2-humanize-extension/).
Your goal when defining an event template is to produce a valid JSON object that defines (at minimum) the `event` name and the `resource["prefect.resource.id"]`, which are required of all events. The simplest template is one in which these are statically defined.
**Make sure to produce valid JSON**
The output of your template, when rendered, should be a valid string that can be parsed, for example, with `json.loads`.
### Static Webhook Events
Here's a static webhook template example that notifies Prefect when your `recommendations` machine learning model has been updated. Those models are produced on a daily schedule by another team that is using `cron` for scheduling. They aren't able to use Prefect for their flows yet, but they are happy to add a `curl` to the end of their daily script to notify you. Because this webhook is only used for a single event from a single resource, your template can be entirely static:
```JSON
{
"event": "model.refreshed",
"resource": {
"prefect.resource.id": "product.models.recommendations",
"prefect.resource.name": "Recommendations [Products]",
"producing-team": "Data Science"
}
}
```
A webhook with this template may be invoked through *any* of the HTTP methods, including a `GET` request with no body, so the team you are integrating with can include this line at the end of their daily script:
```bash
curl https://api.prefect.cloud/hooks/AERylZ_uewzpDx-8fcweHQ
```
Each time the script hits the webhook, the webhook produces a single Prefect event with that name and resource in your workspace.
### Event fields that Prefect Cloud populates for you
You only had to provide the `event` and `resource` definition, which is not a completely fleshed out event. Prefect Cloud sets default values for any missing fields, such as `occurred` and `id`, so you don't need to set them in your template. Additionally, Prefect Cloud adds the webhook itself as a related resource on all of the events it produces.
If your template does not produce a `payload` field, the `payload` defaults to a standard set of debugging information, including the HTTP method, headers, and body.
### Dynamic Webhook Events
Let's say that after a few days you and the Data Science team are getting a lot of value from the automations you have set up with the static webhook. You've agreed to upgrade this webhook to handle all of the various models that the team produces. It's time to add some dynamic information to your webhook template.
Your colleagues on the team have adjusted their daily `cron` scripts to `POST` a small body that includes the ID and name of the model that was updated:
```bash
curl \
-d "model=recommendations" \
-d "friendly_name=Recommendations%20[Products]" \
-X POST https://api.prefect.cloud/hooks/AERylZ_uewzpDx-8fcweHQ
```
This script sends a `POST` request and the body will include a traditional URL-encoded form with two fields describing the model that was updated: `model` and `friendly_name`. Here's the webhook code that uses Jinja to receive these values in your template and produce different events for the different models:
```jinja2
{
"event": "model.refreshed",
"resource": {
"prefect.resource.id": "product.models.{{ body.model }}",
"prefect.resource.name": "{{ body.friendly_name }}",
"producing-team": "Data Science"
}
}
```
All subsequent `POST` requests will produce events with those variable resource IDs and names. The other statically defined parts, such as `event` or the `producing-team` label you included earlier, will still be used.
**Use Jinja2's `default` filter to handle missing values**
Jinja2 has a helpful [`default`](https://jinja.palletsprojects.com/en/3.1.x/templates/#jinja-filters.default) filter that can compensate for missing values in the request. In this example, you may want to use the model's ID in place of the friendly name when the friendly name is not provided: `{{ body.friendly_name|default(body.model) }}`.
### How HTTP request components are handled
The Jinja2 template context includes the three parts of the incoming HTTP request:
* `method` is the uppercased string of the HTTP method, like `GET` or `POST`.
* `headers` is a case-insensitive dictionary of the HTTP headers included with the request. To prevent accidental disclosures, the `Authorization` header is removed.
* `body` represents the body that was posted to the webhook, with a best-effort approach to parse it into an object you can access.
HTTP headers are available without any alteration as a `dict`-like object, but you may access them with header names in any case. For example, these template expressions all return the value of the `Content-Length` header:
```jinja2
{{ headers['Content-Length'] }}
{{ headers['content-length'] }}
{{ headers['CoNtEnt-LeNgTh'] }}
```
The HTTP request body goes through some light preprocessing to make it more useful in templates. If the `Content-Type` of the request is `application/json`, the body will be parsed as a JSON object and made available to the webhook templates. If the `Content-Type` is `application/x-www-form-urlencoded` (as in our example above), the body is parsed into a flat `dict`-like object of key-value pairs. Jinja2 supports both index and attribute access to the fields of these objects, so the following two expressions are equivalent:
```jinja2
{{ body['friendly_name'] }}
{{ body.friendly_name }}
```
**Only for Python identifiers**
Jinja2's syntax only allows attribute-like access if the key is a valid Python identifier, so `body.friendly-name` will not work. Use `body['friendly-name']` in those cases.
Prefect Cloud will attempt to parse any other content type (such as `text/plain`) as if it were JSON first. In any case where the body cannot be transformed into JSON, it is made available to your templates as a Python `str`.
### Accept Prefect events directly
In cases where you have more control over the client, your webhook can accept Prefect events directly with a simple pass-through template:
```jinja2
{{ body|tojson }}
```
This template accepts the incoming body (assuming it was in JSON format) and passes it through unmodified. This allows a `POST` of a partial Prefect event as in this example:
```
POST /hooks/AERylZ_uewzpDx-8fcweHQ HTTP/1.1
Host: api.prefect.cloud
Content-Type: application/json
Content-Length: 228
{
"event": "model.refreshed",
"resource": {
"prefect.resource.id": "product.models.recommendations",
"prefect.resource.name": "Recommendations [Products]",
"producing-team": "Data Science"
}
}
```
The resulting event is filled out with the default values for `occurred`, `id`, and other fields as described [above](#event-fields-that-prefect-cloud-populates-for-you).
### Accepting CloudEvents
The [Cloud Native Computing Foundation](https://cncf.io) has standardized [CloudEvents](https://cloudevents.io) for use by systems to exchange event information in a common format. These events are supported by major cloud providers and a growing number of cloud-native systems. Prefect Cloud can interpret a webhook containing a CloudEvent natively with the following template:
```jinja2
{{ body|from_cloud_event(headers) }}
```
The resulting event uses the CloudEvent's `subject` as the resource (or the `source` if no `subject` is available). The CloudEvent's `data` attribute becomes the Prefect event's `payload['data']`, and the other CloudEvent metadata will be at `payload['cloudevents']`. To handle CloudEvents in a more specific way tailored to your use case, use a dynamic template to interpret the incoming `body`.
## Managing Webhooks Programmatically
In addition to [creating webhooks in the Prefect Cloud UI](/v3/how-to-guides/cloud/create-a-webhook), you can also manage them programmatically via the Prefect CLI, the Prefect Cloud API, or Terraform.
* **Prefect CLI**: Use the `prefect cloud webhook` command group. For example, to create a webhook:
```bash
prefect cloud webhook create your-webhook-name \
--description "Receives webhooks from your system" \
--template '{ "event": "your.event.name", "resource": { "prefect.resource.id": "your.resource.id" } }'
```
Use `prefect cloud webhook --help` for more commands like `ls`, `get`, `toggle`, and `rotate`. For detailed template guidance, see [Webhook Templates](#webhook-templates).
* **Prefect Cloud API**: You can interact with webhook endpoints programmatically. Refer to the [API documentation](/v3/api-ref/rest-api/cloud/) for available operations.
* **Terraform**: Use the [Prefect Terraform Provider](https://registry.terraform.io/providers/PrefectHQ/prefect/latest/docs/resources/webhook) to manage webhooks as part of your infrastructure-as-code setup. This is particularly useful for versioning webhook configurations alongside other Prefect resources.
## Troubleshooting Webhook Configuration
The initial configuration of your webhook may require some trial and error as you get the sender and your receiving webhook speaking a compatible language.
When Prefect Cloud encounters an error during receipt of a webhook, it produces a `prefect-cloud.webhook.failed` event in your workspace. This event includes critical information about the HTTP method, headers, and body it received, as well as what the template rendered. Keep an eye out for these events when something goes wrong with webhook processing or template rendering. You can inspect these events in the [event feed](/v3/concepts/events) in the UI to understand what might have gone wrong.
# Work pools
Source: https://docs-3.prefect.io/v3/concepts/work-pools
Learn how to configure dynamic infrastructure provisioning with work pools
Work pools are a bridge between the Prefect orchestration layer and the infrastructure where flows are run.
The primary reason to use work pools is for **dynamic infrastructure provisioning and configuration**.
For example, you might have a workflow that has expensive infrastructure requirements and runs infrequently.
In this case, you don't want an idle process running within that infrastructure.
Other advantages of work pools:
* Configure default infrastructure configurations on your work pools that all jobs inherit and can override.
* Allow platform teams to use work pools to expose opinionated (and enforced) interfaces to the infrastructure that they oversee.
* Allow work pools to prioritize (or limit) flow runs through the use of [work queues](/v3/deploy/infrastructure-concepts/work-pools/#work-queues).
Work pools remain a consistent interface for configuring deployment infrastructure, but only some work pool types require you to run a [worker](/v3/concepts/workers).
| Type | Description | You run a worker |
| ----------------------------------------------------- | -------------------------------------------------------------------------------------- | ---------------- |
| [Hybrid](/v3/concepts/workers) | a worker in your infrastructure submits runs to your infrastructure | Yes |
| [Push](/v3/how-to-guides/deployment_infra/serverless) | runs are automatically submitted to your configured serverless infrastructure provider | No |
| [Managed](/v3/how-to-guides/deployment_infra/managed) | runs are automatically submitted to Prefect-managed infrastructure | No |
Each type of work pool is optimized for different use cases, allowing you to choose the best fit for your specific infrastructure and workflow requirements.
By using work pools, you can efficiently manage the distribution and execution of your Prefect flows across environments and infrastructures.
**Work pools are like pub/sub topics**
Work pools help coordinate deployments with workers
through a known channel: the pool itself. This is similar to how "topics" are used to connect producers and consumers in a
pub/sub or message-based system. By switching a deployment's work pool, users can quickly change the worker that will execute their runs,
making it easy to promote runs through environments — or even to debug locally.
The following diagram provides a high-level overview of the conceptual elements involved in defining a work-pool based
deployment that is polled by a worker and executes a flow run based on that deployment.
```mermaid
%%{
init: {
'theme': 'neutral',
'themeVariables': {
'margin': '10px'
}
}
}%%
flowchart LR
B(Deployment Definition)
subgraph Server [Prefect API]
C(Deployment)
end
subgraph Remote Storage [Remote Storage]
D(Flow Code)
end
E(Worker)
subgraph Infrastructure [Infrastructure]
F((Flow Run))
end
B --> C
B -.-> D
C --> E
D -.-> E
E -.-> F
```
### Work pool types
The following work pool types are supported by Prefect:
| Infrastructure Type | Description |
| ------------------------------------ | ------------------------------------------------------------------------------------------------------------------------------------------------------------------------------------------------------------------------------------------------- |
| Process | Execute flow runs as subprocesses on a worker. Works well for local execution when first getting started. |
| AWS Elastic Container Service | Execute flow runs within containers on AWS ECS. Works with EC2 and Fargate clusters. Requires an AWS account. |
| Azure Container Instances | Execute flow runs within containers on Azure's Container Instances service. Requires an Azure account. |
| Docker | Execute flow runs within Docker containers. Works well for managing flow execution environments through Docker images. Requires access to a running Docker daemon. |
| Google Cloud Run | Execute flow runs within containers on Google Cloud Run. Requires a Google Cloud Platform account. |
| Google Cloud Run V2 | Execute flow runs within containers on Google Cloud Run (V2 API). Requires a Google Cloud Platform account. |
| Google Vertex AI | Execute flow runs within containers on Google Vertex AI. Requires a Google Cloud Platform account. |
| Kubernetes | Execute flow runs within jobs scheduled on a Kubernetes cluster. Requires a Kubernetes cluster. |
| Google Cloud Run - Push | Execute flow runs within containers on Google Cloud Run. Requires a Google Cloud Platform account. Flow runs are pushed directly to your environment, without the need for a Prefect worker. |
| AWS Elastic Container Service - Push | Execute flow runs within containers on AWS ECS. Works with existing ECS clusters and serverless execution through AWS Fargate. Requires an AWS account. Flow runs are pushed directly to your environment, without the need for a Prefect worker. |
| Azure Container Instances - Push | Execute flow runs within containers on Azure's Container Instances service. Requires an Azure account. Flow runs are pushed directly to your environment, without the need for a Prefect worker. |
| Modal - Push | Execute [flow runs on Modal](/v3/how-to-guides/deployment_infra/modal). Requires a Modal account. Flow runs are pushed directly to your Modal workspace, without the need for a Prefect worker. |
| Coiled | Execute flow runs in the cloud platform of your choice with Coiled. Makes it easy to run in your account without setting up Kubernetes or other cloud infrastructure. |
| Prefect Managed | Execute flow runs within containers on Prefect managed infrastructure. |
| Infrastructure Type | Description |
| ----------------------------- | ------------------------------------------------------------------------------------------------------------------------------------------------------------------ |
| Process | Execute flow runs as subprocesses on a worker. Works well for local execution when first getting started. |
| AWS Elastic Container Service | Execute flow runs within containers on AWS ECS. Works with EC2 and Fargate clusters. Requires an AWS account. |
| Azure Container Instances | Execute flow runs within containers on Azure's Container Instances service. Requires an Azure account. |
| Docker | Execute flow runs within Docker containers. Works well for managing flow execution environments through Docker images. Requires access to a running Docker daemon. |
| Google Cloud Run | Execute flow runs within containers on Google Cloud Run. Requires a Google Cloud Platform account. |
| Google Cloud Run V2 | Execute flow runs within containers on Google Cloud Run (V2 API). Requires a Google Cloud Platform account. |
| Google Vertex AI | Execute flow runs within containers on Google Vertex AI. Requires a Google Cloud Platform account. |
| Kubernetes | Execute flow runs within jobs scheduled on a Kubernetes cluster. Requires a Kubernetes cluster. |
### Work queues
Work queues offer advanced control over how runs are executed. Each work pool has a "default" queue which is used if another work queue name is not specified.
Add additional queues to a work pool to enable greater control over work delivery through fine-grained priority and concurrency.
#### Queue priority
Each work queue has a priority indicated by a unique positive integer. Lower numbers take greater priority in the allocation of work with `1` being the highest priority.
You can add new queues without changing the rank of the higher-priority queues.
#### Queue concurrency limits
Work queues can also have their own concurrency limits. Each queue is also subject to the global work pool concurrency limit,
which cannot be exceeded.
#### Precise control with priority and concurrency
Together, work queue priority and concurrency enable precise control over work. For example, a pool may have three queues:
* a "low" queue with priority `10` and no concurrency limit
* a "high" queue with priority `5` and a concurrency limit of `3`
* a "critical" queue with priority `1` and a concurrency limit of `1`
This arrangement enables a pattern of two levels of priority: "high" and "low" for regularly scheduled flow runs,
with the remaining "critical" queue for unplanned, urgent work, such as a backfill.
Priority determines the order of flow runs submitted for execution.
If all flow runs are capable of being executed with no limitation due to concurrency or otherwise,
priority is still used to determine order of submission, but there is no impact to execution.
If not all flow runs can execute, usually as a result of concurrency limits, priority determines which queues receive
precedence to submit runs for execution.
Priority for flow run submission proceeds from the highest priority to the lowest priority. In the previous example, all work from the
"critical" queue (priority 1) is submitted, before any work is submitted from "high" (priority 5). Once all work is submitted
from priority queue "critical", work from the "high" queue begins submission.
If new flow runs are received on the "critical" queue while flow runs are still in scheduled on the "high" and "low" queues, flow run
submission goes back to ensuring all scheduled work is first satisfied. This happens from the highest priority queue, until it is empty,
in waterfall fashion.
**Work queue status**
A work queue has a `READY` status when it has been polled by a worker in the last 60 seconds. Pausing a work queue gives it a
`PAUSED` status and means that it will accept no new work until it is unpaused. A user can control the work queue's paused status in the UI.
Unpausing a work queue gives the work queue a `NOT_READY` status unless a worker has polled it in the last 60 seconds.
## Further reading
* Learn more about [workers](/v3/deploy/infrastructure-concepts/workers) and how they interact with work pools
* Learn how to [deploy flows](/v3/deploy/infrastructure-concepts/prefect-yaml) that run in work pools
* Learn how to set up work pools for:
* [Kubernetes](/v3/how-to-guides/deployment_infra/kubernetes)
* [Docker](/v3/how-to-guides/deployment_infra/docker)
* [Serverless platforms](/v3/how-to-guides/deployment_infra/serverless)
* [Infrastructure managed by Prefect Cloud](/v3/how-to-guides/deployment_infra/managed)
# Workers
Source: https://docs-3.prefect.io/v3/concepts/workers
Workers poll work pools for new runs to execute.
export const workers = {
helm: "https://github.com/PrefectHQ/prefect-helm/tree/main/charts/prefect-server"
};
export const HELM = ({name, href}) => You can manage {name} with the Prefect Helm charts.
;
Workers are lightweight polling services that retrieve scheduled runs from a work pool and execute them.
Workers each have a type corresponding to the execution environment to submit flow runs to.
Workers can only poll work pools that match their type.
As a result, when deployments are assigned to a work pool, you know in which execution environment scheduled flow runs for that deployment will run.
The following diagram summarizes the architecture of a worker-based work pool deployment:
```mermaid
%%{
init: {
'theme': 'neutral',
'themeVariables': {
'margin': '10px'
}
}
}%%
flowchart TD
subgraph your_infra["Your Execution Environment"]
worker["Worker"]
subgraph flow_run_infra[Infrastructure]
flow_run_a(("Flow Run A"))
end
subgraph flow_run_infra_2[Infrastructure]
flow_run_b(("Flow Run B"))
end
end
subgraph api["Prefect API"]
Deployment --> |assigned to| work_pool
work_pool(["Work Pool"])
end
worker --> |polls| work_pool
worker --> |creates| flow_run_infra
worker --> |creates| flow_run_infra_2
```
The worker is in charge of provisioning the *flow run infrastructure*.
### Worker types
Below is a list of available worker types. Most worker types require installation of an additional package.
| Worker Type | Description | Required Package |
| ---------------------------------------------------------------------------------------------------- | ------------------------------------------------- | -------------------- |
| [`process`](https://reference.prefect.io/prefect/workers/process/) | Executes flow runs in subprocesses | |
| [`kubernetes`](https://reference.prefect.io/prefect_kubernetes/worker/) | Executes flow runs as Kubernetes jobs | `prefect-kubernetes` |
| [`docker`](https://reference.prefect.io/prefect_docker/worker/) | Executes flow runs within Docker containers | `prefect-docker` |
| [`ecs`](https://reference.prefect.io/prefect_aws/workers/ecs_worker/) | Executes flow runs as ECS tasks | `prefect-aws` |
| [`cloud-run-v2`](https://reference.prefect.io/prefect_gcp/workers/cloud_run_v2/) | Executes flow runs as Google Cloud Run jobs | `prefect-gcp` |
| [`vertex-ai`](https://reference.prefect.io/prefect_gcp/workers/vertex/) | Executes flow runs as Google Cloud Vertex AI jobs | `prefect-gcp` |
| [`azure-container-instance`](https://reference.prefect.io/prefect_azure/workers/container_instance/) | Execute flow runs in ACI containers | `prefect-azure` |
| [`coiled`](https://github.com/coiled/prefect-worker/blob/main/example/README.md) | Execute flow runs in your cloud with Coiled | `prefect-coiled` |
If you don't see a worker type that meets your needs, consider
[developing a new worker type](/contribute/develop-a-new-worker-type/).
### Worker options
Workers poll for work from one or more queues within a work pool. If the worker references a work queue that doesn't exist, it is created automatically.
The worker CLI infers the worker type from the work pool.
Alternatively, you can specify the worker type explicitly.
If you supply the worker type to the worker CLI, a work pool is created automatically if it doesn't exist (using default job settings).
Configuration parameters you can specify when starting a worker include:
| Option | Description |
| ------------------------------------------------- | ------------------------------------------------------------------------------------------------------------------------------------------- |
| `--name`, `-n` | The name to give to the started worker. If not provided, a unique name will be generated. |
| `--pool`, `-p` | The work pool the started worker should poll. |
| `--work-queue`, `-q` | One or more work queue names for the worker to pull from. If not provided, the worker pulls from all work queues in the work pool. |
| `--type`, `-t` | The type of worker to start. If not provided, the worker type is inferred from the work pool. |
| `--prefetch-seconds` | The amount of time before a flow run's scheduled start time to begin submission. Default is the value of `PREFECT_WORKER_PREFETCH_SECONDS`. |
| `--run-once` | Only run worker polling once. By default, the worker runs forever. |
| `--limit`, `-l` | The maximum number of flow runs to start simultaneously. |
| `--with-healthcheck` | Start a healthcheck server for the worker. |
| `--install-policy` | Install policy to use workers from Prefect integration packages. |
You must start a worker within an environment to access or create the required infrastructure to execute flow runs.
The worker will deploy flow runs to the infrastructure corresponding to the worker type. For example, if you start a worker with
type `kubernetes`, the worker deploys flow runs to a Kubernetes cluster.
Prefect must be installed in any environment (for example, virtual environment, Docker container) where you intend to run the worker or
execute a flow run.
**`PREFECT_API_URL` and `PREFECT_API_KEY`settings for workers**
`PREFECT_API_URL` must be set for the environment where your worker is running. When using Prefect Cloud, you must also have a user or service account
with the `Worker` role, which you can configure by setting the `PREFECT_API_KEY`.
### Worker status
Workers have two statuses: `ONLINE` and `OFFLINE`. A worker is online if it sends regular heartbeat messages to the Prefect API.
If a worker misses three heartbeats, it is considered offline. By default, a worker is considered offline a maximum of 90 seconds
after it stopped sending heartbeats, but you can configure the threshold with the `PREFECT_WORKER_HEARTBEAT_SECONDS` setting.
### Worker logs
Workers send logs to the Prefect Cloud API if you're connected to Prefect Cloud.
* All worker logs are automatically sent to the Prefect Cloud API
* Logs are accessible through both the Prefect Cloud UI and API
* Each flow run will include a link to its associated worker's logs
### Worker details
The **Worker Details** page shows you three key areas of information:
* Worker status
* Installed Prefect version
* Installed Prefect integrations (e.g., `prefect-aws`, `prefect-gcp`)
* Live worker logs (if worker logging is enabled)
Access a worker's details by clicking on the worker's name in the Work Pool list.
### Start a worker
Use the `prefect worker start` CLI command to start a worker. You must pass at least the work pool name.
If the work pool does not exist, it will be created if the `--type` flag is used.
```bash
prefect worker start -p [work pool name]
```
For example:
```bash
prefect worker start -p "my-pool"
```
Results in output like this:
```bash
Discovered worker type 'process' for work pool 'my-pool'.
Worker 'ProcessWorker 65716280-96f8-420b-9300-7e94417f2673' started!
```
In this case, Prefect automatically discovered the worker type from the work pool.
To create a work pool and start a worker in one command, use the `--type` flag:
```bash
prefect worker start -p "my-pool" --type "process"
```
```bash
Worker 'ProcessWorker d24f3768-62a9-4141-9480-a056b9539a25' started!
06:57:53.289 | INFO | prefect.worker.process.processworker d24f3768-62a9-4141-9480-a056b9539a25 - Worker pool 'my-pool' created.
```
In addition, workers can limit the number of flow runs to start simultaneously with the `--limit` flag.
For example, to limit a worker to five concurrent flow runs:
```bash
prefect worker start --pool "my-pool" --limit 5
```
### Configure prefetch
By default, the worker submits flow runs 10 seconds before they are scheduled to run.
This allows time for the infrastructure to be created so the flow run can start on time.
In some cases, infrastructure takes longer than 10 seconds to start the flow run. You can increase the prefetch time with the
`--prefetch-seconds` option or the `PREFECT_WORKER_PREFETCH_SECONDS` setting.
If this value is *more* than the amount of time it takes for the infrastructure to start, the flow run will *wait* until its
scheduled start time.
### Polling for work
Workers poll for work every 15 seconds by default. You can configure this interval in your [profile settings](/v3/develop/settings-and-profiles/)
with the
`PREFECT_WORKER_QUERY_SECONDS` setting.
### Install policy
The Prefect CLI can install the required package for Prefect-maintained worker types automatically. Configure this behavior
with the `--install-policy` option. The following are valid install policies:
| Install Policy | Description |
| ------------------------------------------------------------------------------------------------------------ | ------------------------------------------------------------------------------------------------------------------ |
| `always` | Always install the required package. Updates the required package to the most recent version if already installed. |
| `if-not-present` | Install the required package if it is not already installed. |
| `never` | Never install the required package. |
| `prompt` | Prompt the user to choose whether to install the required package. This is the default install policy. |
| If `prefect worker start` is run non-interactively, the `prompt` install policy behaves the same as `never`. | |
### Further reading
* See how to [daemonize a Prefect worker](/v3/advanced/daemonize-processes/).
* See more information on [overriding a work pool's job variables](/v3/deploy/infrastructure-concepts/customize).
***
# Hello, world!
Source: https://docs-3.prefect.io/v3/examples/hello-world
Your first steps with Prefect – learn how to create a basic flow and understand core concepts.
{/*
This page is automatically generated via the `generate_example_pages.py` script. Any changes to this page will be overwritten.
*/}
View on GitHub
Welcome to your first Prefect flow. In under a minute you will:
1. Ship production-ready orchestration code with **zero boilerplate**.
2. See live, structured logs without writing any logging boilerplate.
3. Understand how the very same Python stays portable from a laptop to Kubernetes (or Prefect Cloud).
*Pro tip*: change anything in this file and re-run it. Prefect hot-loads your new logic in seconds, no image builds, ever.
## Importing Prefect and setting up
We start by importing the essential `flow` decorator from Prefect.
```python
from prefect import flow, tags
```
## Defining a flow
Prefect takes your Python functions and transforms them into flows with enhanced capabilities.
Let's write a simple function that takes a name parameter and prints a greeting.
To make this function work with Prefect, we just wrap it in the `@flow` decorator.
```python
@flow(log_prints=True)
def hello(name: str = "Marvin") -> None:
"""Log a friendly greeting."""
print(f"Hello, {name}!")
```
## Running our flow locally and with parameters
Now let's see different ways we can call that flow:
1. As a regular call with default parameters
2. With custom parameters
3. Multiple times to greet different people
```python
if __name__ == "__main__":
# run the flow with default parameters
with tags(
"test"
): # This is a tag that we can use to filter the flow runs in the UI
hello() # Logs: "Hello, Marvin!"
# run the flow with a different input
hello("Marvin") # Logs: "Hello, Marvin!"
# run the flow multiple times for different people
crew = ["Zaphod", "Trillian", "Ford"]
for name in crew:
hello(name)
```
## What just happened?
When we decorated our function with `@flow`, the function was transformed into a Prefect flow. Each time we called it:
1. Prefect registered the execution as a flow run
2. It tracked all inputs, outputs, and logs
3. It maintained detailed state information about the execution
4. Added tags to the flow run to make it easier to find when observing the flow runs in the UI
In short, we took a regular function and enhanced it with observability and tracking capabilities.
## But why does this matter?
This simple example demonstrates Prefect's core value proposition: taking regular Python code and enhancing it with production-grade orchestration capabilities. Let's explore why this matters for real-world data workflows.
### You can change the code and run it again
For instance, change the greeting message in the `hello` function to a different message and run the flow again.
You'll see your changes immediately reflected in the logs.
### You can process more data
Add more names to the `crew` list or create a larger data set to process. Prefect will handle each execution and track every input and output.
### You can run a more complex flow
The `hello` function is a simple example, but in its place imagine something that matters to you, like:
* ETL processes that extract, transform, and load data
* Machine learning training and inference pipelines
* API integrations and data synchronization jobs
Prefect lets you orchestrate these operations effortlessly with automatic observability, error handling, and retries.
### Key Takeaways
Remember that Prefect makes it easy to:
* Transform regular Python functions into production-ready workflows with just a [decorator](https://docs.prefect.io/v3/develop/write-flows#write-and-run-flows)
* Get automatic logging, [retries](https://docs.prefect.io/v3/develop/write-tasks#retries), and observability without extra code
* Run the same code anywhere - from your laptop to production
* Build complex data pipelines while maintaining simplicity
* Track every execution with [detailed logs](https://docs.prefect.io/v3/develop/logging#configure-logging) and state information
The `@flow` decorator is your gateway to enterprise-grade orchestration - no complex configuration needed!
For more information about the orchestration concepts demonstrated in this example, see the [Prefect documentation](https://docs.prefect.io/).
# Overview
Source: https://docs-3.prefect.io/v3/examples/index
{/*
This page is automatically generated via the `generate_example_pages.py` script. Any changes to this page will be overwritten.
*/}
Have an example to share? Check out our [contributing guide](/contribute/docs-contribute#contributing-examples) to get started.
Orchestrate any dbt project with bullet-proof retries, observability, and a single Python file – no YAML or shell scripts required.
Your first steps with Prefect – learn how to create a basic flow and understand core concepts.
Learn how to scrape article content from web pages with Prefect tasks, retries, and automatic logging.
Build a small ETL pipeline that fetches JSON from a public API, transforms it with pandas, and writes a CSV – all orchestrated by Prefect.
# API-sourced ETL
Source: https://docs-3.prefect.io/v3/examples/run-api-sourced-etl
Build a small ETL pipeline that fetches JSON from a public API, transforms it with pandas, and writes a CSV – all orchestrated by Prefect.
{/*
This page is automatically generated via the `generate_example_pages.py` script. Any changes to this page will be overwritten.
*/}
View on GitHub
Prefect turns everyday Python into production-grade workflows with **zero boilerplate**.
When you pair Prefect with pandas you get a **versatile ETL toolkit**:
* **Python** supplies a rich ecosystem of connectors and libraries for virtually every data source and destination.
* **pandas** gives you lightning-fast, expressive transforms that turn raw bits into tidy DataFrames.
* **Prefect** wraps the whole thing in battle-tested orchestration: automatic [retries](https://docs.prefect.io/v3/develop/write-tasks#retries), [scheduling](https://docs.prefect.io/v3/deploy/index#workflow-scheduling-and-parametrization), and [observability](https://docs.prefect.io/v3/develop/logging#prefect-loggers) , so you don't have to write reams of defensive code.
The result? You spend your time thinking about *what* you want to build, not *how* to keep it alive. Point this trio at any API, database, or file system and it will move the data where you need it while handling the messy details for you.
In this article you will:
1. **Extract** JSON from the public [Dev.to REST API](https://dev.to/api).
2. **Transform** it into an analytics-friendly pandas `DataFrame`.
3. **Load** the result to a CSV – ready for your BI tool of choice.
This example demonstrates these Prefect features:
* [`@task`](https://docs.prefect.io/v3/develop/write-tasks#write-and-run-tasks) – wrap any function in retries & observability.
* [`log_prints`](https://docs.prefect.io/v3/develop/logging#configure-logging) – surface `print()` logs automatically.
* Automatic [**retries**](https://docs.prefect.io/v3/develop/write-tasks#retries) with back-off, no extra code.
### Rapid analytics from a public API
Your data team wants engagement metrics from Dev.to articles, daily. You need a quick,
reliable pipeline that anyone can run locally and later schedule in Prefect Cloud.
### The Solution
Write three small Python functions (extract, transform, load), add two decorators, and
let Prefect handle [retries](https://docs.prefect.io/v3/develop/write-tasks#retries), [concurrency](https://docs.prefect.io/v3/develop/task-runners#configure-a-task-runner), and [logging](https://docs.prefect.io/v3/develop/logging#prefect-loggers). No framework-specific hoops, just
Python the way you already write it.
*For more background on Prefect's design philosophy, check out our blog post: [Built to Fail: Design Patterns for Resilient Data Pipelines](https://www.prefect.io/blog/built-to-fail-design-patterns-for-resilient-data-pipelines)*
Watch as Prefect orchestrates the ETL pipeline with automatic retries and logging. The flow fetches multiple pages of articles, transforms them into a structured DataFrame, and saves the results to CSV. This pattern is highly adaptable - use it to build pipelines that move data between any sources and destinations:
* APIs → Databases (Postgres, MySQL, etc.)
* APIs → Cloud Storage (S3, GCS, Azure)
* APIs → Data Warehouses (Snowflake, BigQuery, Redshift, etc.)
* And many more combinations
## Code walkthrough
1. **Imports** – Standard libraries for HTTP + pandas.
2. **`fetch_page` task** – Downloads a single page with retries.
3. **`to_dataframe` task** – Normalises JSON to a pandas DataFrame.
4. **`save_csv` task** – Persists the DataFrame and logs a peek.
5. **`etl` flow** – Orchestrates the tasks sequentially for clarity.
6. **Execution** – A friendly `if __name__ == "__main__"` with some basic configurations kicks things off.
```python
from __future__ import annotations
from pathlib import Path
from typing import Any
import httpx
import pandas as pd
from prefect import flow, task
```
***
## Extract – fetch a single page of articles
```python
@task(retries=3, retry_delay_seconds=[2, 5, 15])
def fetch_page(page: int, api_base: str, per_page: int) -> list[dict[str, Any]]:
"""Return a list of article dicts for a given page number."""
url = f"{api_base}/articles"
params = {"page": page, "per_page": per_page}
print(f"Fetching page {page} …")
response = httpx.get(url, params=params, timeout=30)
response.raise_for_status()
return response.json()
```
***
## Transform – convert list\[dict] ➜ pandas DataFrame
```python
@task
def to_dataframe(raw_articles: list[list[dict[str, Any]]]) -> pd.DataFrame:
"""Flatten & normalise JSON into a tidy DataFrame."""
# Combine pages, then select fields we care about
records = [article for page in raw_articles for article in page]
df = pd.json_normalize(records)[
[
"id",
"title",
"published_at",
"url",
"comments_count",
"positive_reactions_count",
"tag_list",
"user.username",
]
]
return df
```
***
## Load – save DataFrame to CSV (or print preview)
```python
@task
def save_csv(df: pd.DataFrame, path: Path) -> None:
"""Persist DataFrame to disk then log a preview."""
df.to_csv(path, index=False)
print(f"Saved {len(df)} rows ➜ {path}\n\nPreview:\n{df.head()}\n")
```
***
## Flow – orchestrate the ETL with optional concurrency
```python
@flow(name="devto_etl", log_prints=True)
def etl(api_base: str, pages: int, per_page: int, output_file: Path) -> None:
"""Run the end-to-end ETL for *pages* of articles."""
# Extract – simple loop for clarity
raw_pages: list[list[dict[str, Any]]] = []
for page_number in range(1, pages + 1):
raw_pages.append(fetch_page(page_number, api_base, per_page))
# Transform
df = to_dataframe(raw_pages)
# Load
save_csv(df, output_file)
```
## Run it!
```bash
python 01_getting_started/03_run_api_sourced_etl.py
```
```python
if __name__ == "__main__":
# Configuration – tweak to taste
api_base = "https://dev.to/api"
pages = 3 # Number of pages to fetch
per_page = 30 # Articles per page (max 30 per API docs)
output_file = Path("devto_articles.csv")
etl(api_base=api_base, pages=pages, per_page=per_page, output_file=output_file)
```
## What just happened?
1. Prefect registered a *flow run* and three *task runs* (`fetch_page`, `to_dataframe`, `save_csv`).
2. Each `fetch_page` call downloaded a page and, if it failed, would automatically retry.
3. The raw JSON pages were combined into a single pandas DataFrame.
4. The CSV was written to disk and a preview printed locally (the flow's `log_prints=True` flag logs messages inside the flow body; prints inside tasks are displayed in the console).
5. You can view run details, timings, and logs in the Prefect UI.
## Key Takeaways
* **Pure Python, powered-up** – Decorators add retries and logging without changing your logic.
* **Observability first** – Each task run (including every page fetch) is logged and can be viewed in the UI if you have a Prefect Cloud account or a local Prefect server running.
* **Composable** – Swap `save_csv` for a database loader or S3 upload with one small change.
* **Reusable** – Import the `etl` flow and run it with different parameters from another flow.
Prefect lets you focus on *data*, not orchestration plumbing – happy ETL-ing! 🎉
# dbt Model Orchestration
Source: https://docs-3.prefect.io/v3/examples/run-dbt-with-prefect
Orchestrate any dbt project with bullet-proof retries, observability, and a single Python file – no YAML or shell scripts required.
{/*
This page is automatically generated via the `generate_example_pages.py` script. Any changes to this page will be overwritten.
*/}
View on GitHub
**Transform unreliable dbt scripts into production-grade data pipelines with enterprise observability, automatic failure recovery, and zero-downtime deployments.**
When you combine Prefect with dbt, you get the **perfect marriage of best-in-class analytics tools**:
* **Python** gives you the flexibility to integrate with any data source, API, or system your analytics need.
* **dbt Core** handles the heavy lifting of SQL transformations, testing, and documentation.
* **Prefect** wraps the entire workflow in battle-tested orchestration: automatic [retries](https://docs.prefect.io/v3/develop/write-tasks#retries), [scheduling](https://docs.prefect.io/v3/deploy/index#workflow-scheduling-and-parametrization), and [observability](https://docs.prefect.io/v3/develop/logging#prefect-loggers).
The result? Your analytics team gets reliable, observable data pipelines that leverage the strengths of both platforms. Point this combo at any warehouse and it will transform your data while providing enterprise-grade workflow management.
> **Note**: This example uses **dbt Core** (the open-source CLI). For dbt Cloud integration, see the [dbt Cloud examples](https://docs.prefect.io/integrations/prefect-dbt#dbt-cloud) in the Prefect documentation.
This example demonstrates these Prefect features:
* [`@task`](https://docs.prefect.io/v3/develop/write-tasks#write-and-run-tasks) – wrap dbt commands in retries & observability.
* [`log_prints`](https://docs.prefect.io/v3/develop/logging#configure-logging) – surface dbt output automatically in Prefect logs.
* Automatic [**retries**](https://docs.prefect.io/v3/develop/write-tasks#retries) with exponential back-off for flaky network connections.
* [**prefect-dbt integration**](https://docs.prefect.io/integrations/prefect-dbt) – native dbt execution with enhanced logging and failure handling.
### The Scenario: Reliable Analytics Workflows
Your analytics team uses dbt to model data in DuckDB for rapid local development and testing, but deploys to Snowflake in production. You need a workflow that:
* Anyone can run locally without complex setup (DuckDB)
* Automatically retries on network failures or temporary dbt errors
* Provides clear logs and observability for debugging
* Can be easily scheduled and deployed to production
### Our Solution
Write three focused Python functions (download project, run dbt commands, orchestrate workflow), add Prefect decorators, and let Prefect handle [retries](https://docs.prefect.io/v3/develop/write-tasks#retries), [logging](https://docs.prefect.io/v3/develop/logging#prefect-loggers), and [scheduling](https://docs.prefect.io/v3/deploy/index#workflow-scheduling-and-parametrization). The entire example is self-contained – no git client or global dbt configuration required.
*For more on integrating Prefect with dbt, see the [Prefect documentation](https://docs.prefect.io/integrations/dbt).*
### Running the example locally
```bash
python 02_flows/prefect_and_dbt.py
```
Watch as Prefect orchestrates the complete dbt lifecycle: downloading the project, running models, executing tests, and materializing results. The flow creates a local DuckDB file you can explore with any SQL tool.
## Code walkthrough
1. **Project Setup** – Download and cache a demo dbt project from GitHub
2. **dbt CLI Wrapper** – Execute dbt commands with automatic retries and logging using prefect-dbt
3. **Orchestration Flow** – Run the complete dbt lifecycle in sequence
4. **Execution** – Self-contained example that works out of the box
```python
import io
import shutil
import urllib.request
import zipfile
from pathlib import Path
from prefect_dbt import PrefectDbtRunner, PrefectDbtSettings
from prefect import flow, task
DEFAULT_REPO_ZIP = (
"https://github.com/PrefectHQ/examples/archive/refs/heads/examples-markdown.zip"
)
```
***
## Project Setup – download and cache dbt project
To keep this example fully self-contained, we download a demo dbt project
directly from GitHub as a ZIP file. This means users don't need git installed.
[Learn more about tasks in the Prefect documentation](https://docs.prefect.io/v3/develop/write-tasks)
```python
@task(retries=2, retry_delay_seconds=5, log_prints=True)
def build_dbt_project(repo_zip_url: str = DEFAULT_REPO_ZIP) -> Path:
"""Download and extract the demo dbt project, returning its local path.
To keep the example fully self-contained we grab the GitHub archive as a ZIP
so users do **not** need `git` installed. The project is extracted from the
PrefectHQ/examples repository into a sibling directory next to this script
(`prefect_dbt_project`). If that directory already exists we skip the download
to speed up subsequent runs.
"""
project_dir = Path(__file__).parent / "prefect_dbt_project"
if project_dir.exists():
print(f"Using cached dbt project at {project_dir}\n")
return project_dir
tmp_extract_base = project_dir.parent / "_tmp_dbt_extract"
if tmp_extract_base.exists():
shutil.rmtree(tmp_extract_base)
print(f"Downloading dbt project archive → {repo_zip_url}\n")
with urllib.request.urlopen(repo_zip_url) as resp:
data = resp.read()
with zipfile.ZipFile(io.BytesIO(data)) as zf:
zf.extractall(tmp_extract_base)
# Find the folder containing dbt_project.yml (in resources/prefect_dbt_project)
candidates = list(
tmp_extract_base.rglob("**/resources/prefect_dbt_project/dbt_project.yml")
)
if not candidates:
raise ValueError(
"dbt_project.yml not found in resources/prefect_dbt_project – structure unexpected"
)
project_root = candidates[0].parent
shutil.move(str(project_root), str(project_dir))
shutil.rmtree(tmp_extract_base)
print(f"Extracted dbt project to {project_dir}\n")
return project_dir
```
***
## Create profiles.yml for DuckDB – needed for dbt to work
This task creates a simple profiles.yml file for DuckDB so dbt can connect
to the database. This keeps the example self-contained.
```python
@task(retries=2, retry_delay_seconds=5, log_prints=True)
def create_dbt_profiles(project_dir: Path) -> None:
"""Create a profiles.yml file for DuckDB connection.
This creates a simple DuckDB profile so dbt can run without external
database configuration. The profile points to a local DuckDB file.
This will overwrite any existing profiles.yml to ensure correct formatting.
"""
profiles_content = f"""demo:
outputs:
dev:
type: duckdb
path: {project_dir}/demo.duckdb
threads: 1
target: dev"""
profiles_path = project_dir / "profiles.yml"
with open(profiles_path, "w") as f:
f.write(profiles_content)
print(f"Created/updated profiles.yml at {profiles_path}")
```
***
## dbt CLI Wrapper – execute commands with retries and logging using prefect-dbt
This task uses the modern PrefectDbtRunner from prefect-dbt integration which
provides native dbt execution with enhanced logging, failure handling, and
automatic event emission.
[Learn more about retries in the Prefect documentation](https://docs.prefect.io/v3/develop/write-tasks#retries)
```python
@task(retries=2, retry_delay_seconds=5, log_prints=True)
def run_dbt_commands(commands: list[str], project_dir: Path) -> None:
"""Run dbt commands using the modern prefect-dbt integration.
Uses PrefectDbtRunner which provides enhanced logging, failure handling,
and automatic Prefect event emission for dbt node status changes.
This is much more robust than subprocess calls and integrates natively
with Prefect's observability features.
"""
print(f"Running dbt commands: {commands}\n")
# Configure dbt settings to point to our project directory
settings = PrefectDbtSettings(
project_dir=str(project_dir),
profiles_dir=str(project_dir), # Use project dir for profiles too
)
# Create runner and execute commands
# Use raise_on_failure=False to handle dbt failures more gracefully
runner = PrefectDbtRunner(settings=settings, raise_on_failure=False)
for command in commands:
print(f"Executing: dbt {command}")
runner.invoke(command.split())
print(f"Completed: dbt {command}\n")
```
***
## Orchestration Flow – run the complete dbt lifecycle
This flow orchestrates the standard dbt workflow: debug → deps → seed → run → test.
Each step is a separate task run in Prefect, providing granular observability
and automatic retry handling for any step that fails. Now using the flexible
prefect-dbt integration for enhanced dbt execution.
[Learn more about flows in the Prefect documentation](https://docs.prefect.io/v3/develop/write-flows)
```python
@flow(name="dbt_flow", log_prints=True)
def dbt_flow(repo_zip_url: str = DEFAULT_REPO_ZIP) -> None:
"""Run the demo dbt project with Prefect using prefect-dbt integration.
Steps executed:
1. Download and setup the dbt project
2. Create profiles.yml for DuckDB connection
3. `dbt deps` – download any package dependencies (none for this tiny demo).
4. `dbt seed` – load seed CSVs if they exist (safe to run even when empty).
5. `dbt run` – build the model(s) defined under `models/`.
6. `dbt test` – execute any tests declared in the project.
Each step runs as a separate Prefect task with automatic retries and logging.
Uses the modern prefect-dbt integration for enhanced observability and
native dbt execution.
"""
project_dir = build_dbt_project(repo_zip_url)
create_dbt_profiles(project_dir)
# dbt commands – executed sequentially using prefect-dbt integration
run_dbt_commands(["deps"], project_dir)
run_dbt_commands(["seed"], project_dir)
run_dbt_commands(["run"], project_dir)
run_dbt_commands(["test"], project_dir)
# Let users know where the DuckDB file was written for exploration
duckdb_path = project_dir / "demo.duckdb"
print(f"\nDone! DuckDB file located at: {duckdb_path.resolve()}")
```
### What Just Happened?
Here's the sequence of events when you run this flow:
1. **Project Download** – Prefect registered a task run to download and extract the dbt project from GitHub (with automatic caching for subsequent runs).
2. **dbt Lifecycle** – Five separate task runs executed the standard dbt workflow: `deps`, `seed`, `run`, and `test`.
3. **Native dbt Integration** – Each dbt command used the `DbtCoreOperation` for enhanced logging, failure handling, and automatic event emission.
4. **Automatic Retries** – Each dbt command would automatically retry on failure (network issues, temporary dbt errors, etc.).
5. **Centralized Logging** – All dbt output streamed directly to Prefect logs with proper log level mapping.
6. **Event Emission** – Prefect automatically emitted events for each dbt node execution, enabling advanced monitoring and alerting.
7. **Local Results** – A DuckDB file appeared at `prefect_dbt_project/demo.duckdb` ready for analysis.
**Prefect + prefect-dbt transformed a series of shell commands into a resilient, observable workflow** – no YAML files, no cron jobs, just Python with enterprise-grade dbt integration.
### Why This Matters
Traditional dbt orchestration often involves brittle shell scripts, complex YAML configurations, or heavyweight workflow tools. Prefect with the prefect-dbt integration gives you **enterprise-grade orchestration with zero operational overhead**:
* **Reliability**: Automatic retries with exponential backoff handle transient failures
* **Native Integration**: DbtCoreOperation provides enhanced logging, failure handling, and event emission
* **Observability**: Every dbt command and node is logged, timed, and searchable in the Prefect UI with proper log level mapping
* **Event-Driven**: Automatic Prefect events for dbt node status changes enable advanced monitoring and alerting
* **Portability**: The same Python file runs locally, in CI/CD, and in production
* **Composability**: Easily extend this flow with data quality checks, Slack alerts, or downstream dependencies
This pattern scales from prototype analytics to production data platforms. Whether you're running dbt against DuckDB for rapid local iteration or Snowflake for enterprise analytics, Prefect ensures your workflows are reliable, observable, and maintainable.
To learn more about orchestrating analytics workflows with Prefect, check out:
* [prefect-dbt integration guide](https://docs.prefect.io/integrations/prefect-dbt)
* [Task configuration and retries](https://docs.prefect.io/v3/develop/write-tasks#retries)
* [Workflow scheduling and deployment](https://docs.prefect.io/v3/deploy/index#workflow-scheduling-and-parametrization)
```python
if __name__ == "__main__":
dbt_flow()
```
# Simple web scraper
Source: https://docs-3.prefect.io/v3/examples/simple-web-scraper
Learn how to scrape article content from web pages with Prefect tasks, retries, and automatic logging.
{/*
This page is automatically generated via the `generate_example_pages.py` script. Any changes to this page will be overwritten.
*/}
View on GitHub
This example shows how Prefect enhances regular Python code without getting in its way.
You'll write code exactly as you normally would, and Prefect's decorators add production-ready
features with zero boilerplate.
In this example you will:
1. Write regular Python functions for web scraping
2. Add production features ([retries](https://docs.prefect.io/v3/develop/write-tasks#retries), [logging](https://docs.prefect.io/v3/develop/logging#configure-logging)) with just two decorators:
* `@task` - Turn any function into a [retryable, observable unit](https://docs.prefect.io/v3/develop/write-tasks#write-and-run-tasks)
* `@flow` - Compose tasks into a [reliable pipeline](https://docs.prefect.io/v3/develop/write-flows#write-and-run-flows)
3. Keep your code clean and Pythonic - no framework-specific patterns needed
## The Power of Regular Python
Notice how the code below is just standard Python with two decorators. You could remove
the decorators and the code would still work - Prefect just makes it more resilient.
* Regular Python functions? ✓
* Standard libraries (requests, BeautifulSoup)? ✓
* Normal control flow (if/else, loops)? ✓
* Prefect's magic? Just two decorators! ✓
```python
from __future__ import annotations
import requests
from bs4 import BeautifulSoup
from prefect import flow, task
```
## Defining tasks
We separate network IO from parsing so both pieces can be retried or cached independently.
```python
@task(retries=3, retry_delay_seconds=2)
def fetch_html(url: str) -> str:
"""Download page HTML (with retries).
This is just a regular requests call - Prefect adds retry logic
without changing how we write the code."""
print(f"Fetching {url} …")
response = requests.get(url, timeout=10)
response.raise_for_status()
return response.text
@task
def parse_article(html: str) -> str:
"""Extract article text, skipping code blocks.
Regular BeautifulSoup parsing with standard Python string operations.
Prefect adds observability without changing the logic."""
soup = BeautifulSoup(html, "html.parser")
# Find main content - just regular BeautifulSoup
article = soup.find("article") or soup.find("main")
if not article:
return ""
# Standard Python all the way
for code in article.find_all(["pre", "code"]):
code.decompose()
content = []
for elem in article.find_all(["h1", "h2", "h3", "p", "ul", "ol", "li"]):
text = elem.get_text().strip()
if not text:
continue
if elem.name.startswith("h"):
content.extend(["\n" + "=" * 80, text.upper(), "=" * 80 + "\n"])
else:
content.extend([text, ""])
return "\n".join(content)
```
## Defining a flow
`@flow` elevates a function to a *flow* – the orchestration nucleus that can call
tasks, other flows, and any Python you need. We enable `log_prints=True` so each
`print()` surfaces in Prefect Cloud or the local API.
```python
@flow(log_prints=True)
def scrape(urls: list[str] | None = None) -> None:
"""Scrape and print article content from URLs.
A regular Python function that composes our tasks together.
Prefect adds logging and dependency management automatically."""
if urls:
for url in urls:
content = parse_article(fetch_html(url))
print(content if content else "No article content found.")
```
## Run it!
Feel free to tweak the URL list or the regex and re-run. Prefect hot-reloads your
code instantly – no container builds required.
```python
if __name__ == "__main__":
urls = [
"https://www.prefect.io/blog/airflow-to-prefect-why-modern-teams-choose-prefect"
]
scrape(urls=urls)
```
## What just happened?
When you ran this script, Prefect did a few things behind the scenes:
1. Turned each decorated function into a *task run* or *flow run* with structured state.
2. Applied retry logic to the network call – a flaky connection would auto-retry up to 3 times.
3. Captured all `print()` statements so you can view them in the Prefect UI or logs.
4. Passed the HTML between tasks **in memory** – no external storage required.
Yet the code itself is standard Python. You could copy-paste the body of `fetch_html` or
`parse_article` into a notebook and they'd work exactly the same.
## Key Takeaways
* **Less boilerplate, more Python** – You focus on the scraping logic, Prefect adds production features.
* **Observability out of the box** – Every run is tracked, making debugging and monitoring trivial.
* **Portability** – The same script runs on your laptop today and on Kubernetes tomorrow.
* **Reliability** – Retries, timeouts, and state management are just one decorator away.
Happy scraping – and happy orchestrating! 🎉
# Introduction
Source: https://docs-3.prefect.io/v3/get-started/index
Prefect is an open-source orchestration engine that turns your Python functions into production-grade data pipelines with minimal friction. You can build and schedule workflows in pure Python—no DSLs or complex config files—and run them anywhere you can run Python. Prefect handles the heavy lifting for you out of the box: automatic state tracking, failure handling, real-time monitoring, and more.
### Essential features
| Feature | Description |
| --------------------------------- | ----------------------------------------------------------------------------------------------------------------------------------------------------------------------------------------------------------------------------------------------------------------------------------- |
| **Pythonic** | Write workflows in native Python—no DSLs, YAML, or special syntax. Full support for type hints, async/await, and modern Python patterns. Use your existing IDE, debugger, and testing tools. |
| **State & Recovery** | Robust state management that tracks success, failure, and retry states. Resume interrupted runs from the last successful point, and cache expensive computations to avoid unnecessary rework. |
| **Flexible & Portable Execution** | Start flows locally for easy development, then deploy them anywhere—from a single process to containers, Kubernetes, or cloud services—without locking into a vendor. Infrastructure is defined by code (not just configuration), making it simple to scale or change environments. |
| **Event-Driven** | Trigger flows on schedules, external events, or via API. Pause flows for human intervention or approval. Chain flows together based on states, conditions, or any custom logic. |
| **Dynamic Runtime** | Create tasks dynamically at runtime based on actual data or conditions. Easily spawn new tasks and branches during execution for truly data-driven workflows. |
| **Modern UI** | Real-time flow run monitoring, logging, and state tracking through an intuitive interface. View dependency graphs and DAGs automatically—just run your flow and open the UI. |
| **CI/CD First** | Test and simulate flows like normal Python code, giving you fast feedback during development. Integrate seamlessly into your existing CI/CD pipeline for automated testing and deployment. |
## Quickstart
Quickly create your first deployable workflow tracked by Prefect.
Install Prefect and get connected to Prefect Cloud or a self-hosted server.
Upgrade from Prefect 2 to Prefect 3 to get the latest features and performance enhancements.
## How-to guides
Learn how to write and customize your Prefect workflows with tasks and flows.
Deploy and manage your workflows as Prefect deployments.
Deploy your workflows to specific infrastructure platforms.
Work with events, triggers, and automations to build reactive workflows.
Configure your Prefect environment, secrets, and variables.
Set up and manage your Prefect Cloud account.
## Advanced
Build interactive workflows that can pause and receive input.
Use Prefect as a platform for your teams' data pipelines.
Extend Prefect with custom blocks and API integrations.
## Examples
Check out the gallery of [examples](/v3/examples/index) to see Prefect in action.
## Mini-history of Prefect
**2018-2021:** Our story begins in 2018, when we introduced the idea that workflow orchestration should be Pythonic.
Inspired by distributed tools like Dask, and building on the experience of our founder, Jeremiah Lowin (a PMC member of Apache Airflow), we created a system based on simple Python decorators for tasks and flows.
But what made Prefect truly special was our introduction of task mapping—a feature that would later become foundational to our dynamic execution capabilities (and eventually imitated by other orchestration SDKs).
**2022:** Prefect's 2.0 release became inevitable once we recognized that real-world workflows don't always fit into neat, pre-planned DAG structures: sometimes you need to update a job definition based on runtime information, for example by skipping a branch of your workflow.
So we removed a key constraint that workflows be written explicitly as DAGs, fully embracing native Python control flow—if/else conditionals, while loops-everything that makes Python…Python.
**2023-present:** With our release of Prefect 3.0 in 2024, we fully embraced these dynamic patterns by open-sourcing our events and automations backend, allowing users to natively represent event-driven workflows and gain additional observability into their execution.
Prefect 3.0 also unlocked a leap forward in performance, improving the runtime overhead of Prefect by up to 90%.
## Join our community
Join Prefect's vibrant [community of nearly 30,000 engineers](/contribute/index/) to learn with others and share your knowledge!
## LLM-friendly docs
### MCP server
Connect to `https://docs.prefect.io/mcp` in Claude Desktop, Cursor, or VS Code for AI-powered documentation search and assistance.
### Plain text formats
The docs are also available in [llms.txt format](https://llmstxt.org/):
* [llms.txt](https://docs.prefect.io/llms.txt) - A sitemap listing all documentation pages
* [llms-full.txt](https://docs.prefect.io/llms-full.txt) - The entire documentation in one file (may exceed context windows)
Any page can be accessed as markdown by appending `.md` to the URL. For example, this page becomes `https://docs.prefect.io/v3/get-started.md`.
You can also copy any page as markdown by pressing "Cmd+C" (or "Ctrl+C" on Windows) on your keyboard.
# Install Prefect
Source: https://docs-3.prefect.io/v3/get-started/install
Prefect is published as a Python package, which requires Python 3.9 or newer. We recommend installing Prefect in a Python virtual environment.
To install Prefect with `pip`, run:
```bash pip
pip install -U prefect
```
```bash uv
uv pip install -U prefect
```
To confirm that Prefect was installed successfully, run:
```bash
prefect version
```
You should see output similar to:
```bash
Version: 3.1.10
API version: 0.8.4
Python version: 3.12.2
Git commit: d6bdb075
Built: Thu, Apr 11, 2024 6:58 PM
OS/Arch: darwin/arm64
Profile: local
Server type: ephemeral
Server:
Database: sqlite
SQLite version: 3.45.2
```
### If you use `uv`
start an `ipython` shell with python 3.12 and `prefect` installed:
```bash
uvx --python 3.12 --with prefect ipython
```
install prefect into a `uv` virtual environment:
```bash
uv venv --python 3.12 && source .venv/bin/activate
uv pip install -U prefect
```
add prefect to an active project:
```bash
uv add prefect
```
run prefect server in an ephemeral python environment with `uvx`:
```bash
uvx prefect server start
```
### If you use `docker`
run prefect server in a container port-forwarded to your local machine's 4200 port:
```bash
docker run -d -p 4200:4200 prefecthq/prefect:3-latest -- prefect server start --host 0.0.0.0
```
## Windows installation
You can install and run Prefect via Windows PowerShell, the Windows Command Prompt, or [conda](https://docs.conda.io/projects/conda/en/latest/user-guide/install/windows.html). After installation, you may need to manually add the Python local packages `Scripts` folder to your `Path` environment variable.
The `Scripts` folder path looks something like:
```bash
C:\Users\MyUserNameHere\AppData\Local\Packages\PythonSoftwareFoundation.Python.3.11_qbz5n2kfra8p0\LocalCache\local-packages\Python311\Scripts
```
Review the `pip install` output messages for the `Scripts` folder path on your system.
## Minimal Prefect installation
The `prefect-client` library is a minimal installation of Prefect designed for interacting with Prefect Cloud or a remote self-hosted Prefect server instance.
`prefect-client` enables a subset of Prefect's capabilities with a smaller installation size, making it ideal for use in lightweight, resource-constrained, or ephemeral environments.
It omits all CLI and server components found in the `prefect` library.
To install the latest release of `prefect-client`, run:
```bash
pip install -U prefect-client
```
## Next steps
You also need an API server, either:
* [Prefect Cloud](/v3/how-to-guides/cloud/connect-to-cloud/), a managed solution that provides strong scaling, performance, and security, or
* [Self-hosted Prefect server](/v3/concepts/server/), an API server that you run on your own infrastructure where you are responsible for scaling and any authentication and authorization.
Now that you have Prefect installed, go through the [quickstart](/v3/get-started/quickstart/) to try it out.
See the full history of [Prefect releases](https://github.com/PrefectHQ/prefect/releases) on GitHub.
See our [Contributing docs](/contribute/dev-contribute/) for instructions on installing Prefect for development.
# Quickstart
Source: https://docs-3.prefect.io/v3/get-started/quickstart
Create your first workflow
Prefect is a workflow orchestration tool that helps you build, deploy, run, and monitor data pipelines. It makes complex workflows reliable by tracking dependencies and handling failures gracefully.
In this tutorial, you'll deploy your first workflow to Prefect -- by specifying what code should run, where it should run, and when it should run. Choose your preferred approach below:
Prefect uses a database to store workflow metadata.
For the ease of getting started, we'll use one hosted on Prefect Cloud. To create an account, we need to install `prefect-cloud`. We'll leverage `uv`, a modern Python package manager, to do this. Run the following commands in your terminal, after which you'll be prompted in your browser to create or login to your free Prefect Cloud account.
```bash
curl -LsSf https://astral.sh/uv/install.sh | sh # Install `uv`.
uvx prefect-cloud login # Installs `prefect-cloud` into a temporary virtual env.
```
Let's start with a boring Python script that fetches a list of customer ids and processes them all in parallel. You can find this code and other examples hosted in our [quickstart repository](https://github.com/PrefectHQ/quickstart/blob/main/01_getting_started.py).
```python 01_getting_started.py [expandable]
from prefect import flow, task
import random
@task
def get_customer_ids() -> list[str]:
# Fetch customer IDs from a database or API
return [f"customer{n}" for n in random.choices(range(100), k=10)]
@task
def process_customer(customer_id: str) -> str:
# Process a single customer
return f"Processed {customer_id}"
@flow
def main() -> list[str]:
customer_ids = get_customer_ids()
# Map the process_customer task across all customer IDs
results = process_customer.map(customer_ids)
return results
if __name__ == "__main__":
main()
```
This looks like the ordinary Python you'd write, except there is:
* a `@flow` decorator on the script's entrypoint.
* a `@task` decorator on each function called within the flow.
When you run this `flow`, Prefect dynamically creates a graph of each `task` and the state of their upstream dependencies. This allows Prefect to execute each `task` in the right order and, in the case of failure, to recover the state of your workflow and resume from its point of failure.
Let's run this code locally on your computer. To do that, run the following command in your terminal.
```bash
git clone https://github.com/PrefectHQ/quickstart && cd quickstart
uv run 01_getting_started.py
```
If all went well, you'll see a link to see its execution graph in the Prefect UI followed by a flurry of state changes and logs as Prefect dynamically discovers and executes your workflow.
```bash {11} [expandable]
00:30:53.633 | INFO | Flow run 'airborne-ringtail' - Beginning flow run 'airborne-ringtail' for flow 'main'
00:30:53.638 | INFO | Flow run 'airborne-ringtail' - View at https://app.prefect.cloud/account/...
00:30:53.685 | INFO | Task run 'get_customer_ids-136' - Finished in state Completed()
00:30:54.512 | INFO | Task run 'process_customer-d9b' - Finished in state Completed()
00:30:54.518 | INFO | Task run 'process_customer-113' - Finished in state Completed()
00:30:54.519 | INFO | Task run 'process_customer-1c6' - Finished in state Completed()
00:30:54.519 | INFO | Task run 'process_customer-30d' - Finished in state Completed()
00:30:54.520 | INFO | Task run 'process_customer-eaa' - Finished in state Completed()
00:30:54.523 | INFO | Task run 'process_customer-b2b' - Finished in state Completed()
00:30:54.523 | INFO | Task run 'process_customer-90a' - Finished in state Completed()
00:30:54.524 | INFO | Task run 'process_customer-4af' - Finished in state Completed()
00:30:54.524 | INFO | Task run 'process_customer-e66' - Finished in state Completed()
00:30:54.526 | INFO | Task run 'process_customer-e7e' - Finished in state Completed()
00:30:54.527 | INFO | Flow run 'airborne-ringtail' - Finished in state Completed('All states completed.')
```
At this point, you've successfully run a Prefect `flow` locally. Let's get it running off of your machine! Again, for simplicity,
we'll deploy this workflow to Prefect's Serverless Compute (so we don't have to wrangle any infrastructure). We'll tell Prefect to clone
`https://github.com/PrefectHQ/quickstart` and invoke `01_getting_started.py:main`.
```bash
uvx prefect-cloud deploy 01_getting_started.py:main \
--name my_first_deployment \
--from https://github.com/PrefectHQ/quickstart
```
If all went well, you've created your first deployed workflow.
Since we now know what code to run and where to run it, this can now be invoked remotely.
To do that, run the following command and visit the returned link to see the run's status in the Prefect UI:
```bash
uvx prefect-cloud run main/my_first_deployment
```
Congrats! You've just run your first Prefect workflow remotely.
Now that you've deployed and run your workflow remotely, you might want to schedule it to run automatically at specific times. Prefect makes this easy with the `prefect-cloud schedule` command.
Let's schedule our workflow to run every day at 8:00 AM with [`cron`](https://en.wikipedia.org/wiki/Cron) syntax.
```bash
uvx prefect-cloud schedule main/my_first_deployment "0 8 * * *"
```
After running the command, your workflow will automatically execute remotely according to the schedule you've set.
You can view and manage all your scheduled runs in the Prefect UI.
If you're using Prefect Open Source, you'll run a server that backs your workflows. [Install Prefect](/v3/get-started/install) and start your local server:
```bash
prefect server start
```
If you prefer to run your Prefect server in a Docker container, you can use the following command:
```bash
docker run -p 4200:4200 -d --rm prefecthq/prefect:3-python3.12 prefect server start --host 0.0.0.0
```
Both commands start a server at [`http://localhost:4200`](http://localhost:4200). Keep this process running for this tutorial.
Let's start with a boring Python script that fetches a list of customer ids and processes them all in parallel. You can find this code and other examples hosted in our [quickstart repository](https://github.com/PrefectHQ/quickstart/blob/main/01_getting_started.py).
```python 01_getting_started.py [expandable]
from prefect import flow, task
import random
@task
def get_customer_ids() -> list[str]:
# Fetch customer IDs from a database or API
return [f"customer{n}" for n in random.choices(range(100), k=10)]
@task
def process_customer(customer_id: str) -> str:
# Process a single customer
return f"Processed {customer_id}"
@flow
def main() -> list[str]:
customer_ids = get_customer_ids()
# Map the process_customer task across all customer IDs
results = process_customer.map(customer_ids)
return results
if __name__ == "__main__":
main()
```
This looks like the ordinary Python you'd write, except there is:
* a `@flow` decorator on the script's entrypoint.
* a `@task` decorator on each function called within the flow.
When you run this `flow`, Prefect dynamically creates a graph of each `task` and the state of their upstream dependencies. This allows Prefect to execute each `task` in the right order and, in the case of failure, to recover the state of your workflow and resume from its point of failure.
Let's run this code locally on your computer. To do that, run the following command in your terminal (in a new terminal window, keeping the server running):
```bash
git clone https://github.com/PrefectHQ/quickstart && cd quickstart
python 01_getting_started.py
```
If all went well, you'll see a link to see its execution graph in the Prefect UI followed by a flurry of state changes and logs as Prefect dynamically discovers and executes your workflow.
At this point, you've successfully run a Prefect `flow` locally. Let's set up a simple deployment by updating the file to use `.serve()`:
```python 01_getting_started.py [expandable]
from prefect import flow, task
import random
@task
def get_customer_ids() -> list[str]:
# Fetch customer IDs from a database or API
return [f"customer{n}" for n in random.choices(range(100), k=10)]
@task
def process_customer(customer_id: str) -> str:
# Process a single customer
return f"Processed {customer_id}"
@flow
def main() -> list[str]:
customer_ids = get_customer_ids()
# Map the process_customer task across all customer IDs
results = process_customer.map(customer_ids)
return results
if __name__ == "__main__":
main.serve(name="my-first-deployment")
```
Now run the updated file:
```bash
python 01_getting_started.py
```
This starts a process listening for scheduled runs. You can now trigger the flow from the Prefect UI or programmatically.
Now let's schedule your workflow to run automatically. Update the file to add a cron schedule:
```python 01_getting_started.py [expandable]
from prefect import flow, task
import random
@task
def get_customer_ids() -> list[str]:
# Fetch customer IDs from a database or API
return [f"customer{n}" for n in random.choices(range(100), k=10)]
@task
def process_customer(customer_id: str) -> str:
# Process a single customer
return f"Processed {customer_id}"
@flow
def main() -> list[str]:
customer_ids = get_customer_ids()
# Map the process_customer task across all customer IDs
results = process_customer.map(customer_ids)
return results
if __name__ == "__main__":
main.serve(
name="my-first-deployment",
cron="0 8 * * *" # Run every day at 8:00 AM
)
```
Run the updated file:
```bash
python 01_getting_started.py
```
Your workflow will now run automatically according to the schedule while the serve process is running.
## Next steps
Now that you've created your first workflow, explore Prefect's features to enable more sophisticated workflows.
* Learn more about [flows](/v3/concepts/flows) and [tasks](/v3/concepts/tasks).
* Learn more about [deployments](/v3/concepts/deployments).
* Learn more about [work pools](/v3/concepts/work-pools).
* Learn how to [run work concurrently](/v3/how-to-guides/workflows/run-work-concurrently).
# How to access deployment and flow run parameters
Source: https://docs-3.prefect.io/v3/how-to-guides/automations/access-parameters-in-templates
Learn how to access deployment and flow run parameters in templates
Many of the parameters of automation actions can be defined with [Jinja2 templates](/v3/concepts/automations#templating-with-jinja). These templates have access to objects related to the event that triggered your automation, including the deployment and flow run of that event (if applicable). Here we'll explore an example illustrating how to access their parameters in an automation action.
Let's start with two flows, `alpha` and `beta`:
```python
from prefect import flow
@flow
def alpha(name: str, value: int):
print(name, value)
@flow
def beta(name: str, value: int, another: float):
print(name, value, another)
```
Once a run of `alpha` completes, we'll automate running a flow of `beta` with the same parameters:
{/* pmd-metadata: notest */}
```python
from datetime import timedelta
from prefect.automations import (
Automation,
EventTrigger,
Posture,
ResourceSpecification,
RunDeployment,
)
from .flows import alpha, beta
# Note: deploy these flows in the way you best see fit for your environment
alpha.deploy(
name="alpha",
work_pool_name="my-work-pool",
image="prefecthq/prefect-client:3-latest",
)
beta_deployment_id = beta.deploy(
name="beta",
work_pool_name="my-work-pool",
image="prefecthq/prefect-client:3-latest",
)
automation = Automation(
name="Passing parameters",
trigger=EventTrigger(
# Here we're matching on every completion of the `alpha` flow
expect={"prefect.flow-run.Completed"},
match_related=ResourceSpecification(
{
"prefect.resource.role": "flow",
"prefect.resource.name": "alpha"
}
),
# And we'll react to each event immediately and individually
posture=Posture.Reactive,
threshold=1,
within=timedelta(0),
),
actions=[
RunDeployment(
# We will be selecting a specific deployment (rather than attempting to
# infer it from the event)
source="selected",
# The deployment we want to run is the `beta` deployment we created above
deployment_id=beta_deployment_id,
parameters={
# For the "name" and "value" parameters, we tell Prefect we're using a
# Jinja2 template by creating a nested dictionary with the special
# `__prefect_kind` key set to "jinja". Then we supply the `template`
# value with any valid Jinja2 template. This step may also be done
# in the Prefect UI by selecting "Use Jinja input" for the parameters
# you want to template.
#
# The "{{ flow_run }}" variable here is a special shortcut that gives us
# access to the `FlowRun` object associated with this event. There are
# also variables like "{{ deployment }}", "{{ flow }}",
# "{{ work_pool }}" and so on.
#
# In this case, the {{ flow_run }} represent the run of `alpha` that
# emitted the `prefect.flow-run.Completed` event that triggered this
# automation.
"name": {
"template": "{{ flow_run.parameters['name'] }}",
"__prefect_kind": "jinja",
},
"value": {
"template": "{{ flow_run.parameters['value'] }}",
"__prefect_kind": "jinja",
},
# You can also just pass literal parameters
"another": 1.2345,
},
)
],
).create()
```
If you are defining your automation in the Prefect web UI, you can switch the parameter input to support Jinja2 values:
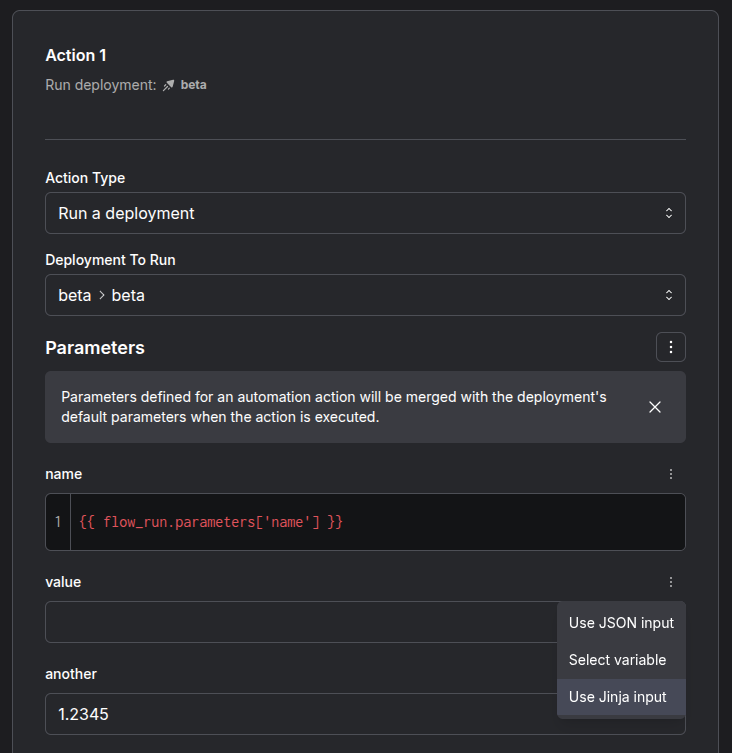 # How to chain deployments with events
Source: https://docs-3.prefect.io/v3/how-to-guides/automations/chaining-deployments-with-events
Learn how to establish event-based dependencies between individual workflows.
This example shows how to use a trigger to schedule a run of downstream deployment when a run of an upstream deployment completes.
## Define an upstream and downstream deployment
```python event_driven_deployments.py
from prefect import flow, serve
from prefect.events import DeploymentEventTrigger
@flow(log_prints=True)
def upstream_flow():
print("upstream flow")
@flow(log_prints=True)
def downstream_flow():
print("downstream flow")
if __name__ == "__main__":
upstream_deployment = upstream_flow.to_deployment(name="upstream_deployment")
downstream_deployment = downstream_flow.to_deployment(
name="downstream_deployment",
triggers=[
DeploymentEventTrigger(
expect={"prefect.flow-run.Completed"},
match_related={"prefect.resource.name": "upstream_deployment"},
)
],
)
serve(upstream_deployment, downstream_deployment)
```
## Test it out
First, start the `serve` process to listen for scheduled deployments runs:
```bash
python event_driven_deployments.py
```
Now, run the upstream deployment and see the downstream deployment kick off after it completes:
```bash
prefect deployment run upstream-flow/upstream_deployment
```
**Check the event feed**
You can inspect raw events in the event feed in the UI to see what related resources are available to match against.
For example, the following `prefect.flow-run.Completed` event's related resources include:
```json
{
"related": [
{
"prefect.resource.id": "prefect.flow.10e099ec-8358-4146-b188-be68027ee58f",
"prefect.resource.role": "flow",
"prefect.resource.name": "upstream-flow"
},
{
"prefect.resource.id": "prefect.deployment.be777bbd-4b15-49f3-bc1f-4d109374cee2",
"prefect.resource.role": "deployment",
"prefect.resource.name": "upstream_deployment"
},
{
"prefect.resource.id": "prefect-cloud.user.80546602-9f31-4396-ab4b-e873a5377feb",
"prefect.resource.role": "creator",
"prefect.resource.name": "stoat"
}
]
}
```
# How to create automations
Source: https://docs-3.prefect.io/v3/how-to-guides/automations/creating-automations
Learn how to define automations that trigger actions based on events.
export const automations = {
cli: "https://docs.prefect.io/v3/api-ref/cli/automation",
api: "https://app.prefect.cloud/api/docs#tag/Automations",
tf: "https://registry.terraform.io/providers/PrefectHQ/prefect/latest/docs/resources/automation"
};
export const COMBINED = ({name, hrefTF, hrefAPI, hrefCLI}) =>
# How to chain deployments with events
Source: https://docs-3.prefect.io/v3/how-to-guides/automations/chaining-deployments-with-events
Learn how to establish event-based dependencies between individual workflows.
This example shows how to use a trigger to schedule a run of downstream deployment when a run of an upstream deployment completes.
## Define an upstream and downstream deployment
```python event_driven_deployments.py
from prefect import flow, serve
from prefect.events import DeploymentEventTrigger
@flow(log_prints=True)
def upstream_flow():
print("upstream flow")
@flow(log_prints=True)
def downstream_flow():
print("downstream flow")
if __name__ == "__main__":
upstream_deployment = upstream_flow.to_deployment(name="upstream_deployment")
downstream_deployment = downstream_flow.to_deployment(
name="downstream_deployment",
triggers=[
DeploymentEventTrigger(
expect={"prefect.flow-run.Completed"},
match_related={"prefect.resource.name": "upstream_deployment"},
)
],
)
serve(upstream_deployment, downstream_deployment)
```
## Test it out
First, start the `serve` process to listen for scheduled deployments runs:
```bash
python event_driven_deployments.py
```
Now, run the upstream deployment and see the downstream deployment kick off after it completes:
```bash
prefect deployment run upstream-flow/upstream_deployment
```
**Check the event feed**
You can inspect raw events in the event feed in the UI to see what related resources are available to match against.
For example, the following `prefect.flow-run.Completed` event's related resources include:
```json
{
"related": [
{
"prefect.resource.id": "prefect.flow.10e099ec-8358-4146-b188-be68027ee58f",
"prefect.resource.role": "flow",
"prefect.resource.name": "upstream-flow"
},
{
"prefect.resource.id": "prefect.deployment.be777bbd-4b15-49f3-bc1f-4d109374cee2",
"prefect.resource.role": "deployment",
"prefect.resource.name": "upstream_deployment"
},
{
"prefect.resource.id": "prefect-cloud.user.80546602-9f31-4396-ab4b-e873a5377feb",
"prefect.resource.role": "creator",
"prefect.resource.name": "stoat"
}
]
}
```
# How to create automations
Source: https://docs-3.prefect.io/v3/how-to-guides/automations/creating-automations
Learn how to define automations that trigger actions based on events.
export const automations = {
cli: "https://docs.prefect.io/v3/api-ref/cli/automation",
api: "https://app.prefect.cloud/api/docs#tag/Automations",
tf: "https://registry.terraform.io/providers/PrefectHQ/prefect/latest/docs/resources/automation"
};
export const COMBINED = ({name, hrefTF, hrefAPI, hrefCLI}) => You can manage {name} with the Prefect CLI, Terraform provider, or Prefect API.
;
## Create an automation
On the **Automations** page, select the **+** icon to create a new automation. You'll be prompted to configure:
* A [trigger](#triggers) condition that causes the automation to execute.
* One or more [actions](#actions) carried out by the automation.
* [Details](#details) about the automation, such as a name and description.
### Create automations with the CLI
You can create automations from YAML or JSON files using the Prefect CLI:
```bash
# Create from a YAML file
prefect automation create --from-file automation.yaml
# or use the short form
prefect automation create -f automation.yaml
# Create from a JSON file
prefect automation create --from-file automation.json
# Create from a JSON string
prefect automation create --from-json '{"name": "my-automation", "trigger": {...}, "actions": [...]}'
# or use the short form
prefect automation create -j '{"name": "my-automation", "trigger": {...}, "actions": [...]}'
```
#### Single automation example
Here's an example YAML file that creates an automation to cancel long-running flows:
```yaml
name: Cancel Long Running Flows
description: Cancels flows running longer than 5 minutes
enabled: true
trigger:
type: event
posture: Proactive
expect:
- prefect.flow-run.Completed
threshold: 1
within: 300 # 5 minutes
for_each:
- prefect.resource.id
actions:
- type: cancel-flow-run
```
#### Multiple automations example
You can also create multiple automations at once by using the `automations:` key. If any automation fails to create, the command will continue with the remaining automations and report both successes and failures:
```yaml
automations:
- name: Cancel Long Running Flows
description: Cancels flows running longer than 30 minutes
enabled: true
trigger:
type: event
posture: Reactive
expect:
- prefect.flow-run.Running
threshold: 1
for_each:
- prefect.resource.id
actions:
- type: cancel-flow-run
- name: Notify on Flow Failure
description: Send notification when flows fail
enabled: true
trigger:
type: event
posture: Reactive
expect:
- prefect.flow-run.Failed
threshold: 1
actions:
- type: send-notification
subject: "Flow Failed: {{ event.resource.name }}"
body: "Flow run {{ event.resource.name }} has failed."
```
Or as a JSON array:
```json
[
{
"name": "First Automation",
"trigger": {...},
"actions": [...]
},
{
"name": "Second Automation",
"trigger": {...},
"actions": [...]
}
]
```
### Create automations with the Python SDK
You can create and access any automation with the Python SDK's `Automation` class and its methods.
```python
from prefect.automations import Automation
from prefect.events.schemas.automations import EventTrigger
from prefect.events.actions import CancelFlowRun
# creating an automation
automation = Automation(
name="woodchonk",
trigger=EventTrigger(
expect={"animal.walked"},
match={
"genus": "Marmota",
"species": "monax",
},
posture="Reactive",
threshold=3,
),
actions=[CancelFlowRun()],
).create()
# reading the automation
automation = Automation.read(id=automation.id)
# or by name
automation = Automation.read(name="woodchonk")
```
# How to create deployment triggers
Source: https://docs-3.prefect.io/v3/how-to-guides/automations/creating-deployment-triggers
Learn how to define automations that trigger deployment runs based on events.
## Creating deployment triggers
To enable the simple configuration of event-driven deployments, Prefect provides **deployment triggers**—a shorthand for
creating automations that are linked to specific deployments to run them based on the presence or absence of events.
Deployment triggers are a special case of automations where the configured action is always running a deployment.
Trigger definitions for deployments are supported in `prefect.yaml`, `.serve`, and `.deploy`. At deployment time,
specified trigger definitions create linked automations triggered by events matching your chosen
[grammar](/v3/concepts/events/#event-grammar). Each trigger definition may include a [jinja template](https://en.wikipedia.org/wiki/Jinja_\(template_engine\))
to render the triggering `event` as the `parameters` of your deployment's flow run.
### Define triggers in `prefect.yaml`
You can include a list of triggers on any deployment in a `prefect.yaml` file:
```yaml
deployments:
- name: my-deployment
entrypoint: path/to/flow.py:decorated_fn
work_pool:
name: my-work-pool
triggers:
- type: event
enabled: true
match:
prefect.resource.id: my.external.resource
expect:
- external.resource.pinged
parameters:
param_1: "{{ event }}"
```
### Scheduling delayed deployment runs
You can configure deployment triggers to run after a specified delay using the `schedule_after` field. This is useful for implementing opt-out workflows or providing review windows before automated actions:
```yaml
deployments:
- name: campaign-execution
entrypoint: path/to/campaign.py:execute_campaign
work_pool:
name: my-work-pool
triggers:
- type: event
enabled: true
match:
prefect.resource.id: marketing.campaign
expect:
- campaign.proposal.created
schedule_after: "PT2H" # Wait 2 hours before execution
parameters:
campaign_id: "{{ event.resource.id }}"
```
The `schedule_after` field accepts:
* **ISO 8601 durations** (e.g., "PT2H" for 2 hours, "PT30M" for 30 minutes)
* **Seconds as integer** (e.g., 7200 for 2 hours)
* **Python timedelta objects** in code
This deployment creates a flow run when an `external.resource.pinged` event *and* an `external.resource.replied`
event have been seen from `my.external.resource`:
```yaml
deployments:
- name: my-deployment
entrypoint: path/to/flow.py:decorated_fn
work_pool:
name: my-work-pool
triggers:
- type: compound
require: all
parameters:
param_1: "{{ event }}"
schedule_after: "PT1H" # Wait 1 hour before running
triggers:
- type: event
match:
prefect.resource.id: my.external.resource
expect:
- external.resource.pinged
- type: event
match:
prefect.resource.id: my.external.resource
expect:
- external.resource.replied
```
### Define deployment triggers using Terraform
You can also set up a deployment trigger via Terraform resources, specifically via the `prefect_automation` [resource](https://registry.terraform.io/providers/PrefectHQ/prefect/latest/docs/resources/automation).
```hcl
resource "prefect_deployment" "my_deployment" {
name = "my-deployment"
work_pool_name = "my-work-pool"
work_queue_name = "default"
entrypoint = "path/to/flow.py:decorated_fn"
}
resource "prefect_automation" "event_trigger" {
name = "my-automation"
trigger = {
event = {
posture = "Reactive"
expect = ["external.resource.pinged"]
threshold = 1
within = 0
}
}
actions = [
{
type = "run-deployment"
source = "selected"
deployment_id = prefect_deployment.my_deployment.id
parameters = jsonencode({
"param_1" : "{{ event }}"
})
},
]
}
```
### Define triggers in `.serve` and `.deploy`
To create deployments with triggers in Python, the trigger types `DeploymentEventTrigger`,
`DeploymentMetricTrigger`, `DeploymentCompoundTrigger`, and `DeploymentSequenceTrigger` can be imported
from `prefect.events`:
```python
from datetime import timedelta
from prefect import flow
from prefect.events import DeploymentEventTrigger
@flow(log_prints=True)
def decorated_fn(param_1: str):
print(param_1)
if __name__=="__main__":
decorated_fn.serve(
name="my-deployment",
triggers=[
DeploymentEventTrigger(
enabled=True,
match={"prefect.resource.id": "my.external.resource"},
expect=["external.resource.pinged"],
schedule_after=timedelta(hours=1), # Wait 1 hour before running
parameters={
"param_1": "{{ event }}",
},
)
],
)
```
As with prior examples, you must supply composite triggers with a list of underlying triggers:
```python
from datetime import timedelta
from prefect import flow
from prefect.events import DeploymentCompoundTrigger
@flow(log_prints=True)
def decorated_fn(param_1: str):
print(param_1)
if __name__=="__main__":
decorated_fn.deploy(
name="my-deployment",
image="my-image-registry/my-image:my-tag",
triggers=[
DeploymentCompoundTrigger(
enabled=True,
name="my-compound-trigger",
require="all",
schedule_after=timedelta(minutes=30), # Wait 30 minutes
triggers=[
{
"type": "event",
"match": {"prefect.resource.id": "my.external.resource"},
"expect": ["external.resource.pinged"],
},
{
"type": "event",
"match": {"prefect.resource.id": "my.external.resource"},
"expect": ["external.resource.replied"],
},
],
parameters={
"param_1": "{{ event }}",
},
)
],
work_pool_name="my-work-pool",
)
```
### Pass triggers to `prefect deploy`
You can pass one or more `--trigger` arguments to `prefect deploy` as either a JSON string or a
path to a `.yaml` or `.json` file.
```bash
# Pass a trigger as a JSON string
prefect deploy -n test-deployment \
--trigger '{
"enabled": true,
"match": {
"prefect.resource.id": "prefect.flow-run.*"
},
"expect": ["prefect.flow-run.Completed"]
}'
# Pass a trigger using a JSON/YAML file
prefect deploy -n test-deployment --trigger triggers.yaml
prefect deploy -n test-deployment --trigger my_stuff/triggers.json
```
For example, a `triggers.yaml` file could have many triggers defined:
```yaml
triggers:
- enabled: true
match:
prefect.resource.id: my.external.resource
expect:
- external.resource.pinged
parameters:
param_1: "{{ event }}"
- enabled: true
match:
prefect.resource.id: my.other.external.resource
expect:
- some.other.event
parameters:
param_1: "{{ event }}"
```
Both of the above triggers would be attached to `test-deployment` after running `prefect deploy`.
**Triggers passed to `prefect deploy` will override any triggers defined in `prefect.yaml`**
While you can define triggers in `prefect.yaml` for a given deployment, triggers passed to `prefect deploy`
take precedence over those defined in `prefect.yaml`.
Note that deployment triggers contribute to the total number of automations in your workspace.
## Further reading
For more on the concepts behind deployment triggers, see the [Automations concepts](/v3/concepts/automations) page.
# How to connect to Prefect Cloud
Source: https://docs-3.prefect.io/v3/how-to-guides/cloud/connect-to-cloud
Configure a local execution environment to access Prefect Cloud.
To create flow runs in a local or remote execution environment, first connect with Prefect Cloud or a
Prefect server as the backend API server.
This involves:
* Configuring the execution environment with the location of the API.
* Authenticating with the API, either by logging in or providing a valid API key (Prefect Cloud only).
## Log into Prefect Cloud from a terminal
Configure a local execution environment to use Prefect Cloud as the API server for flow runs.
You will log in a to Prefect Cloud account from the local environment where you want to run a flow.
### Steps
1. Open a new terminal session.
2. [Install Prefect](/v3/get-started/install/) in the environment where you want to execute flow runs.
```bash
pip install -U prefect
```
3. Use the `prefect cloud login` Prefect CLI command to log into Prefect Cloud from your environment.
```bash
prefect cloud login
```
The `prefect cloud login` command provides an interactive login experience.
```bash
prefect cloud login
```
```bash
? How would you like to authenticate? [Use arrows to move; enter to select]
> Log in with a web browser
Paste an API key
Paste your authentication key:
? Which workspace would you like to use? [Use arrows to move; enter to select]
> prefect/terry-prefect-workspace
g-gadflow/g-workspace
Authenticated with Prefect Cloud! Using workspace 'prefect/terry-prefect-workspace'.
```
You can authenticate by manually pasting an [API key](/v3/how-to-guides/cloud/manage-users/api-keys) or through a browser-based approval that auto-generates an API key with a 30-day expiration.
### Change workspaces
To change which workspace to sync with, use the `prefect cloud workspace set`
Prefect CLI command while logged in, passing the account handle and workspace name:
```bash
prefect cloud workspace set --workspace "prefect/my-workspace"
```
If you don't provide a workspace, you will need to select one.
**Workspace Settings** also shows you the `prefect cloud workspace set` Prefect CLI
command to sync a local execution environment with a given workspace.
You may also use the `prefect cloud login` command with the `--workspace` or `-w` option to set the current workspace.
```bash
prefect cloud login --workspace "prefect/my-workspace"
```
## Manually configure Prefect API settings
You can manually configure the `PREFECT_API_URL` setting to specify the Prefect Cloud API.
For Prefect Cloud, configure the `PREFECT_API_URL` and `PREFECT_API_KEY` settings to authenticate
with Prefect Cloud by using an account ID, workspace ID, and API key.
```bash
prefect config set PREFECT_API_URL="https://api.prefect.cloud/api/accounts/[ACCOUNT-ID]/workspaces/[WORKSPACE-ID]"
prefect config set PREFECT_API_KEY="[API-KEY]"
```
**Find account ID and workspace ID in the browser**
When authenticated to your Prefect Cloud workspace in the browser, you can get the account ID and workspace ID for the `PREFECT_API_URL` string from the page URL.
For example, if you're on the dashboard page, the URL looks like this:
[https://app.prefect.cloud/account/\[ACCOUNT-ID\]/workspace/\[WORKSPACE-ID\]/dashboard](https://app.prefect.cloud/account/\[ACCOUNT-ID]/workspace/\[WORKSPACE-ID]/dashboard)
The example above configures `PREFECT_API_URL` and `PREFECT_API_KEY` in the default profile.
You can use `prefect profile` CLI commands to create settings profiles for different configurations.
For example, you can configure a "cloud" profile to use the Prefect Cloud API URL and API key;
and another "local" profile for local development using a local Prefect API server started with `prefect server start`.
See [Settings](/v3/develop/settings-and-profiles/) for details.
**Environment variables**
You can set `PREFECT_API_URL` and `PREFECT_API_KEY` just like any other environment variable.
Setting these environment variables is a good way to connect to Prefect Cloud in a remote serverless environment.
See [Overriding defaults with environment variables](/v3/develop/settings-and-profiles/) for more information.
## Install requirements in execution environments
In local and remote execution environments, such as VMs and containers, ensure that you've installed any flow
requirements or dependencies before creating a flow run.
# How to create a webhook
Source: https://docs-3.prefect.io/v3/how-to-guides/cloud/create-a-webhook
Learn how to setup a webhook in the UI to trigger automations from external events.
This page shows you how to quickly set up a webhook using the Prefect Cloud UI, invoke it, and create an automation based on the received event.
## Trigger an Automation from an External Event
Here's how to set up a webhook and trigger an automation using the Prefect Cloud UI.
### 1. Create a Webhook in the UI
Navigate to the **Webhooks** page in Prefect Cloud and click **Create Webhook**.
You will need to provide a name for your webhook and a Jinja2 template. The template defines how the incoming HTTP request data is transformed into a Prefect event. For example, to capture a model ID and a friendly name from the request body:
```JSON
{
"event": "model-update",
"resource": {
"prefect.resource.id": "product.models.{{ body.model_id}}",
"prefect.resource.name": "{{ body.friendly_name }}",
"run_count": "{{body.run_count}}"
}
}
```
This template will look for `model_id`, `friendly_name`, and `run_count` in the body of the incoming request.
 After saving, Prefect Cloud will provide you with a unique URL for your webhook.
### 2. Invoke the Webhook Endpoint
Use any HTTP client to send a `POST` request to the unique URL provided for your webhook. Include the data you want to pass in the request body. For the example template above:
```console
curl -X POST https://api.prefect.cloud/hooks/YOUR_UNIQUE_WEBHOOK_ID \
-d "model_id=my_model_123" \
-d "friendly_name=My Awesome Model" \
-d "run_count=15"
```
Replace `YOUR_UNIQUE_WEBHOOK_ID` with your actual webhook ID.
### 3. Observe the Event in Prefect Cloud
After invoking the webhook, navigate to the **Event Feed** in Prefect Cloud. You should see a new event corresponding to your webhook invocation.
After saving, Prefect Cloud will provide you with a unique URL for your webhook.
### 2. Invoke the Webhook Endpoint
Use any HTTP client to send a `POST` request to the unique URL provided for your webhook. Include the data you want to pass in the request body. For the example template above:
```console
curl -X POST https://api.prefect.cloud/hooks/YOUR_UNIQUE_WEBHOOK_ID \
-d "model_id=my_model_123" \
-d "friendly_name=My Awesome Model" \
-d "run_count=15"
```
Replace `YOUR_UNIQUE_WEBHOOK_ID` with your actual webhook ID.
### 3. Observe the Event in Prefect Cloud
After invoking the webhook, navigate to the **Event Feed** in Prefect Cloud. You should see a new event corresponding to your webhook invocation.
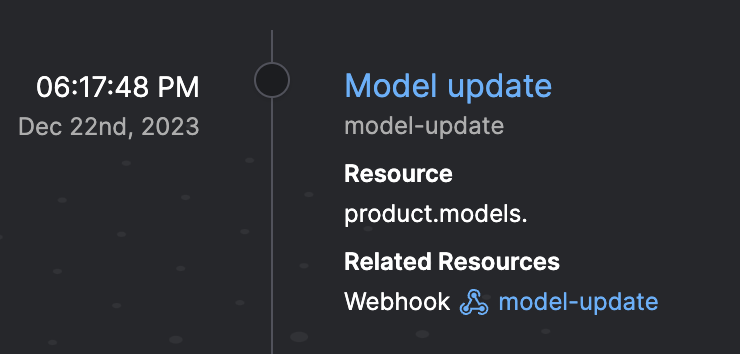 ### 4. Create an Automation from the Event
From the event details page (click on the event in the feed), you can click the **Automate** button.
### 4. Create an Automation from the Event
From the event details page (click on the event in the feed), you can click the **Automate** button.
 This will pre-fill an automation trigger based on the event you just created.
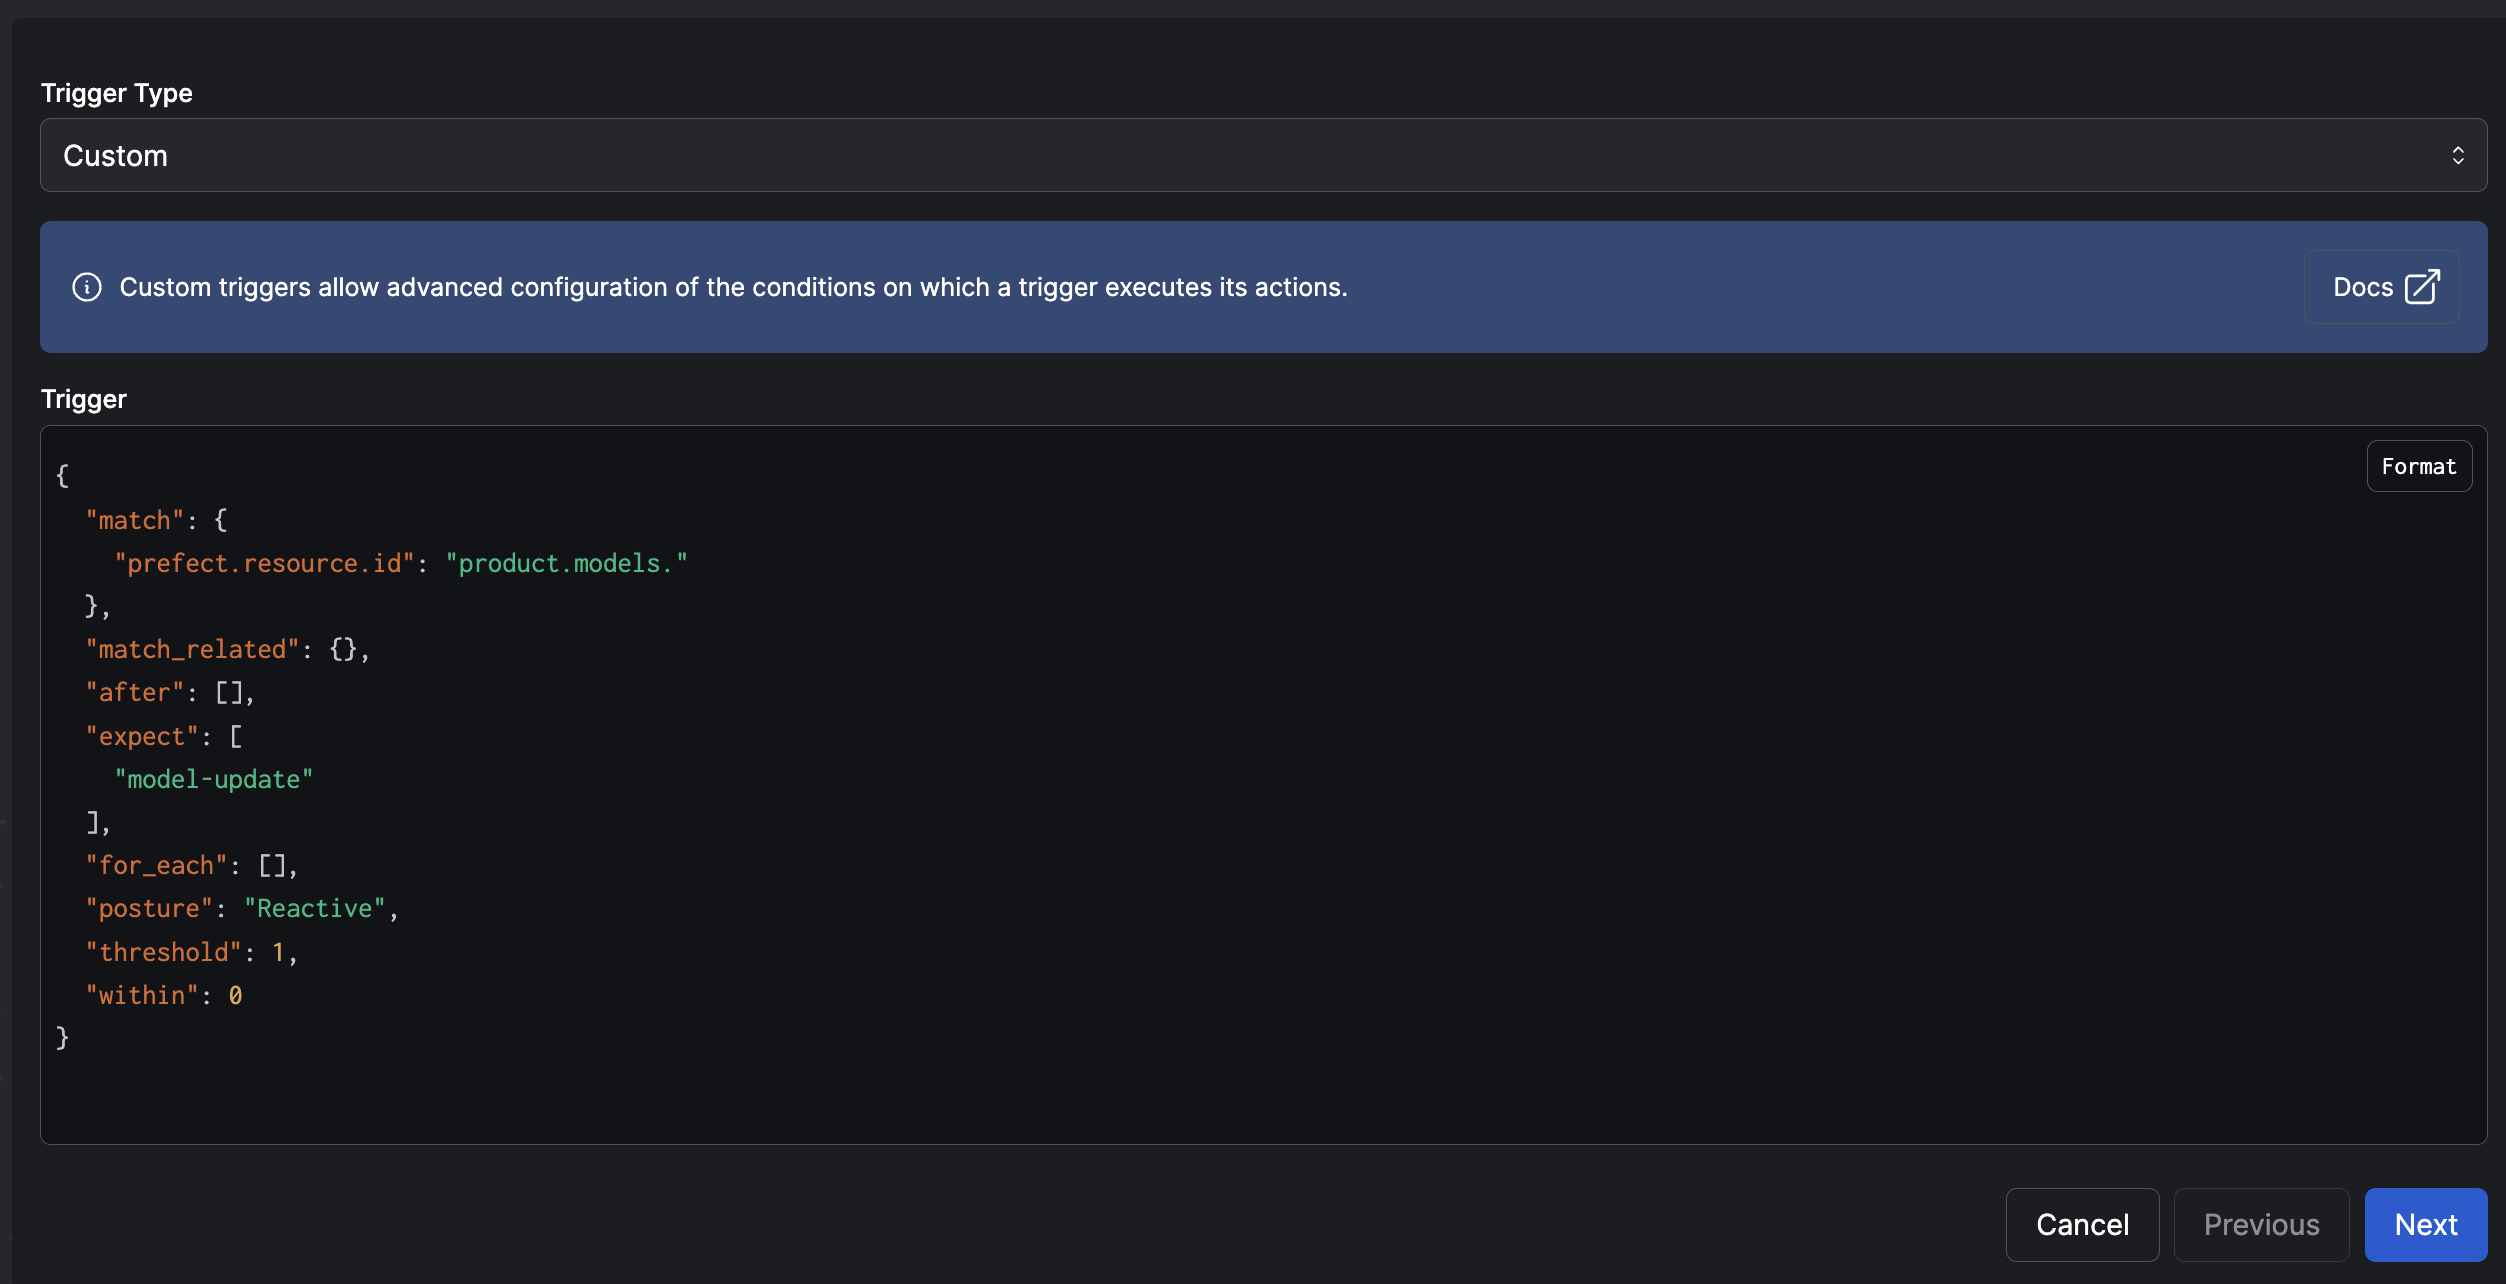 Click **Next** to define the action(s) this automation should perform, such as running a deployment or sending a notification.
## Troubleshooting Event Reception
If you've invoked your webhook but don't see the expected event in Prefect Cloud, or the event data isn't what you anticipated:
* **Check the Event Feed**: Look for any events related to your webhook, even if they don't match your exact expectations.
* **Look for `prefect-cloud.webhook.failed` events**: If Prefect Cloud encountered an error processing the webhook (e.g., an invalid template or malformed request), it will generate a `prefect-cloud.webhook.failed` event. This event contains details about the received request and any template rendering errors.
* **Verify your request**: Double-check the URL, HTTP method, headers, and body of the request you sent to the webhook.
* **Review your template**: Ensure your Jinja2 template correctly accesses the parts of the HTTP request you intend to use (e.g., `body.field_name`, `headers['Header-Name']`).
For more in-depth troubleshooting of webhook configuration and template rendering, see [Troubleshooting Webhook Configuration in the Concepts documentation](/v3/concepts/webhooks#troubleshooting-webhook-configuration).
## Further reading
For more on webhooks, see the [Webhooks Concepts](/v3/concepts/webhooks) page.
# How to manage API keys
Source: https://docs-3.prefect.io/v3/how-to-guides/cloud/manage-users/api-keys
Create an API key to access Prefect Cloud from a local execution environment.
API keys enable you to authenticate a local environment to work with Prefect Cloud.
If you run `prefect cloud login` from your CLI, you can authenticate through your browser or by pasting an API key.
Authenticating through the browser directs you to an authorization page.
After you grant approval to connect, you're redirected to the CLI and the API key is saved to your local
[Prefect profile](/v3/develop/settings-and-profiles/).
If you choose to authenticate by pasting an API key, you must create an API key in the Prefect Cloud UI first.
## Create an API key
1. Select the account icon at the bottom-left corner of the UI.
2. Select **API Keys**.
The page displays a list of previously generated keys, and allows you to create or delete API keys.
3. Select the **+** button to create a new API key.
Provide a name for the key and an expiration date.
Copy the key to a secure location since an API key cannot be revealed again in the UI after it is generated.
## Log in to Prefect Cloud with an API Key
```bash
prefect cloud login -k ''
```
Alternatively, if you don't have a CLI available - for example, if you are connecting to Prefect Cloud within a remote serverless environment - set the `PREFECT_API_KEY` environment variable.
For more information see [Connect to Prefect Cloud](/v3/manage/cloud/connect-to-cloud).
## Service account API keys (Pro) (Enterprise)
Service accounts are a feature of Prefect Cloud [Pro and Enterprise tier plans](https://www.prefect.io/pricing) that enable you to
create a Prefect Cloud API key that is not associated with a user account.
Service accounts are useful for configuring API access for running workers, or executing flow runs on remote infrastructure.
Events and logs for flow runs in those environments are associated with the service account rather than a user. Manage or revoke API access by
configuring or removing the service account without disrupting user access.
See [service accounts](/v3/how-to-guides/cloud/manage-users/service-accounts) for more information.
# How to audit Cloud activity
Source: https://docs-3.prefect.io/v3/how-to-guides/cloud/manage-users/audit-logs
Monitor user access and activity with audit logs in Prefect Cloud.
Prefect Cloud's [Pro and Enterprise plans](https://www.prefect.io/pricing) offer enhanced compliance and transparency through audit logs.
Audit logs provide a chronological record of activities performed by members in your account,
allowing you to monitor detailed Prefect Cloud actions for security and compliance purposes.
Audit logs show who took what action, when, and using what resources within your Prefect Cloud account.
In conjunction with appropriate tools and procedures, audit logs assist in detecting
potential security violations and investigating application errors.
Audit logs record:
* Access to workspaces
* User login activity
* User API key creation and removal
* Workspace creation and removal
* Account member invitations and removal
* Service account creation, API key rotation, and removal
* Billing payment method for self-serve pricing tiers
## View audit logs
From your account settings page, select the **Audit Log** page to view audit logs.
Administrators can view audit logs for:
* Account-level events in Prefect Cloud, such as:
* Member invites
* Changing a member's role
* Member login and logout of Prefect Cloud
* Creating or deleting a service account
* Workspace-level events in Prefect Cloud, such as:
* Adding a member to a workspace
* Changing a member's workspace role
* Creating or deleting a workspace
Admins can filter audit logs on multiple dimensions to restrict the results they see by workspace, user, or event type.
View audit log events in the **Events** drop-down menu.
You may also filter audit logs by date range.
Audit log retention period varies by [Prefect Cloud plan](https://www.prefect.io/pricing).
# How to configure single sign-on
Source: https://docs-3.prefect.io/v3/how-to-guides/cloud/manage-users/configure-sso
Configure single sign-on (SSO) for your Prefect Cloud users.
Prefect Cloud's [Enterprise plans](https://www.prefect.io/pricing) offer single sign-on (SSO) integration with your team's identity provider.
You can set up SSO integration with any identity provider that supports:
* OIDC
* SAML 2.0
When using SSO, Prefect Cloud won't store passwords for any accounts managed by your identity provider.
Members of your Prefect Cloud account will log in and authenticate using your identity provider.
Once your SSO integration is set up, non-admins are required to authenticate through the SSO provider when
accessing account resources.
See the [Prefect Cloud plans](https://www.prefect.io/pricing) to learn more about options for supporting more users and
workspaces, service accounts, and SSO.
## Configure SSO
Within your account, select the **SSO** page to enable SSO for users.
If you haven't enabled SSO for a domain yet, enter the email domains for enabling SSO in Prefect Cloud, and save it.
Under **Enabled Domains**, select the domains from the **Domains** list, then select **Generate Link**.
This step creates a link to configure SSO with your identity provider.
Using the provided link, navigate to the Identity Provider Configuration dashboard and select your identity provider to continue
configuration. If your provider isn't listed, try `SAML` or `Open ID Connect` instead.
Click **Next** to define the action(s) this automation should perform, such as running a deployment or sending a notification.
## Troubleshooting Event Reception
If you've invoked your webhook but don't see the expected event in Prefect Cloud, or the event data isn't what you anticipated:
* **Check the Event Feed**: Look for any events related to your webhook, even if they don't match your exact expectations.
* **Look for `prefect-cloud.webhook.failed` events**: If Prefect Cloud encountered an error processing the webhook (e.g., an invalid template or malformed request), it will generate a `prefect-cloud.webhook.failed` event. This event contains details about the received request and any template rendering errors.
* **Verify your request**: Double-check the URL, HTTP method, headers, and body of the request you sent to the webhook.
* **Review your template**: Ensure your Jinja2 template correctly accesses the parts of the HTTP request you intend to use (e.g., `body.field_name`, `headers['Header-Name']`).
For more in-depth troubleshooting of webhook configuration and template rendering, see [Troubleshooting Webhook Configuration in the Concepts documentation](/v3/concepts/webhooks#troubleshooting-webhook-configuration).
## Further reading
For more on webhooks, see the [Webhooks Concepts](/v3/concepts/webhooks) page.
# How to manage API keys
Source: https://docs-3.prefect.io/v3/how-to-guides/cloud/manage-users/api-keys
Create an API key to access Prefect Cloud from a local execution environment.
API keys enable you to authenticate a local environment to work with Prefect Cloud.
If you run `prefect cloud login` from your CLI, you can authenticate through your browser or by pasting an API key.
Authenticating through the browser directs you to an authorization page.
After you grant approval to connect, you're redirected to the CLI and the API key is saved to your local
[Prefect profile](/v3/develop/settings-and-profiles/).
If you choose to authenticate by pasting an API key, you must create an API key in the Prefect Cloud UI first.
## Create an API key
1. Select the account icon at the bottom-left corner of the UI.
2. Select **API Keys**.
The page displays a list of previously generated keys, and allows you to create or delete API keys.
3. Select the **+** button to create a new API key.
Provide a name for the key and an expiration date.
Copy the key to a secure location since an API key cannot be revealed again in the UI after it is generated.
## Log in to Prefect Cloud with an API Key
```bash
prefect cloud login -k ''
```
Alternatively, if you don't have a CLI available - for example, if you are connecting to Prefect Cloud within a remote serverless environment - set the `PREFECT_API_KEY` environment variable.
For more information see [Connect to Prefect Cloud](/v3/manage/cloud/connect-to-cloud).
## Service account API keys (Pro) (Enterprise)
Service accounts are a feature of Prefect Cloud [Pro and Enterprise tier plans](https://www.prefect.io/pricing) that enable you to
create a Prefect Cloud API key that is not associated with a user account.
Service accounts are useful for configuring API access for running workers, or executing flow runs on remote infrastructure.
Events and logs for flow runs in those environments are associated with the service account rather than a user. Manage or revoke API access by
configuring or removing the service account without disrupting user access.
See [service accounts](/v3/how-to-guides/cloud/manage-users/service-accounts) for more information.
# How to audit Cloud activity
Source: https://docs-3.prefect.io/v3/how-to-guides/cloud/manage-users/audit-logs
Monitor user access and activity with audit logs in Prefect Cloud.
Prefect Cloud's [Pro and Enterprise plans](https://www.prefect.io/pricing) offer enhanced compliance and transparency through audit logs.
Audit logs provide a chronological record of activities performed by members in your account,
allowing you to monitor detailed Prefect Cloud actions for security and compliance purposes.
Audit logs show who took what action, when, and using what resources within your Prefect Cloud account.
In conjunction with appropriate tools and procedures, audit logs assist in detecting
potential security violations and investigating application errors.
Audit logs record:
* Access to workspaces
* User login activity
* User API key creation and removal
* Workspace creation and removal
* Account member invitations and removal
* Service account creation, API key rotation, and removal
* Billing payment method for self-serve pricing tiers
## View audit logs
From your account settings page, select the **Audit Log** page to view audit logs.
Administrators can view audit logs for:
* Account-level events in Prefect Cloud, such as:
* Member invites
* Changing a member's role
* Member login and logout of Prefect Cloud
* Creating or deleting a service account
* Workspace-level events in Prefect Cloud, such as:
* Adding a member to a workspace
* Changing a member's workspace role
* Creating or deleting a workspace
Admins can filter audit logs on multiple dimensions to restrict the results they see by workspace, user, or event type.
View audit log events in the **Events** drop-down menu.
You may also filter audit logs by date range.
Audit log retention period varies by [Prefect Cloud plan](https://www.prefect.io/pricing).
# How to configure single sign-on
Source: https://docs-3.prefect.io/v3/how-to-guides/cloud/manage-users/configure-sso
Configure single sign-on (SSO) for your Prefect Cloud users.
Prefect Cloud's [Enterprise plans](https://www.prefect.io/pricing) offer single sign-on (SSO) integration with your team's identity provider.
You can set up SSO integration with any identity provider that supports:
* OIDC
* SAML 2.0
When using SSO, Prefect Cloud won't store passwords for any accounts managed by your identity provider.
Members of your Prefect Cloud account will log in and authenticate using your identity provider.
Once your SSO integration is set up, non-admins are required to authenticate through the SSO provider when
accessing account resources.
See the [Prefect Cloud plans](https://www.prefect.io/pricing) to learn more about options for supporting more users and
workspaces, service accounts, and SSO.
## Configure SSO
Within your account, select the **SSO** page to enable SSO for users.
If you haven't enabled SSO for a domain yet, enter the email domains for enabling SSO in Prefect Cloud, and save it.
Under **Enabled Domains**, select the domains from the **Domains** list, then select **Generate Link**.
This step creates a link to configure SSO with your identity provider.
Using the provided link, navigate to the Identity Provider Configuration dashboard and select your identity provider to continue
configuration. If your provider isn't listed, try `SAML` or `Open ID Connect` instead.
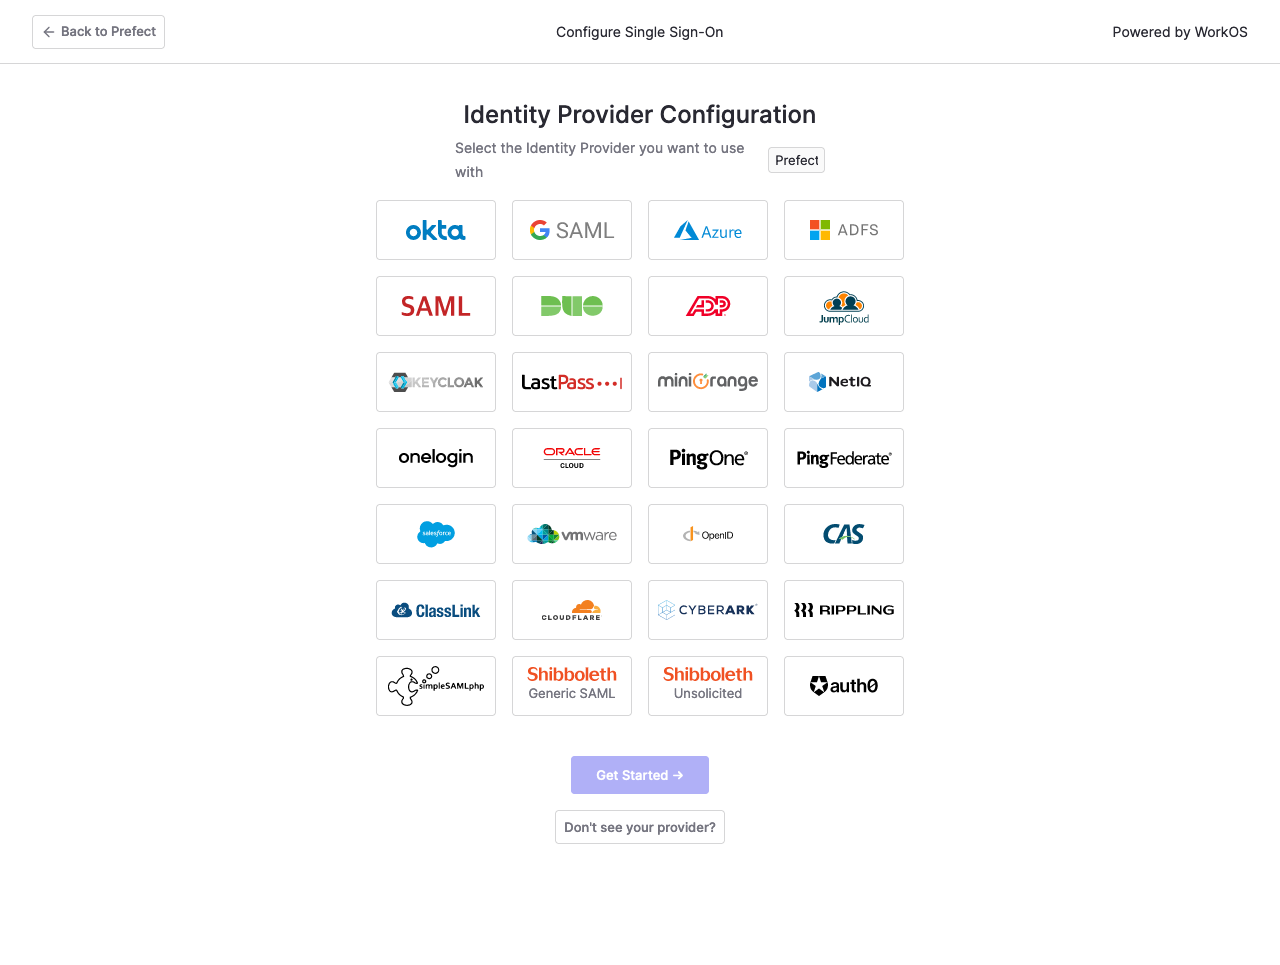 Once you complete SSO configuration, your users must authenticate through your identity provider when accessing account resources, giving you full control over application access.
## Directory sync
**Directory sync** automatically provisions and de-provisions users for your account.
Provisioned users are given basic “Member” roles and have access to any resources that role entails.
When a user is unassigned from the Prefect Cloud application in your identity provider, they automatically lose access to
Prefect Cloud resources. This allows your IT team to control access to Prefect Cloud without signing into the Prefect UI.
## SCIM Provisioning
Enterprise plans have access to SCIM for user provisioning.
The SSO tab provides access to enable SCIM provisioning.
# How to manage user accounts
Source: https://docs-3.prefect.io/v3/how-to-guides/cloud/manage-users/index
Special features for Prefect Cloud users
Sign up for a Prefect Cloud account at [app.prefect.cloud](https://app.prefect.cloud).
An individual user can be invited to become a member of other accounts.
## User settings
You can access your personal settings in the [profile menu](https://app.prefect.cloud/my/profile), including:
* **Profile**: View and edit basic information, such as name.
* **API keys**: Create and view [API keys](/v3/how-to-guides/cloud/manage-users/api-keys)
for connecting to Prefect Cloud from the CLI or other environments.
* **Preferences**: Manage settings, such as color mode and default time zone.
* **Feature previews**: Enable or disable feature previews.
## Account roles
Users who are part of an account can hold the role of Admin or Member.
Admins can invite other users to join the account and manage the account's workspaces and teams.
Admins on Pro and Enterprise tier Prefect Cloud accounts can grant members of the account
[roles](/v3/how-to-guides/cloud/manage-users/manage-roles) in a workspace, such as Runner or Viewer.
Custom roles are available on Enterprise tier accounts.
## API keys
[API keys](/v3/how-to-guides/cloud/manage-users/api-keys) enable you to authenticate an environment to work with Prefect Cloud.
## Service accounts (Pro) (Enterprise)
[Service accounts](/v3/how-to-guides/cloud/manage-users/service-accounts) enable you to create a
Prefect Cloud API key that is not associated with a user account.
## Single sign-on (Pro)
Enterprise tier plans offer [single sign-on (SSO)](/v3/how-to-guides/cloud/manage-users/configure-sso/)
integration with your team's identity provider, including options for
[directory sync and SCIM provisioning](/v3/how-to-guides/cloud/manage-users/configure-sso/#directory-sync).
## Audit log (Pro) (Enterprise)
[Audit logs](/v3/how-to-guides/cloud/manage-users/audit-logs/) provide a chronological record of
activities performed by Prefect Cloud users who are members of an account.
## Object-level access control lists (Enterprise)
Prefect Cloud's Enterprise plan offers object-level access control lists (ACLs) to
restrict access to specific users and service accounts within a workspace.
## Teams (Enterprise)
Users of Enterprise tier Prefect Cloud accounts can be added to
[Teams](/v3/how-to-guides/cloud/manage-users/manage-teams/) to simplify access control governance.
# How to manage account roles
Source: https://docs-3.prefect.io/v3/how-to-guides/cloud/manage-users/manage-roles
Configure user workspace roles in Prefect Cloud.
Prefect Cloud's [Pro and Enterprise tiers](https://www.prefect.io/pricing) allow you to set team member
access to the appropriate level within specific workspaces.
Role-based access controls (RBAC) enable you to assign users granular permissions to perform certain activities.
Enterprise account administrators can create custom roles for users to give users access to capabilities
beyond the scope of Prefect's built-in workspace roles.
## Built-in roles
Roles give users abilities at either the account level or at the individual workspace level.
* An *account-level role* defines a user's default permissions within an account.
* A *workspace-level role* defines a user's permissions within a specific workspace.
The following sections outline the abilities of the built-in, Prefect-defined access controls and workspace roles.
### Account-level roles
The following built-in roles have permissions across an account in Prefect Cloud.
{/*
*/}
| Role | Abilities |
| ------ | ---------------------------------------------------------------------------------------------------------------------------------------------------------------------------------------------------------------------------------------------------------------------------------------------------------------------------------------------------------------------- |
| Owner | - Set/change all account profile settings allowed to be set/changed by a Prefect user.
Once you complete SSO configuration, your users must authenticate through your identity provider when accessing account resources, giving you full control over application access.
## Directory sync
**Directory sync** automatically provisions and de-provisions users for your account.
Provisioned users are given basic “Member” roles and have access to any resources that role entails.
When a user is unassigned from the Prefect Cloud application in your identity provider, they automatically lose access to
Prefect Cloud resources. This allows your IT team to control access to Prefect Cloud without signing into the Prefect UI.
## SCIM Provisioning
Enterprise plans have access to SCIM for user provisioning.
The SSO tab provides access to enable SCIM provisioning.
# How to manage user accounts
Source: https://docs-3.prefect.io/v3/how-to-guides/cloud/manage-users/index
Special features for Prefect Cloud users
Sign up for a Prefect Cloud account at [app.prefect.cloud](https://app.prefect.cloud).
An individual user can be invited to become a member of other accounts.
## User settings
You can access your personal settings in the [profile menu](https://app.prefect.cloud/my/profile), including:
* **Profile**: View and edit basic information, such as name.
* **API keys**: Create and view [API keys](/v3/how-to-guides/cloud/manage-users/api-keys)
for connecting to Prefect Cloud from the CLI or other environments.
* **Preferences**: Manage settings, such as color mode and default time zone.
* **Feature previews**: Enable or disable feature previews.
## Account roles
Users who are part of an account can hold the role of Admin or Member.
Admins can invite other users to join the account and manage the account's workspaces and teams.
Admins on Pro and Enterprise tier Prefect Cloud accounts can grant members of the account
[roles](/v3/how-to-guides/cloud/manage-users/manage-roles) in a workspace, such as Runner or Viewer.
Custom roles are available on Enterprise tier accounts.
## API keys
[API keys](/v3/how-to-guides/cloud/manage-users/api-keys) enable you to authenticate an environment to work with Prefect Cloud.
## Service accounts (Pro) (Enterprise)
[Service accounts](/v3/how-to-guides/cloud/manage-users/service-accounts) enable you to create a
Prefect Cloud API key that is not associated with a user account.
## Single sign-on (Pro)
Enterprise tier plans offer [single sign-on (SSO)](/v3/how-to-guides/cloud/manage-users/configure-sso/)
integration with your team's identity provider, including options for
[directory sync and SCIM provisioning](/v3/how-to-guides/cloud/manage-users/configure-sso/#directory-sync).
## Audit log (Pro) (Enterprise)
[Audit logs](/v3/how-to-guides/cloud/manage-users/audit-logs/) provide a chronological record of
activities performed by Prefect Cloud users who are members of an account.
## Object-level access control lists (Enterprise)
Prefect Cloud's Enterprise plan offers object-level access control lists (ACLs) to
restrict access to specific users and service accounts within a workspace.
## Teams (Enterprise)
Users of Enterprise tier Prefect Cloud accounts can be added to
[Teams](/v3/how-to-guides/cloud/manage-users/manage-teams/) to simplify access control governance.
# How to manage account roles
Source: https://docs-3.prefect.io/v3/how-to-guides/cloud/manage-users/manage-roles
Configure user workspace roles in Prefect Cloud.
Prefect Cloud's [Pro and Enterprise tiers](https://www.prefect.io/pricing) allow you to set team member
access to the appropriate level within specific workspaces.
Role-based access controls (RBAC) enable you to assign users granular permissions to perform certain activities.
Enterprise account administrators can create custom roles for users to give users access to capabilities
beyond the scope of Prefect's built-in workspace roles.
## Built-in roles
Roles give users abilities at either the account level or at the individual workspace level.
* An *account-level role* defines a user's default permissions within an account.
* A *workspace-level role* defines a user's permissions within a specific workspace.
The following sections outline the abilities of the built-in, Prefect-defined access controls and workspace roles.
### Account-level roles
The following built-in roles have permissions across an account in Prefect Cloud.
{/*
*/}
| Role | Abilities |
| ------ | ---------------------------------------------------------------------------------------------------------------------------------------------------------------------------------------------------------------------------------------------------------------------------------------------------------------------------------------------------------------------- |
| Owner | - Set/change all account profile settings allowed to be set/changed by a Prefect user.
- Add and remove account members, and their account roles.
- Create and delete service accounts in the account.
- Create workspaces in the account.
- Implicit workspace owner access on all workspaces in the account.
- Bypass SSO. |
| Admin | - Set/change all account profile settings allowed to be set/changed by a Prefect user.
- Add and remove account members, and their account roles.
- Create and delete service accounts in the account.
- Create workspaces in the account.
- Implicit workspace owner access on all workspaces in the account.
- Cannot bypass SSO. |
| Member | - View account profile settings.
- View workspaces you have access to in the account.
- View account members and their roles.
- View service accounts in the account. |
{/*
*/}
### Workspace-level roles
The following built-in roles have permissions within a given workspace in Prefect Cloud.
| Role | Abilities |
| --------- | ------------------------------------------------------------------------------------------------------------------------------------------------------------------------------------------------------------------------------------------------------------------------------------------------------------------------------------------------------------------------------------------------------------------------------------------------ |
| Viewer | - View flow runs within a workspace.
- View deployments within a workspace.
- View all work pools within a workspace.
- View all blocks within a workspace.
- View all automations within a workspace.
- View workspace handle and description. |
| Runner | All Viewer abilities, *plus*:
- Run deployments within a workspace. |
| Developer | All Runner abilities, *plus*:
- Run flows within a workspace.
- Delete flow runs within a workspace.
- Create, edit, and delete deployments within a workspace.
- Create, edit, and delete work pools within a workspace.
- Create, edit, and delete all blocks and their secrets within a workspace.
- Create, edit, and delete automations within a workspace.
- View all workspace settings. |
| Owner | All Developer abilities, *plus*:
- Add and remove account members, and set their role within a workspace.
- Set the workspace's default workspace role for all users in the account.
- Set, view, edit workspace settings. |
| Worker | The minimum scopes required for a worker to poll for and submit work. |
## Custom workspace roles
The built-in roles serve the needs of most users, but custom roles give users access to
specific permissions within a workspace.
Custom roles can inherit permissions from a built-in role.
This enables tweaks to the role to meet your team's needs, while ensuring users still benefit
from Prefect's default workspace role permission curation as new capabilities becomes available.
{/*
*/}
You can create custom workspace roles independently of Prefect's built-in roles. This option gives
workspace admins full control of user access to workspace capabilities. However, for non-inherited custom roles,
the workspace Admin takes on the responsibility for monitoring and setting permissions for new capabilities as it is released.
{/*
*/}
See [Role permissions](#workspace-role-permissions) for details of permissions you may set for custom roles.
After you create a new role, it becomes available in the account **Members** page and the **Workspace Sharing**
page for you to apply to users.
### Inherited roles
You can configure a custom role as an **Inherited Role**. Using an inherited role allows you to create a
custom role from a set of initial permissions associated with a built-in Prefect role.
You can add additional permissions to the custom role. Permissions included in the inherited role cannot be removed.
Custom roles created from an inherited role follow Prefect's default workspace role permission curation as
new capabilities becomes available.
To configure an inherited role alongside a custom role, select **Inherit permission from a default role**, then select the role from which the new role should inherit permissions.
## Workspace role permissions
The following permissions are available for custom roles.
### Automations
| Permission | Description |
| ------------------------------------ | --------------------------------------------------------------------------------------------------------------- |
| View automations | User can see configured automations within a workspace. |
| Create, edit, and delete automations | User can create, edit, and delete automations within a workspace. Includes permissions of **View automations**. |
### Blocks
| Permission | Description |
| ------------------------------- | ------------------------------------------------------------------------------------------------------------------------------------ |
| View blocks | User can see configured blocks within a workspace. |
| View secret block data | User can see configured blocks and their secrets within a workspace. Includes permissions of **View blocks**. |
| Create, edit, and delete blocks | User can create, edit, and delete blocks within a workspace. Includes permissions of **View blocks** and **View secret block data**. |
### Deployments
| Permission | Description |
| --------------------------- | -------------------------------------------------------------------------------------------------------------------------------------------------------------------------------------------------------------------------------------------------------------------------------------------------------------------------------------------------------------------- |
| View deployments | User can see configured deployments within a workspace. |
| Run deployments | User can run deployments within a workspace. This does not give a user permission to execute the flow associated with the deployment. This only gives a user (through their key) the ability to run a deployment—another user/key must actually execute that flow, such as a service account with an appropriate role. Includes permissions of **View deployments**. |
| Create and edit deployments | User can create and edit deployments within a workspace. Includes permissions of **View deployments** and **Run deployments**. |
| Delete deployments | User can delete deployments within a workspace. Includes permissions of **View deployments**, **Run deployments**, and **Create and edit deployments**. |
### Flows
| Permission | Description |
| ----------------------------------------------- | ------------------------------------------------------------------------------------------------------------------------------------------------------ |
| View flows and flow runs | User can see flows and flow runs within a workspace. |
| Create, update, and delete saved search filters | User can create, update, and delete saved flow run search filters configured within a workspace. Includes permissions of **View flows and flow runs**. |
| Create, update, and run flows | User can create, update, and run flows within a workspace. Includes permissions of **View flows and flow runs**. |
| Delete flows | User can delete flows within a workspace. Includes permissions of **View flows and flow runs** and **Create, update, and run flows**. |
### Notifications
| Permission | Description |
| ------------------------------------- | -------------------------------------------------------------------------------------------------------------------------------------------------------------------------- |
| View notification policies | User can see notification policies configured within a workspace. |
| Create and edit notification policies | User can create and edit notification policies configured within a workspace. Includes permissions of **View notification policies**. |
| Delete notification policies | User can delete notification policies configured within a workspace. Includes permissions of **View notification policies** and **Create and edit notification policies**. |
### Task run concurrency
| Permission | Description |
| ------------------------------------------- | -------------------------------------------------------------------------------------------------------------------------------------- |
| View concurrency limits | User can see configured task run concurrency limits within a workspace. |
| Create, edit, and delete concurrency limits | User can create, edit, and delete task run concurrency limits within a workspace. Includes permissions of **View concurrency limits**. |
### Work pools
| Permission | Description |
| ---------------------------------- | ------------------------------------------------------------------------------------------------------------------------------------------------- |
| View work pools | User can see work pools configured within a workspace. |
| Create, edit, and pause work pools | User can create, edit, and pause work pools configured within a workspace. Includes permissions of **View work pools**. |
| Delete work pools | User can delete work pools configured within a workspace. Includes permissions of **View work pools** and **Create, edit, and pause work pools**. |
### Workspace management
| Permission | Description |
| ------------------------------------------------- | ----------------------------------------------------------------------------------------------------------------- |
| View information about workspace service accounts | User can see service accounts configured within a workspace. |
| View information about workspace users | User can see user accounts for users invited to the workspace. |
| View workspace settings | User can see settings configured within a workspace. |
| Edit workspace settings | User can edit settings for a workspace. Includes permissions of **View workspace settings**. |
| Delete the workspace | User can delete a workspace. Includes permissions of **View workspace settings** and **Edit workspace settings**. |
# How to manage teams
Source: https://docs-3.prefect.io/v3/how-to-guides/cloud/manage-users/manage-teams
Manage teams of users in Prefect Cloud.
Prefect Cloud's [Enterprise plan](https://www.prefect.io/pricing) offers team management to simplify access control governance.
Account Admins can configure teams and team membership from the account settings menu by clicking **Teams**.
Teams are composed of users and service accounts.
Teams can be added to workspaces or object access control lists just like users and service accounts.
If SCIM is enabled on your account, the set of teams and the users within them is governed by your IDP.
Prefect Cloud service accounts, which are not governed by your IDP, can be still be added to your existing set of teams.
See the [Prefect Cloud plans](https://www.prefect.io/pricing) to learn more about options for supporting teams.
# How to manage Access Control Lists (ACLs)
Source: https://docs-3.prefect.io/v3/how-to-guides/cloud/manage-users/object-access-control-lists
Restrict block and deployment access to individual actors within a workspace.
Prefect Cloud's [Enterprise plan](https://www.prefect.io/pricing) offers object-level access control lists (ACLs) to restrict access to
specific users and service accounts within a workspace. ACLs are supported for blocks, deployments, and work pools.
Organization Admins and Workspace Owners can configure access control lists by navigating to an object and clicking **manage access**.
When an ACL is added, all users and service accounts with access to an object through their workspace role will lose access if not
explicitly added to the ACL.
**ACLs and visibility**
Objects not governed by access control lists such as flow runs, flows, and artifacts are visible to a user within a
workspace even if an associated block or deployment has been restricted for that user.
See the [Prefect Cloud plans](https://www.prefect.io/pricing) to learn more about options for supporting object-level access control.
## ACL delegation for work pools and deployments
Deployments can delegate their permission checks to work pools. This delegation works as follows:
1. If a work pool has ACLs configured, those ACLs apply to all deployments that use the work pool.
2. If a work pool does not have ACLs, the ACLs of the individual deployments apply instead.
This delegation system allows for more efficient management of permissions, especially when multiple deployments use the same work pool.
# How to secure access by IP address
Source: https://docs-3.prefect.io/v3/how-to-guides/cloud/manage-users/secure-access-by-ip-address
Manage network access to Prefect Cloud accounts with IP Allowlists.
IP allowlisting is an available upgrade to certain Enterprise plans.
IP allowlisting enables account administrators to restrict access to Prefect Cloud APIs and the UI at the network level.
To learn more, please contact your account manager or the Prefect team at [sales@prefect.io](mailto:sales@prefect.io).
Once the feature has been enabled for your team's Enterprise account, use the Prefect CLI to add an IP address to the allowlist:
To help prevent accidental account lockouts, an update to an allowlist requires the requestor's current IP address to be on the list.
```bash
prefect cloud ip-allowlist add --description "My home IP address"
```
The allowlist has a limit of 25 entries;
however in addition to individual IP addresses, a range of IP addresses can be added as a single entry using CIDR notation:
```bash
prefect cloud ip-allowlist add "192.168.1.0/24" -d "A CIDR block containing 256 IP addresses from 192.168.1.0 to 192.168.1.255"
```
Next, enable the allowlist for your account to start enforcing the restrictions:
```bash
prefect cloud ip-allowlist enable
```
Individual entries can also be toggled on or off:
```bash
prefect cloud ip-allowlist toggle
```
Once turned on with at least one enabled IP entry, the allowlist will be enforced for all incoming requests to Prefect Cloud from the UI and API.
For other related commands, see the CLI help documentation with:
```bash
prefect cloud ip-allowlist --help
```
# How to secure access over PrivateLink
Source: https://docs-3.prefect.io/v3/how-to-guides/cloud/manage-users/secure-access-by-private-link
Manage network access to Prefect Cloud accounts over PrivateLink.
PrivateLink is an available upgrade to certain Enterprise plans.\
[PrivateLink](https://aws.amazon.com/privatelink/) enables account administrators to restrict access to Prefect Cloud APIs and the UI at the network level, by routing all network traffic through AWS and GCP.\
Traffic between your network and Prefect Cloud is encrypted, and does not traverse the public internet.
To learn more, please contact your account manager or the Prefect team at [sales@prefect.io](mailto:sales@prefect.io).
Your Prefect team will provide the service endpoint to register.
Provide the following information for the registered endpoint so that Prefect can accept the connection:
* AWS Account Number
* AWS VPC IDs
* Source Region for each VPC (for example, `us-east-1`, `us-east-2`, etc.)
* VPC Endpoint ID
Prefect will match your pending connection to the information provided, and accept the connection once approved.
Once accepted, customers should enable "Modify Private DNS" to ensure the VPCs can resolve the Prefect service endpoint.
With Private DNS and the accepted connection, connectivity can be validated through curl:
```bash
curl -i https://api-internal.private.prefect.cloud/api/health
```
To configure Prefect clients and workers to use the endpoint, `PREFECT_API_URL` and `PREFECT_CLOUD_API_URL` should be set to the endpoint provided by Prefect.
```bash
prefect config set PREFECT_API_URL=https://api-internal.private.prefect.cloud/api/accounts//workspaces/
prefect config set PREFECT_CLOUD_API_URL=https://api-internal.private.prefect.cloud/api
```
# How to manage service accounts
Source: https://docs-3.prefect.io/v3/how-to-guides/cloud/manage-users/service-accounts
Workspaces are isolated environments for flows and deployments within Prefect Cloud.
Service accounts enable you to create a Prefect Cloud API key that is not associated with a user account.
Service accounts are typically used to configure API access for running workers or executing deployment flow runs on remote infrastructure.
Service accounts are non-user accounts that have the following features:
* Prefect Cloud [API keys](/v3/how-to-guides/cloud/manage-users/api-keys)
* [Roles](/v3/how-to-guides/cloud/manage-users/manage-roles) and permissions
With service account credentials, you can
[configure an execution environment](/v3/manage/cloud/connect-to-cloud/#configure-a-local-execution-environment)
to interact with your Prefect Cloud workspaces without a user manually logging in from that environment.
Service accounts may be created, added to workspaces, have their roles changed, or deleted without affecting other user accounts.
You may apply any valid *workspace-level* role to a service account.
Select **Service Accounts** to view, create, or edit service accounts.
Service accounts are created at the account level, but individual workspaces may be shared with the service account.
See [workspace sharing](/v3/manage/cloud/workspaces/#workspace-sharing) for more information.
**Service account credentials**
When you create a service account, Prefect Cloud creates a new API key for the account and provides the
API configuration command for the execution environment.
Save these to a safe location for future use.
If the access credentials are lost or compromised, regenerate them from the service account page.
## Create a service account
On the **Service Accounts** page, select the **+** icon to create a new service account. Configure:
* The service account name. This name must be unique within your account.
* An expiration date, or the **Never Expire** option.
**Service account roles**
A service account may only be a Member of an account.
You may apply any valid *workspace-level* role to a service account when it is
[added to a workspace](/v3/manage/cloud/workspaces/#workspace-sharing).
Select **Create** to create the new service account.
Copy the key to a secure location since an API key cannot be revealed again in the UI after it is generated.
Change the API key and expiration for a service account by rotating the API key.
Select **Rotate API Key** from the menu on the left side of the service account's information on this page.
Optionally, you can set a period of time for your old service account key to remain active.
To delete a service account, select **Remove** from the menu on the left side of the service account's information.
# How to troubleshoot Prefect Cloud
Source: https://docs-3.prefect.io/v3/how-to-guides/cloud/troubleshoot-cloud
Learn how to identify and resolve common issues with Prefect Cloud.
## Prefect Cloud and proxies
Proxies handle network requests between a server and a client.
To communicate with Prefect Cloud, the Prefect client library makes HTTPS requests.
These requests are made with the [`httpx`](https://www.python-httpx.org/) Python library.
`httpx` respects accepted proxy environment variables, so the Prefect client can communicate through proxies.
To enable communication through proxies, set the `HTTPS_PROXY` and `SSL_CERT_FILE` environment
variables in your execution environment.
See the [Using Prefect Cloud with proxies](https://github.com/PrefectHQ/prefect/discussions/16175)
GitHub Discussion for more information.
You should whitelist the URLs for the UI, API, Authentication,
and the current OCSP server for outbound-communication in a secure environment:
* app.prefect.cloud
* api.prefect.cloud
* auth.workos.com
* api.github.com
* github.com
* ocsp.pki.goog/s/gts1d4/OxYEb8XcYmo
## Prefect Cloud access through the API
If the Prefect Cloud API key, environment variable settings, or account login for your execution environment
are not configured correctly, you may experience errors or unexpected flow run results when using Prefect CLI commands,
running flows, or observing flow run results in Prefect Cloud.
Use the `prefect config view` CLI command to make sure your execution environment is correctly configured
to access Prefect Cloud:
```bash
$ prefect config view
PREFECT_PROFILE='cloud'
PREFECT_API_KEY='pnu_xxxxxxxxxxxxxxxxxxxxxxxxxxxxxxxxxxxx' (from profile)
PREFECT_API_URL='https://api.prefect.cloud/api/accounts/...' (from profile)
```
Make sure `PREFECT_API_URL` is configured to use `https://api.prefect.cloud/api/...`.
Make sure `PREFECT_API_KEY` is configured to use a valid API key.
You can use the `prefect cloud workspace ls` CLI command to view or set the active workspace.
```bash
prefect cloud workspace ls
```
```shell
┏━━━━━━━━━━━━━━━━━━━━━━━━━┓
┃ Available Workspaces: ┃
┡━━━━━━━━━━━━━━━━━━━━━━━━━┩
│ g-gadflow/g-workspace │
│ * prefect/workinonit │
━━━━━━━━━━━━━━━━━━━━━━━━━━━
* active workspace
```
You can also check that the account and workspace IDs specified in the URL for `PREFECT_API_URL`
match those shown in the URL for your Prefect Cloud workspace.
## Prefect Cloud login errors
If you're having difficulty logging in to Prefect Cloud, the following troubleshooting steps may resolve the issue,
or will provide more information when sharing your case to the support channel.
* Are you logging into Prefect Cloud 3? Prefect Cloud 1, Prefect Cloud 2, and Prefect Cloud 3 use separate accounts.
Make sure to use the right Prefect Cloud 3 URL: \<[https://app.prefect.cloud/>](https://app.prefect.cloud/>)
* Do you already have a Prefect Cloud account? If you're having difficulty accepting an invitation,
try creating an account first using the email associated with the invitation, then accept the invitation.
* Are you using a single sign-on (SSO) provider, social authentication (Google, Microsoft, or GitHub) or just using an emailed link?
Other tips to help with login difficulties:
* Hard refresh your browser with Cmd+Shift+R.
* Try in a different browser. We actively test against the following browsers:
* Chrome
* Edge
* Firefox
* Safari
* Clear recent browser history/cookies
None of this worked?
Email us at \<[help@prefect.io](mailto:help@prefect.io)> and provide answers to the questions above in your email to make it faster to troubleshoot
and unblock you. Make sure you add the email address you used to attempt to log in, your Prefect Cloud account name, and, if applicable,
the organization it belongs to.
# General troubleshooting
The first troubleshooting step is to confirm that you are running the latest version of Prefect.
If you are not, upgrade (see below) to the latest version, since the issue may have already been fixed.
Beyond that, there are several categories of errors:
* The issue may be in your flow code, in which case you should carefully read the [logs](#logs).
* The issue could be with how you are authenticated, and whether or not you are connected to [Cloud](#cloud).
* The issue might have to do with how your code is [executed](#execution).
## Upgrade
Prefect is constantly evolving by adding new features and fixing bugs. A patch may have already been
identified and released. Search existing [issues](https://github.com/PrefectHQ/prefect/issues) for similar reports
and check out the [Release Notes](https://github.com/PrefectHQ/prefect/releases).
Upgrade to the newest version with the following command:
```bash
pip install --upgrade prefect
```
Different components may use different versions of Prefect:
* **Cloud** is generally the newest version. Cloud is continuously deployed by the Prefect team.
When using a self-hosted server, you can control this version.
* **Workers** change versions infrequently, and are usually the latest version at the time of creation.
Workers provision infrastructure for flow runs, so upgrading them may help with infrastructure problems.
* **Flows** could use a different version than the worker that created them, especially when running in different environments.
Suppose your worker and flow both use the latest official Docker image, but your worker was created a month ago.
Your worker is often an older version than your flow.
**Integration Versions**
[Integrations](/integrations/) are versioned and released independently of the core Prefect library.
They should be upgraded simultaneously with the core library, using the same method.
## Logs
In many cases, there is an informative stack trace in Prefect's [logs](/v3/develop/logging/).
**Read it carefully**, locate the source of the error, and try to identify the cause.
There are two types of logs:
* **Flow and task logs** are always scoped to a flow. They are sent to Prefect and are viewable in the UI.
* **Worker logs** are not scoped to a flow and may have more information on what happened before the flow started.
These logs are generally only available where the worker is running.
If your flow and task logs are empty, there may have been an infrastructure issue that prevented your flow from starting.
Check your worker logs for more details.
If there is no clear indication of what went wrong, try updating the logging level from the default `INFO` level
to the `DEBUG` level. [Settings](https://reference.prefect.io/prefect/settings/) such as the logging level are propagated
from the worker environment to the flow run environment. Set them with environment variables or the `prefect config set` CLI:
```bash
# Using the CLI
prefect config set PREFECT_LOGGING_LEVEL=DEBUG
# Using environment variables
export PREFECT_LOGGING_LEVEL=DEBUG
```
The `DEBUG` logging level produces a high volume of logs, so consider setting it back to `INFO` once any issues are resolved.
## Cloud
When using Prefect Cloud, there are the additional concerns of authentication and authorization.
The Prefect API authenticates users and service accounts, collectively known as actors, with API keys.
Missing, incorrect, or expired API keys result in a 401 response with detail `Invalid authentication credentials`.
Use the following command to check your authentication, replacing `$PREFECT_API_KEY` with your API key:
```bash
curl -s -H "Authorization: Bearer $PREFECT_API_KEY" "https://api.prefect.cloud/api/me/"
```
**Users vs Service Accounts**
[Service accounts](/v3/how-to-guides/cloud/manage-users/service-accounts) (sometimes referred to as bots),
represent non-human actors that interact with Prefect such as workers and CI/CD systems.
Each human that interacts with Prefect should be represented as a user.
User API keys start with `pnu_` and service account API keys start with `pnb_`.
Actors can be members of [workspaces](/v3/manage/cloud/workspaces/). An actor attempting an action in a
workspace they are not a member of results in a 404 response. Use the following command to check your actor's workspace memberships:
```bash
curl -s -H "Authorization: Bearer $PREFECT_API_KEY" "https://api.prefect.cloud/api/me/workspaces"
```
**Formatting JSON**
Python comes with a helpful [tool](https://docs.python.org/3/library/json.html#module-json.tool) for formatting JSON.
Append the following to the end of the command above to make the output more readable: `| python -m json.tool`
Make sure your actor is a member of the workspace you are working in. Within a workspace,
an actor has a [role](/v3/how-to-guides/cloud/manage-users/manage-roles) which grants them certain permissions.
Insufficient permissions result in an error. For example, starting a worker with the **Viewer** role results in errors.
## Execution
The user can execute flows locally, or remotely by a worker. Local execution generally means that you, the user,
run your flow directly with a command like `python flow.py`. Remote execution generally means that a worker runs your flow
through a [deployment](/v3/how-to-guides/deployment_infra/docker) (optionally on different infrastructure).
With remote execution, the creation of your flow run happens separately from its execution.
Flow runs are assigned to a work pool and a work queue. For flow runs to execute, a worker must be subscribed
to the work pool and work queue, or the flow runs will go from `Scheduled` to `Late`.
Ensure that your work pool and work queue have a subscribed worker.
Local and remote execution can also differ in their treatment of relative imports.
If switching from local to remote execution results in local import errors, try replicating the
behavior by executing the flow locally with the `-m` flag (For example, `python -m flow` instead of `python flow.py`).
Read more about `-m` in this [Stack Overflow post](https://stackoverflow.com/a/62923810).
## API tests return an unexpected 307 Redirected
**Summary:** requests require a trailing `/` in the request URL.
If you write a test that does not include a trailing `/` when making a request to a specific endpoint:
```python
async def test_example(client):
response = await client.post("/my_route")
assert response.status_code == 201
```
You'll see a failure like:
```bash
E assert 307 == 201
E + where 307 = .status_code
```
To resolve this, include the trailing `/`:
```python
async def test_example(client):
response = await client.post("/my_route/")
assert response.status_code == 201
```
Note: requests to nested URLs may exhibit the *opposite* behavior and require no trailing slash:
```python
async def test_nested_example(client):
response = await client.post("/my_route/filter/")
assert response.status_code == 307
response = await client.post("/my_route/filter")
assert response.status_code == 200
```
**Reference:** "HTTPX disabled redirect following by default" in
[`0.22.0`](https://github.com/encode/httpx/blob/master/CHANGELOG.md#0200-13th-october-2021).
## `pytest.PytestUnraisableExceptionWarning` or `ResourceWarning`
As you're working with one of the `FlowRunner` implementations, you may get an
error like this:
```bash
E pytest.PytestUnraisableExceptionWarning: Exception ignored in:
E
E Traceback (most recent call last):
E File ".../pytest_asyncio/plugin.py", line 306, in setup
E res = await func(**_add_kwargs(func, kwargs, event_loop, request))
E ResourceWarning: unclosed
.../_pytest/unraisableexception.py:78: PytestUnraisableExceptionWarning
```
This error states that your test suite (or the `prefect` library code) opened a
connection to something (like a Docker daemon or a Kubernetes cluster) and didn't close
it.
It may help to re-run the specific test with `PYTHONTRACEMALLOC=25 pytest ...` so that
Python can display more of the stack trace where the connection was opened.
# How to manage workspaces
Source: https://docs-3.prefect.io/v3/how-to-guides/cloud/workspaces
Organize and compartmentalize your workflows with workspaces.
A workspace is a discrete environment within Prefect Cloud for your workflows and related information.
For example, you can use separate workspaces to isolate dev, staging, and prod environments, or to provide separation between different teams.
## Get started with workspaces
When you first log into Prefect Cloud, you are prompted to create your own workspace.
To see all workspace workspaces you can access, click on your workspace name in the top of the navigation sidebar.
To see all workspace workspaces you can access, click on your workspace name in the top of the navigation sidebar.
Your list of available workspaces may include:
* Your own account's workspace.
* Workspaces in an account you're invited to with Admin or Member access.
Your user permissions within workspaces may vary. Account admins can assign roles and permissions at the workspace level.
## Create a workspace
On the Account settings dropdown, select the "Create a new workspace" button to create a new workspace.
Configure:
* The **Workspace Owner** from the dropdown account menu options.
* A unique **Workspace Name** must be unique within the account.
* An optional description for the workspace.
Select **Create** to create the new workspace. The number of available workspaces varies by [Prefect Cloud plan](https://www.prefect.io/pricing/).
See [Pricing](https://www.prefect.io/pricing/) if you need additional workspaces or users.
## Control access
Within a Prefect Cloud Pro or Enterprise tier account, workspace owners can invite other people as members, and provision [service accounts](https://docs.prefect.io/ui/service-accounts/) to a workspace.
A workspace owner assigns a [workspace role](https://docs.prefect.io/ui/roles/) to the user and specifies the user's scope of permissions within the workspace.
As a workspace owner, select **Workspaces -> Members** to manage members and **Workspaces -> Service Accounts** and service accounts for the workspace.
Previously invited individuals or provisioned service accounts are listed here.
To invite someone to an account, select the **Members +** icon. You can select from a list of existing account members.
Select a role for the user. This is the initial role for the user within the workspace.
A workspace owner can change this role at any time.
To remove a workspace member, select **Remove** from the menu on the right side of the user information on this page.
To add a service account to a workspace, select the **Service Accounts +** icon.
Select a **Name**, **Account Role**, **Expiration Date**, and optionally, a **Workspace**.
To update, delete, or rotate the API key for a service account, select an option for an existing service account from the menu on the right side of the service account.
## Transfer a workspace
Workspace transfer enables you to move an existing workspace from one account to another.
Workspace transfer retains existing workspace configuration and flow run history, including blocks, deployments, automations, work pools, and logs.
**Workspace transfer permissions**
You must have administrator privileges to initiate or approve a workspace transfer.
To initiate a workspace transfer between personal accounts, contact [support@prefect.io](mailto:support@prefect.io).
Click on the name of your workspace in the sidebar navigation and select **Workspace settings**.
From the three dot menu in the upper right of the page, select **Transfer**.
The **Transfer Workspace** page shows the workspace to be transferred on the left.
Select the target account for the workspace on the right.
**Workspace transfer impact on accounts**
Workspace transfer may impact resource usage and costs for source and target accounts.
When you transfer a workspace, users, API keys, and service accounts may lose access to the workspace.
The audit log will no longer track activity on the workspace.
Flow runs ending outside of the destination account's flow run retention period will be removed.
You may also need to update Prefect CLI profiles and execution environment settings to access the workspace's new location.
You may incur new charges in the target account to accommodate the transferred workspace.
## Delete a workspace
Deleting a workspace deletes all of its data including deployments, flow run history, work pools, and automations.
Click on the name of your workspace in the sidebar navigation and select **Workspace settings**.
From the three dot menu in the upper right of the page, select **Delete**.
# How to manage settings
Source: https://docs-3.prefect.io/v3/how-to-guides/configuration/manage-settings
### View current configuration
To view all available settings and their active values from the command line, run:
```bash
prefect config view --show-defaults
```
These settings are type-validated and you may verify your setup at any time with:
```bash
prefect config validate
```
### Configure settings for the active profile
To update a setting for the active profile, run:
```bash
prefect config set =
```
For example, to set the `PREFECT_API_URL` setting to `http://127.0.0.1:4200/api`, run:
```bash
prefect config set PREFECT_API_URL=http://127.0.0.1:4200/api
```
To restore the default value for a setting, run:
```bash
prefect config unset
```
For example, to restore the default value for the `PREFECT_API_URL` setting, run:
```bash
prefect config unset PREFECT_API_URL
```
### Create a new profile
To create a new profile, run:
```bash
prefect profile create
```
To switch to a new profile, run:
```bash
prefect profile use
```
### Configure settings for a project
To configure settings for a project, create a `prefect.toml` or `.env` file in the project directory and add the settings with the values you want to use.
For example, to configure the `PREFECT_API_URL` setting to `http://127.0.0.1:4200/api`, create a `.env` file with the following content:
```bash
PREFECT_API_URL=http://127.0.0.1:4200/api
```
To configure the `PREFECT_API_URL` setting to `http://127.0.0.1:4200/api` in a `prefect.toml` file, create a `prefect.toml` file with the following content:
```bash
api.url = "http://127.0.0.1:4200/api"
```
Refer to the [setting concept guide](/v3/concepts/settings-and-profiles/) for more information on how to configure settings and the [settings reference guide](/v3/api-ref/settings-ref/) for more information on the available settings.
### Configure temporary settings for a process
To configure temporary settings for a process, set an environment variable with the name matching the setting you want to configure.
For example, to configure the `PREFECT_API_URL` setting to `http://127.0.0.1:4200/api` for a process, set the `PREFECT_API_URL` environment variable to `http://127.0.0.1:4200/api`.
```bash
export PREFECT_API_URL=http://127.0.0.1:4200/api
```
You can use this to run a command with the temporary setting:
```bash
PREFECT_LOGGING_LEVEL=DEBUG python my_script.py
```
# How to store secrets
Source: https://docs-3.prefect.io/v3/how-to-guides/configuration/store-secrets
### Store secret strings
You can use the `Secret` block to store secret strings.
```python
from prefect.blocks.system import Secret
secret = Secret(value="Marvin's surprise birthday party is on the 15th")
secret.save("surprise-party")
```
You can access the secret value in your workflow by loading a `Secret` block with the same name.
{/* pmd-metadata: notest */}
```python
from prefect import flow
from prefect.blocks.system import Secret
@flow
def my_flow():
secret = Secret.load("surprise-party")
print(secret.get())
```
Secret values are encrypted at rest when stored in your Prefect backend.
To update a secret, save the new value with the `overwrite` parameter set to `True`.
{/* pmd-metadata: notest */}
```python
from prefect.blocks.system import Secret
secret = Secret(value="Marvin's surprise birthday party is actually on the 16th")
secret.save("surprise-party", overwrite=True)
```
Secret blocks can also be created and updated through the Prefect UI.
### Store common configuration securely
Prefect offers a set of blocks for storing common configuration.
Many of these blocks are included as part of Prefect's integration libraries.
For example, use the `AwsCredentials` block to store AWS keys to connect to AWS services in your workflows.
You can install `prefect-aws` by running `pip install prefect-aws`.
```python
from prefect_aws import AwsCredentials
aws_credentials = AwsCredentials(
aws_access_key_id="my-access-key-id",
aws_secret_access_key="nice-try-you-are-not-getting-my-key-friend")
aws_credentials.save("aws-credentials")
```
You can load the block to use the credentials in your workflow.
{/* pmd-metadata: notest */}
```python
from prefect_aws import AwsCredentials
import boto3
# Load AWS credentials from Prefect
creds = AwsCredentials.load("aws-credentials")
# Create boto3 session using the credentials
session = boto3.Session(
aws_access_key_id=creds.aws_access_key_id,
aws_secret_access_key=creds.aws_secret_access_key
)
# Create S3 client
s3_client = session.client('s3')
# List all buckets
response = s3_client.list_buckets()
for bucket in response['Buckets']:
print(f"Bucket name: {bucket['Name']}")
```
# How to share configuration between workflows
Source: https://docs-3.prefect.io/v3/how-to-guides/configuration/variables
### Create a variable
To create a variable stored in the Prefect backend, use `Variable.set()`.
```python
from prefect.variables import Variable
Variable.set("answer", 42)
```
### Read a variable
To read a variable, use `Variable.get()`.
```python
from prefect.variables import Variable
Variable.get("answer")
```
To read a variable with a fallback value, use `Variable.get(default=...)`.
```python
from prefect.variables import Variable
Variable.get("answer", default=42)
```
### Update a variable
To update a variable, use `Variable.set(value, overwrite=True)`.
```python
from prefect.variables import Variable
Variable.set("answer", 42, overwrite=True)
```
### Delete a variable
To delete a variable, use `Variable.unset()`.
```python
from prefect.variables import Variable
Variable.unset("answer")
```
**Contextual Behavior**
In a sync context (such as an `if __name__ == "__main__"` block or simple `def` scope), these methods are used synchronously.
In an async context (such as an `async def` scope), they are used asynchronously.
```python Synchronous
from prefect import flow
from prefect.variables import Variable
@flow(log_prints=True)
def space_mission_sync(mission_name: str):
crew = Variable.get("crew_members", default=["Backup1", "Backup2"])
print(f"Launching {mission_name} with crew: {', '.join(crew)}")
if __name__ == "__main__":
Variable.set("crew_members", ["Zaphod", "Arthur", "Trillian"])
space_mission_sync("Mars Expedition")
```
```python Asynchronous
import asyncio
from prefect import flow
from prefect.variables import Variable
@flow(log_prints=True)
async def space_mission_async(mission_name: str):
crew = await Variable.get("crew_members", default=["Backup1", "Backup2"])
print(f"Launching {mission_name} with crew: {', '.join(crew)}")
if __name__ == "__main__":
Variable.set("crew_members", ["Zaphod", "Arthur", "Trillian"])
asyncio.run(space_mission_async("Mars Expedition"))
```
### Use variables in `prefect.yaml` deployment steps
In `prefect.yaml` files, variables are expressed as strings wrapped in quotes and double curly brackets:
```
"{{ prefect.variables.my_variable }}"
```
Use variables to templatize deployment steps by
referencing them in the `prefect.yaml` file that creates the deployments.
For example, you can pass in a variable to specify a branch for a git repo in a deployment `pull` step:
```
pull:
- prefect.deployments.steps.git_clone:
repository: https://github.com/PrefectHQ/hello-projects.git
branch: "{{ prefect.variables.deployment_branch }}"
```
The `deployment_branch` variable is evaluated at runtime for the deployed flow, allowing changes to variables used in a pull action without updating a deployment directly.
# How to run flows on Coiled
Source: https://docs-3.prefect.io/v3/how-to-guides/deployment_infra/coiled
Deploy cloud infrastructure without expertise with Coiled
This page provides a step-by-step guide to run Prefect flows in your own cloud
account using two technologies:
* [Serverless push work pools](/v3/how-to-guides/deployment_infra/serverless), which remove the need to
host any always-on Prefect worker
* [Coiled](https://coiled.io?utm_source=prefect-docs), which manages cloud VMs such as
ECS, Cloud Run, and ACI in your account ergonomically and accessibly.
This combination combines the cost efficiency and security
of a cloud VM with easy setup and zero-maintenance infrastructure.
Coiled is a for-profit service, but its free tier is usually enough for most
Prefect users. Coiled is provided by the makers of Dask. This video
walks through the steps in this article:
## Install and set up accounts
```
pip install prefect coiled prefect-coiled
```
If you haven't used Prefect Cloud before, you'll need to [create a Prefect account](https://app.prefect.cloud) and log in:
```
prefect cloud login
```
If you haven't used Coiled before, you'll need to [create a Coiled account](https://cloud.coiled.io/signup?utm_source=prefect-docs) and log in:
```
coiled login
```
and then connect Coiled to your cloud account (AWS, Google Cloud, or Azure) where Coiled will run your flows. You can either use our interactive setup CLI:
```
coiled setup
```
or via the web app UI at [cloud.coiled.io/settings/setup](https://cloud.coiled.io/settings/setup).
## Create the Prefect push work pool
To create the push work pool:
```
prefect work-pool create --type coiled:push --provision-infra 'example-coiled-pool'
```
## Create flow and create deployment
We write our flow in Python as normal, using the work pool `"example-coiled-pool"` that we created in the last step.
```py
#example_flow.py
from prefect import flow, task
@task
def f(n):
return n**2
@task
def do_something(x):
print(x)
@flow(log_prints=True)
def my_flow():
print("Hello from your Prefect flow!")
X = f.map(list(range(10)))
do_something(X)
return X
if __name__ == "__main__":
my_flow.deploy(
name="example-coiled-deployment",
work_pool_name="example-coiled-pool",
image="my-image",
)
```
```
python example_flow.py
```
Here we specified the Docker image `”my-image”` that you would replace with your own image location. Alternatively, if you don’t enjoy working with Docker, see the section [Dockerless Execution](#dockerless-execution) below.
Our deployment is now launched and we can execute runs either on the command line using the command printed out:
```
prefect deployment run 'my-flow/example-coiled-deployment'
```
Or by going to the deployment at the URL that Prefect prints in the CLI.
## Dockerless execution
You don’t have to use Docker if you don’t want to. In our example above we used Docker to build an image locally and push up to our Docker image repository:
{/* pmd-metadata: notest */}
```python
if __name__ == "__main__":
my_flow.deploy(
name="example-coiled-deployment",
work_pool_name="example-coiled-pool",
image="my-image", # <--------
)
```
This works well if you and your team are familiar with Docker. However, if you’re not familiar, then it can cause confusion in a variety of ways:
* You may not have Docker installed
* You may be on a Mac, and be generating ARM-based Docker images for Intel-based cloud machines
* You may need to rebuild your Docker image each time you update libraries
* People on your team may not know how Docker works, limiting who can use Prefect
Because of this, Coiled also provides a Dockerless execution process that called [Package Sync](#how-environment-synchronization). Coiled can automatically inspect your local environment and build a remote cloud environment on the fly. This can be more ergonomic and accessible to everyone on the team.
To invoke this feature today you need to have both a Python file such as `example_flow.py` with your flow defined, and a `prefect.yaml` deployment configuration file .
```py
from prefect import flow, task
@task
def foo(n):
return n**2
@task
def do_something(x):
print(x)
@flow(log_prints=True)
def my_flow():
print("Hello from your Prefect flow!")
X = foo.map(list(range(10)))
do_something(X)
return X
```
```yaml
push:
- prefect_coiled.deployments.steps.build_package_sync_senv:
id: coiled_senv
pull:
- prefect.deployments.steps.set_working_directory:
directory: /scratch/batch
deployments:
- name: example-coiled-deploy
build: null
entrypoint: example_flow:my_flow
work_pool:
name: example-coiled-pool
job_variables:
software: '{{ coiled_senv.name }}'
```
You can deploy this flow to Prefect Cloud with the `prefect deploy` command, which makes it ready to run in the cloud.
```
prefect deploy --prefect-file prefect.yaml --all
```
You can then run this flow as follows:
```
prefect deployment run 'my-flow/example-coiled-deployment'
```
If the Docker example above didn’t work for you (for example because you didn’t have Docker installed, or because you have a Mac) then you may find this approach to be more robust.
## Configure hardware
One of the great things about the cloud is that you can experiment with different kinds of machines. Need lots of memory? No problem. A big GPU? Of course! Want to try ARM architectures for cost efficiency? Sure!
If you’re using Coiled’s Dockerless framework you can specify the following variables in your `prefect.yaml` file:
```
job_variables:
cpu: 16
memory: 32GB
```
If you’re operating straight from Python you can add these as a keyword in the `.deploy` call.
{/* pmd-metadata: notest */}
```py
my_flow.deploy(
...,
job_variables={"cpu": 16, "memory": "32GB"}
)
```
For a full list of possible configuration options see [Coiled API Documentation](https://docs.coiled.io/user_guide/api.html?utm_source=prefect-docs#coiled-batch-run).
## Extra: scale out
Coiled makes it simple to parallelize individual flows on distributed cloud hardware. The easiest way to do this is to annotate your Prefect tasks with the `@coiled.function` decorator.
Let’s modify our example from above:
{/* pmd-metadata: notest */}
```python
from prefect import flow, task
import coiled # new!
@task
def f(n):
return n**2
@task
@coiled.function(memory="64 GiB") # new!
def do_something(x):
print(x)
@flow(log_prints=True)
def my_flow():
print("Hello from your Prefect flow!")
X = f.map(list(range(10)))
```
If you’re using Docker, then you’ll have to rerun the Python script to rebuild the image. If you’re using the Dockerless approach, then you’ll need to redeploy your flow.
```
prefect deploy --prefect-file prefect.yaml --all
```
And then you can re-run things to see the new machines show up:
```
prefect deployment run 'my-flow/example-coiled-deployment'
```
## Architecture: How does this work?
It’s important to know where work happens so that you can understand the security and cost implications involved.
Coiled runs flows on VMs spun up in *your* cloud account (this is why you had to setup Coiled with your cloud account earlier). This means that …
* You’ll be charged directly by your cloud provider for any computation used.
* Your data stays within your cloud account. Neither Prefect nor Coiled ever see your data.
Coiled uses raw VM services (like AWS EC2) rather than systems like Kubernetes or Fargate, which has both good and bad tradeoffs:
* **Bad:** there will be a 30-60 second spin-up time on any new flow.
* **Good:** there is no resting infrastructure like a Kubernetes controller or long-standing VM, so there are no standing costs when you aren’t actively running flows.
* **Good:** you can use any VM type available on the cloud, like big memory machines or GPUs.
* **Good:** there is no cloud infrastructure to maintain and keep up-to-date.
* **Good:** Raw VMs are cheap. They cost from $0.02 to $0.05 per CPU-hour.
See [Coiled Documentation](https://docs.coiled.io/user_guide/why.html?utm_source=prefect-docs) to learn more about Coiled architecture and design decisions.
## FAQ
* **Q:** Where do my computations run?
**A:** Coiled deploys VMs inside your account.
* **Q:** Can anyone see my data?
**A:** Only you and people in your own cloud account.
* **Q:** When I update my software libraries how does that software get on my cloud machines?
**A:** If you’re using Docker then you handle this. Otherwise, when you redeploy your flow Coiled scans your local Python environment and ships a specification of all libraries you’re using, along with any local .py files you have lying around. These live in a secure S3 bucket while waiting for your VMs.
* **Q:** How much does this cost?
**A:** You’ll have to pay your cloud provider for compute that you use. Additionally, if you use more than 10,000 CPU-hours per month, you’ll have to pay Coiled \$0.05 per CPU-hour.
The average cost we see of Prefect flows is less than \$0.02.
* **Q:** Will this leave expensive things running in my cloud account?
**A:** No. We clean everything up very thoroughly (VMs, storage, …) It is safe to try and cheap to run.
* **Q:** What permissions do I need to give Coiled?
**A:** In the [cloud setup process above](#install-and-setup-accounts) you give us permissions to do things like turn on and off VMs, set up security groups, and put logs into your cloud logging systems. You do not give us any access to your data.
Coiled is happy to talk briefly to your IT group if they’re concerned. Reach out at [support@coiled.io](mailto:support@coiled.io)
# How to run flows in Docker containers
Source: https://docs-3.prefect.io/v3/how-to-guides/deployment_infra/docker
Learn how to execute deployments in isolated Docker containers
In this example, you will set up:
* a Docker [**work pool**](/v3/deploy/infrastructure-concepts/work-pools/): stores the infrastructure configuration for your deployment
* a Docker [**worker**](/v3/deploy/infrastructure-concepts/workers/): process that polls the Prefect API for flow runs to execute as Docker containers
* a [**deployment**](/v3/deploy/index/): a flow that should run according to the configuration on your Docker work pool
Then you can execute your deployment via the Prefect API (through the SDK, CLI, UI, etc).
You must have [Docker](https://docs.docker.com/engine/install/) installed and running on your machine.
**Executing flows in a long-lived container**
This guide shows how to run a flow in an ephemeral container that is removed after the flow run completes.
To instead learn how to run flows in a static, long-lived container, see [this](/v3/deploy/static-infrastructure-examples/docker/) guide.
### Create a work pool
A work pool provides default infrastructure configurations that all jobs inherit and can override.
You can adjust many defaults, such as the base Docker image, container cleanup behavior, and resource limits.
To set up a **Docker** type work pool with the default values, run:
```bash
prefect work-pool create --type docker my-docker-pool
```
... or create the work pool in the UI.
To confirm the work pool creation was successful, run:
```bash
prefect work-pool ls
```
You should see your new `my-docker-pool` listed in the output.
Next, check that you can see this work pool in your Prefect UI.
Navigate to the **Work Pools** tab and verify that you see `my-docker-pool` listed.
When you click into `my-docker-pool`, you should see a red status icon signifying that this work pool is not ready.
To make the work pool ready, you'll need to start a worker.
We'll show how to do this next.
### Start a worker
Workers are a lightweight polling process that kick off scheduled flow runs on a specific type of infrastructure (such as Docker).
To start a worker on your local machine, open a new terminal and confirm that your virtual environment has `prefect` installed.
Run the following command in this new terminal to start the worker:
```bash
prefect worker start --pool my-docker-pool
```
You should see the worker start.
It's now polling the Prefect API to check for any scheduled flow runs it should pick up and then submit for execution.
You'll see your new worker listed in the UI under the **Workers** tab of the Work Pools page with a recent last polled date.
The work pool should have a `Ready` status indicator.
**Pro Tip:**
If `my-docker-pool` does not already exist, the below command will create it for you automatically with the default settings for that work pool type, in this case `docker`.
```bash
prefect worker start --pool my-docker-pool --type docker
```
Keep this terminal session active for the worker to continue to pick up jobs.
Since you are running this worker locally, the worker will if you close the terminal.
In a production setting this worker should run as a [daemonized or managed process](/v3/deploy/daemonize-processes/).
## Create the deployment
From the previous steps, you now have:
* A work pool
* A worker
Next, you'll create a deployment from your flow code.
### Automatically bake your code into a Docker image
Create a deployment from Python code by calling the `.deploy` method on a flow:
```python deploy_buy.py
from prefect import flow
@flow(log_prints=True)
def buy():
print("Buying securities")
if __name__ == "__main__":
buy.deploy(
name="my-code-baked-into-an-image-deployment",
work_pool_name="my-docker-pool",
image="my_registry/my_image:my_image_tag" # YOUR IMAGE REGISTRY
)
```
Now, run the script to create a deployment (in future examples this step is omitted for brevity):
```bash
python deploy_buy.py
```
You should see messages in your terminal that Docker is building your image.
When the deployment build succeeds, you will see information in your terminal showing you how to start a worker for your
deployment, and how to run your deployment.
Your deployment is visible on the `Deployments` page in the UI.
By default, `.deploy` builds a Docker image with your flow code baked into it and pushes the image to the
[Docker Hub](https://hub.docker.com/) registry implied by the `image` argument to `.deploy`.
**Authentication to Docker Hub**
Your environment must be authenticated to your Docker registry to push an image to it.
You can specify a registry other than Docker Hub by providing the full registry path in the `image` argument.
If building a Docker image, your environment with your deployment needs Docker installed and running.
To avoid pushing to a registry, set `push=False` in the `.deploy` method:
```python
if __name__ == "__main__":
buy.deploy(
name="my-code-baked-into-an-image-deployment",
work_pool_name="my-docker-pool",
image="my_registry/my_image:my_image_tag",
push=False
)
```
To avoid building an image, set `build=False` in the `.deploy` method:
```python
if __name__ == "__main__":
buy.deploy(
name="my-code-baked-into-an-image-deployment",
work_pool_name="my-docker-pool",
image="my_registry/already-built-image:1.0",
build=False
)
```
The specified image must be available in your deployment's execution environment for accessible flow code.
Prefect generates a Dockerfile for you that builds an image based off of one of Prefect's published images.
The generated Dockerfile copies the current directory into the Docker image and installs any dependencies listed
in a `requirements.txt` file.
### Automatically build a custom Docker image with a local Dockerfile
If you want to use a custom image, specify the path to your Dockerfile via `DockerImage`:
```python my_flow.py
from prefect import flow
from prefect.docker import DockerImage
@flow(log_prints=True)
def buy():
print("Buying securities")
if __name__ == "__main__":
buy.deploy(
name="my-custom-dockerfile-deployment",
work_pool_name="my-docker-pool",
image=DockerImage(
name="my_image",
tag="deploy-guide",
dockerfile="Dockerfile"
),
push=False
)
```
The `DockerImage` object enables image customization.
For example, you can install a private Python package from GCP's artifact registry like this:
1. Create a custom base Dockerfile.
```Dockerfile sample.Dockerfile
FROM python:3.12
ARG AUTHED_ARTIFACT_REG_URL
COPY ./requirements.txt /requirements.txt
RUN pip install --extra-index-url ${AUTHED_ARTIFACT_REG_URL} -r /requirements.txt
```
2. Create your deployment with the `DockerImage` class:
```python deploy_using_private_package.py
from prefect import flow
from prefect.deployments.runner import DockerImage
from prefect.blocks.system import Secret
from myproject.cool import do_something_cool
@flow(log_prints=True)
def my_flow():
do_something_cool()
if __name__ == "__main__":
artifact_reg_url = Secret.load("artifact-reg-url")
my_flow.deploy(
name="my-deployment",
work_pool_name="my-docker-pool",
image=DockerImage(
name="my-image",
tag="test",
dockerfile="sample.Dockerfile",
buildargs={"AUTHED_ARTIFACT_REG_URL": artifact_reg_url.get()},
),
)
```
Note that this example used a [Prefect Secret block](/v3/develop/blocks/) to load the URL configuration for
the artifact registry above.
See all the optional keyword arguments for the [`DockerImage` class](https://docker-py.readthedocs.io/en/stable/images.html#docker.models.images.ImageCollection.build).
**Default Docker namespace**
You can set the `PREFECT_DEFAULT_DOCKER_BUILD_NAMESPACE` setting to append a default Docker namespace to all images
you build with `.deploy`. This is helpful if you use a private registry to store your images.
To set a default Docker namespace for your current profile run:
```bash
prefect config set PREFECT_DEFAULT_DOCKER_BUILD_NAMESPACE=/
```
Once set, you can omit the namespace from your image name when creating a deployment:
```python with_default_docker_namespace.py
if __name__ == "__main__":
buy.deploy(
name="my-code-baked-into-an-image-deployment",
work_pool_name="my-docker-pool",
image="my_image:my_image_tag"
)
```
The above code builds an image with the format `//my_image:my_image_tag`
when `PREFECT_DEFAULT_DOCKER_BUILD_NAMESPACE` is set.
### Store your code in git-based cloud storage
While baking code into Docker images is a popular deployment option, many teams store their workflow code in git-based
storage, such as GitHub, Bitbucket, or GitLab.
If you don't specify an `image` argument for `.deploy`, you must specify where to pull the flow code from at runtime
with the `from_source` method.
Here's how to pull your flow code from a GitHub repository:
```python git_storage.py
from prefect import flow
if __name__ == "__main__":
flow.from_source(
"https://github.com/my_github_account/my_repo/my_file.git",
entrypoint="flows/no-image.py:hello_world",
).deploy(
name="no-image-deployment",
work_pool_name="my-docker-pool",
build=False
)
```
The `entrypoint` is the path to the file the flow is located in and the function name, separated by a colon.
See the [Store flow code](/v3/deploy/infrastructure-concepts/store-flow-code/) guide for more flow code storage options.
### Additional configuration with `.deploy`
Next, see deployment configuration options.
To pass parameters to your flow, you can use the `parameters` argument in the `.deploy` method. Just pass in a dictionary of
key-value pairs.
```python pass_params.py
from prefect import flow
@flow
def hello_world(name: str):
print(f"Hello, {name}!")
if __name__ == "__main__":
hello_world.deploy(
name="pass-params-deployment",
work_pool_name="my-docker-pool",
parameters=dict(name="Prefect"),
image="my_registry/my_image:my_image_tag",
)
```
The `job_variables` parameter allows you to fine-tune the infrastructure settings for a deployment.
The values passed in override default values in the specified work pool's
[base job template](/v3/deploy/infrastructure-concepts/work-pools/#base-job-template).
You can override environment variables, such as `image_pull_policy` and `image`, for a specific deployment with the `job_variables`
argument.
```python job_var_image_pull.py
if __name__ == "__main__":
get_repo_info.deploy(
name="my-deployment-never-pull",
work_pool_name="my-docker-pool",
job_variables={"image_pull_policy": "Never"},
image="my-image:my-tag",
push=False
)
```
Similarly, you can override the environment variables specified in a work pool through the `job_variables` parameter:
```python job_var_env_vars.py
if __name__ == "__main__":
get_repo_info.deploy(
name="my-deployment-never-pull",
work_pool_name="my-docker-pool",
job_variables={"env": {"EXTRA_PIP_PACKAGES": "boto3"} },
image="my-image:my-tag",
push=False
)
```
The dictionary key "EXTRA\_PIP\_PACKAGES" denotes a special environment variable that Prefect uses to install additional
Python packages at runtime.
This approach is an alternative to building an image with a custom `requirements.txt` copied into it.
See [Override work pool job variables](/v3/deploy/infrastructure-concepts/customize) for more information about how to customize these variables.
### Work with multiple deployments with `deploy`
Create multiple deployments from one or more Python files that use `.deploy`.
You can manage these deployments independently of one another to deploy the same flow with different configurations
in the same codebase.
To create multiple deployments at once, use the `deploy` function, which is analogous to the `serve` function:
```python
from prefect import deploy, flow
@flow(log_prints=True)
def buy():
print("Buying securities")
if __name__ == "__main__":
deploy(
buy.to_deployment(name="dev-deploy", work_pool_name="my-docker-pool"),
buy.to_deployment(name="prod-deploy", work_pool_name="my-other-docker-pool"),
image="my-registry/my-image:dev",
push=False,
)
```
In the example above you created two deployments from the same flow, but with different work pools.
Alternatively, you can create two deployments from different flows:
```python
from prefect import deploy, flow
@flow(log_prints=True)
def buy():
print("Buying securities.")
@flow(log_prints=True)
def sell():
print("Selling securities.")
if __name__ == "__main__":
deploy(
buy.to_deployment(name="buy-deploy"),
sell.to_deployment(name="sell-deploy"),
work_pool_name="my-docker-pool",
image="my-registry/my-image:dev",
push=False,
)
```
In the example above, the code for both flows is baked into the same image.
You can specify one or more flows to pull from a remote location at runtime with the `from_source` method.
Here's an example of deploying two flows, one defined locally and one defined in a remote repository:
```python
from prefect import deploy, flow
@flow(log_prints=True)
def local_flow():
print("I'm a flow!")
if __name__ == "__main__":
deploy(
local_flow.to_deployment(name="example-deploy-local-flow"),
flow.from_source(
source="https://github.com/org/repo.git",
entrypoint="flows.py:my_flow",
).to_deployment(
name="example-deploy-remote-flow",
),
work_pool_name="my-docker-pool",
image="my-registry/my-image:dev",
)
```
You can pass any number of flows to the `deploy` function.
This is useful if using a monorepo approach to your workflows.
## Learn more
* [Deploy flows on Kubernetes](/v3/how-to-guides/deployment_infra/kubernetes/)
* [Deploy flows on serverless infrastructure](/v3/how-to-guides/deployment_infra/serverless)
* [Daemonize workers](/v3/deploy/daemonize-processes/)
# How to run flows on Kubernetes
Source: https://docs-3.prefect.io/v3/how-to-guides/deployment_infra/kubernetes
Learn how to run flows on Kubernetes using containers.
This guide explains how to run flows on Kubernetes.
Though much of the guide is general to any Kubernetes cluster, it focuses on
Amazon Elastic Kubernetes Service (EKS). Prefect is tested against
Kubernetes 1.26.0 and newer minor versions.
## Prerequisites
1. A Prefect Cloud account
2. A cloud provider (AWS, GCP, or Azure) account
3. Python and Prefect [installed](/v3/get-started/install/)
4. Helm [installed](https://helm.sh/docs/intro/install/)
5. Kubernetes CLI (kubectl)[installed](https://kubernetes.io/docs/tasks/tools/install-kubectl/)
6. Admin access for Prefect Cloud and your cloud provider. You can downgrade it after this setup.
## Create a cluster
If you already have one, skip ahead to the next section.
One easy way to get set up with a cluster in EKS is with [`eksctl`](https://eksctl.io/).
Node pools can be backed by either EC2 instances or FARGATE.
Choose FARGATE so there's less to manage.
The following command takes around 15 minutes and must not be interrupted:
```bash
# Replace the cluster name with your own value
eksctl create cluster --fargate --name
# Authenticate to the cluster.
aws eks update-kubeconfig --name
```
You can get a GKE cluster up and running with a few commands using the
[`gcloud` CLI](https://cloud.google.com/sdk/docs/install).
This builds a bare-bones cluster that is accessible over the open
internet - but it should **not** be used in a production environment.
To deploy the cluster, your project must have a VPC network configured.
First, authenticate to GCP by setting the following configuration options:
```bash
# Authenticate to gcloud
gcloud auth login
# Specify the project & zone to deploy the cluster to
# Replace the project name with your GCP project name
gcloud config set project
gcloud config set compute/zone
```
Next, deploy the cluster. This command takes \~15 minutes to complete.
Once the cluster has been created, authenticate to the cluster.
```bash
# Create cluster
# Replace the cluster name with your own value
gcloud container clusters create --num-nodes=1 \
--machine-type=n1-standard-2
# Authenticate to the cluster
gcloud container clusters --region
```
**GCP potential errors**
```
ERROR: (gcloud.container.clusters.create) ResponseError: code=400, message=Service account "000000000000-compute@developer.gserviceaccount.com" is disabled.
```
* You must enable the default service account in the IAM console, or
specify a different service account with the appropriate permissions.
```
creation failed: Constraint constraints/compute.vmExternalIpAccess violated for project 000000000000. Add instance projects//zones/us-east1-b/instances/gke-gke-guide-1-default-pool-c369c84d-wcfl to the constraint to use external IP with it."
```
* Organization policy blocks creation of external (public) IPs. Override
this policy (if you have the appropriate permissions) under the `Organizational Policy`
page within IAM.
Create an AKS cluster using the
[Azure CLI](https://learn.microsoft.com/en-us/cli/azure/get-started-with-azure-cli),
or use the Cloud Shell directly from the Azure portal [shell.azure.com](https://shell.azure.com).
First, authenticate to Azure if not already done.
```bash
az login
```
Next, deploy the cluster - this command takes \~4 minutes to complete.
Once the cluster is created, authenticate to the cluster.
```bash
# Create a Resource Group at the desired location, e.g. westus
az group create --name --location
# Create a kubernetes cluster with default kubernetes version, default SKU load balancer (Standard) and default vm set type (VirtualMachineScaleSets)
az aks create --resource-group --name
# Configure kubectl to connect to your Kubernetes cluster
az aks get-credentials --resource-group --name
# Verify the connection by listing the cluster nodes
kubectl get nodes
```
## Create a container registry
Besides a cluster, the other critical resource is a container registry.
A registry is not strictly required, but in most cases you'll want to use custom
images and/or have more control over where images are stored.
If you already have a registry, skip ahead to the next section.
Create a registry using the AWS CLI and authenticate the docker daemon to
that registry:
```bash
# Replace the image name with your own value
aws ecr create-repository --repository-name
# Login to ECR
# Replace the region and account ID with your own values
aws ecr get-login-password --region | docker login \
--username AWS --password-stdin .dkr.ecr..amazonaws.com
```
Create a registry using the gcloud CLI and authenticate the docker daemon to
that registry:
```bash
# Create artifact registry repository to host your custom image
# Replace the repository name with your own value; it can be the
# same name as your image
gcloud artifacts repositories create \
--repository-format=docker --location=us
# Authenticate to artifact registry
gcloud auth configure-docker us-docker.pkg.dev
```
Create a registry using the Azure CLI and authenticate the docker daemon to
that registry:
```bash
# Name must be a lower-case alphanumeric
# Tier SKU can easily be updated later, e.g. az acr update --name --sku Standard
az acr create --resource-group \
--name \
--sku Basic
# Attach ACR to AKS cluster
# You need Owner, Account Administrator, or Co-Administrator role on your Azure subscription as per Azure docs
az aks update --resource-group --name --attach-acr
# You can verify AKS can now reach ACR
az aks check-acr --resource-group RESOURCE-GROUP-NAME> --name --acr .azurecr.io
```
## Create a Kubernetes work pool
[Work pools](/v3/deploy/infrastructure-concepts/work-pools/) allow you to manage deployment
infrastructure.
This section shows you how to configure the default values for your
Kubernetes base job template.
These values can be overridden by individual deployments.
Switch to the Prefect Cloud UI to create a new Kubernetes work pool.
(Alternatively, you could use the Prefect CLI to create a work pool.)
1. Click on the **Work Pools** tab on the left sidebar
2. Click the **+** button at the top of the page
3. Select **Kubernetes** as the work pool type
4. Click **Next** to configure the work pool settings
5. Set the `namespace` field to `prefect`
If you set a different namespace, use your selected namespace instead of `prefect` in all commands below.
You may come back to this page to configure the work pool options at any time.
### Configure work pool options
Here are some popular configuration options.
**Environment Variables**
Add environment variables to set when starting a flow run.
If you are using a Prefect-maintained image and haven't overwritten the image's
entrypoint, you can specify Python packages to install at runtime with `{"EXTRA_PIP_PACKAGES":"my_package"}`.
For example `{"EXTRA_PIP_PACKAGES":"pandas==1.2.3"}` installs pandas version 1.2.3.
Alternatively, you can specify package installation in a custom Dockerfile, which
allows you to use image caching.
As shown below, Prefect can help create a Dockerfile with your flow code and the
packages specified in a `requirements.txt` file baked in.
**Namespace**
Set the Kubernetes namespace to create jobs within, such as `prefect`. By default, set
to **default**.
**Image**
Specify the Docker container image for created jobs.
If not set, the latest Prefect 3 image is used (for example, `prefecthq/prefect:3-latest`).
You can override this on each deployment through `job_variables`.
**Image Pull Policy**
Select from the dropdown options to specify when to pull the image.
When using the `IfNotPresent` policy, make sure to use unique image tags, or
old images may get cached on your nodes.
**Finished Job TTL**
Number of seconds before finished jobs are automatically cleaned up by the Kubernetes
controller.
Set to 60 so completed flow runs are cleaned up after a minute.
**Pod Watch Timeout Seconds**
Number of seconds for pod creation to complete before timing out.
Consider setting to 300, especially if using a **serverless** type node pool, as
these tend to have longer startup times.
**Kubernetes cluster config**
Specify a KubernetesClusterConfig block to configure the Kubernetes cluster for job creation.
In most cases, leave the cluster config blank since the worker should already have appropriate
access and permissions.
We recommend using this setting when deploying a worker to a cluster that differs from the one
executing the flow runs.
**Advanced Settings**
Modify the default base job template to add other fields or delete existing
fields.
Select the **Advanced** tab and edit the JSON representation of the base job template.
For example, to set a CPU request, add the following section under variables:
```json
"cpu_request": {
"title": "CPU Request",
"description": "The CPU allocation to request for this pod.",
"default": "default",
"type": "string"
},
```
Next add the following to the first `containers` item under `job_configuration`:
```json
...
"containers": [
{
...,
"resources": {
"requests": {
"cpu": "{{ cpu_request }}"
}
}
}
],
...
```
Running deployments with this work pool will request the specified CPU.
After configuring the work pool settings, move to the next screen.
Give the work pool a name and save.
Your new Kubernetes work pool should appear in the list of work pools.
## Create a Prefect Cloud API key
If you already have a Prefect Cloud API key, you can skip these steps.
To create a Prefect Cloud API key:
1. Log in to the Prefect Cloud UI.
2. Click on your profile avatar picture in the top right corner.
3. Click on your name to go to your profile settings.
4. In the left sidebar, click on [API Keys](https://app.prefect.cloud/my/api-keys).
5. Click the **+** button to create a new API key.
6. Securely store the API key, ideally using a password manager.
## Deploy a worker using Helm
After you create a cluster and work pool, the next step is to deploy a worker.
The worker sets up the necessary Kubernetes infrastructure to run your flows.
The recommended method for deploying a worker is with the [Prefect Helm Chart](https://github.com/PrefectHQ/prefect-helm/tree/main/charts/prefect-worker).
### Add the Prefect Helm repository
Add the Prefect Helm repository to your Helm client:
```bash
helm repo add prefect https://prefecthq.github.io/prefect-helm
helm repo update
```
### Create a namespace
Create a new namespace in your Kubernetes cluster to deploy the Prefect worker:
```bash
kubectl create namespace prefect
```
### Create a Kubernetes secret for the Prefect API key
```bash
kubectl create secret generic prefect-api-key \
--namespace=prefect --from-literal=key=your-prefect-cloud-api-key
```
### Configure Helm chart values
Create a `values.yaml` file to customize the Prefect worker configuration.
Add the following contents to the file:
```yaml
worker:
cloudApiConfig:
accountId:
workspaceId:
config:
workPool:
```
These settings ensure that the worker connects to the proper account, workspace,
and work pool.
View your Account ID and Workspace ID in your browser URL when logged into Prefect Cloud.
For example: \<[https://app.prefect.cloud/account/abc-my-account-id-is-here/workspaces/123-my-workspace-id-is-here>](https://app.prefect.cloud/account/abc-my-account-id-is-here/workspaces/123-my-workspace-id-is-here>).
### Create a Helm release
Install the Prefect worker using the Helm chart with your custom `values.yaml` file:
```bash
helm install prefect-worker prefect/prefect-worker \
--namespace=prefect \
-f values.yaml
```
### Verify deployment
Check the status of your Prefect worker deployment:
```bash
kubectl get pods -n prefect
```
## Define a flow
Start simple with a flow that just logs a message.
In a directory named `flows`, create a file named `hello.py` with the following contents:
```python
from prefect import flow, tags
from prefect.logging import get_run_logger
@flow
def hello(name: str = "Marvin"):
logger = get_run_logger()
logger.info(f"Hello, {name}!")
if __name__ == "__main__":
with tags("local"):
hello()
```
Run the flow locally with `python hello.py` to verify that it works.
Use the `tags` context manager to tag the flow run as `local`.
This step is not required, but does add some helpful metadata.
## Define a Prefect deployment
Prefect has two recommended options for creating a deployment with dynamic infrastructure.
You can define a deployment in a Python script using the `flow.deploy` mechanics or in a
`prefect.yaml` definition file.
The `prefect.yaml` file currently allows for more customization in terms of push and pull
steps.
To learn about the Python deployment creation method with `flow.deploy` see
[Workers](/v3/how-to-guides/deployment_infra/docker).
The [`prefect.yaml`](/v3/deploy/infrastructure-concepts/prefect-yaml/#managing-deployments) file is used
by the `prefect deploy` command to deploy your flows.
As a part of that process it also builds and pushes your image.
Create a new file named `prefect.yaml` with the following contents:
```yaml
# Generic metadata about this project
name: flows
prefect-version: 3.0.0
# build section allows you to manage and build docker images
build:
- prefect_docker.deployments.steps.build_docker_image:
id: build-image
requires: prefect-docker>=0.4.0
image_name: "{{ $PREFECT_IMAGE_NAME }}"
tag: latest
dockerfile: auto
platform: "linux/amd64"
# push section allows you to manage if and how this project is uploaded to remote locations
push:
- prefect_docker.deployments.steps.push_docker_image:
requires: prefect-docker>=0.4.0
image_name: "{{ build-image.image_name }}"
tag: "{{ build-image.tag }}"
# pull section allows you to provide instructions for cloning this project in remote
locations
pull:
- prefect.deployments.steps.set_working_directory:
directory: /opt/prefect/flows
# the definitions section allows you to define reusable components for your deployments
definitions:
tags: &common_tags
- "eks"
work_pool: &common_work_pool
name: "kubernetes"
job_variables:
image: "{{ build-image.image }}"
# the deployments section allows you to provide configuration for deploying flows
deployments:
- name: "default"
tags: *common_tags
schedule: null
entrypoint: "flows/hello.py:hello"
work_pool: *common_work_pool
- name: "arthur"
tags: *common_tags
schedule: null
entrypoint: "flows/hello.py:hello"
parameters:
name: "Arthur"
work_pool: *common_work_pool
```
We define two deployments of the `hello` flow: `default` and `arthur`.
By specifying `dockerfile: auto`, Prefect automatically creates a dockerfile
that installs any `requirements.txt` and copies over the current directory.
You can pass a custom Dockerfile instead with `dockerfile: Dockerfile` or
`dockerfile: path/to/Dockerfile`.
We are specifically building for the `linux/amd64` platform.
This specification is often necessary when images are built on Macs with M series chips
but run on cloud provider instances.
**Deployment specific build, push, and pull**
You can override the build, push, and pull steps for each deployment.
This allows for more custom behavior, such as specifying a different image for each
deployment.
Define your requirements in a `requirements.txt` file:
```
prefect>=3.0.0
prefect-docker>=0.4.0
prefect-kubernetes>=0.3.1
```
The directory should now look something like this:
```
.
├── prefect.yaml
└── flows
├── requirements.txt
└── hello.py
```
### Tag images with a Git SHA
If your code is stored in a GitHub repository, it's good practice to tag your images
with the Git SHA of the code used to build it.
Do this in the `prefect.yaml` file with a few minor modifications, since it's not yet
an option with the Python deployment creation method.
Use the `run_shell_script` command to grab the SHA and pass it to the `tag`
parameter of `build_docker_image`:
```yaml
build:
- prefect.deployments.steps.run_shell_script:
id: get-commit-hash
script: git rev-parse --short HEAD
stream_output: false
- prefect_docker.deployments.steps.build_docker_image:
id: build-image
requires: prefect-docker>=0.4.0
image_name: "{{ $PREFECT_IMAGE_NAME }}"
tag: "{{ get-commit-hash.stdout }}"
dockerfile: auto
platform: "linux/amd64"
```
Set the SHA as a tag for easy identification in the UI:
```yaml
definitions:
tags: &common_tags
- "eks"
- "{{ get-commit-hash.stdout }}"
work_pool: &common_work_pool
name: "kubernetes"
job_variables:
image: "{{ build-image.image }}"
```
## Authenticate to Prefect
Before deploying the flows to Prefect, you need to authenticate through the Prefect CLI.
You also need to ensure that all of your flow's dependencies are present at `deploy` time.
This example uses a virtual environment to ensure consistency across environments.
```bash
# Create a virtualenv & activate it
virtualenv prefect-demo
source prefect-demo/bin/activate
# Install dependencies of your flow
prefect-demo/bin/pip install -r requirements.txt
# Authenticate to Prefect & select the appropriate
# workspace to deploy your flows to
prefect-demo/bin/prefect cloud login
```
## Deploy the flows
You're ready to deploy your flows to build your images.
The image name determines its registry.
You have configured our `prefect.yaml` file to get the image name from the
`PREFECT_IMAGE_NAME` environment variable, so set that first:
```bash
export PREFECT_IMAGE_NAME=.dkr.ecr..amazonaws.com/
```
```bash
export PREFECT_IMAGE_NAME=us-docker.pkg.dev///
```
```bash
export PREFECT_IMAGE_NAME=.azurecr.io/
```
To deploy your flows, ensure your Docker daemon is running. Deploy all the
flows with `prefect deploy --all` or deploy them individually by name: `prefect deploy
-n hello/default` or `prefect deploy -n hello/arthur`.
## Run the flows
Once the deployments are successfully created, you can run them from the UI or the CLI:
```bash
prefect deployment run hello/default
prefect deployment run hello/arthur
```
You can now check the status of your two deployments in the UI.
# How to manage work pools
Source: https://docs-3.prefect.io/v3/how-to-guides/deployment_infra/manage-work-pools
Configure Prefect work pools using the CLI, Terraform, or REST API
export const API = ({name, href}) => You can manage {name} with the Prefect API.
;
export const TF = ({name, href}) => You can manage {name} with the Terraform provider for Prefect.
;
export const work_pools = {
cli: "https://docs.prefect.io/v3/api-ref/cli/work-pool",
api: "https://app.prefect.cloud/api/docs#tag/Work-Pools",
tf: "https://registry.terraform.io/providers/PrefectHQ/prefect/latest/docs/resources/work_pool"
};
export const CLI = ({name, href}) => You can manage {name} with the Prefect CLI.
;
You can configure work pools by using the Prefect UI.
To manage work pools in the UI, click the **Work Pools** icon. This displays a list of currently configured work pools.
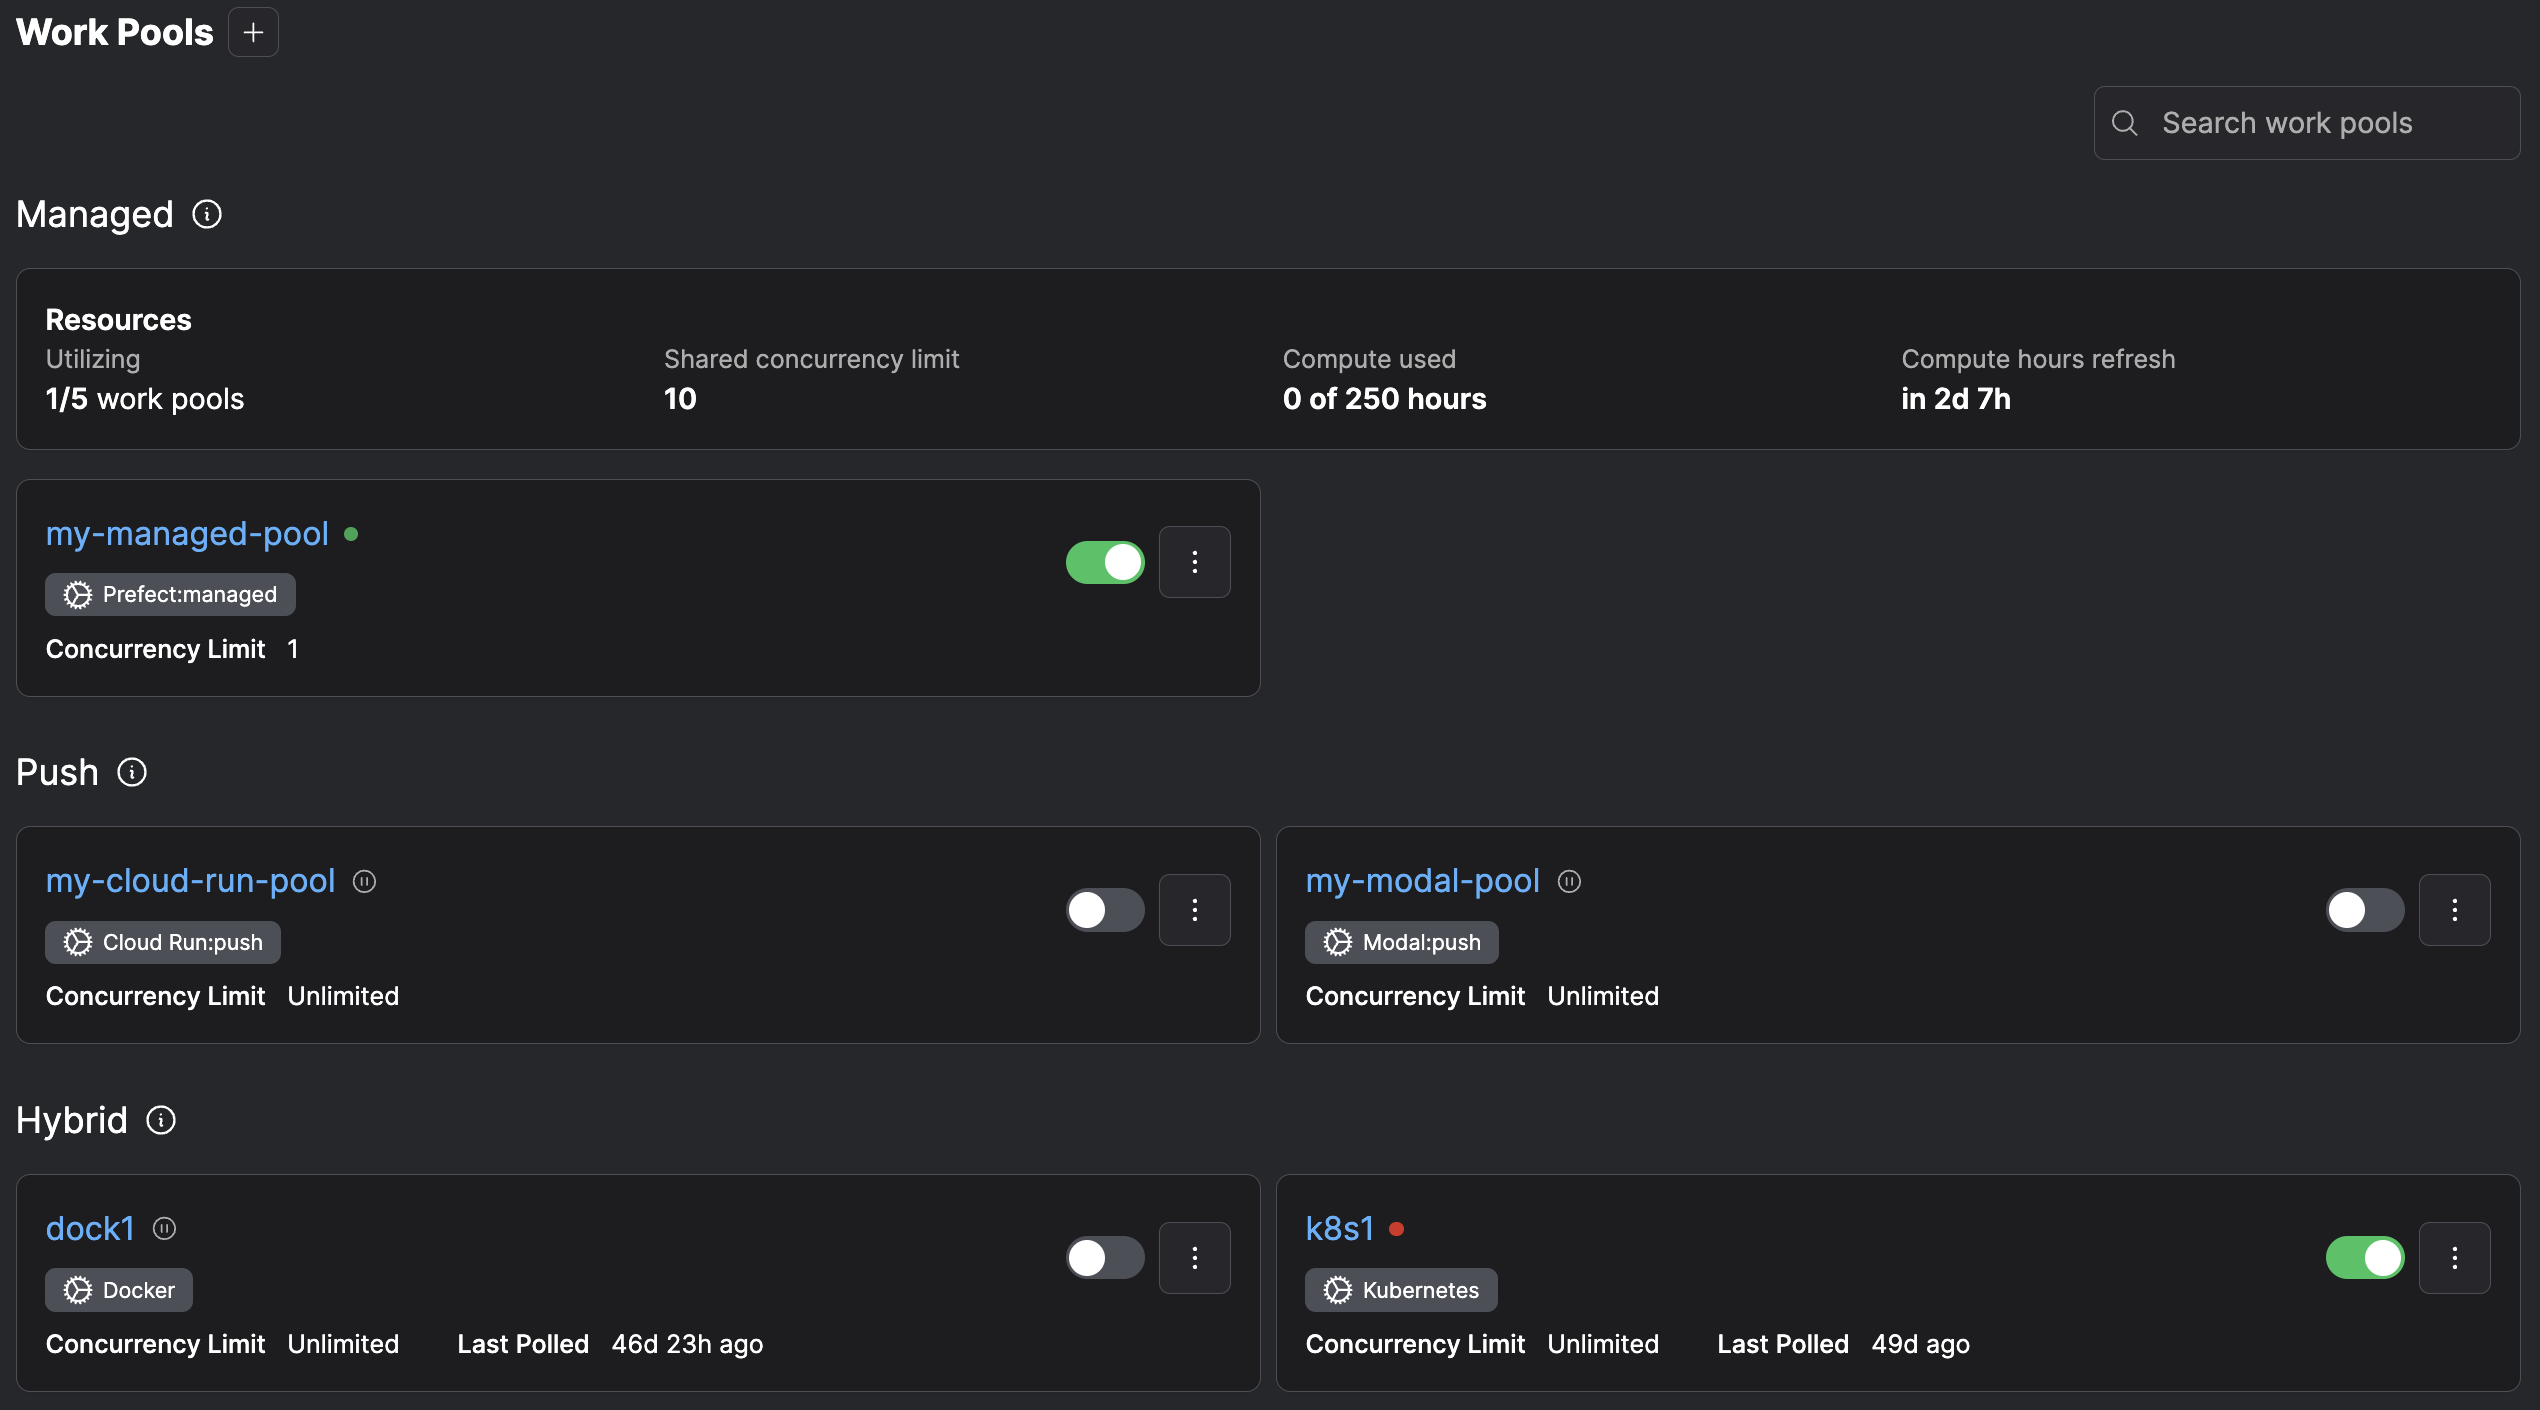 Select the **+** button to create a new work pool. You can specify the details about infrastructure created for this work pool.
## Using the CLI
```bash
prefect work-pool create [OPTIONS] NAME
```
`NAME` is a required, unique name for the work pool.
Optional configuration parameters to filter work on the pool include:
**Managing work pools in CI/CD**
Version control your base job template by committing it as a JSON file to a git repository and control updates to your
work pools' base job templates with the `prefect work-pool update` command in your CI/CD pipeline.
For example, use the following command to update a work pool's base job template to the contents of a file named `base-job-template.json`:
```bash
prefect work-pool update --base-job-template base-job-template.json my-work-pool
```
### List available work pools
```bash
prefect work-pool ls
```
### Inspect a work pool
```bash
prefect work-pool inspect 'test-pool'
```
### Preview scheduled work
```bash
prefect work-pool preview 'test-pool' --hours 12
```
### Pause a work pool
```bash
prefect work-pool pause 'test-pool'
```
### Resume a work pool
```bash
prefect work-pool resume 'test-pool'
```
### Delete a work pool
```bash
prefect work-pool delete 'test-pool'
```
**Pausing a work pool does not pause deployment schedules**
### Manage concurrency for a work pool
Set concurrency:
```bash
prefect work-pool set-concurrency-limit [LIMIT] [POOL_NAME]
```
Clear concurrency:
```bash
prefect work-pool clear-concurrency-limit [POOL_NAME]
```
### Base job template
View default base job template:
```bash
prefect work-pool get-default-base-job-template --type process
```
Example `prefect.yaml`:
```yaml
deployments:
- name: demo-deployment
entrypoint: demo_project/demo_flow.py:some_work
work_pool:
name: above-ground
job_variables:
stream_output: false
```
**Advanced customization of the base job template**
For advanced use cases, create work pools with fully customizable job templates. This customization is available when
creating or editing a work pool on the 'Advanced' tab within the UI or when updating a work pool via the Prefect CLI.
Advanced customization is useful anytime the underlying infrastructure supports a high degree of customization.
In these scenarios a work pool job template allows you to expose a minimal and easy-to-digest set of options to deployment authors.
Additionally, these options are the *only* customizable aspects for deployment infrastructure, which are useful for restricting
capabilities in secure environments. For example, the `kubernetes` worker type allows users to specify a custom job template\
to configure the manifest that workers use to create jobs for flow execution.
See more information about [overriding a work pool's job variables](/v3/deploy/infrastructure-concepts/customize).
## Using Terraform
## Using the REST API
## Further reading
* [Work pools](/v3/concepts/work-pools) concept page
* [Customize job variables](/v3/deploy/infrastructure-concepts/customize) page
# How to run flows on Prefect Managed infrastructure
Source: https://docs-3.prefect.io/v3/how-to-guides/deployment_infra/managed
Learn how Prefect runs deployments on Prefect's infrastructure.
Prefect Cloud can run your flows on your behalf with Prefect Managed work pools.
Flows that run with this work pool do not require a worker or cloud provider
account—Prefect handles the infrastructure and code execution for you.
Managed execution is a great option for users who want to get started quickly, with no infrastructure setup.
## Create a managed deployment
1. Create a new work pool of type Prefect Managed in the UI or the CLI.
Use this command to create a new work pool using the CLI:
```bash
prefect work-pool create my-managed-pool --type prefect:managed
```
2. Create a deployment using the flow `deploy` method or `prefect.yaml`.
Specify the name of your managed work pool, as shown in this example that uses the `deploy` method:
```python managed-execution.py
from prefect import flow
if __name__ == "__main__":
flow.from_source(
source="https://github.com/prefecthq/demo.git",
entrypoint="flow.py:my_flow",
).deploy(
name="test-managed-flow",
work_pool_name="my-managed-pool",
)
```
3. With your [CLI authenticated to your Prefect Cloud workspace](/v3/how-to-guides/cloud/manage-users/api-keys), run the script to create your deployment:
```bash
python managed-execution.py
```
4. Run the deployment from the UI or from the CLI.
This process runs a flow on remote infrastructure without any infrastructure setup, starting a worker, or requiring a cloud provider account.
## Add dependencies
Prefect can install Python packages in the container that runs your flow at runtime.
Specify these dependencies in the **Pip Packages** field in the UI, or by configuring
`job_variables={"pip_packages": ["pandas", "prefect-aws"]}` in your deployment creation like this:
```python
from prefect import flow
if __name__ == "__main__":
flow.from_source(
source="https://github.com/prefecthq/demo.git",
entrypoint="flow.py:my_flow",
).deploy(
name="test-managed-flow",
work_pool_name="my-managed-pool",
job_variables={"pip_packages": ["pandas", "prefect-aws"]}
)
```
Alternatively, you can create a `requirements.txt` file and reference it in your [prefect.yaml pull step](/v3/deploy/infrastructure-concepts/prefect-yaml#utility-steps).
## Networking
### Static Outbound IP addresses
Flows running on Prefect Managed infrastructure can be assigned static IP addresses on outbound traffic, which will pose as the `source` address for requests interacting with your system or database.
Include these `source` addresses in your firewall rules to explicitly allow flows to communicate with your environment.
* `184.73.85.134`
* `52.4.218.198`
* `44.217.117.74`
### Images
Managed execution requires that you run an official Prefect Docker image, such as `prefecthq/prefect:3-latest`.
However, as noted above, you can install Python package dependencies at runtime.
If you need to use your own image, we recommend using another type of work pool.
### Code storage
You must store flow code in an accessible remote location.
Prefect supports git-based cloud providers such as GitHub, Bitbucket, or GitLab.
Remote block-based storage is also supported, so S3, GCS, and Azure Blob are additional code storage options.
### Resources & Limitations
All flow runs receive:
* 4vCPUs
* 16GB of RAM
* 128GB of ephemeral storage
Maximum flow run time is limited to 24 hours.
Every account has a compute usage limit per workspace that resets monthly. Compute used is defined as the duration
between compute startup and teardown, rounded up to the nearest minute. This is approximately, although not exactly,
the duration of a flow run going from `PENDING` to `COMPLETED`.
## Next steps
Read more about creating deployments in [Run flows in Docker containers](/v3/how-to-guides/deployment_infra/docker).
For more control over your infrastructure, such as the ability to run
custom Docker images, [serverless push work pools](/v3/how-to-guides/deployment_infra/serverless)
are a good option.
# How to run flows on Modal
Source: https://docs-3.prefect.io/v3/how-to-guides/deployment_infra/modal
Learn how to use Modal as a push work pool to schedule, run, and debug your Prefect flows
Prefect is the world's best orchestrator.
Modal is the world's best serverless compute framework.
It only makes sense that they would fit together perfectly.
In this tutorial, you'll build your first Prefect deployment that runs on Modal every hour, and create a scalable framework to grow your project.
Here's an architecture diagram which shows what you'll build.
Select the **+** button to create a new work pool. You can specify the details about infrastructure created for this work pool.
## Using the CLI
```bash
prefect work-pool create [OPTIONS] NAME
```
`NAME` is a required, unique name for the work pool.
Optional configuration parameters to filter work on the pool include:
**Managing work pools in CI/CD**
Version control your base job template by committing it as a JSON file to a git repository and control updates to your
work pools' base job templates with the `prefect work-pool update` command in your CI/CD pipeline.
For example, use the following command to update a work pool's base job template to the contents of a file named `base-job-template.json`:
```bash
prefect work-pool update --base-job-template base-job-template.json my-work-pool
```
### List available work pools
```bash
prefect work-pool ls
```
### Inspect a work pool
```bash
prefect work-pool inspect 'test-pool'
```
### Preview scheduled work
```bash
prefect work-pool preview 'test-pool' --hours 12
```
### Pause a work pool
```bash
prefect work-pool pause 'test-pool'
```
### Resume a work pool
```bash
prefect work-pool resume 'test-pool'
```
### Delete a work pool
```bash
prefect work-pool delete 'test-pool'
```
**Pausing a work pool does not pause deployment schedules**
### Manage concurrency for a work pool
Set concurrency:
```bash
prefect work-pool set-concurrency-limit [LIMIT] [POOL_NAME]
```
Clear concurrency:
```bash
prefect work-pool clear-concurrency-limit [POOL_NAME]
```
### Base job template
View default base job template:
```bash
prefect work-pool get-default-base-job-template --type process
```
Example `prefect.yaml`:
```yaml
deployments:
- name: demo-deployment
entrypoint: demo_project/demo_flow.py:some_work
work_pool:
name: above-ground
job_variables:
stream_output: false
```
**Advanced customization of the base job template**
For advanced use cases, create work pools with fully customizable job templates. This customization is available when
creating or editing a work pool on the 'Advanced' tab within the UI or when updating a work pool via the Prefect CLI.
Advanced customization is useful anytime the underlying infrastructure supports a high degree of customization.
In these scenarios a work pool job template allows you to expose a minimal and easy-to-digest set of options to deployment authors.
Additionally, these options are the *only* customizable aspects for deployment infrastructure, which are useful for restricting
capabilities in secure environments. For example, the `kubernetes` worker type allows users to specify a custom job template\
to configure the manifest that workers use to create jobs for flow execution.
See more information about [overriding a work pool's job variables](/v3/deploy/infrastructure-concepts/customize).
## Using Terraform
## Using the REST API
## Further reading
* [Work pools](/v3/concepts/work-pools) concept page
* [Customize job variables](/v3/deploy/infrastructure-concepts/customize) page
# How to run flows on Prefect Managed infrastructure
Source: https://docs-3.prefect.io/v3/how-to-guides/deployment_infra/managed
Learn how Prefect runs deployments on Prefect's infrastructure.
Prefect Cloud can run your flows on your behalf with Prefect Managed work pools.
Flows that run with this work pool do not require a worker or cloud provider
account—Prefect handles the infrastructure and code execution for you.
Managed execution is a great option for users who want to get started quickly, with no infrastructure setup.
## Create a managed deployment
1. Create a new work pool of type Prefect Managed in the UI or the CLI.
Use this command to create a new work pool using the CLI:
```bash
prefect work-pool create my-managed-pool --type prefect:managed
```
2. Create a deployment using the flow `deploy` method or `prefect.yaml`.
Specify the name of your managed work pool, as shown in this example that uses the `deploy` method:
```python managed-execution.py
from prefect import flow
if __name__ == "__main__":
flow.from_source(
source="https://github.com/prefecthq/demo.git",
entrypoint="flow.py:my_flow",
).deploy(
name="test-managed-flow",
work_pool_name="my-managed-pool",
)
```
3. With your [CLI authenticated to your Prefect Cloud workspace](/v3/how-to-guides/cloud/manage-users/api-keys), run the script to create your deployment:
```bash
python managed-execution.py
```
4. Run the deployment from the UI or from the CLI.
This process runs a flow on remote infrastructure without any infrastructure setup, starting a worker, or requiring a cloud provider account.
## Add dependencies
Prefect can install Python packages in the container that runs your flow at runtime.
Specify these dependencies in the **Pip Packages** field in the UI, or by configuring
`job_variables={"pip_packages": ["pandas", "prefect-aws"]}` in your deployment creation like this:
```python
from prefect import flow
if __name__ == "__main__":
flow.from_source(
source="https://github.com/prefecthq/demo.git",
entrypoint="flow.py:my_flow",
).deploy(
name="test-managed-flow",
work_pool_name="my-managed-pool",
job_variables={"pip_packages": ["pandas", "prefect-aws"]}
)
```
Alternatively, you can create a `requirements.txt` file and reference it in your [prefect.yaml pull step](/v3/deploy/infrastructure-concepts/prefect-yaml#utility-steps).
## Networking
### Static Outbound IP addresses
Flows running on Prefect Managed infrastructure can be assigned static IP addresses on outbound traffic, which will pose as the `source` address for requests interacting with your system or database.
Include these `source` addresses in your firewall rules to explicitly allow flows to communicate with your environment.
* `184.73.85.134`
* `52.4.218.198`
* `44.217.117.74`
### Images
Managed execution requires that you run an official Prefect Docker image, such as `prefecthq/prefect:3-latest`.
However, as noted above, you can install Python package dependencies at runtime.
If you need to use your own image, we recommend using another type of work pool.
### Code storage
You must store flow code in an accessible remote location.
Prefect supports git-based cloud providers such as GitHub, Bitbucket, or GitLab.
Remote block-based storage is also supported, so S3, GCS, and Azure Blob are additional code storage options.
### Resources & Limitations
All flow runs receive:
* 4vCPUs
* 16GB of RAM
* 128GB of ephemeral storage
Maximum flow run time is limited to 24 hours.
Every account has a compute usage limit per workspace that resets monthly. Compute used is defined as the duration
between compute startup and teardown, rounded up to the nearest minute. This is approximately, although not exactly,
the duration of a flow run going from `PENDING` to `COMPLETED`.
## Next steps
Read more about creating deployments in [Run flows in Docker containers](/v3/how-to-guides/deployment_infra/docker).
For more control over your infrastructure, such as the ability to run
custom Docker images, [serverless push work pools](/v3/how-to-guides/deployment_infra/serverless)
are a good option.
# How to run flows on Modal
Source: https://docs-3.prefect.io/v3/how-to-guides/deployment_infra/modal
Learn how to use Modal as a push work pool to schedule, run, and debug your Prefect flows
Prefect is the world's best orchestrator.
Modal is the world's best serverless compute framework.
It only makes sense that they would fit together perfectly.
In this tutorial, you'll build your first Prefect deployment that runs on Modal every hour, and create a scalable framework to grow your project.
Here's an architecture diagram which shows what you'll build.
 You'll build a full serverless infrastructure framework for scheduling and provisioning workflows.
GitHub will act as the source of truth, Prefect will be the orchestrator, and Modal will be the serverless infrastructure.
You'll only pay for the Modal CPU time you use.
First, here's a recap of some important terms:
| Term | Definition |
| ------------ | -------------------------------------------------------------------------------------------------------------------------------------------------------------------------------- |
| *Flow* | A Python function in a file, decorated with `@flow`, that is an entrypoint to perform a task in Prefect. |
| *Run* | An instance of a flow, executed at a specific time with a specific payload. |
| *Deployment* | A manifest around a flow, including where it should run, when it should run, and any variables it needs to run. A deployment can schedule your flows, creating runs when needed. |
| *Work Pool* | An interface to the hardware used to run a given flow. |
## Prerequisites
* A free [Prefect Cloud](https://app.prefect.cloud/auth/sign-in) account.
* A free [Modal](https://modal.com/signup?next=%2Fapps) account.
## Create a GitHub repository
Create a GitHub repository containing your Prefect flows.
You can reference the [Ben-Epstein/prefect-modal](https://github.com/Ben-Epstein/prefect-modal) repository for a complete example.
Your repository should have a `prefect.yaml` deployment configuration file, standard Python tooling, and CI/CD.
1. Start by creating the following `Makefile` to keep things easy:
```makefile Makefile
export PYTHONPATH = .venv
.PHONY: uv
uv:
pip install --upgrade 'uv>=0.5.6,<0.6'
uv venv
setup:
@if [ ! -d ".venv" ] || ! command -v uv > /dev/null; then \
echo "UV not installed or .venv does not exist, running uv"; \
make uv; \
fi
@if [ ! -f "uv.lock" ]; then \
echo "Can't find lockfile. Locking"; \
uv lock; \
fi
uv sync --all-extras --all-groups
uv pip install --no-deps -e .
```
2. Set up and manage your environment with `uv`.
```bash
make setup
```
3. Create your Python project.
```bash
uv init --lib --name prefect_modal --python 3.12
```
If `uv` creates a `python-version` that is pinned to a micro version (for example, 3.12.6), remove the micro version (for example, 3.12) to avoid downstream issues.
4. Add your dependencies:
```bash
uv add modal 'prefect[github]'
```
5. Add the following to the end of the `pyproject.toml` file created by `uv`:
```makefile
[tool.hatch.build.targets.wheel]
packages = ["src/prefect_modal"]
```
6. Initialize the Prefect environment:
```bash
uv run prefect init
```
You will be prompted to choose your code storage; select `git` to store code within a git repository.
You'll build a full serverless infrastructure framework for scheduling and provisioning workflows.
GitHub will act as the source of truth, Prefect will be the orchestrator, and Modal will be the serverless infrastructure.
You'll only pay for the Modal CPU time you use.
First, here's a recap of some important terms:
| Term | Definition |
| ------------ | -------------------------------------------------------------------------------------------------------------------------------------------------------------------------------- |
| *Flow* | A Python function in a file, decorated with `@flow`, that is an entrypoint to perform a task in Prefect. |
| *Run* | An instance of a flow, executed at a specific time with a specific payload. |
| *Deployment* | A manifest around a flow, including where it should run, when it should run, and any variables it needs to run. A deployment can schedule your flows, creating runs when needed. |
| *Work Pool* | An interface to the hardware used to run a given flow. |
## Prerequisites
* A free [Prefect Cloud](https://app.prefect.cloud/auth/sign-in) account.
* A free [Modal](https://modal.com/signup?next=%2Fapps) account.
## Create a GitHub repository
Create a GitHub repository containing your Prefect flows.
You can reference the [Ben-Epstein/prefect-modal](https://github.com/Ben-Epstein/prefect-modal) repository for a complete example.
Your repository should have a `prefect.yaml` deployment configuration file, standard Python tooling, and CI/CD.
1. Start by creating the following `Makefile` to keep things easy:
```makefile Makefile
export PYTHONPATH = .venv
.PHONY: uv
uv:
pip install --upgrade 'uv>=0.5.6,<0.6'
uv venv
setup:
@if [ ! -d ".venv" ] || ! command -v uv > /dev/null; then \
echo "UV not installed or .venv does not exist, running uv"; \
make uv; \
fi
@if [ ! -f "uv.lock" ]; then \
echo "Can't find lockfile. Locking"; \
uv lock; \
fi
uv sync --all-extras --all-groups
uv pip install --no-deps -e .
```
2. Set up and manage your environment with `uv`.
```bash
make setup
```
3. Create your Python project.
```bash
uv init --lib --name prefect_modal --python 3.12
```
If `uv` creates a `python-version` that is pinned to a micro version (for example, 3.12.6), remove the micro version (for example, 3.12) to avoid downstream issues.
4. Add your dependencies:
```bash
uv add modal 'prefect[github]'
```
5. Add the following to the end of the `pyproject.toml` file created by `uv`:
```makefile
[tool.hatch.build.targets.wheel]
packages = ["src/prefect_modal"]
```
6. Initialize the Prefect environment:
```bash
uv run prefect init
```
You will be prompted to choose your code storage; select `git` to store code within a git repository.
 7. Because this is meant to be a scalable repository, create a submodule just for your workflows.
```bash
mkdir src/prefect_modal/flows
touch src/prefect_modal/flows/__init__.py
```
Now that your repository is set up, take a look at the `prefect.yaml` file that you generated.
```yaml prefect.yaml
# Welcome to your prefect.yaml file! You can use this file for storing and managing
# configuration for deploying your flows. We recommend committing this file to source
# control along with your flow code.
# Generic metadata about this project
name: prefect-modal
prefect-version: 3.1.15
# build section allows you to manage and build docker images
build: null
# push section allows you to manage if and how this project is uploaded to remote locations
push: null
# pull section allows you to provide instructions for cloning this project in remote locations
pull:
- prefect.deployments.steps.git_clone:
repository: https://github.com/Ben-Epstein/prefect-modal
branch: main
access_token: null
# the deployments section allows you to provide configuration for deploying flows
deployments:
- name: null
version: null
tags: []
description: null
schedule: {}
flow_name: null
entrypoint: null
parameters: {}
work_pool:
name: null
work_queue_name: null
job_variables: {}
```
The important sections here are `pull`, which defines the repository and branch to pull from, as well as `deployments`, which define the `flows` that will be `run` at some `schedule` on a `work_pool`.
The work pool will be set to modal later in this tutorial.
Finally, create your flow.
```bash
touch src/prefect_modal/flows/flow1.py
```
You can do anything in your flow, but use the following code to keep it simple.
```python src/prefect_modal/flows/flow1.py
from prefect import flow, task
@task()
def do_print(param: str) -> None:
print("Doing the task")
print(param)
@flow(log_prints=True)
def run_my_flow(param: str) -> None:
print("flow 2")
do_print(param)
@flow(log_prints=True)
def main(name: str = "world", goodbye: bool = False):
print(f"Hello {name} from Prefect! 🤗")
run_my_flow(name)
if goodbye:
print(f"Goodbye {name}!")
```
## Give Prefect access to your GitHub repository
First, authenticate to Prefect Cloud.
```bash
uv run prefect cloud login
```
You'll need a Personal Access Token (PAT) for authentication.
For simplicity, use a classic token, but you can configure a fine-grained token if you want.
In GitHub, go to [Personal access tokens](https://github.com/settings/tokens) and click **Generate new token (classic)**.
7. Because this is meant to be a scalable repository, create a submodule just for your workflows.
```bash
mkdir src/prefect_modal/flows
touch src/prefect_modal/flows/__init__.py
```
Now that your repository is set up, take a look at the `prefect.yaml` file that you generated.
```yaml prefect.yaml
# Welcome to your prefect.yaml file! You can use this file for storing and managing
# configuration for deploying your flows. We recommend committing this file to source
# control along with your flow code.
# Generic metadata about this project
name: prefect-modal
prefect-version: 3.1.15
# build section allows you to manage and build docker images
build: null
# push section allows you to manage if and how this project is uploaded to remote locations
push: null
# pull section allows you to provide instructions for cloning this project in remote locations
pull:
- prefect.deployments.steps.git_clone:
repository: https://github.com/Ben-Epstein/prefect-modal
branch: main
access_token: null
# the deployments section allows you to provide configuration for deploying flows
deployments:
- name: null
version: null
tags: []
description: null
schedule: {}
flow_name: null
entrypoint: null
parameters: {}
work_pool:
name: null
work_queue_name: null
job_variables: {}
```
The important sections here are `pull`, which defines the repository and branch to pull from, as well as `deployments`, which define the `flows` that will be `run` at some `schedule` on a `work_pool`.
The work pool will be set to modal later in this tutorial.
Finally, create your flow.
```bash
touch src/prefect_modal/flows/flow1.py
```
You can do anything in your flow, but use the following code to keep it simple.
```python src/prefect_modal/flows/flow1.py
from prefect import flow, task
@task()
def do_print(param: str) -> None:
print("Doing the task")
print(param)
@flow(log_prints=True)
def run_my_flow(param: str) -> None:
print("flow 2")
do_print(param)
@flow(log_prints=True)
def main(name: str = "world", goodbye: bool = False):
print(f"Hello {name} from Prefect! 🤗")
run_my_flow(name)
if goodbye:
print(f"Goodbye {name}!")
```
## Give Prefect access to your GitHub repository
First, authenticate to Prefect Cloud.
```bash
uv run prefect cloud login
```
You'll need a Personal Access Token (PAT) for authentication.
For simplicity, use a classic token, but you can configure a fine-grained token if you want.
In GitHub, go to [Personal access tokens](https://github.com/settings/tokens) and click **Generate new token (classic)**.
 Give the token a name, an expiration date, and repository access.
 Once you've created the token, copy it and give it to Prefect.
First, run:
```bash
# Register the block
uv run prefect block register -m prefect_github
# Create the block
uv run prefect block create prefect_github
```
The second command returns a URL.
Click that URL to give your block a name and paste in the token you got from GitHub.
Name the block `prefect-modal`.
In `prefect.yaml`, edit the `pull:` section as follows:
```yaml
pull:
- prefect.deployments.steps.git_clone:
id: clone-step
repository: https://github.com/Ben-Epstein/prefect-modal
branch: main
credentials: '{{ prefect.blocks.github-credentials.prefect-modal }}'
```
* Replace the `access_token` key name with `credentials`.
* Change the repository name to the name of your repository.
Now, add the following section to configure how you install your package and what your working directory is:
```yaml
- prefect.deployments.steps.run_shell_script:
directory: '{{ clone-step.directory }}'
script: pip install --upgrade 'uv>=0.5.6,<0.6'
- prefect.deployments.steps.run_shell_script:
directory: '{{ clone-step.directory }}'
script: uv sync --no-editable --no-dev
```
Typically, `uv sync` creates a new virtual environment.
The following steps show how to tell `uv` to use the root Python version.
This configuration tells Prefect how to download the code from GitHub into the Modal pod before running the flow.
This is important: you are telling Modal to load the code from `main`.
This means that if you push new code to main, the next run of a flow in Modal will change to whatever is in main.
To keep this stable, you can set that to a release branch, for example, to only update that release branch when you’re stable and ready.
Now, configure a few more options on the `deployment` to get it ready: `entrypoint`, `schedule`, and `description`.
```yaml
name: prefect-modal-example
description: "Your first deployment which runs daily at 12:00 on Modal"
entrypoint: prefect_modal.flows.flow1:main
schedules:
- cron: '0 12 * * *'
timezone: America/New_York
active: true
```
This schedule runs once a day at 12PM EST.
You can add another schedule by adding another list element.
Because you referenced the entrypoint as a module and not a path, you can call it from anywhere (as long as it’s installed).
This is much more flexible.
## Connect Prefect and Modal
You need to give Prefect access to your Modal account to provision a serverless instance to run your flows and tasks.
Modal will be the *Work Pool* in Prefect terms, remaining off when unused, and spinning up the infrastructure you need when a new flow run is scheduled.
Prefect makes this incredibly easy.
First, authenticate with Modal:
```bash
uv run modal setup
```
Next, create a token:
```bash
uv run modal token new
```
Finally, create a work pool:
```bash
uv run prefect work-pool create --type modal:push --provision-infra pref-modal-pool
```
The name `pref-modal-pool` in the last command is custom, you can name it whatever you want.
Take the work pool name and update your `prefect.yaml` file with it.
```yaml prefect.yaml {2}
...
work_pool:
name: "pref-modal-pool"
work_queue_name: "default"
job_variables: {
"env": {"UV_PROJECT_ENVIRONMENT": "/usr/local"}
}
```
This `UV_PROJECT_ENVIRONMENT` is how you tell uv to use the root python.
You could `pip install` without `uv` but it would be significantly slower (minutes instead of seconds) and you can't leverage your lockfile, resulting in unexpected behavior!
You can create multiple work queues across the same pool (for example, if you have another job using this pool).
Multiple work queues let you handle concurrency and swim-lane priorities.
To keep things simple, this tutorial will use the the default queue name that comes with every new pool.
When you deploy to Prefect, it will know to schedule all of the flow runs for this particular deployment on your modal work pool!
At this point, you could `git add . && git commit -m "prefect modal" && git push` to get your code into GitHub, and then `uv run prefect deploy --all` to get your deployment live.
But first, learn how to automate Prefect deployments.
## Configure CI/CD
Since the code must exist in GitHub in order for Modal to download, install, and run it, GitHub should also be the source of truth for telling Prefect what to do with the code.
First, create two secrets to add to the GitHub repository: `PREFECT_API_KEY` and `PREFECT_API_URL`.
1. For `PREFECT_API_URL`, the format is as follows: `https://api.prefect.cloud/api/accounts/{account_id}/workspaces/{workspace_id}`.
Go to the Prefect Cloud Dashboard, and then extract the account ID and workspace ID from the URL.
The Prefect console URL uses `/account` and `/workspace` but the API uses `/accounts` and `/workspaces`, respectively.
2. For `PREFECT_API_KEY`, go to the [API keys](https://app.prefect.cloud/my/api-keys) page and create a new API key.
Once you've created the token, copy it and give it to Prefect.
First, run:
```bash
# Register the block
uv run prefect block register -m prefect_github
# Create the block
uv run prefect block create prefect_github
```
The second command returns a URL.
Click that URL to give your block a name and paste in the token you got from GitHub.
Name the block `prefect-modal`.
In `prefect.yaml`, edit the `pull:` section as follows:
```yaml
pull:
- prefect.deployments.steps.git_clone:
id: clone-step
repository: https://github.com/Ben-Epstein/prefect-modal
branch: main
credentials: '{{ prefect.blocks.github-credentials.prefect-modal }}'
```
* Replace the `access_token` key name with `credentials`.
* Change the repository name to the name of your repository.
Now, add the following section to configure how you install your package and what your working directory is:
```yaml
- prefect.deployments.steps.run_shell_script:
directory: '{{ clone-step.directory }}'
script: pip install --upgrade 'uv>=0.5.6,<0.6'
- prefect.deployments.steps.run_shell_script:
directory: '{{ clone-step.directory }}'
script: uv sync --no-editable --no-dev
```
Typically, `uv sync` creates a new virtual environment.
The following steps show how to tell `uv` to use the root Python version.
This configuration tells Prefect how to download the code from GitHub into the Modal pod before running the flow.
This is important: you are telling Modal to load the code from `main`.
This means that if you push new code to main, the next run of a flow in Modal will change to whatever is in main.
To keep this stable, you can set that to a release branch, for example, to only update that release branch when you’re stable and ready.
Now, configure a few more options on the `deployment` to get it ready: `entrypoint`, `schedule`, and `description`.
```yaml
name: prefect-modal-example
description: "Your first deployment which runs daily at 12:00 on Modal"
entrypoint: prefect_modal.flows.flow1:main
schedules:
- cron: '0 12 * * *'
timezone: America/New_York
active: true
```
This schedule runs once a day at 12PM EST.
You can add another schedule by adding another list element.
Because you referenced the entrypoint as a module and not a path, you can call it from anywhere (as long as it’s installed).
This is much more flexible.
## Connect Prefect and Modal
You need to give Prefect access to your Modal account to provision a serverless instance to run your flows and tasks.
Modal will be the *Work Pool* in Prefect terms, remaining off when unused, and spinning up the infrastructure you need when a new flow run is scheduled.
Prefect makes this incredibly easy.
First, authenticate with Modal:
```bash
uv run modal setup
```
Next, create a token:
```bash
uv run modal token new
```
Finally, create a work pool:
```bash
uv run prefect work-pool create --type modal:push --provision-infra pref-modal-pool
```
The name `pref-modal-pool` in the last command is custom, you can name it whatever you want.
Take the work pool name and update your `prefect.yaml` file with it.
```yaml prefect.yaml {2}
...
work_pool:
name: "pref-modal-pool"
work_queue_name: "default"
job_variables: {
"env": {"UV_PROJECT_ENVIRONMENT": "/usr/local"}
}
```
This `UV_PROJECT_ENVIRONMENT` is how you tell uv to use the root python.
You could `pip install` without `uv` but it would be significantly slower (minutes instead of seconds) and you can't leverage your lockfile, resulting in unexpected behavior!
You can create multiple work queues across the same pool (for example, if you have another job using this pool).
Multiple work queues let you handle concurrency and swim-lane priorities.
To keep things simple, this tutorial will use the the default queue name that comes with every new pool.
When you deploy to Prefect, it will know to schedule all of the flow runs for this particular deployment on your modal work pool!
At this point, you could `git add . && git commit -m "prefect modal" && git push` to get your code into GitHub, and then `uv run prefect deploy --all` to get your deployment live.
But first, learn how to automate Prefect deployments.
## Configure CI/CD
Since the code must exist in GitHub in order for Modal to download, install, and run it, GitHub should also be the source of truth for telling Prefect what to do with the code.
First, create two secrets to add to the GitHub repository: `PREFECT_API_KEY` and `PREFECT_API_URL`.
1. For `PREFECT_API_URL`, the format is as follows: `https://api.prefect.cloud/api/accounts/{account_id}/workspaces/{workspace_id}`.
Go to the Prefect Cloud Dashboard, and then extract the account ID and workspace ID from the URL.
The Prefect console URL uses `/account` and `/workspace` but the API uses `/accounts` and `/workspaces`, respectively.
2. For `PREFECT_API_KEY`, go to the [API keys](https://app.prefect.cloud/my/api-keys) page and create a new API key.
 Go to your repository, and then **Settings** / **Secrets and variables** / **Actions**.
 Click **New repository secret** to add these secrets to your GitHub repository.
Now, add a simple GitHub workflow.
Create a new folder in the root of your GitHub repository:
```bash
mkdir -p .github/workflows
```
Create a workflow file.
```bash
touch .github/workflows/prefect_cd.yaml
```
Add the following code to this workflow.
```yaml .github/workflows/prefect_cd.yaml
name: Deploy Prefect flow
on:
push:
branches:
- main
jobs:
deploy:
name: Deploy
runs-on: ubuntu-latest
steps:
- name: Checkout
uses: actions/checkout@v4
- name: Setup Python
uses: actions/setup-python@v5
with:
python-version: "3.12"
- name: Prefect Deploy
env:
PREFECT_API_KEY: ${{ secrets.PREFECT_API_KEY }}
PREFECT_API_URL: ${{ secrets.PREFECT_API_URL }}
run: |
make prefect-deploy
```
The `make prefect-deploy` command is used to deploy the flows in your deployment.
You can run `make prefect-deploy` locally at any time to keep your deployment up to date.
Add the following command to your `Makefile`.
```makefile Makefile
prefect-deploy: setup
uv run prefect deploy --prefect-file prefect.yaml --all
```
Before pushing your code, run `make prefect-deploy` once to make sure everything works.
Prefect will suggest changes to `prefect.yaml`, which you should accept.
Click **New repository secret** to add these secrets to your GitHub repository.
Now, add a simple GitHub workflow.
Create a new folder in the root of your GitHub repository:
```bash
mkdir -p .github/workflows
```
Create a workflow file.
```bash
touch .github/workflows/prefect_cd.yaml
```
Add the following code to this workflow.
```yaml .github/workflows/prefect_cd.yaml
name: Deploy Prefect flow
on:
push:
branches:
- main
jobs:
deploy:
name: Deploy
runs-on: ubuntu-latest
steps:
- name: Checkout
uses: actions/checkout@v4
- name: Setup Python
uses: actions/setup-python@v5
with:
python-version: "3.12"
- name: Prefect Deploy
env:
PREFECT_API_KEY: ${{ secrets.PREFECT_API_KEY }}
PREFECT_API_URL: ${{ secrets.PREFECT_API_URL }}
run: |
make prefect-deploy
```
The `make prefect-deploy` command is used to deploy the flows in your deployment.
You can run `make prefect-deploy` locally at any time to keep your deployment up to date.
Add the following command to your `Makefile`.
```makefile Makefile
prefect-deploy: setup
uv run prefect deploy --prefect-file prefect.yaml --all
```
Before pushing your code, run `make prefect-deploy` once to make sure everything works.
Prefect will suggest changes to `prefect.yaml`, which you should accept.
 You let Prefect override your deployment spec, which allowed your CD to run without any interruptions or prompts.
If you go to the **Deployment** page in Prefect Cloud, you'll see your deployment!
You let Prefect override your deployment spec, which allowed your CD to run without any interruptions or prompts.
If you go to the **Deployment** page in Prefect Cloud, you'll see your deployment!
 There are no runs yet.
The output from `make prefect-deploy` shows the command to run your deployed flow.
However, since the code isn’t in GitHub yet, this will fail.
To fix this, push your code:
```bash
git push
```
Go to the repository in **GitHub**, and then open **Actions** to verify that your CI/CD is running successfully.
There are no runs yet.
The output from `make prefect-deploy` shows the command to run your deployed flow.
However, since the code isn’t in GitHub yet, this will fail.
To fix this, push your code:
```bash
git push
```
Go to the repository in **GitHub**, and then open **Actions** to verify that your CI/CD is running successfully.
 You can see the flow run in Prefect Cloud as well.
The flow will run automatically at 12 PM, but you can also run it manually.
In a new browser tab, open your \[[https://modal.com/apps/\](Modal](https://modal.com/apps/]\(Modal) dashboard) alongside your Prefect Cloud dashboard.
In your terminal, run the following command:
```bash
uv run prefect deployment run main/prefect-modal-example
```
You should see the run start in your Prefect dashboard.
In 30-60 seconds, you should see it run in Modal.
You can click on the run to see the logs.
You can see the flow run in Prefect Cloud as well.
The flow will run automatically at 12 PM, but you can also run it manually.
In a new browser tab, open your \[[https://modal.com/apps/\](Modal](https://modal.com/apps/]\(Modal) dashboard) alongside your Prefect Cloud dashboard.
In your terminal, run the following command:
```bash
uv run prefect deployment run main/prefect-modal-example
```
You should see the run start in your Prefect dashboard.
In 30-60 seconds, you should see it run in Modal.
You can click on the run to see the logs.
 Click into the app and then click **App Logs** on the left to show everything that’s happening inside the flow run!
 Click on a specific log line to get more details.
 If you open the URL in that log, you’ll see the corresponding logs in Prefect Cloud.
 As you make changes to either the code or deployment file, Prefect will redeploy and Modal will automatically pick up changes.
You've successfully built your first Prefect deployment that runs on Modal every hour!
For more information about CI/CD in Prefect, see [Build deployments via CI/CD](/v3/advanced/deploy-ci-cd).
# How to run flows in local processes
Source: https://docs-3.prefect.io/v3/how-to-guides/deployment_infra/run-flows-in-local-processes
Create a deployment for a flow by calling the `serve` method.
The simplest way to create a [deployment](/v3/deploy) for your flow is by calling its `serve` method.
## Serve a flow
The serve method creates a deployment for the flow and starts a long-running process
that monitors for work from the Prefect server.
When work is found, it is executed within its own isolated subprocess.
```python hello_world.py
from prefect import flow
@flow(log_prints=True)
def hello_world(name: str = "world", goodbye: bool = False):
print(f"Hello {name} from Prefect! 🤗")
if goodbye:
print(f"Goodbye {name}!")
if __name__ == "__main__":
# creates a deployment and starts a long-running
# process that listens for scheduled work
hello_world.serve(name="my-first-deployment",
tags=["onboarding"],
parameters={"goodbye": True},
interval=60
)
```
This interface provides the configuration for a deployment (with no
strong infrastructure requirements), such as:
* schedules
* event triggers
* metadata such as tags and description
* default parameter values
**Schedules are auto-paused on shutdown**
By default, stopping the process running `flow.serve` will pause the schedule
for the deployment (if it has one).
When running this in environments where restarts are expected use the
`pause_on_shutdown=False` flag to prevent this behavior:
```python
if __name__ == "__main__":
hello_world.serve(
name="my-first-deployment",
tags=["onboarding"],
parameters={"goodbye": True},
pause_on_shutdown=False,
interval=60
)
```
## Additional serve options
The `serve` method on flows exposes many options for the deployment.
Here's how to use some of those options:
* `cron`: a keyword that allows you to set a cron string schedule for the deployment; see
[schedules](/v3/automate/add-schedules/) for more advanced scheduling options
* `tags`: a keyword that allows you to tag this deployment and its runs for bookkeeping and filtering purposes
* `description`: a keyword that allows you to document what this deployment does; by default the
description is set from the docstring of the flow function (if documented)
* `version`: a keyword that allows you to track changes to your deployment; uses a hash of the
file containing the flow by default; popular options include semver tags or git commit hashes
* `triggers`: a keyword that allows you to define a set of conditions for when the deployment should run; see
[triggers](/v3/concepts/event-triggers/) for more on Prefect Events concepts
Next, add these options to your deployment:
```python
if __name__ == "__main__":
get_repo_info.serve(
name="my-first-deployment",
cron="* * * * *",
tags=["testing", "tutorial"],
description="Given a GitHub repository, logs repository statistics for that repo.",
version="tutorial/deployments",
)
```
**Triggers with `.serve`**
See this [example](/v3/how-to-guides/automations/chaining-deployments-with-events) that triggers downstream work on upstream events.
When you rerun this script, you will find an updated deployment in the UI that is actively scheduling work.
Stop the script in the CLI using `CTRL+C` and your schedule automatically pauses.
**`serve()` is a long-running process**
To execute remotely triggered or scheduled runs, your script with `flow.serve` must be actively running.
## Serve multiple flows at once
Serve multiple flows with the same process using the `serve` utility along with the `to_deployment` method of flows:
```python serve_two_flows.py
import time
from prefect import flow, serve
@flow
def slow_flow(sleep: int = 60):
"Sleepy flow - sleeps the provided amount of time (in seconds)."
time.sleep(sleep)
@flow
def fast_flow():
"Fastest flow this side of the Mississippi."
return
if __name__ == "__main__":
slow_deploy = slow_flow.to_deployment(name="sleeper", interval=45)
fast_deploy = fast_flow.to_deployment(name="fast")
serve(slow_deploy, fast_deploy)
```
The behavior and interfaces are identical to the single flow case.
A few things to note:
* the `flow.to_deployment` interface exposes the *exact same* options as `flow.serve`; this method
produces a deployment object
* the deployments are only registered with the API once `serve(...)` is called
* when serving multiple deployments, the only requirement is that they share a Python environment;
they can be executed and scheduled independently of each other
A few optional steps for exploration include:
* pause and unpause the schedule for the `"sleeper"` deployment
* use the UI to submit ad-hoc runs for the `"sleeper"` deployment with different values for `sleep`
* cancel an active run for the `"sleeper"` deployment from the UI
**Hybrid execution option**
Prefect's deployment interface allows you to choose a hybrid execution model.
Whether you use Prefect Cloud or self-host Prefect server, you can run workflows in the
environments best suited to their execution.
This model enables efficient use of your infrastructure resources while maintaining the privacy
of your code and data.
There is no ingress required.
Read more about our [hybrid model](https://www.prefect.io/security/overview/#hybrid-model).
## Retrieve a flow from remote storage
Just like the `.deploy` method, the `flow.from_source` method is used to define how to retrieve the flow that you want to serve.
### `from_source`
The `flow.from_source` method on `Flow` objects requires a `source` and an `entrypoint`.
#### `source`
The `source` of your deployment can be:
* a path to a local directory such as `path/to/a/local/directory`
* a repository URL such as `https://github.com/org/repo.git`
* a `GitRepository` object that accepts
* a repository URL
* a reference to a branch, tag, or commit hash
* `GitCredentials` for private repositories
#### `entrypoint`
A flow `entrypoint` is the path to the file where the flow is located within that `source`, in the form
```python
{path}:{flow_name}
```
For example, the following code will load the `hello` flow from the `flows/hello_world.py` file in the `PrefectHQ/examples` repository:
```python load_from_url.py
from prefect import flow
my_flow = flow.from_source(
source="https://github.com/PrefectHQ/examples.git",
entrypoint="flows/hello_world.py:hello"
)
if __name__ == "__main__":
my_flow()
```
```bash
16:40:33.818 | INFO | prefect.engine - Created flow run 'muscular-perch' for flow 'hello'
16:40:34.048 | INFO | Flow run 'muscular-perch' - Hello world!
16:40:34.706 | INFO | Flow run 'muscular-perch' - Finished in state Completed()
```
For more ways to store and access flow code, see the [Retrieve code from storage page](/v3/deploy/infrastructure-concepts/store-flow-code).
**You can serve loaded flows**
You can serve a flow loaded from remote storage with the same [`serve`](#serve-a-flow) method as a local flow:
```python serve_loaded_flow.py
from prefect import flow
if __name__ == "__main__":
flow.from_source(
source="https://github.com/org/repo.git",
entrypoint="flows.py:my_flow"
).serve(name="my-deployment")
```
### Remote storage polling
When you serve a flow loaded from remote storage, the serving process periodically polls your remote storage for updates to the flow's code.
This pattern allows you to update your flow code without restarting the serving process.
Note that if you change metadata associated with your flow's deployment such as parameters, you *will* need to restart the serve process.
## Further reading
* [Serve flows in a long-lived Docker container](/v3/deploy/static-infrastructure-examples/docker)
* [Work pools and deployments with dynamic infrastructure](/v3/deploy/infrastructure-concepts/work-pools)
# How to run flows in a long-lived Docker container
Source: https://docs-3.prefect.io/v3/how-to-guides/deployment_infra/serve-flows-docker
Learn how to serve a flow in a long-lived Docker container
The `.serve` method allows you to easily elevate a flow to a deployment, listening for scheduled work to execute [as a local process](/v3/how-to-guides/deployment_infra/run-flows-in-local-processes).
However, this *"local"* process does not need to be on your local machine. In this example we show how to run a flow in Docker container on your local machine, but you could use a Docker container on any machine that has [Docker installed](https://docs.docker.com/engine/install/).
## Overview
In this example, you will set up:
* a simple flow that retrieves the number of stars for some GitHub repositories
* a `Dockerfile` that packages up your flow code and dependencies into a container image
## Writing the flow
Say we have a flow that retrieves the number of stars for a GitHub repository:
```python serve_retrieve_github_stars.py {19-23}
import httpx
from prefect import flow, task
@task(log_prints=True)
def get_stars_for_repo(repo: str) -> int:
response = httpx.Client().get(f"https://api.github.com/repos/{repo}")
stargazer_count = response.json()["stargazers_count"]
print(f"{repo} has {stargazer_count} stars")
return stargazer_count
@flow
def retrieve_github_stars(repos: list[str]) -> list[int]:
return get_stars_for_repo.map(repos).wait()
if __name__ == "__main__":
retrieve_github_stars.serve(
parameters={
"repos": ["python/cpython", "prefectHQ/prefect"],
}
)
```
We can serve this flow on our local machine using:
```bash
python serve_retrieve_github_stars.py
```
... but how can we package this up so we can run it on other machines?
## Writing the Dockerfile
Assuming we have our Python requirements defined in a file:
```txt requirements.txt
prefect
```
and this directory structure:
```
├── Dockerfile
├── requirements.txt
└── serve_retrieve_github_stars.py
```
We can package up our flow into a Docker container using a `Dockerfile`.
```dockerfile Using pip
# Use an official Python runtime as the base image
FROM python:3.12-slim
# Set the working directory in the container
WORKDIR /app
# Copy the requirements file into the container
COPY requirements.txt .
# Install the required packages
RUN pip install --no-cache-dir -r requirements.txt
# Copy the rest of the application code
COPY serve_retrieve_github_stars.py .
# Set the command to run your application
CMD ["python", "serve_retrieve_github_stars.py"]
```
```dockerfile Using uv
# Use the official Python image with uv pre-installed
FROM ghcr.io/astral-sh/uv:python3.12-bookworm-slim
# Set the working directory
WORKDIR /app
# Set environment variables
ENV UV_SYSTEM_PYTHON=1
ENV PATH="/root/.local/bin:$PATH"
# Copy only the requirements file first to leverage Docker cache
COPY requirements.txt .
# Install dependencies
RUN --mount=type=cache,target=/root/.cache/uv \
uv pip install -r requirements.txt
# Copy the rest of the application code
COPY serve_retrieve_github_stars.py .
# Set the entrypoint
ENTRYPOINT ["python", "serve_retrieve_github_stars.py"]
```
Using `pip`, the image is built in about 20 seconds, and using `uv`, the image is built in about 3 seconds.
You can learn more about using `uv` in the [Astral documentation](https://docs.astral.sh/uv/guides/integration/docker/).
## Build and run the container
Now that we have a flow and a Dockerfile, we can build the image from the Dockerfile and run a container from this image.
### Build (and push) the image
We can build the image with the `docker build` command and the `-t` flag to specify a name for the image.
```bash
docker build -t my-flow-image .
```
At this point, you may also want to push the image to a container registry such as [Docker Hub](https://hub.docker.com/) or [GitHub Container Registry](https://docs.github.com/en/packages/working-with-a-github-packages-registry/working-with-the-container-registry). Please refer to each registry's respective documentation for details on authentication and registry naming conventions.
### Run the container
You'll likely want to inject some environment variables into your container, so let's define a `.env` file:
```bash .env
PREFECT_API_URL=
PREFECT_API_KEY=
```
Then, run the container in [detached mode](https://docs.docker.com/engine/reference/commandline/run/#detached-d) (in other words, in the background):
```bash
docker run -d --env-file .env my-flow-image
```
#### Verify the container is running
```bash
docker ps | grep my-flow-image
```
You should see your container in the list of running containers, note the `CONTAINER ID` as we'll need it to view logs.
#### View logs
```bash
docker logs
```
You should see logs from your newly served process, with the link to your deployment in the UI.
### Stop the container
```bash
docker stop
```
## Health checks for production deployments
When deploying to production environments like Google Cloud Run, AWS ECS, or Kubernetes, you may need to configure health checks to ensure your container is running properly. The `.serve()` method supports an optional webserver that exposes a health endpoint.
### Enabling the health check webserver
You can enable the health check webserver in two ways:
1. **Pass `webserver=True` to `.serve()`:**
```python
if __name__ == "__main__":
retrieve_github_stars.serve(
parameters={
"repos": ["python/cpython", "prefectHQ/prefect"],
},
webserver=True # Enable health check webserver
)
```
2. **Set the environment variable:**
```bash
PREFECT_RUNNER_SERVER_ENABLE=true
```
When enabled, the webserver exposes a health endpoint at `http://localhost:8080/health` by default.
### Configuring the health check port
You can customize the host and port using environment variables:
```bash
PREFECT_RUNNER_SERVER_HOST=0.0.0.0 # Allow external connections
PREFECT_RUNNER_SERVER_PORT=8080 # Port for health checks
```
### Docker with health checks
Add a health check to your Dockerfile:
```dockerfile
# ... your existing Dockerfile content ...
# Health check configuration
HEALTHCHECK --interval=30s --timeout=10s --start-period=60s --retries=3 \
CMD python -c "import urllib.request as u; u.urlopen('http://localhost:8080/health', timeout=1)"
# Set the command to run your application with webserver enabled
CMD ["python", "serve_retrieve_github_stars.py"]
```
Or if you prefer to use environment variables:
```dockerfile
# ... your existing Dockerfile content ...
# Enable the health check webserver
ENV PREFECT_RUNNER_SERVER_ENABLE=true
ENV PREFECT_RUNNER_SERVER_HOST=0.0.0.0
ENV PREFECT_RUNNER_SERVER_PORT=8080
# Health check configuration
HEALTHCHECK --interval=30s --timeout=10s --start-period=60s --retries=3 \
CMD python -c "import urllib.request as u; u.urlopen('http://localhost:8080/health', timeout=1)"
CMD ["python", "serve_retrieve_github_stars.py"]
```
### Platform-specific configurations
Cloud Run requires containers to listen on a port. Configure your container to expose the health check port:
```yaml
# In your Cloud Run configuration
livenessProbe:
httpGet:
path: /health
port: 8080
initialDelaySeconds: 60
periodSeconds: 30
```
Make sure to set the container port to 8080 in Cloud Run settings.
Configure health checks in your task definition:
```json
{
"healthCheck": {
"command": ["CMD-SHELL", "python -c \"import urllib.request as u; u.urlopen('http://localhost:8080/health', timeout=1)\""],
"interval": 30,
"timeout": 10,
"retries": 3,
"startPeriod": 60
}
}
```
Add liveness and readiness probes to your deployment:
```yaml
livenessProbe:
httpGet:
path: /health
port: 8080
initialDelaySeconds: 60
periodSeconds: 30
timeoutSeconds: 10
failureThreshold: 3
readinessProbe:
httpGet:
path: /health
port: 8080
initialDelaySeconds: 10
periodSeconds: 5
```
The health endpoint returns:
* **200 OK** with `{"message": "OK"}` when the runner is healthy and polling for work
* **503 Service Unavailable** when the runner hasn't polled recently (indicating it may be unresponsive)
## Next steps
Congratulations! You have packaged and served a flow on a long-lived Docker container.
You may now easily deploy this container to other infrastructures, such as:
* [Modal](https://modal.com/)
* [Google Cloud Run](https://cloud.google.com/run)
* [AWS Fargate / ECS](https://aws.amazon.com/fargate/)
* Managed Kubernetes (For example: GKE, EKS, or AKS)
or anywhere else you can run a Docker container!
# How to run flows on serverless compute
Source: https://docs-3.prefect.io/v3/how-to-guides/deployment_infra/serverless
Learn how to use Prefect push work pools to schedule work on serverless infrastructure without having to run a worker.
Push [work pools](/v3/deploy/infrastructure-concepts/work-pools/) are a special type of work pool. They allow
Prefect Cloud to submit flow runs for execution to serverless computing infrastructure without requiring you to run a worker.
Push work pools currently support execution in AWS ECS tasks, Azure Container Instances, Google Cloud Run jobs, Modal, and Coiled.
In this guide you will:
* Create a push work pool that sends work to Amazon Elastic Container Service (AWS ECS), Azure Container Instances (ACI),
Google Cloud Run, Modal, or Coiled
* Deploy a flow to that work pool
* Execute a flow without having to run a worker process to poll for flow runs
{/*
*/}
You can automatically provision infrastructure and create your push work pool using the `prefect work-pool create`
CLI command with the `--provision-infra` flag.
This approach greatly simplifies the setup process.
{/*
*/}
First, you will set up automatic infrastructure provisioning for push work pools. Then you will learn how to manually
set up your push work pool.
## Automatic infrastructure provisioning
With Perfect Cloud you can provision infrastructure for use with an AWS ECS, Google Cloud Run, ACI push work pool.
Push work pools in Prefect Cloud simplify the setup and management of the infrastructure necessary to run your flows.
However, setting up infrastructure on your cloud provider can still be a time-consuming process.
Prefect dramatically simplifies this process by automatically provisioning the necessary infrastructure for you.
We'll use the `prefect work-pool create` CLI command with the `--provision-infra` flag to automatically provision your
serverless cloud resources and set up your Prefect workspace to use a new push pool.
### Prerequisites
To use automatic infrastructure provisioning, you need:
* the relevant cloud CLI library installed
* to be authenticated with your cloud provider
Install the [AWS CLI](https://docs.aws.amazon.com/cli/latest/userguide/getting-started-install.html),
[authenticate with your AWS account](https://docs.aws.amazon.com/signin/latest/userguide/command-line-sign-in.html),
and [set a default region](https://docs.aws.amazon.com/cli/latest/userguide/cli-configure-files.html#cli-configure-files-methods).
If you already have the AWS CLI installed, be sure to [update to the latest version](https://docs.aws.amazon.com/cli/latest/userguide/getting-started-install.html#getting-started-install-instructions).
You will need the following permissions in your authenticated AWS account:
IAM Permissions:
* iam:CreatePolicy
* iam:GetPolicy
* iam:ListPolicies
* iam:CreateUser
* iam:GetUser
* iam:AttachUserPolicy
* iam:CreateRole
* iam:GetRole
* iam:AttachRolePolicy
* iam:ListRoles
* iam:PassRole
Amazon ECS Permissions:
* ecs:CreateCluster
* ecs:DescribeClusters
Amazon EC2 Permissions:
* ec2:CreateVpc
* ec2:DescribeVpcs
* ec2:CreateInternetGateway
* ec2:AttachInternetGateway
* ec2:CreateRouteTable
* ec2:CreateRoute
* ec2:CreateSecurityGroup
* ec2:DescribeSubnets
* ec2:CreateSubnet
* ec2:DescribeAvailabilityZones
* ec2:AuthorizeSecurityGroupIngress
* ec2:AuthorizeSecurityGroupEgress
Amazon ECR Permissions:
* ecr:CreateRepository
* ecr:DescribeRepositories
* ecr:GetAuthorizationToken
If you want to use AWS managed policies, you can use the following:
* AmazonECS\_FullAccess
* AmazonEC2FullAccess
* IAMFullAccess
* AmazonEC2ContainerRegistryFullAccess
The above policies give you all the permissions needed, but are more permissive than necessary.
[Docker](https://docs.docker.com/get-docker/) is also required to build and push images to your registry.
Install the [Azure CLI](https://learn.microsoft.com/en-us/cli/azure/install-azure-cli) and
[authenticate with your Azure account](https://learn.microsoft.com/en-us/cli/azure/authenticate-azure-cli).
If you already have the Azure CLI installed, be sure to update to the latest version with `az upgrade`.
You will also need the following roles in your Azure subscription:
* Contributor
* User Access Administrator
* Application Administrator
* Managed Identity Operator
* Azure Container Registry Contributor
Docker is also required to build and push images to your registry. You can install Docker
[here](https://docs.docker.com/get-docker/).
Install the [gcloud CLI](https://cloud.google.com/sdk/docs/install) and
[authenticate with your GCP project](https://cloud.google.com/docs/authentication/gcloud).
If you already have the gcloud CLI installed, be sure to update to the latest version with `gcloud components update`.
You will also need the following permissions in your GCP project:
* resourcemanager.projects.list
* serviceusage.services.enable
* iam.serviceAccounts.create
* iam.serviceAccountKeys.create
* resourcemanager.projects.setIamPolicy
* artifactregistry.repositories.create
Docker is also required to build and push images to your registry. You can install Docker
[here](https://docs.docker.com/get-docker/).
Install `modal` by running:
```bash
pip install modal
```
Create a Modal API token by running:
```bash
modal token new
```
See [Run flows on Modal](/v3/how-to-guides/deployment_infra/modal) for more details.
Install `coiled` by running:
```bash
pip install coiled prefect-coiled
```
Create a Coiled API token by running:
```bash
coiled login
```
Connect Coiled to your cloud account by running
```bash
coiled setup
```
or by navigating to [cloud.coiled.io/get-started](https://cloud.coiled.io/get-started)
### Automatically create a new push work pool and provision infrastructure
To create a new push work pool and configure the necessary infrastructure,
run this command for your particular cloud provider:
```bash
prefect work-pool create --type ecs:push --provision-infra my-ecs-pool
```
The `--provision-infra` flag automatically sets up your default AWS account to execute
flows with ECS tasks.
In your AWS account, this command creates a new IAM user, IAM policy, and
ECS cluster that uses AWS Fargate, VPC, and ECR repository (if they don't already exist).
In your Prefect workspace, this command creates an
[`AWSCredentials` block](/integrations/prefect-aws/index#save-credentials-to-an-aws-credentials-block) for storing the generated credentials.
Here's an abbreviated example output from running the command:
```bash
_____________________________________________________________________________________________
| Provisioning infrastructure for your work pool my-ecs-pool will require: |
| |
| - Creating an IAM user for managing ECS tasks: prefect-ecs-user |
| - Creating and attaching an IAM policy for managing ECS tasks: prefect-ecs-policy |
| - Storing generated AWS credentials in a block |
| - Creating an ECS cluster for running Prefect flows: prefect-ecs-cluster |
| - Creating a VPC with CIDR 172.31.0.0/16 for running ECS tasks: prefect-ecs-vpc |
| - Creating an ECR repository for storing Prefect images: prefect-flows |
_____________________________________________________________________________________________
Proceed with infrastructure provisioning? [y/n]: y
Provisioning IAM user
Creating IAM policy
Generating AWS credentials
Creating AWS credentials block
Provisioning ECS cluster
Provisioning VPC
Creating internet gateway
Setting up subnets
Setting up security group
Provisioning ECR repository
Authenticating with ECR
Setting default Docker build namespace
Provisioning Infrastructure ━━━━━━━━━━━━━━━━━━━━━━━━━━━━━━━━━━━━━━━━ 100% 0:00:00
Infrastructure successfully provisioned!
Created work pool 'my-ecs-pool'!
```
**Default Docker build namespace**
After infrastructure provisioning completes, you will be logged into your new ECR repository and the default
Docker build namespace will be set to the URL of the registry.
While the default namespace is set, you do not need to provide the registry URL when building images as
part of your deployment process.
To take advantage of this, you can write your deploy scripts like this:
```python example_deploy_script.py
from prefect import flow
from prefect.docker import DockerImage
@flow(log_prints=True)
def my_flow(name: str = "world"):
print(f"Hello {name}! I'm a flow running in a ECS task!")
if __name__ == "__main__":
my_flow.deploy(
name="my-deployment",
work_pool_name="my-work-pool",
image=DockerImage(
name="my-repository:latest",
platform="linux/amd64",
)
)
```
This builds an image with the tag `/my-image:latest` and push it to the registry.
Your image name needs to match the name of the repository created with your work pool. You can create
new repositories in the ECR console.
```bash
prefect work-pool create --type azure-container-instance:push --provision-infra my-aci-pool
```
The `--provision-infra` flag automatically sets up your default Azure account to execute
flows through Azure Container Instances.
In your Azure account, this command creates a resource group, app registration, service account with necessary permission,
generates a secret for the app registration, and creates an Azure Container Registry, (if they don't already exist).
In your Prefect workspace, this command creates an
[`AzureContainerInstanceCredentials` block](/integrations/prefect-azure)
to store the client secret value from the generated secret.
Here's an abbreviated example output from running the command:
```bash
_____________________________________________________________________________________________
| Provisioning infrastructure for your work pool my-aci-work-pool will require: |
| |
| Updates in subscription Azure subscription 1 |
| |
| - Create a resource group in location eastus |
| - Create an app registration in Azure AD prefect-aci-push-pool-app |
| - Create/use a service principal for app registration |
| - Generate a secret for app registration |
| - Create an Azure Container Registry with prefix prefect |
| - Create an identity prefect-acr-identity to allow access to the created registry |
| - Assign Contributor role to service account |
| - Create an ACR registry for image hosting |
| - Create an identity for Azure Container Instance to allow access to the registry |
| |
| Updates in Prefect workspace |
| |
| - Create Azure Container Instance credentials block aci-push-pool-credentials |
| |
_____________________________________________________________________________________________
Proceed with infrastructure provisioning? [y/n]:
Creating resource group
Creating app registration
Generating secret for app registration
Creating ACI credentials block
ACI credentials block 'aci-push-pool-credentials' created in Prefect Cloud
Assigning Contributor role to service account
Creating Azure Container Registry
Creating identity
Provisioning infrastructure... ━━━━━━━━━━━━━━━━━━━━━━━━━━━━━━━━━━━━━━━━ 100% 0:00:00
Infrastructure successfully provisioned for 'my-aci-work-pool' work pool!
Created work pool 'my-aci-work-pool'!
```
**Default Docker build namespace**
After infrastructure provisioning completes, you are logged into your new Azure Container Registry and
the default Docker build namespace is set to the URL of the registry.
While the default namespace is set, any images you build without specifying a registry or username/organization
are pushed to the registry.
To use this capability, write your deploy scripts like this:
```python example_deploy_script.py
from prefect import flow
from prefect.docker import DockerImage
@flow(log_prints=True)
def my_flow(name: str = "world"):
print(f"Hello {name}! I'm a flow running on an Azure Container Instance!")
if __name__ == "__main__":
my_flow.deploy(
name="my-deployment",
work_pool_name="my-work-pool",
image=DockerImage(
name="my-image:latest",
platform="linux/amd64",
)
)
```
This builds an image with the tag `/my-image:latest` and pushes it to the registry.
```bash
prefect work-pool create --type cloud-run:push --provision-infra my-cloud-run-pool
```
The `--provision-infra` flag allows you to select a GCP project to use for your work pool and automatically
configures it to execute flows through Cloud Run.
In your GCP project, this command activates the Cloud Run API, creates a service account, and creates a key for the
service account, (if they don't already exist).
In your Prefect workspace, this command creates a
[`GCPCredentials` block](/integrations/prefect-gcp/index#authenticate-using-a-gcp-credentials-block) to store the service account key.
Here's an abbreviated example output from running the command:
```bash
____________________________________________________________________________________________________________
| Provisioning infrastructure for your work pool my-cloud-run-pool will require: |
| |
| Updates in GCP project central-kit-405415 in region us-central1 |
| |
| - Activate the Cloud Run API for your project |
| - Activate the Artifact Registry API for your project |
| - Create an Artifact Registry repository named prefect-images |
| - Create a service account for managing Cloud Run jobs: prefect-cloud-run |
| - Service account will be granted the following roles: |
| - Service Account User |
| - Cloud Run Developer |
| - Create a key for service account prefect-cloud-run |
| |
| Updates in Prefect workspace |
| |
| - Create GCP credentials block my--pool-push-pool-credentials to store the service account key |
| |
____________________________________________________________________________________________________________
Proceed with infrastructure provisioning? [y/n]: y
Activating Cloud Run API
Activating Artifact Registry API
Creating Artifact Registry repository
Configuring authentication to Artifact Registry
Setting default Docker build namespace
Creating service account
Assigning roles to service account
Creating service account key
Creating GCP credentials block
Provisioning Infrastructure ━━━━━━━━━━━━━━━━━━━━━━━━━━━━━━━━━━━━━━━━ 100% 0:00:00
Infrastructure successfully provisioned!
Created work pool 'my-cloud-run-pool'!
```
**Default Docker build namespace**
After infrastructure provisioning completes, you are logged into your new Artifact Registry repository
and the default Docker build namespace is set to the URL of the repository.
While the default namespace is set, any images you build without specifying a registry or username/organization
are pushed to the repository.
To use this capability, write your deploy scripts like this:
```python example_deploy_script.py
from prefect import flow
from prefect.docker import DockerImage
@flow(log_prints=True)
def my_flow(name: str = "world"):
print(f"Hello {name}! I'm a flow running on Cloud Run!")
if __name__ == "__main__":
my_flow.deploy(
name="my-deployment",
work_pool_name="above-ground",
image=DockerImage(
name="my-image:latest",
platform="linux/amd64",
)
)
```
This builds an image with the tag `-docker.pkg.dev///my-image:latest`
and pushes it to the repository.
```bash
prefect work-pool create --type modal:push --provision-infra my-modal-pool
```
Using the `--provision-infra` flag triggers the creation of a `ModalCredentials` block in your Prefect Cloud workspace.
This block stores your Modal API token, which authenticates with Modal's API. By default, the token for your
current Modal profile is used for the new `ModalCredentials` block. If Prefect is unable to discover a Modal
API token for your current profile, you will be prompted to create a new one.
```bash
prefect work-pool create --type coiled:push --provision-infra my-coiled-pool
```
Using the `--provision-infra` flag triggers the creation of a `CoiledCredentials` block in your Prefect Cloud workspace.
This block stores your Coiled API token, which authenticates with Coiled's API.
You're ready to create and schedule deployments that use your new push work pool.
Reminder that no worker is required to run flows with a push work pool.
### Use existing resources with automatic infrastructure provisioning
If you already have the necessary infrastructure set up, Prefect detects that at work pool creation and the
infrastructure provisioning for that resource is skipped.
For example, here's how `prefect work-pool create my-work-pool --provision-infra` looks when existing Azure resources are detected:
```bash
Proceed with infrastructure provisioning? [y/n]: y
Creating resource group
Resource group 'prefect-aci-push-pool-rg' already exists in location 'eastus'.
Creating app registration
App registration 'prefect-aci-push-pool-app' already exists.
Generating secret for app registration
Provisioning infrastructure
ACI credentials block 'bb-push-pool-credentials' created
Assigning Contributor role to service account...
Service principal with object ID '4be6fed7-...' already has the 'Contributor' role assigned in
'/subscriptions/.../'
Creating Azure Container Instance
Container instance 'prefect-aci-push-pool-container' already exists.
Creating Azure Container Instance credentials block
Provisioning infrastructure... ━━━━━━━━━━━━━━━━━━━━━━━━━━━━━━━━━━━━━━━━ 100% 0:00:00
Infrastructure successfully provisioned!
Created work pool 'my-work-pool'!
```
## Provision infrastructure for an existing push work pool
If you already have a push work pool set up, but haven't configured the necessary infrastructure, you can use the
`provision-infra` sub-command to provision the infrastructure for that work pool.
For example, you can run the following command if you have a work pool named "my-work-pool".
```bash
prefect work-pool provision-infra my-work-pool
```
Prefect creates the necessary infrastructure for the `my-work-pool` work pool and provides you with a summary
of the changes:
```bash
__________________________________________________________________________________________________________________
| Provisioning infrastructure for your work pool my-work-pool will require: |
| |
| Updates in subscription Azure subscription 1 |
| |
| - Create a resource group in location eastus |
| - Create an app registration in Azure AD prefect-aci-push-pool-app |
| - Create/use a service principal for app registration |
| - Generate a secret for app registration |
| - Assign Contributor role to service account |
| - Create Azure Container Instance 'aci-push-pool-container' in resource group prefect-aci-push-pool-rg |
| |
| Updates in Prefect workspace |
| |
| - Create Azure Container Instance credentials block aci-push-pool-credentials |
| |
__________________________________________________________________________________________________________________
Proceed with infrastructure provisioning? [y/n]: y
```
This command speeds up your infrastructure setup process.
As with the examples above, you need to have the related cloud CLI library installed and to be authenticated with
your cloud provider.
## Manual infrastructure provisioning
If you prefer to set up your infrastructure manually, exclude the `--provision-infra` flag in the CLI command.
In the examples below, you'll create a push work pool through the Prefect Cloud UI.
To push work to ECS, AWS credentials are required.
Create a user and attach the *AmazonECS\_FullAccess* permissions.
From that user's page, create credentials and store them somewhere safe for use in the next section.
To push work to Azure, you need an Azure subscription, resource group, and tenant secret.
**Create Subscription and Resource Group**
1. In the Azure portal, create a subscription.
2. Create a resource group within your subscription.
**Create App Registration**
1. In the Azure portal, create an app registration.
2. In the app registration, create a client secret. Copy the value and store it somewhere safe.
**Add App Registration to Resource Group**
1. Navigate to the resource group you created earlier.
2. Choose the "Access control (IAM)" blade in the left-hand side menu. Click "+ Add" button at the top, then
"Add role assignment".
3. Go to the "Privileged administrator roles" tab, click on "Contributor", then click "Next" at the bottom of the page.
4. Click on "+ Select members". Type the name of the app registration (otherwise it may not autopopulate) and click to add it.
Then hit "Select" and click "Next". The default permissions associated with a role like "Contributor" may
not be sufficient for all operations related to Azure Container Instances (ACI). The specific permissions
required depend on the operations you need to perform (like creating, running, and deleting ACI container groups)
and your organization's security policies. In some cases, additional permissions or custom roles are necessary.
5. Click "Review + assign" to finish.
You need a GCP service account and an API Key to push work to Cloud Run.
Create a service account by navigating to the service accounts page and clicking *Create*. Name and describe your service account,
and click *continue* to configure permissions.
The service account must have two roles at a minimum: *Cloud Run Developer* and *Service Account User*.
As you make changes to either the code or deployment file, Prefect will redeploy and Modal will automatically pick up changes.
You've successfully built your first Prefect deployment that runs on Modal every hour!
For more information about CI/CD in Prefect, see [Build deployments via CI/CD](/v3/advanced/deploy-ci-cd).
# How to run flows in local processes
Source: https://docs-3.prefect.io/v3/how-to-guides/deployment_infra/run-flows-in-local-processes
Create a deployment for a flow by calling the `serve` method.
The simplest way to create a [deployment](/v3/deploy) for your flow is by calling its `serve` method.
## Serve a flow
The serve method creates a deployment for the flow and starts a long-running process
that monitors for work from the Prefect server.
When work is found, it is executed within its own isolated subprocess.
```python hello_world.py
from prefect import flow
@flow(log_prints=True)
def hello_world(name: str = "world", goodbye: bool = False):
print(f"Hello {name} from Prefect! 🤗")
if goodbye:
print(f"Goodbye {name}!")
if __name__ == "__main__":
# creates a deployment and starts a long-running
# process that listens for scheduled work
hello_world.serve(name="my-first-deployment",
tags=["onboarding"],
parameters={"goodbye": True},
interval=60
)
```
This interface provides the configuration for a deployment (with no
strong infrastructure requirements), such as:
* schedules
* event triggers
* metadata such as tags and description
* default parameter values
**Schedules are auto-paused on shutdown**
By default, stopping the process running `flow.serve` will pause the schedule
for the deployment (if it has one).
When running this in environments where restarts are expected use the
`pause_on_shutdown=False` flag to prevent this behavior:
```python
if __name__ == "__main__":
hello_world.serve(
name="my-first-deployment",
tags=["onboarding"],
parameters={"goodbye": True},
pause_on_shutdown=False,
interval=60
)
```
## Additional serve options
The `serve` method on flows exposes many options for the deployment.
Here's how to use some of those options:
* `cron`: a keyword that allows you to set a cron string schedule for the deployment; see
[schedules](/v3/automate/add-schedules/) for more advanced scheduling options
* `tags`: a keyword that allows you to tag this deployment and its runs for bookkeeping and filtering purposes
* `description`: a keyword that allows you to document what this deployment does; by default the
description is set from the docstring of the flow function (if documented)
* `version`: a keyword that allows you to track changes to your deployment; uses a hash of the
file containing the flow by default; popular options include semver tags or git commit hashes
* `triggers`: a keyword that allows you to define a set of conditions for when the deployment should run; see
[triggers](/v3/concepts/event-triggers/) for more on Prefect Events concepts
Next, add these options to your deployment:
```python
if __name__ == "__main__":
get_repo_info.serve(
name="my-first-deployment",
cron="* * * * *",
tags=["testing", "tutorial"],
description="Given a GitHub repository, logs repository statistics for that repo.",
version="tutorial/deployments",
)
```
**Triggers with `.serve`**
See this [example](/v3/how-to-guides/automations/chaining-deployments-with-events) that triggers downstream work on upstream events.
When you rerun this script, you will find an updated deployment in the UI that is actively scheduling work.
Stop the script in the CLI using `CTRL+C` and your schedule automatically pauses.
**`serve()` is a long-running process**
To execute remotely triggered or scheduled runs, your script with `flow.serve` must be actively running.
## Serve multiple flows at once
Serve multiple flows with the same process using the `serve` utility along with the `to_deployment` method of flows:
```python serve_two_flows.py
import time
from prefect import flow, serve
@flow
def slow_flow(sleep: int = 60):
"Sleepy flow - sleeps the provided amount of time (in seconds)."
time.sleep(sleep)
@flow
def fast_flow():
"Fastest flow this side of the Mississippi."
return
if __name__ == "__main__":
slow_deploy = slow_flow.to_deployment(name="sleeper", interval=45)
fast_deploy = fast_flow.to_deployment(name="fast")
serve(slow_deploy, fast_deploy)
```
The behavior and interfaces are identical to the single flow case.
A few things to note:
* the `flow.to_deployment` interface exposes the *exact same* options as `flow.serve`; this method
produces a deployment object
* the deployments are only registered with the API once `serve(...)` is called
* when serving multiple deployments, the only requirement is that they share a Python environment;
they can be executed and scheduled independently of each other
A few optional steps for exploration include:
* pause and unpause the schedule for the `"sleeper"` deployment
* use the UI to submit ad-hoc runs for the `"sleeper"` deployment with different values for `sleep`
* cancel an active run for the `"sleeper"` deployment from the UI
**Hybrid execution option**
Prefect's deployment interface allows you to choose a hybrid execution model.
Whether you use Prefect Cloud or self-host Prefect server, you can run workflows in the
environments best suited to their execution.
This model enables efficient use of your infrastructure resources while maintaining the privacy
of your code and data.
There is no ingress required.
Read more about our [hybrid model](https://www.prefect.io/security/overview/#hybrid-model).
## Retrieve a flow from remote storage
Just like the `.deploy` method, the `flow.from_source` method is used to define how to retrieve the flow that you want to serve.
### `from_source`
The `flow.from_source` method on `Flow` objects requires a `source` and an `entrypoint`.
#### `source`
The `source` of your deployment can be:
* a path to a local directory such as `path/to/a/local/directory`
* a repository URL such as `https://github.com/org/repo.git`
* a `GitRepository` object that accepts
* a repository URL
* a reference to a branch, tag, or commit hash
* `GitCredentials` for private repositories
#### `entrypoint`
A flow `entrypoint` is the path to the file where the flow is located within that `source`, in the form
```python
{path}:{flow_name}
```
For example, the following code will load the `hello` flow from the `flows/hello_world.py` file in the `PrefectHQ/examples` repository:
```python load_from_url.py
from prefect import flow
my_flow = flow.from_source(
source="https://github.com/PrefectHQ/examples.git",
entrypoint="flows/hello_world.py:hello"
)
if __name__ == "__main__":
my_flow()
```
```bash
16:40:33.818 | INFO | prefect.engine - Created flow run 'muscular-perch' for flow 'hello'
16:40:34.048 | INFO | Flow run 'muscular-perch' - Hello world!
16:40:34.706 | INFO | Flow run 'muscular-perch' - Finished in state Completed()
```
For more ways to store and access flow code, see the [Retrieve code from storage page](/v3/deploy/infrastructure-concepts/store-flow-code).
**You can serve loaded flows**
You can serve a flow loaded from remote storage with the same [`serve`](#serve-a-flow) method as a local flow:
```python serve_loaded_flow.py
from prefect import flow
if __name__ == "__main__":
flow.from_source(
source="https://github.com/org/repo.git",
entrypoint="flows.py:my_flow"
).serve(name="my-deployment")
```
### Remote storage polling
When you serve a flow loaded from remote storage, the serving process periodically polls your remote storage for updates to the flow's code.
This pattern allows you to update your flow code without restarting the serving process.
Note that if you change metadata associated with your flow's deployment such as parameters, you *will* need to restart the serve process.
## Further reading
* [Serve flows in a long-lived Docker container](/v3/deploy/static-infrastructure-examples/docker)
* [Work pools and deployments with dynamic infrastructure](/v3/deploy/infrastructure-concepts/work-pools)
# How to run flows in a long-lived Docker container
Source: https://docs-3.prefect.io/v3/how-to-guides/deployment_infra/serve-flows-docker
Learn how to serve a flow in a long-lived Docker container
The `.serve` method allows you to easily elevate a flow to a deployment, listening for scheduled work to execute [as a local process](/v3/how-to-guides/deployment_infra/run-flows-in-local-processes).
However, this *"local"* process does not need to be on your local machine. In this example we show how to run a flow in Docker container on your local machine, but you could use a Docker container on any machine that has [Docker installed](https://docs.docker.com/engine/install/).
## Overview
In this example, you will set up:
* a simple flow that retrieves the number of stars for some GitHub repositories
* a `Dockerfile` that packages up your flow code and dependencies into a container image
## Writing the flow
Say we have a flow that retrieves the number of stars for a GitHub repository:
```python serve_retrieve_github_stars.py {19-23}
import httpx
from prefect import flow, task
@task(log_prints=True)
def get_stars_for_repo(repo: str) -> int:
response = httpx.Client().get(f"https://api.github.com/repos/{repo}")
stargazer_count = response.json()["stargazers_count"]
print(f"{repo} has {stargazer_count} stars")
return stargazer_count
@flow
def retrieve_github_stars(repos: list[str]) -> list[int]:
return get_stars_for_repo.map(repos).wait()
if __name__ == "__main__":
retrieve_github_stars.serve(
parameters={
"repos": ["python/cpython", "prefectHQ/prefect"],
}
)
```
We can serve this flow on our local machine using:
```bash
python serve_retrieve_github_stars.py
```
... but how can we package this up so we can run it on other machines?
## Writing the Dockerfile
Assuming we have our Python requirements defined in a file:
```txt requirements.txt
prefect
```
and this directory structure:
```
├── Dockerfile
├── requirements.txt
└── serve_retrieve_github_stars.py
```
We can package up our flow into a Docker container using a `Dockerfile`.
```dockerfile Using pip
# Use an official Python runtime as the base image
FROM python:3.12-slim
# Set the working directory in the container
WORKDIR /app
# Copy the requirements file into the container
COPY requirements.txt .
# Install the required packages
RUN pip install --no-cache-dir -r requirements.txt
# Copy the rest of the application code
COPY serve_retrieve_github_stars.py .
# Set the command to run your application
CMD ["python", "serve_retrieve_github_stars.py"]
```
```dockerfile Using uv
# Use the official Python image with uv pre-installed
FROM ghcr.io/astral-sh/uv:python3.12-bookworm-slim
# Set the working directory
WORKDIR /app
# Set environment variables
ENV UV_SYSTEM_PYTHON=1
ENV PATH="/root/.local/bin:$PATH"
# Copy only the requirements file first to leverage Docker cache
COPY requirements.txt .
# Install dependencies
RUN --mount=type=cache,target=/root/.cache/uv \
uv pip install -r requirements.txt
# Copy the rest of the application code
COPY serve_retrieve_github_stars.py .
# Set the entrypoint
ENTRYPOINT ["python", "serve_retrieve_github_stars.py"]
```
Using `pip`, the image is built in about 20 seconds, and using `uv`, the image is built in about 3 seconds.
You can learn more about using `uv` in the [Astral documentation](https://docs.astral.sh/uv/guides/integration/docker/).
## Build and run the container
Now that we have a flow and a Dockerfile, we can build the image from the Dockerfile and run a container from this image.
### Build (and push) the image
We can build the image with the `docker build` command and the `-t` flag to specify a name for the image.
```bash
docker build -t my-flow-image .
```
At this point, you may also want to push the image to a container registry such as [Docker Hub](https://hub.docker.com/) or [GitHub Container Registry](https://docs.github.com/en/packages/working-with-a-github-packages-registry/working-with-the-container-registry). Please refer to each registry's respective documentation for details on authentication and registry naming conventions.
### Run the container
You'll likely want to inject some environment variables into your container, so let's define a `.env` file:
```bash .env
PREFECT_API_URL=
PREFECT_API_KEY=
```
Then, run the container in [detached mode](https://docs.docker.com/engine/reference/commandline/run/#detached-d) (in other words, in the background):
```bash
docker run -d --env-file .env my-flow-image
```
#### Verify the container is running
```bash
docker ps | grep my-flow-image
```
You should see your container in the list of running containers, note the `CONTAINER ID` as we'll need it to view logs.
#### View logs
```bash
docker logs
```
You should see logs from your newly served process, with the link to your deployment in the UI.
### Stop the container
```bash
docker stop
```
## Health checks for production deployments
When deploying to production environments like Google Cloud Run, AWS ECS, or Kubernetes, you may need to configure health checks to ensure your container is running properly. The `.serve()` method supports an optional webserver that exposes a health endpoint.
### Enabling the health check webserver
You can enable the health check webserver in two ways:
1. **Pass `webserver=True` to `.serve()`:**
```python
if __name__ == "__main__":
retrieve_github_stars.serve(
parameters={
"repos": ["python/cpython", "prefectHQ/prefect"],
},
webserver=True # Enable health check webserver
)
```
2. **Set the environment variable:**
```bash
PREFECT_RUNNER_SERVER_ENABLE=true
```
When enabled, the webserver exposes a health endpoint at `http://localhost:8080/health` by default.
### Configuring the health check port
You can customize the host and port using environment variables:
```bash
PREFECT_RUNNER_SERVER_HOST=0.0.0.0 # Allow external connections
PREFECT_RUNNER_SERVER_PORT=8080 # Port for health checks
```
### Docker with health checks
Add a health check to your Dockerfile:
```dockerfile
# ... your existing Dockerfile content ...
# Health check configuration
HEALTHCHECK --interval=30s --timeout=10s --start-period=60s --retries=3 \
CMD python -c "import urllib.request as u; u.urlopen('http://localhost:8080/health', timeout=1)"
# Set the command to run your application with webserver enabled
CMD ["python", "serve_retrieve_github_stars.py"]
```
Or if you prefer to use environment variables:
```dockerfile
# ... your existing Dockerfile content ...
# Enable the health check webserver
ENV PREFECT_RUNNER_SERVER_ENABLE=true
ENV PREFECT_RUNNER_SERVER_HOST=0.0.0.0
ENV PREFECT_RUNNER_SERVER_PORT=8080
# Health check configuration
HEALTHCHECK --interval=30s --timeout=10s --start-period=60s --retries=3 \
CMD python -c "import urllib.request as u; u.urlopen('http://localhost:8080/health', timeout=1)"
CMD ["python", "serve_retrieve_github_stars.py"]
```
### Platform-specific configurations
Cloud Run requires containers to listen on a port. Configure your container to expose the health check port:
```yaml
# In your Cloud Run configuration
livenessProbe:
httpGet:
path: /health
port: 8080
initialDelaySeconds: 60
periodSeconds: 30
```
Make sure to set the container port to 8080 in Cloud Run settings.
Configure health checks in your task definition:
```json
{
"healthCheck": {
"command": ["CMD-SHELL", "python -c \"import urllib.request as u; u.urlopen('http://localhost:8080/health', timeout=1)\""],
"interval": 30,
"timeout": 10,
"retries": 3,
"startPeriod": 60
}
}
```
Add liveness and readiness probes to your deployment:
```yaml
livenessProbe:
httpGet:
path: /health
port: 8080
initialDelaySeconds: 60
periodSeconds: 30
timeoutSeconds: 10
failureThreshold: 3
readinessProbe:
httpGet:
path: /health
port: 8080
initialDelaySeconds: 10
periodSeconds: 5
```
The health endpoint returns:
* **200 OK** with `{"message": "OK"}` when the runner is healthy and polling for work
* **503 Service Unavailable** when the runner hasn't polled recently (indicating it may be unresponsive)
## Next steps
Congratulations! You have packaged and served a flow on a long-lived Docker container.
You may now easily deploy this container to other infrastructures, such as:
* [Modal](https://modal.com/)
* [Google Cloud Run](https://cloud.google.com/run)
* [AWS Fargate / ECS](https://aws.amazon.com/fargate/)
* Managed Kubernetes (For example: GKE, EKS, or AKS)
or anywhere else you can run a Docker container!
# How to run flows on serverless compute
Source: https://docs-3.prefect.io/v3/how-to-guides/deployment_infra/serverless
Learn how to use Prefect push work pools to schedule work on serverless infrastructure without having to run a worker.
Push [work pools](/v3/deploy/infrastructure-concepts/work-pools/) are a special type of work pool. They allow
Prefect Cloud to submit flow runs for execution to serverless computing infrastructure without requiring you to run a worker.
Push work pools currently support execution in AWS ECS tasks, Azure Container Instances, Google Cloud Run jobs, Modal, and Coiled.
In this guide you will:
* Create a push work pool that sends work to Amazon Elastic Container Service (AWS ECS), Azure Container Instances (ACI),
Google Cloud Run, Modal, or Coiled
* Deploy a flow to that work pool
* Execute a flow without having to run a worker process to poll for flow runs
{/*
*/}
You can automatically provision infrastructure and create your push work pool using the `prefect work-pool create`
CLI command with the `--provision-infra` flag.
This approach greatly simplifies the setup process.
{/*
*/}
First, you will set up automatic infrastructure provisioning for push work pools. Then you will learn how to manually
set up your push work pool.
## Automatic infrastructure provisioning
With Perfect Cloud you can provision infrastructure for use with an AWS ECS, Google Cloud Run, ACI push work pool.
Push work pools in Prefect Cloud simplify the setup and management of the infrastructure necessary to run your flows.
However, setting up infrastructure on your cloud provider can still be a time-consuming process.
Prefect dramatically simplifies this process by automatically provisioning the necessary infrastructure for you.
We'll use the `prefect work-pool create` CLI command with the `--provision-infra` flag to automatically provision your
serverless cloud resources and set up your Prefect workspace to use a new push pool.
### Prerequisites
To use automatic infrastructure provisioning, you need:
* the relevant cloud CLI library installed
* to be authenticated with your cloud provider
Install the [AWS CLI](https://docs.aws.amazon.com/cli/latest/userguide/getting-started-install.html),
[authenticate with your AWS account](https://docs.aws.amazon.com/signin/latest/userguide/command-line-sign-in.html),
and [set a default region](https://docs.aws.amazon.com/cli/latest/userguide/cli-configure-files.html#cli-configure-files-methods).
If you already have the AWS CLI installed, be sure to [update to the latest version](https://docs.aws.amazon.com/cli/latest/userguide/getting-started-install.html#getting-started-install-instructions).
You will need the following permissions in your authenticated AWS account:
IAM Permissions:
* iam:CreatePolicy
* iam:GetPolicy
* iam:ListPolicies
* iam:CreateUser
* iam:GetUser
* iam:AttachUserPolicy
* iam:CreateRole
* iam:GetRole
* iam:AttachRolePolicy
* iam:ListRoles
* iam:PassRole
Amazon ECS Permissions:
* ecs:CreateCluster
* ecs:DescribeClusters
Amazon EC2 Permissions:
* ec2:CreateVpc
* ec2:DescribeVpcs
* ec2:CreateInternetGateway
* ec2:AttachInternetGateway
* ec2:CreateRouteTable
* ec2:CreateRoute
* ec2:CreateSecurityGroup
* ec2:DescribeSubnets
* ec2:CreateSubnet
* ec2:DescribeAvailabilityZones
* ec2:AuthorizeSecurityGroupIngress
* ec2:AuthorizeSecurityGroupEgress
Amazon ECR Permissions:
* ecr:CreateRepository
* ecr:DescribeRepositories
* ecr:GetAuthorizationToken
If you want to use AWS managed policies, you can use the following:
* AmazonECS\_FullAccess
* AmazonEC2FullAccess
* IAMFullAccess
* AmazonEC2ContainerRegistryFullAccess
The above policies give you all the permissions needed, but are more permissive than necessary.
[Docker](https://docs.docker.com/get-docker/) is also required to build and push images to your registry.
Install the [Azure CLI](https://learn.microsoft.com/en-us/cli/azure/install-azure-cli) and
[authenticate with your Azure account](https://learn.microsoft.com/en-us/cli/azure/authenticate-azure-cli).
If you already have the Azure CLI installed, be sure to update to the latest version with `az upgrade`.
You will also need the following roles in your Azure subscription:
* Contributor
* User Access Administrator
* Application Administrator
* Managed Identity Operator
* Azure Container Registry Contributor
Docker is also required to build and push images to your registry. You can install Docker
[here](https://docs.docker.com/get-docker/).
Install the [gcloud CLI](https://cloud.google.com/sdk/docs/install) and
[authenticate with your GCP project](https://cloud.google.com/docs/authentication/gcloud).
If you already have the gcloud CLI installed, be sure to update to the latest version with `gcloud components update`.
You will also need the following permissions in your GCP project:
* resourcemanager.projects.list
* serviceusage.services.enable
* iam.serviceAccounts.create
* iam.serviceAccountKeys.create
* resourcemanager.projects.setIamPolicy
* artifactregistry.repositories.create
Docker is also required to build and push images to your registry. You can install Docker
[here](https://docs.docker.com/get-docker/).
Install `modal` by running:
```bash
pip install modal
```
Create a Modal API token by running:
```bash
modal token new
```
See [Run flows on Modal](/v3/how-to-guides/deployment_infra/modal) for more details.
Install `coiled` by running:
```bash
pip install coiled prefect-coiled
```
Create a Coiled API token by running:
```bash
coiled login
```
Connect Coiled to your cloud account by running
```bash
coiled setup
```
or by navigating to [cloud.coiled.io/get-started](https://cloud.coiled.io/get-started)
### Automatically create a new push work pool and provision infrastructure
To create a new push work pool and configure the necessary infrastructure,
run this command for your particular cloud provider:
```bash
prefect work-pool create --type ecs:push --provision-infra my-ecs-pool
```
The `--provision-infra` flag automatically sets up your default AWS account to execute
flows with ECS tasks.
In your AWS account, this command creates a new IAM user, IAM policy, and
ECS cluster that uses AWS Fargate, VPC, and ECR repository (if they don't already exist).
In your Prefect workspace, this command creates an
[`AWSCredentials` block](/integrations/prefect-aws/index#save-credentials-to-an-aws-credentials-block) for storing the generated credentials.
Here's an abbreviated example output from running the command:
```bash
_____________________________________________________________________________________________
| Provisioning infrastructure for your work pool my-ecs-pool will require: |
| |
| - Creating an IAM user for managing ECS tasks: prefect-ecs-user |
| - Creating and attaching an IAM policy for managing ECS tasks: prefect-ecs-policy |
| - Storing generated AWS credentials in a block |
| - Creating an ECS cluster for running Prefect flows: prefect-ecs-cluster |
| - Creating a VPC with CIDR 172.31.0.0/16 for running ECS tasks: prefect-ecs-vpc |
| - Creating an ECR repository for storing Prefect images: prefect-flows |
_____________________________________________________________________________________________
Proceed with infrastructure provisioning? [y/n]: y
Provisioning IAM user
Creating IAM policy
Generating AWS credentials
Creating AWS credentials block
Provisioning ECS cluster
Provisioning VPC
Creating internet gateway
Setting up subnets
Setting up security group
Provisioning ECR repository
Authenticating with ECR
Setting default Docker build namespace
Provisioning Infrastructure ━━━━━━━━━━━━━━━━━━━━━━━━━━━━━━━━━━━━━━━━ 100% 0:00:00
Infrastructure successfully provisioned!
Created work pool 'my-ecs-pool'!
```
**Default Docker build namespace**
After infrastructure provisioning completes, you will be logged into your new ECR repository and the default
Docker build namespace will be set to the URL of the registry.
While the default namespace is set, you do not need to provide the registry URL when building images as
part of your deployment process.
To take advantage of this, you can write your deploy scripts like this:
```python example_deploy_script.py
from prefect import flow
from prefect.docker import DockerImage
@flow(log_prints=True)
def my_flow(name: str = "world"):
print(f"Hello {name}! I'm a flow running in a ECS task!")
if __name__ == "__main__":
my_flow.deploy(
name="my-deployment",
work_pool_name="my-work-pool",
image=DockerImage(
name="my-repository:latest",
platform="linux/amd64",
)
)
```
This builds an image with the tag `/my-image:latest` and push it to the registry.
Your image name needs to match the name of the repository created with your work pool. You can create
new repositories in the ECR console.
```bash
prefect work-pool create --type azure-container-instance:push --provision-infra my-aci-pool
```
The `--provision-infra` flag automatically sets up your default Azure account to execute
flows through Azure Container Instances.
In your Azure account, this command creates a resource group, app registration, service account with necessary permission,
generates a secret for the app registration, and creates an Azure Container Registry, (if they don't already exist).
In your Prefect workspace, this command creates an
[`AzureContainerInstanceCredentials` block](/integrations/prefect-azure)
to store the client secret value from the generated secret.
Here's an abbreviated example output from running the command:
```bash
_____________________________________________________________________________________________
| Provisioning infrastructure for your work pool my-aci-work-pool will require: |
| |
| Updates in subscription Azure subscription 1 |
| |
| - Create a resource group in location eastus |
| - Create an app registration in Azure AD prefect-aci-push-pool-app |
| - Create/use a service principal for app registration |
| - Generate a secret for app registration |
| - Create an Azure Container Registry with prefix prefect |
| - Create an identity prefect-acr-identity to allow access to the created registry |
| - Assign Contributor role to service account |
| - Create an ACR registry for image hosting |
| - Create an identity for Azure Container Instance to allow access to the registry |
| |
| Updates in Prefect workspace |
| |
| - Create Azure Container Instance credentials block aci-push-pool-credentials |
| |
_____________________________________________________________________________________________
Proceed with infrastructure provisioning? [y/n]:
Creating resource group
Creating app registration
Generating secret for app registration
Creating ACI credentials block
ACI credentials block 'aci-push-pool-credentials' created in Prefect Cloud
Assigning Contributor role to service account
Creating Azure Container Registry
Creating identity
Provisioning infrastructure... ━━━━━━━━━━━━━━━━━━━━━━━━━━━━━━━━━━━━━━━━ 100% 0:00:00
Infrastructure successfully provisioned for 'my-aci-work-pool' work pool!
Created work pool 'my-aci-work-pool'!
```
**Default Docker build namespace**
After infrastructure provisioning completes, you are logged into your new Azure Container Registry and
the default Docker build namespace is set to the URL of the registry.
While the default namespace is set, any images you build without specifying a registry or username/organization
are pushed to the registry.
To use this capability, write your deploy scripts like this:
```python example_deploy_script.py
from prefect import flow
from prefect.docker import DockerImage
@flow(log_prints=True)
def my_flow(name: str = "world"):
print(f"Hello {name}! I'm a flow running on an Azure Container Instance!")
if __name__ == "__main__":
my_flow.deploy(
name="my-deployment",
work_pool_name="my-work-pool",
image=DockerImage(
name="my-image:latest",
platform="linux/amd64",
)
)
```
This builds an image with the tag `/my-image:latest` and pushes it to the registry.
```bash
prefect work-pool create --type cloud-run:push --provision-infra my-cloud-run-pool
```
The `--provision-infra` flag allows you to select a GCP project to use for your work pool and automatically
configures it to execute flows through Cloud Run.
In your GCP project, this command activates the Cloud Run API, creates a service account, and creates a key for the
service account, (if they don't already exist).
In your Prefect workspace, this command creates a
[`GCPCredentials` block](/integrations/prefect-gcp/index#authenticate-using-a-gcp-credentials-block) to store the service account key.
Here's an abbreviated example output from running the command:
```bash
____________________________________________________________________________________________________________
| Provisioning infrastructure for your work pool my-cloud-run-pool will require: |
| |
| Updates in GCP project central-kit-405415 in region us-central1 |
| |
| - Activate the Cloud Run API for your project |
| - Activate the Artifact Registry API for your project |
| - Create an Artifact Registry repository named prefect-images |
| - Create a service account for managing Cloud Run jobs: prefect-cloud-run |
| - Service account will be granted the following roles: |
| - Service Account User |
| - Cloud Run Developer |
| - Create a key for service account prefect-cloud-run |
| |
| Updates in Prefect workspace |
| |
| - Create GCP credentials block my--pool-push-pool-credentials to store the service account key |
| |
____________________________________________________________________________________________________________
Proceed with infrastructure provisioning? [y/n]: y
Activating Cloud Run API
Activating Artifact Registry API
Creating Artifact Registry repository
Configuring authentication to Artifact Registry
Setting default Docker build namespace
Creating service account
Assigning roles to service account
Creating service account key
Creating GCP credentials block
Provisioning Infrastructure ━━━━━━━━━━━━━━━━━━━━━━━━━━━━━━━━━━━━━━━━ 100% 0:00:00
Infrastructure successfully provisioned!
Created work pool 'my-cloud-run-pool'!
```
**Default Docker build namespace**
After infrastructure provisioning completes, you are logged into your new Artifact Registry repository
and the default Docker build namespace is set to the URL of the repository.
While the default namespace is set, any images you build without specifying a registry or username/organization
are pushed to the repository.
To use this capability, write your deploy scripts like this:
```python example_deploy_script.py
from prefect import flow
from prefect.docker import DockerImage
@flow(log_prints=True)
def my_flow(name: str = "world"):
print(f"Hello {name}! I'm a flow running on Cloud Run!")
if __name__ == "__main__":
my_flow.deploy(
name="my-deployment",
work_pool_name="above-ground",
image=DockerImage(
name="my-image:latest",
platform="linux/amd64",
)
)
```
This builds an image with the tag `-docker.pkg.dev///my-image:latest`
and pushes it to the repository.
```bash
prefect work-pool create --type modal:push --provision-infra my-modal-pool
```
Using the `--provision-infra` flag triggers the creation of a `ModalCredentials` block in your Prefect Cloud workspace.
This block stores your Modal API token, which authenticates with Modal's API. By default, the token for your
current Modal profile is used for the new `ModalCredentials` block. If Prefect is unable to discover a Modal
API token for your current profile, you will be prompted to create a new one.
```bash
prefect work-pool create --type coiled:push --provision-infra my-coiled-pool
```
Using the `--provision-infra` flag triggers the creation of a `CoiledCredentials` block in your Prefect Cloud workspace.
This block stores your Coiled API token, which authenticates with Coiled's API.
You're ready to create and schedule deployments that use your new push work pool.
Reminder that no worker is required to run flows with a push work pool.
### Use existing resources with automatic infrastructure provisioning
If you already have the necessary infrastructure set up, Prefect detects that at work pool creation and the
infrastructure provisioning for that resource is skipped.
For example, here's how `prefect work-pool create my-work-pool --provision-infra` looks when existing Azure resources are detected:
```bash
Proceed with infrastructure provisioning? [y/n]: y
Creating resource group
Resource group 'prefect-aci-push-pool-rg' already exists in location 'eastus'.
Creating app registration
App registration 'prefect-aci-push-pool-app' already exists.
Generating secret for app registration
Provisioning infrastructure
ACI credentials block 'bb-push-pool-credentials' created
Assigning Contributor role to service account...
Service principal with object ID '4be6fed7-...' already has the 'Contributor' role assigned in
'/subscriptions/.../'
Creating Azure Container Instance
Container instance 'prefect-aci-push-pool-container' already exists.
Creating Azure Container Instance credentials block
Provisioning infrastructure... ━━━━━━━━━━━━━━━━━━━━━━━━━━━━━━━━━━━━━━━━ 100% 0:00:00
Infrastructure successfully provisioned!
Created work pool 'my-work-pool'!
```
## Provision infrastructure for an existing push work pool
If you already have a push work pool set up, but haven't configured the necessary infrastructure, you can use the
`provision-infra` sub-command to provision the infrastructure for that work pool.
For example, you can run the following command if you have a work pool named "my-work-pool".
```bash
prefect work-pool provision-infra my-work-pool
```
Prefect creates the necessary infrastructure for the `my-work-pool` work pool and provides you with a summary
of the changes:
```bash
__________________________________________________________________________________________________________________
| Provisioning infrastructure for your work pool my-work-pool will require: |
| |
| Updates in subscription Azure subscription 1 |
| |
| - Create a resource group in location eastus |
| - Create an app registration in Azure AD prefect-aci-push-pool-app |
| - Create/use a service principal for app registration |
| - Generate a secret for app registration |
| - Assign Contributor role to service account |
| - Create Azure Container Instance 'aci-push-pool-container' in resource group prefect-aci-push-pool-rg |
| |
| Updates in Prefect workspace |
| |
| - Create Azure Container Instance credentials block aci-push-pool-credentials |
| |
__________________________________________________________________________________________________________________
Proceed with infrastructure provisioning? [y/n]: y
```
This command speeds up your infrastructure setup process.
As with the examples above, you need to have the related cloud CLI library installed and to be authenticated with
your cloud provider.
## Manual infrastructure provisioning
If you prefer to set up your infrastructure manually, exclude the `--provision-infra` flag in the CLI command.
In the examples below, you'll create a push work pool through the Prefect Cloud UI.
To push work to ECS, AWS credentials are required.
Create a user and attach the *AmazonECS\_FullAccess* permissions.
From that user's page, create credentials and store them somewhere safe for use in the next section.
To push work to Azure, you need an Azure subscription, resource group, and tenant secret.
**Create Subscription and Resource Group**
1. In the Azure portal, create a subscription.
2. Create a resource group within your subscription.
**Create App Registration**
1. In the Azure portal, create an app registration.
2. In the app registration, create a client secret. Copy the value and store it somewhere safe.
**Add App Registration to Resource Group**
1. Navigate to the resource group you created earlier.
2. Choose the "Access control (IAM)" blade in the left-hand side menu. Click "+ Add" button at the top, then
"Add role assignment".
3. Go to the "Privileged administrator roles" tab, click on "Contributor", then click "Next" at the bottom of the page.
4. Click on "+ Select members". Type the name of the app registration (otherwise it may not autopopulate) and click to add it.
Then hit "Select" and click "Next". The default permissions associated with a role like "Contributor" may
not be sufficient for all operations related to Azure Container Instances (ACI). The specific permissions
required depend on the operations you need to perform (like creating, running, and deleting ACI container groups)
and your organization's security policies. In some cases, additional permissions or custom roles are necessary.
5. Click "Review + assign" to finish.
You need a GCP service account and an API Key to push work to Cloud Run.
Create a service account by navigating to the service accounts page and clicking *Create*. Name and describe your service account,
and click *continue* to configure permissions.
The service account must have two roles at a minimum: *Cloud Run Developer* and *Service Account User*.
 Once you create the Service account, navigate to its *Keys* page to add an API key. Create a JSON type key, download it,
and store it somewhere safe for use in the next section.
You need a Modal API token to push work to Modal.
Navigate to **Settings** in the Modal UI to create a Modal API token. In the **API Tokens** section of the Settings page,
click **New Token**.
Copy the token ID and token secret and store them somewhere safe for use in the next section.
You need a Coiled API token to push work to Coiled.
In the Coiled UI click on your avatar and select **Profile**. Then press the **Create API Token** button and copy the result. You will need it in the next section.
### Work pool configuration
The push work pool stores information about what type of infrastructure the flow will run on, what default values to
provide to compute jobs, and other important execution environment parameters. Because the push work pool needs to
integrate securely with your serverless infrastructure, you need to store your credentials in Prefect Cloud by making a block.
### Create a Credentials block
Navigate to the blocks page, click create new block, and select AWS Credentials for the type.
For use in a push work pool, set the region, access key, and access key secret.
Provide any other optional information and create your block.
Navigate to the blocks page and click the "+" at the top to create a new block. Find the Azure Container
Instance Credentials block and click "Add +".
Locate the client ID and tenant ID on your app registration and use the client secret you saved earlier.
Make sure the value of the secret, not the secret ID.
Provide any other optional information and click "Create".
Navigate to the blocks page, click create new block, and select GCP Credentials for the type.
For use in a push work pool, this block must have the contents of the JSON key stored in the
Service Account Info field, as such:
Once you create the Service account, navigate to its *Keys* page to add an API key. Create a JSON type key, download it,
and store it somewhere safe for use in the next section.
You need a Modal API token to push work to Modal.
Navigate to **Settings** in the Modal UI to create a Modal API token. In the **API Tokens** section of the Settings page,
click **New Token**.
Copy the token ID and token secret and store them somewhere safe for use in the next section.
You need a Coiled API token to push work to Coiled.
In the Coiled UI click on your avatar and select **Profile**. Then press the **Create API Token** button and copy the result. You will need it in the next section.
### Work pool configuration
The push work pool stores information about what type of infrastructure the flow will run on, what default values to
provide to compute jobs, and other important execution environment parameters. Because the push work pool needs to
integrate securely with your serverless infrastructure, you need to store your credentials in Prefect Cloud by making a block.
### Create a Credentials block
Navigate to the blocks page, click create new block, and select AWS Credentials for the type.
For use in a push work pool, set the region, access key, and access key secret.
Provide any other optional information and create your block.
Navigate to the blocks page and click the "+" at the top to create a new block. Find the Azure Container
Instance Credentials block and click "Add +".
Locate the client ID and tenant ID on your app registration and use the client secret you saved earlier.
Make sure the value of the secret, not the secret ID.
Provide any other optional information and click "Create".
Navigate to the blocks page, click create new block, and select GCP Credentials for the type.
For use in a push work pool, this block must have the contents of the JSON key stored in the
Service Account Info field, as such:
 Provide any other optional information and create your block.
Navigate to the blocks page, click create new block, and select Modal Credentials for the type.
For use in a push work pool, this block must have the token ID and token secret stored in the Token ID and Token
Secret fields, respectively.
Navigate to the blocks page, click create new block, and select Coiled Credentials for the type. Provide the API token from the previous section.
### Create a push work pool
Now navigate to the work pools page.
Click **Create** to configure your push work pool by selecting a push option in the infrastructure type step.
Each step has several optional fields that are detailed in the
[work pools documentation](/v3/deploy/infrastructure-concepts/work-pools/).
Select the block you created under the AWS Credentials field.
This allows Prefect Cloud to securely interact with your ECS cluster.
Fill in the subscription ID and resource group name from the resource group you created.
Add the Azure Container Instance Credentials block you created in the step above.
Each step has several optional fields that are detailed in
[Manage infrastructure with work pools](/v3/deploy/infrastructure-concepts/work-pools/).
Select the block you created under the GCP Credentials field.
This allows Prefect Cloud to securely interact with your GCP project.
Each step has several optional fields that are detailed in the
[work pools documentation](/v3/deploy/infrastructure-concepts/work-pools/).
Select the block you created under the Modal Credentials field.
This allows Prefect Cloud to securely interact with your Modal account.
Each step has several optional fields that are detailed in the
[work pools documentation](/v3/deploy/infrastructure-concepts/work-pools/).
Select the block you created under the Coiled Credentials field.
This allows Prefect Cloud to securely interact with your Coiled account.
Create your pool to be ready to deploy flows to your Push work pool.
## Deployment
You need to configure your [deployment](/v3/how-to-guides/deployment_infra/docker) to send flow runs to your push work pool.
For example, if you create a deployment through the interactive command line experience,
choose the work pool you just created. If you are deploying an existing `prefect.yaml` file, the deployment would contain:
```yaml
work_pool:
name: my-push-pool
```
Deploying your flow to the `my-push-pool` work pool ensures that runs that are ready for execution are
submitted immediately—without the need for a worker to poll for them.
**Serverless infrastructure may require a certain image architecture**
Serverless infrastructure may assume a certain Docker image architecture; for example,
Google Cloud Run will fail to run images built with `linux/arm64` architecture. If using Prefect to build your image,
you can change the image architecture through the `platform` keyword (for example, `platform="linux/amd64"`).
## Putting it all together
With your deployment created, navigate to its detail page and create a new flow run.
You'll see the flow start running without polling the work pool, because Prefect Cloud securely connected
to your serverless infrastructure, created a job, ran the job, and reported on its execution.
## Usage Limits
Push work pool usage is unlimited. However push work pools limit flow runs to 24 hours.
## Next steps
Learn more about [work pools](/v3/deploy/infrastructure-concepts/work-pools/) and [workers](/v3/deploy/infrastructure-concepts/workers/).
Learn about installing dependencies at runtime or baking them into your Docker image in the [Deploy to Docker](/v3/how-to-guides/deployment_infra/docker#automatically-build-a-custom-docker-image-with-a-local-dockerfile) guide.
# How to create deployments
Source: https://docs-3.prefect.io/v3/how-to-guides/deployments/create-deployments
Learn how to create deployments via the CLI, Python, or Terraform.
export const API = ({name, href}) =>
Provide any other optional information and create your block.
Navigate to the blocks page, click create new block, and select Modal Credentials for the type.
For use in a push work pool, this block must have the token ID and token secret stored in the Token ID and Token
Secret fields, respectively.
Navigate to the blocks page, click create new block, and select Coiled Credentials for the type. Provide the API token from the previous section.
### Create a push work pool
Now navigate to the work pools page.
Click **Create** to configure your push work pool by selecting a push option in the infrastructure type step.
Each step has several optional fields that are detailed in the
[work pools documentation](/v3/deploy/infrastructure-concepts/work-pools/).
Select the block you created under the AWS Credentials field.
This allows Prefect Cloud to securely interact with your ECS cluster.
Fill in the subscription ID and resource group name from the resource group you created.
Add the Azure Container Instance Credentials block you created in the step above.
Each step has several optional fields that are detailed in
[Manage infrastructure with work pools](/v3/deploy/infrastructure-concepts/work-pools/).
Select the block you created under the GCP Credentials field.
This allows Prefect Cloud to securely interact with your GCP project.
Each step has several optional fields that are detailed in the
[work pools documentation](/v3/deploy/infrastructure-concepts/work-pools/).
Select the block you created under the Modal Credentials field.
This allows Prefect Cloud to securely interact with your Modal account.
Each step has several optional fields that are detailed in the
[work pools documentation](/v3/deploy/infrastructure-concepts/work-pools/).
Select the block you created under the Coiled Credentials field.
This allows Prefect Cloud to securely interact with your Coiled account.
Create your pool to be ready to deploy flows to your Push work pool.
## Deployment
You need to configure your [deployment](/v3/how-to-guides/deployment_infra/docker) to send flow runs to your push work pool.
For example, if you create a deployment through the interactive command line experience,
choose the work pool you just created. If you are deploying an existing `prefect.yaml` file, the deployment would contain:
```yaml
work_pool:
name: my-push-pool
```
Deploying your flow to the `my-push-pool` work pool ensures that runs that are ready for execution are
submitted immediately—without the need for a worker to poll for them.
**Serverless infrastructure may require a certain image architecture**
Serverless infrastructure may assume a certain Docker image architecture; for example,
Google Cloud Run will fail to run images built with `linux/arm64` architecture. If using Prefect to build your image,
you can change the image architecture through the `platform` keyword (for example, `platform="linux/amd64"`).
## Putting it all together
With your deployment created, navigate to its detail page and create a new flow run.
You'll see the flow start running without polling the work pool, because Prefect Cloud securely connected
to your serverless infrastructure, created a job, ran the job, and reported on its execution.
## Usage Limits
Push work pool usage is unlimited. However push work pools limit flow runs to 24 hours.
## Next steps
Learn more about [work pools](/v3/deploy/infrastructure-concepts/work-pools/) and [workers](/v3/deploy/infrastructure-concepts/workers/).
Learn about installing dependencies at runtime or baking them into your Docker image in the [Deploy to Docker](/v3/how-to-guides/deployment_infra/docker#automatically-build-a-custom-docker-image-with-a-local-dockerfile) guide.
# How to create deployments
Source: https://docs-3.prefect.io/v3/how-to-guides/deployments/create-deployments
Learn how to create deployments via the CLI, Python, or Terraform.
export const API = ({name, href}) => You can manage {name} with the Prefect API.
;
export const deployments = {
cli: "https://docs.prefect.io/v3/api-ref/cli/deployment",
api: "https://app.prefect.cloud/api/docs#tag/Deployments",
tf: "https://registry.terraform.io/providers/PrefectHQ/prefect/latest/docs/resources/deployment"
};
export const TF = ({name, href}) => You can manage {name} with the Terraform provider for Prefect.
;
There are several ways to create deployments, each catering to different organizational needs.
## Create deployments with static infrastructure
### Create a deployment with `serve`
This is the simplest way to get started with deployments:
```python
from prefect import flow
@flow
def my_flow():
print("Hello, Prefect!")
if __name__ == "__main__":
my_flow.serve(name="my-first-deployment", cron="* * * * *")
```
The `serve` method creates a deployment from your flow and immediately begins listening for scheduled runs to execute.
Providing `cron="* * * * *"` to `.serve` associates a schedule with your flow so it will run every minute of every day.
## Create deployments with dynamic infrastructure
For more configuration, you can create a deployment that uses a work pool.
Reasons to create a work-pool based deployment include:
* Wanting to run your flow on dynamically provisioned infrastructure
* Needing more control over the execution environment on a per-flow run basis
* Creating an infrastructure template to use across deployments
Work pools are popular with data platform teams because they allow you to manage infrastructure configuration across an organization.
Prefect offers two options for creating deployments with [dynamic infrastructure](/v3/deploy/infrastructure-concepts/work-pools):
* [Deployments created with the Python SDK](/v3/deploy/infrastructure-concepts/deploy-via-python)
* [Deployments created with a YAML file](/v3/deploy/infrastructure-concepts/prefect-yaml)
### Create a deployment with `deploy`
To define a deployment with a Python script, use the `flow.deploy` method.
Here's an example of a deployment that uses a work pool and bakes the code into a Docker image.
```python
from prefect import flow
@flow
def my_flow():
print("Hello, Prefect!")
if __name__ == "__main__":
my_flow.deploy(
name="my-second-deployment",
work_pool_name="my-work-pool",
image="my-image",
push=False,
cron="* * * * *",
)
```
To learn more about the `deploy` method, see [Deploy flows with Python](/v3/deploy/infrastructure-concepts/deploy-via-python).
### Create a deployment with a YAML file
If you'd rather take a declarative approach to defining a deployment through a YAML file, use a [`prefect.yaml` file](/v3/deploy/infrastructure-concepts/prefect-yaml).
Prefect provides an interactive CLI that walks you through creating a `prefect.yaml` file:
```bash
prefect deploy
```
The result is a `prefect.yaml` file for deployment creation.
The file contains `build`, `push`, and `pull` steps for building a Docker image, pushing code to a Docker registry, and pulling code at runtime.
Learn more about creating deployments with a YAML file in [Define deployments with YAML](/v3/deploy/infrastructure-concepts/prefect-yaml).
Prefect also provides [CI/CD options](/v3/deploy/infrastructure-concepts/deploy-ci-cd) for automatically creating YAML-based deployments.
### Create a deployment with Terraform
### Create a deployment with the API
**Choosing between deployment methods**
For many cases, `serve` is sufficient for scheduling and orchestration.
The work pool / worker paradigm via `.deploy()` or `prefect deploy` can be great for complex infrastructure requirements and isolated flow run environments.
You are not locked into one method and can combine approaches as needed.
# How to create schedules
Source: https://docs-3.prefect.io/v3/how-to-guides/deployments/create-schedules
Learn how to create schedules for your deployments.
export const deployments = {
cli: "https://docs.prefect.io/v3/api-ref/cli/deployment",
api: "https://app.prefect.cloud/api/docs#tag/Deployments",
tf: "https://registry.terraform.io/providers/PrefectHQ/prefect/latest/docs/resources/deployment"
};
export const TF = ({name, href}) => You can manage {name} with the Terraform provider for Prefect.
;
There are several ways to create a schedule for a deployment:
* Through the Prefect UI
* With the `cron`, `interval`, or `rrule` parameters if building your deployment with the
[`serve` method](/v3/how-to-guides/deployment_infra/run-flows-in-local-processes#serve-a-flow) of the `Flow` object or
[the `serve` utility](/v3/how-to-guides/deployment_infra/run-flows-in-local-processes#serve-multiple-flows-at-once) for managing multiple flows simultaneously
* If using [worker-based deployments](/v3/deploy/infrastructure-concepts/workers/)
* When you define a deployment with `flow.serve` or `flow.deploy`
* Through the interactive `prefect deploy` command
* With the `deployments` -> `schedules` section of the `prefect.yaml` file
### Create schedules in the UI
You can add schedules in the **Schedules** section of a **Deployment** page in the UI.
To add a schedule select the **+ Schedule** button.
Choose **Interval** or **Cron** to create a schedule.
**What about RRule?**
The UI does not support creating RRule schedules.
However, the UI will display RRule schedules that you've created through the command line.
The new schedule appears on the **Deployment** page where you created it.
New scheduled flow runs are visible in the **Upcoming** tab of the **Deployment** page.
To edit an existing schedule, select **Edit** from the three-dot menu next to a schedule on a **Deployment** page.
### Create schedules in Python
Specify the schedule when you create a deployment in a Python file with `flow.serve()`, `serve`, `flow.deploy()`, or `deploy`.
Just add the keyword argument `cron`, `interval`, or `rrule`.
| Argument | Description |
| ----------- | ------------------------------------------------------------------------------------------------------------------------------------------------------------------------------------------------------------------------------------------------------ |
| `interval` | An interval on which to execute the deployment. Accepts a number or a timedelta object to create a single schedule. If a number is given, it is interpreted as seconds. Also accepts an iterable of numbers or timedelta to create multiple schedules. |
| `cron` | A cron schedule string of when to execute runs of this deployment. Also accepts an iterable of cron schedule strings to create multiple schedules. |
| `rrule` | An rrule schedule string of when to execute runs of this deployment. Also accepts an iterable of rrule schedule strings to create multiple schedules. |
| `schedules` | A list of schedule objects defining when to execute runs of this deployment. Used to define multiple schedules or additional scheduling options such as `timezone`. |
| `schedule` | A schedule object defining when to execute runs of this deployment. Used to define additional scheduling options such as `timezone`. |
| `slug` | An optional unique identifier for the schedule containing only lowercase letters, numbers, and hyphens. If not provided for a given schedule, the schedule will be unnamed. |
The `serve` method below will create a deployment of `my_flow` with a cron schedule that creates runs every minute of every day:
```python
from prefect import flow
from myproject.flows import my_flow
my_flow.serve(name="flowing", cron="* * * * *")
```
If using deployments with [dynamic infrastructure](/v3/deploy/infrastructure-concepts/work-pools), the `deploy` method has the same schedule-based parameters.
When `my_flow` is served with this interval schedule, it will run every 10 minutes beginning at midnight on January, 1, 2026 in the `America/Chicago` timezone:
```python prefect >= 3.1.16
from datetime import timedelta, datetime
from prefect.schedules import Interval
from myproject.flows import my_flow
my_flow.serve(
name="flowing",
schedule=Interval(
timedelta(minutes=10),
anchor_date=datetime(2026, 1, 1, 0, 0),
timezone="America/Chicago"
)
)
```
```python prefect < 3.1.16
from datetime import timedelta, datetime
from prefect.client.schemas.schedules import IntervalSchedule
from myproject.flows import my_flow
my_flow.serve(
name="flowing",
schedules=[
IntervalSchedule(
interval=timedelta(minutes=10),
anchor_date=datetime(2026, 1, 1, 0, 0),
timezone="America/Chicago"
)
]
)
```
Keyword arguments for schedules are also accepted by the `to_deployment` method that converts a flow to a deployment.
### Create schedules with the CLI
You can create a schedule through the interactive `prefect deploy` command. You will be prompted to choose which type of schedule to create.
You can also create schedules for existing deployments using the `prefect deployment schedule create` command. This command allows you to specify schedule details directly without going through the interactive flow.
By default `prefect deployment schedule create` adds *additional* schedules to your deployment.
Use the `--replace` flag to remove old schedules and update with the new one.
**Examples:**
Create a cron schedule that runs every day at 9 AM:
```bash
prefect deployment schedule create my-deployment --cron "0 9 * * *"
```
Create an interval schedule that runs every 30 minutes:
```bash
prefect deployment schedule create my-deployment --interval 1800
```
Create a schedule with a specific timezone:
```bash
prefect deployment schedule create my-deployment --cron "0 9 * * *" --timezone "America/New_York"
```
Replace all existing schedules with a new one:
```bash
prefect deployment schedule create my-deployment --cron "0 9 * * *" --replace
```
### Create schedules in YAML
If you save the `prefect.yaml` file from the `prefect deploy` command, you will see it has a `schedules` section for your deployment.
Alternatively, you can create a `prefect.yaml` file from a recipe or from scratch and add a `schedules` section to it.
```yaml
deployments:
...
schedules:
- cron: "0 0 * * *"
slug: "chicago-schedule"
timezone: "America/Chicago"
active: false
- cron: "0 12 * * *"
slug: "new-york-schedule"
timezone: "America/New_York"
active: true
- cron: "0 18 * * *"
slug: "london-schedule"
timezone: "Europe/London"
active: true
```
### Create schedules with Terraform
## Associate parameters with schedules
Using any of the above methods to create a schedule, you can bind parameters to your schedules.
For example, say you have a flow that sends an email.
Every day at 8:00 AM you want to send a message to one recipient, and at 8:05 AM you want to send a different message to another recipient.
Instead of creating independent deployments with different default parameters and schedules, you can bind parameters to the schedules themselves:
### Schedule parameters in Python
Whether using `.serve` or `.deploy`, you can pass `parameters` to your deployment `schedules`:
{/* pmd-metadata: notest */}
```python send_email_flow.py {13,17-20}
from prefect import flow
from prefect.schedules import Cron
@flow
def send_email(to: str, message: str = "Stop goofing off!"):
print(f"Sending email to {to} with message: {message}")
send_email.serve(
name="my-flow",
schedules=[
Cron(
"0 8 * * *",
slug="jim-email",
parameters={"to": "jim.halpert@dundermifflin.com"}
),
Cron(
"5 8 * * *",
slug="dwight-email",
parameters={
"to": "dwight.schrute@dundermifflin.com",
"message": "Stop goofing off! You're assistant _to_ the regional manager!"
}
)
]
)
```
Note that our flow has a default `message` parameter, but we've overridden it for the second schedule.
This deployment will schedule runs that:
* Send "Stop goofing off!" to Jim at 8:00 AM every day
* Send "Stop goofing off! You're assistant *to* the regional manager!" to Dwight at 8:05 AM every day
Use the same pattern to bind parameters to any schedule type in `prefect.schedules`.
You can provide one schedule via the `schedule` kwarg or multiple schedules via `schedules`.
### Schedule parameters in `prefect.yaml`
You can also provide parameters to schedules in your `prefect.yaml` file.
```yaml prefect.yaml {4-11}
deployments:
name: send-email
entrypoint: send_email_flow.py:send_email
schedules:
- cron: "0 8 * * *"
slug: "jim-email"
parameters:
to: "jim.halpert@dundermifflin.com"
- cron: "5 8 * * *"
slug: "dwight-email"
parameters:
to: "dwight.schrute@dundermifflin.com"
message: "Stop goofing off! You're assistant _to_ the regional manager!"
```
## See also
* [Manage deployment schedules](/v3/how-to-guides/deployments/manage-schedules) - Learn how to pause and resume deployment schedules
* [Schedules concept](/v3/concepts/schedules) - Deep dive into schedule types and options
* [Deployments](/v3/concepts/deployments) - Learn more about deployments
# How to override job configuration for specific deployments
Source: https://docs-3.prefect.io/v3/how-to-guides/deployments/customize-job-variables
Override job variables on a deployment to set environment variables, specify a Docker image, allocate resources, and more.
export const deployments = {
cli: "https://docs.prefect.io/v3/api-ref/cli/deployment",
api: "https://app.prefect.cloud/api/docs#tag/Deployments",
tf: "https://registry.terraform.io/providers/PrefectHQ/prefect/latest/docs/resources/deployment"
};
export const TF = ({name, href}) => You can manage {name} with the Terraform provider for Prefect.
;
There are two ways to deploy flows to work pools: with a [`prefect.yaml` file](/v3/deploy/infrastructure-concepts/prefect-yaml) or using the [Python `deploy` method](/v3/deploy/infrastructure-concepts/deploy-via-python).
In both cases, you can add or override job variables to the work pool's defaults for a given deployment.
You can override both a work pool and a deployment when a flow run is triggered.
This guide explores common patterns for overriding job variables in
both deployment methods.
## Job variables
Job variables are infrastructure-related values that are configurable on a work pool.
You can override job variables on a per-deployment or
per-flow run basis. This allows you to dynamically change infrastructure from the work pool's defaults.
For example, when you create or edit a work pool, you can specify a set of environment variables to set in the
runtime environment of the flow run.
You could set the following value in the `env` field of any work pool:
```json
{
"EXECUTION_ENV": "staging",
"MY_NOT_SO_SECRET_CONFIG": "plumbus",
}
```
Rather than hardcoding these values into your work pool in the UI (and making them available to all
deployments associated with that work pool), you can override these values for a specific deployment.
## Override job variables on a deployment
Here's an example repo structure:
```
» tree
.
|── README.md
|── requirements.txt
|── demo_project
| |── daily_flow.py
```
With a `demo_flow.py` file like:
```python
import os
from prefect import flow, task
@task
def do_something_important(not_so_secret_value: str) -> None:
print(f"Doing something important with {not_so_secret_value}!")
@flow(log_prints=True)
def some_work():
environment = os.environ.get("EXECUTION_ENVIRONMENT", "local")
print(f"Coming to you live from {environment}!")
not_so_secret_value = os.environ.get("MY_NOT_SO_SECRET_CONFIG")
if not_so_secret_value is None:
raise ValueError("You forgot to set MY_NOT_SO_SECRET_CONFIG!")
do_something_important(not_so_secret_value)
```
### Use a `prefect.yaml` file
Imagine you have the following deployment definition in a `prefect.yaml` file at the
root of your repository:
```yaml
deployments:
- name: demo-deployment
entrypoint: demo_project/demo_flow.py:some_work
work_pool:
name: local
schedule: null
```
While not the focus of this guide, this deployment definition uses a default "global" `pull` step,
because one is not explicitly defined on the deployment. For reference, here's what that would look like at
the top of the `prefect.yaml` file:
```yaml
pull:
- prefect.deployments.steps.git_clone: &clone_repo
repository: https://github.com/some-user/prefect-monorepo
branch: main
```
#### Hard-coded job variables
To provide the `EXECUTION_ENVIRONMENT` and `MY_NOT_SO_SECRET_CONFIG` environment variables to this deployment,
you can add a `job_variables` section to your deployment definition in the `prefect.yaml` file:
```yaml
deployments:
- name: demo-deployment
entrypoint: demo_project/demo_flow.py:some_work
work_pool:
name: local
job_variables:
env:
EXECUTION_ENVIRONMENT: staging
MY_NOT_SO_SECRET_CONFIG: plumbus
schedule: null
```
Then run `prefect deploy -n demo-deployment` to deploy the flow with these job variables.
You should see the job variables in the `Configuration` tab of the deployment in the UI:
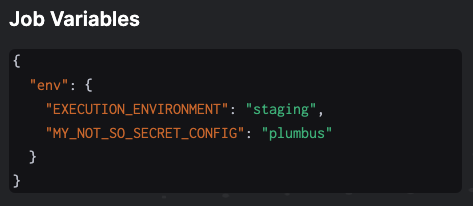 #### Use existing environment variables
To use environment variables that are already set in your local environment, you can template
these in the `prefect.yaml` file using the `{{ $ENV_VAR_NAME }}` syntax:
```yaml
deployments:
- name: demo-deployment
entrypoint: demo_project/demo_flow.py:some_work
work_pool:
name: local
job_variables:
env:
EXECUTION_ENVIRONMENT: "{{ $EXECUTION_ENVIRONMENT }}"
MY_NOT_SO_SECRET_CONFIG: "{{ $MY_NOT_SO_SECRET_CONFIG }}"
schedule: null
```
This assumes that the machine where `prefect deploy` is run would have these environment variables set.
```bash
export EXECUTION_ENVIRONMENT=staging
export MY_NOT_SO_SECRET_CONFIG=plumbus
```
Run `prefect deploy -n demo-deployment` to deploy the flow with these job variables,
and you should see them in the UI under the `Configuration` tab.
### Use the `.deploy()` method
If you're using the `.deploy()` method to deploy your flow, the process is similar. But instead of\
`prefect.yaml` defining the job variables, you can pass them as a dictionary to the `job_variables` argument
of the `.deploy()` method.
Add the following block to your `demo_project/daily_flow.py` file from the setup section:
```python
if __name__ == "__main__":
flow.from_source(
source="https://github.com/zzstoatzz/prefect-monorepo.git",
entrypoint="src/demo_project/demo_flow.py:some_work"
).deploy(
name="demo-deployment",
work_pool_name="local",
job_variables={
"env": {
"EXECUTION_ENVIRONMENT": os.environ.get("EXECUTION_ENVIRONMENT", "local"),
"MY_NOT_SO_SECRET_CONFIG": os.environ.get("MY_NOT_SO_SECRET_CONFIG")
}
}
)
```
The above example works assuming a couple things:
* the machine where this script is run would have these environment variables set.
```bash
export EXECUTION_ENVIRONMENT=staging
export MY_NOT_SO_SECRET_CONFIG=plumbus
```
* `demo_project/daily_flow.py` *already exists* in the repository at the specified path
Run the script to deploy the flow with the specified job variables.
```bash
python demo_project/daily_flow.py
```
The job variables should be visible in the UI under the `Configuration` tab.
## Override job variables on a flow run
When running flows, you can pass in job variables that override any values set on the work pool or deployment.
Any interface that runs deployments can accept job variables.
### Use the custom run form in the UI
Custom runs allow you to pass in a dictionary of variables into your flow run infrastructure. Using the same
`env` example from above, you could do the following:
#### Use existing environment variables
To use environment variables that are already set in your local environment, you can template
these in the `prefect.yaml` file using the `{{ $ENV_VAR_NAME }}` syntax:
```yaml
deployments:
- name: demo-deployment
entrypoint: demo_project/demo_flow.py:some_work
work_pool:
name: local
job_variables:
env:
EXECUTION_ENVIRONMENT: "{{ $EXECUTION_ENVIRONMENT }}"
MY_NOT_SO_SECRET_CONFIG: "{{ $MY_NOT_SO_SECRET_CONFIG }}"
schedule: null
```
This assumes that the machine where `prefect deploy` is run would have these environment variables set.
```bash
export EXECUTION_ENVIRONMENT=staging
export MY_NOT_SO_SECRET_CONFIG=plumbus
```
Run `prefect deploy -n demo-deployment` to deploy the flow with these job variables,
and you should see them in the UI under the `Configuration` tab.
### Use the `.deploy()` method
If you're using the `.deploy()` method to deploy your flow, the process is similar. But instead of\
`prefect.yaml` defining the job variables, you can pass them as a dictionary to the `job_variables` argument
of the `.deploy()` method.
Add the following block to your `demo_project/daily_flow.py` file from the setup section:
```python
if __name__ == "__main__":
flow.from_source(
source="https://github.com/zzstoatzz/prefect-monorepo.git",
entrypoint="src/demo_project/demo_flow.py:some_work"
).deploy(
name="demo-deployment",
work_pool_name="local",
job_variables={
"env": {
"EXECUTION_ENVIRONMENT": os.environ.get("EXECUTION_ENVIRONMENT", "local"),
"MY_NOT_SO_SECRET_CONFIG": os.environ.get("MY_NOT_SO_SECRET_CONFIG")
}
}
)
```
The above example works assuming a couple things:
* the machine where this script is run would have these environment variables set.
```bash
export EXECUTION_ENVIRONMENT=staging
export MY_NOT_SO_SECRET_CONFIG=plumbus
```
* `demo_project/daily_flow.py` *already exists* in the repository at the specified path
Run the script to deploy the flow with the specified job variables.
```bash
python demo_project/daily_flow.py
```
The job variables should be visible in the UI under the `Configuration` tab.
## Override job variables on a flow run
When running flows, you can pass in job variables that override any values set on the work pool or deployment.
Any interface that runs deployments can accept job variables.
### Use the custom run form in the UI
Custom runs allow you to pass in a dictionary of variables into your flow run infrastructure. Using the same
`env` example from above, you could do the following:
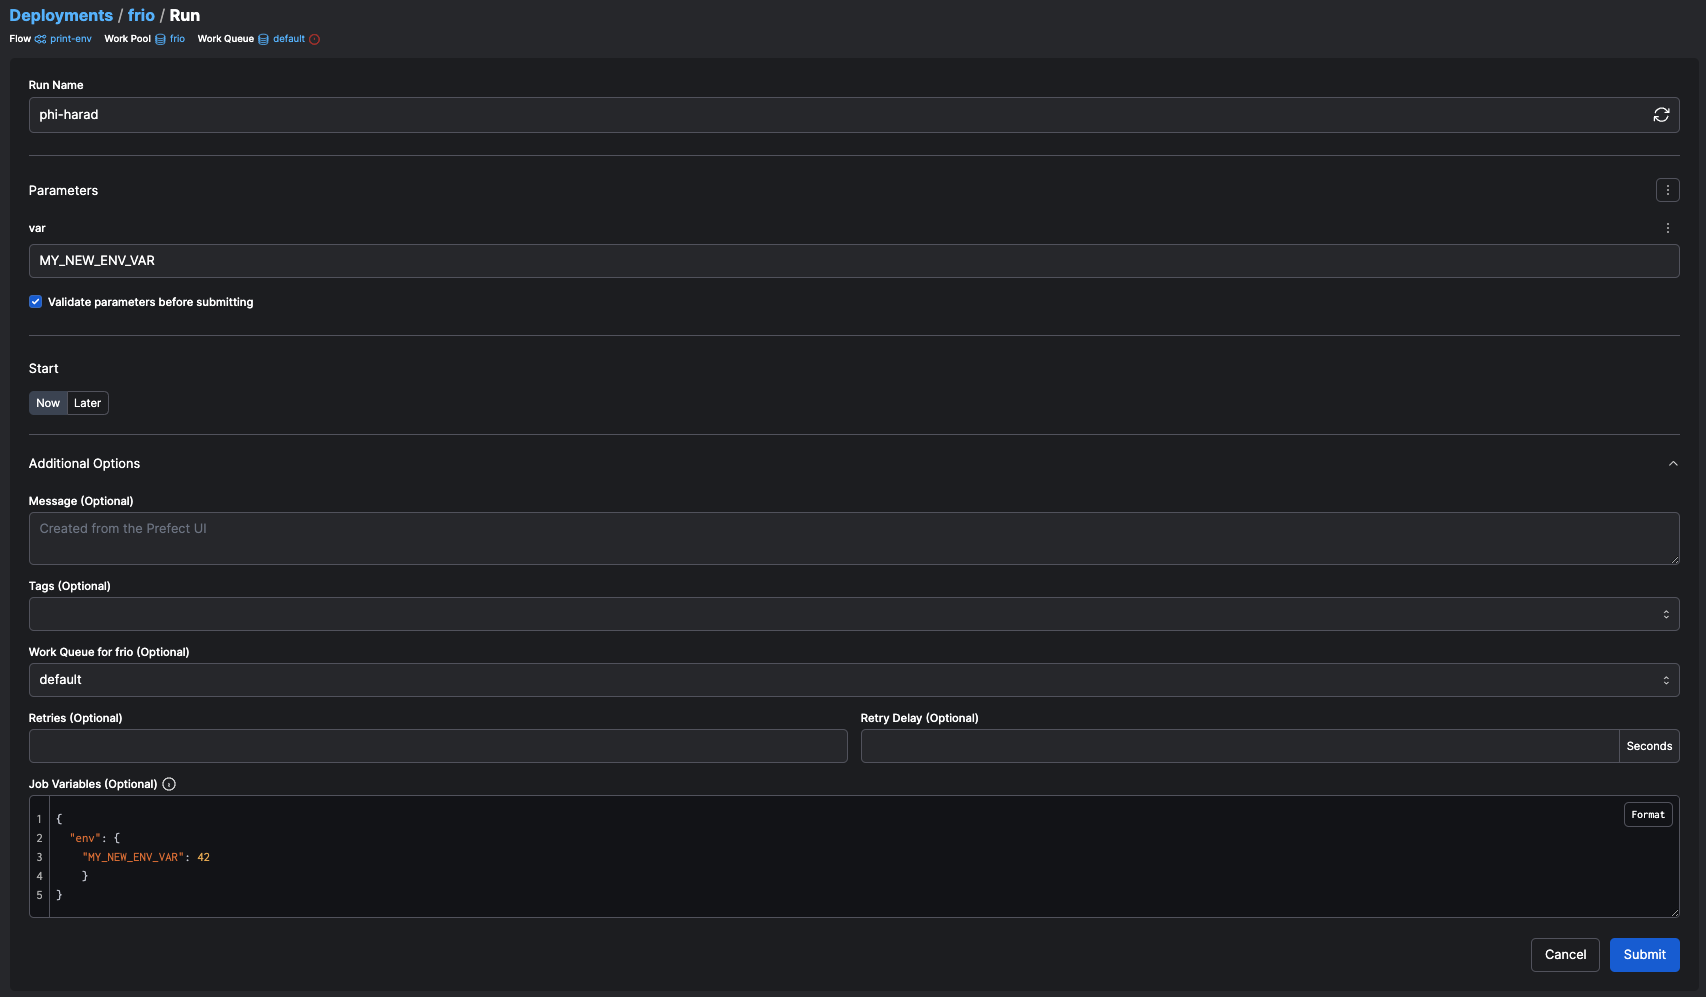 ### Use the CLI
Similarly, runs kicked off through the CLI accept job variables with the `-jv` or `--job-variable` flag.
```bash
prefect deployment run \
--id "fb8e3073-c449-474b-b993-851fe5e80e53" \
--job-variable MY_NEW_ENV_VAR=42 \
--job-variable HELLO=THERE
```
### Use job variables in Terraform
### Use job variables in automations
Additionally, runs kicked off through automation actions can use job variables, including ones rendered from Jinja
templates.
### Use the CLI
Similarly, runs kicked off through the CLI accept job variables with the `-jv` or `--job-variable` flag.
```bash
prefect deployment run \
--id "fb8e3073-c449-474b-b993-851fe5e80e53" \
--job-variable MY_NEW_ENV_VAR=42 \
--job-variable HELLO=THERE
```
### Use job variables in Terraform
### Use job variables in automations
Additionally, runs kicked off through automation actions can use job variables, including ones rendered from Jinja
templates.
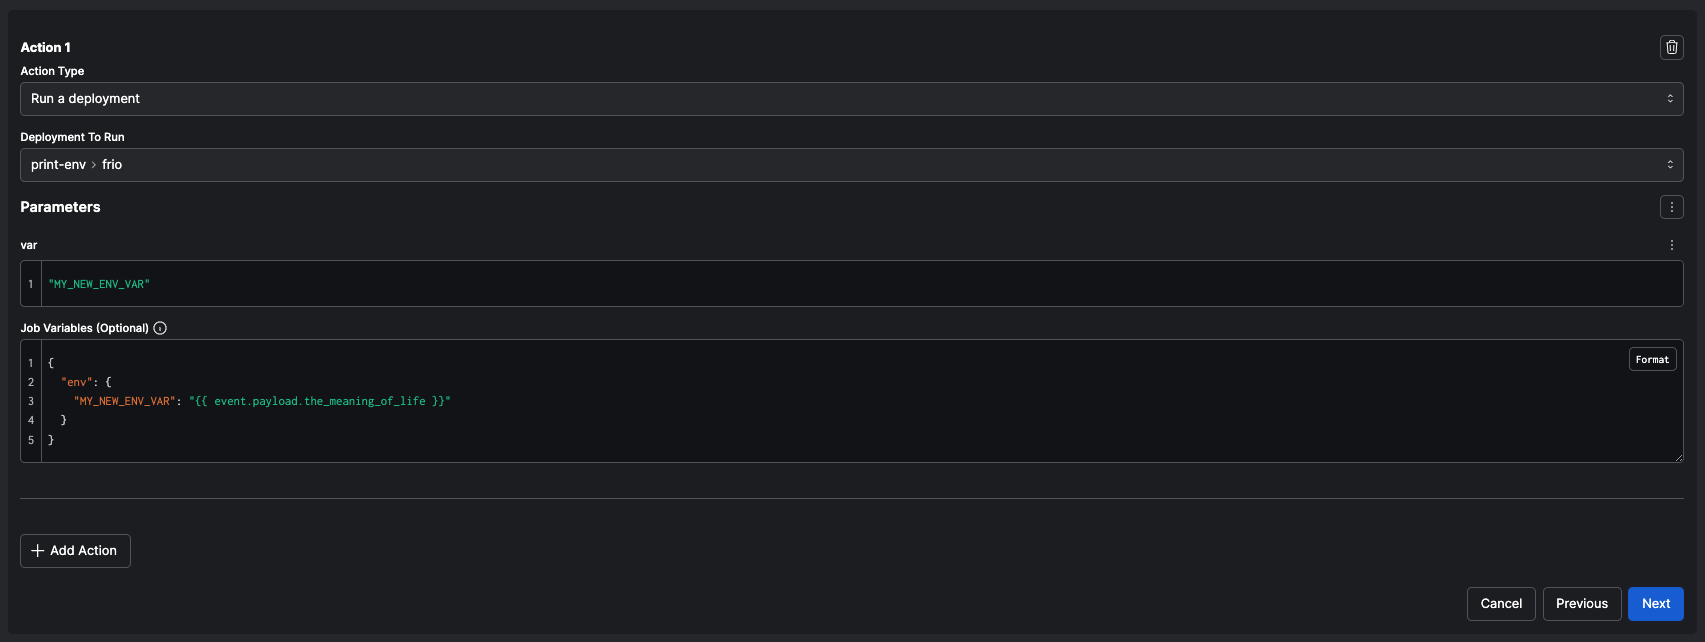 # How to deploy flows with Python
Source: https://docs-3.prefect.io/v3/how-to-guides/deployments/deploy-via-python
Learn how to use the Python SDK to deploy flows to run in work pools.
As an alternative to defining deployments in a `prefect.yaml` file, you can use the Python SDK to create deployments with [dynamic infrastructure](/v3/concepts/work-pools).
This can be more flexible if you have to programmatically gather configuration at deployment time.
## When to use `flow.deploy` instead of `flow.serve`
The `flow.serve` method is one [simple way to create a deployment with the Python SDK](/v3/how-to-guides/deployment_infra/run-flows-in-local-processes#serve-a-flow). It's ideal when you have readily available, static infrastructure for your flow runs and you don't need the dynamic dispatch of infrastructure per flow run offered by work pools.
However, you might want to consider using `flow.deploy` to associate your flow with a work pool that enables dynamic dispatch of infrastructure per flow run for the following reasons:
1. **Cost optimization:** Dynamic infrastructure can help reduce costs by scaling resources up or down based on demand.
2. **Resource scarcity:** If you have limited persistent infrastructure, dynamic provisioning can help manage resource allocation more efficiently.
3. **Varying workloads:** For workflows with inconsistent resource needs, dynamic infrastructure can adapt to changing requirements.
4. **Cloud-native deployments:** When working with cloud providers that offer serverless or auto-scaling options.
Let's explore how to create a deployment using the Python SDK and leverage dynamic infrastructure through work pools.
## Prerequisites
Before deploying your flow using `flow.deploy`, ensure you have the following:
1. **A running Prefect server or Prefect Cloud workspace:** You can either run a Prefect server locally or use a Prefect Cloud workspace.
To start a local server, run `prefect server start`. To use Prefect Cloud, sign up for an account at [app.prefect.cloud](https://app.prefect.cloud)
and follow the [Connect to Prefect Cloud](/v3/manage/cloud/connect-to-cloud/) guide.
2. **A Prefect flow:** You should have a flow defined in your Python script. If you haven't created a flow yet, refer to the
[Write Workflows](/v3/how-to-guides/workflows/write-and-run) guide.
3. **A work pool:** You need a work pool to manage the infrastructure for running your flow. If you haven't created a work pool, you can do so through
the Prefect UI or using the Prefect CLI. For more information, see the [Work Pools](/v3/concepts/work-pools/) guide.
For examples in this guide, we'll use a Docker work pool created by running:
```bash
prefect work-pool create --type docker my-work-pool
```
4. **Docker:** Docker will be used to build and store the image containing your flow code. You can download and install
Docker from the [official Docker website](https://www.docker.com/get-started/). If you don't want to use Docker, you
can see other options in the [Use remote code storage](#use-remote-code-storage) section.
5. **(Optional) A Docker registry:** While not strictly necessary for local development, having an account with a Docker registry (such as
Docker Hub) is recommended for storing and sharing your Docker images.
With these prerequisites in place, you're ready to deploy your flow using `flow.deploy`.
## Deploy a flow with `flow.deploy`
To deploy a flow using `flow.deploy` and Docker, follow these steps:
Ensure your flow is defined in a Python file. Let's use a simple example:
```python example.py
from prefect import flow
@flow(log_prints=True)
def my_flow(name: str = "world"):
print(f"Hello, {name}!")
```
Add a call to `flow.deploy` to tell Prefect how to deploy your flow.
```python example.py
from prefect import flow
@flow(log_prints=True)
def my_flow(name: str = "world"):
print(f"Hello, {name}!")
if __name__ == "__main__":
my_flow.deploy(
name="my-deployment",
work_pool_name="my-work-pool",
image="my-registry.com/my-docker-image:my-tag",
push=False # switch to True to push to your image registry
)
```
Run your script to deploy your flow.
```bash
python example.py
```
Running this script will:
1. Build a Docker image containing your flow code and dependencies.
2. Create a deployment associated with the specified work pool and image.
Building a Docker image for our flow allows us to have a consistent environment for our flow to run in. Workers for our work pool will use the image to run our flow.
In this example, we set `push=False` to skip pushing the image to a registry. This is useful for local development, and you can push your image to a registry such as Docker Hub in a production environment.
**Where's the Dockerfile?**
In the above example, we didn't specify a Dockerfile. By default, Prefect will generate a Dockerfile for us that copies the flow code into an image and installs
any additional dependencies.
If you want to write and use your own Dockerfile, you can do so by passing a `dockerfile` parameter to `flow.deploy`.
### Trigger a run
Now that we have our flow deployed, we can trigger a run via either the Prefect CLI or UI.
First, we need to start a worker to run our flow:
```bash
prefect worker start --pool my-work-pool
```
Then, we can trigger a run of our flow using the Prefect CLI:
```bash
prefect deployment run 'my-flow/my-deployment'
```
After a few seconds, you should see logs from your worker showing that the flow run has started and see the state update in the UI.
## Deploy with a schedule
To deploy a flow with a schedule, you can use one of the following options:
* `interval`
Defines the interval at which the flow should run. Accepts an integer or float value representing the number of seconds between runs or a `datetime.timedelta` object.
```python interval.py
from datetime import timedelta
from prefect import flow
@flow(log_prints=True)
def my_flow(name: str = "world"):
print(f"Hello, {name}!")
if __name__ == "__main__":
my_flow.deploy(
name="my-deployment",
work_pool_name="my-work-pool",
image="my-registry.com/my-docker-image:my-tag",
push=False,
# Run once a minute
interval=timedelta(minutes=1)
)
```
* `cron`
Defines when a flow should run using a cron string.
```python cron.py
from prefect import flow
@flow(log_prints=True)
def my_flow(name: str = "world"):
print(f"Hello, {name}!")
if __name__ == "__main__":
my_flow.deploy(
name="my-deployment",
work_pool_name="my-work-pool",
image="my-registry.com/my-docker-image:my-tag",
push=False,
# Run once a day at midnight
cron="0 0 * * *"
)
```
* `rrule`
Defines a complex schedule using an `rrule` string.
```python rrule.py
from prefect import flow
@flow(log_prints=True)
def my_flow(name: str = "world"):
print(f"Hello, {name}!")
if __name__ == "__main__":
my_flow.deploy(
name="my-deployment",
work_pool_name="my-work-pool",
image="my-registry.com/my-docker-image:my-tag",
push=False,
# Run every weekday at 9 AM
rrule="FREQ=WEEKLY;BYDAY=MO,TU,WE,TH,FR;BYHOUR=9;BYMINUTE=0"
)
```
* `schedules`
Defines multiple schedules for a deployment. This option provides flexibility for:
* Setting up various recurring schedules
* Implementing complex scheduling logic
* Applying timezone offsets to schedules
```python schedules.py
from datetime import datetime, timedelta
from prefect import flow
from prefect.schedules import Interval
@flow(log_prints=True)
def my_flow(name: str = "world"):
print(f"Hello, {name}!")
if __name__ == "__main__":
my_flow.deploy(
name="my-deployment",
work_pool_name="my-work-pool",
image="my-registry.com/my-docker-image:my-tag",
push=False,
# Run every 10 minutes starting from January 1, 2023
# at 00:00 Central Time
schedules=[
Interval(
timedelta(minutes=10),
anchor_date=datetime(2023, 1, 1, 0, 0),
timezone="America/Chicago"
)
]
)
```
Learn more about schedules [here](/v3/how-to-guides/deployments/create-schedules).
## Use remote code storage
In addition to storing your code in a Docker image, Prefect also supports deploying your code to remote storage. This approach allows you to
store your flow code in a remote location, such as a Git repository or cloud storage service.
Using remote storage for your code has several advantages:
1. Faster iterations: You can update your flow code without rebuilding Docker images.
2. Reduced storage requirements: You don't need to store large Docker images for each code version.
3. Flexibility: You can use different storage backends based on your needs and infrastructure.
Using an existing remote Git repository like GitHub, GitLab, or Bitbucket works really well as remote code storage because:
1. Your code is already there.
2. You can deploy to multiple environments via branches and tags.
3. You can roll back to previous versions of your flows.
To deploy using remote storage, you'll need to specify where your code is stored by using `flow.from_source` to first load your flow code from a remote location.
Here's an example of loading a flow from a Git repository and deploying it:
```python git-deploy.py
from prefect import flow
if __name__ == "__main__":
flow.from_source(
source="https://github.com/username/repository.git",
entrypoint="path/to/your/flow.py:your_flow_function"
).deploy(
name="my-deployment",
work_pool_name="my-work-pool",
)
```
The `source` parameter can accept a variety of remote storage options including:
* Git repositories
* S3 buckets (using the `s3://` scheme)
* Google Cloud Storage buckets (using the `gs://` scheme)
* Azure Blob Storage (using the `az://` scheme)
The `entrypoint` parameter is the path to the flow function within your repository combined with the name of the flow function.
Learn more about remote code storage [here](/v3/deploy/infrastructure-concepts/store-flow-code/).
## Set default parameters
You can set default parameters for a deployment using the `parameters` keyword argument in `flow.deploy`.
```python default-parameters.py
from prefect import flow
@flow
def my_flow(name: str = "world"):
print(f"Hello, {name}!")
if __name__ == "__main__":
my_flow.deploy(
name="my-deployment",
work_pool_name="my-work-pool",
# Will print "Hello, Marvin!" by default instead of "Hello, world!"
parameters={"name": "Marvin"},
image="my-registry.com/my-docker-image:my-tag",
push=False,
)
```
Note these parameters can still be overridden on a per-deployment basis.
## Set job variables
You can set default job variables for a deployment using the `job_variables` keyword argument in `flow.deploy`.
The job variables provided will override the values set on the work pool.
```python job-variables.py
import os
from prefect import flow
@flow
def my_flow():
name = os.getenv("NAME", "world")
print(f"Hello, {name}!")
if __name__ == "__main__":
my_flow.deploy(
name="my-deployment",
work_pool_name="my-work-pool",
# Will print "Hello, Marvin!" by default instead of "Hello, world!"
job_variables={"env": {"NAME": "Marvin"}},
image="my-registry.com/my-docker-image:my-tag",
push=False,
)
```
Job variables can be used to customize environment variables, resources limits, and other infrastructure options, allowing fine-grained control over your infrastructure on a per-deployment or per-flow-run basis.
Any variable defined in the base job template of the associated work pool can be overridden by a job variable.
You can learn more about job variables [here](/v3/how-to-guides/deployments/customize-job-variables).
## Deploy multiple flows
To deploy multiple flows at once, use the `deploy` function.
```python multi-deploy.py
from prefect import flow, deploy
@flow
def my_flow_1():
print("I'm number one!")
@flow
def my_flow_2():
print("Always second...")
if __name__ == "__main__":
deploy(
# Use the `to_deployment` method to specify configuration
#specific to each deployment
my_flow_1.to_deployment("my-deployment-1"),
my_flow_2.to_deployment("my-deployment-2"),
# Specify shared configuration for both deployments
image="my-registry.com/my-docker-image:my-tag",
push=False,
work_pool_name="my-work-pool",
)
```
When we run the above script, it will build a single Docker image for both deployments.
This approach offers the following benefits:
* Saves time and resources by avoiding redundant image builds.
* Simplifies management by maintaining a single image for multiple flows.
## Further reading
* [Work Pools](/v3/concepts/work-pools/)
* [Store Flow Code](/v3/deploy/infrastructure-concepts/store-flow-code/)
* [Customize Infrastructure](/v3/how-to-guides/deployments/customize-job-variables)
* [Schedules](/v3/how-to-guides/deployments/create-schedules)
* [Write Workflows](/v3/how-to-guides/workflows/write-and-run)
# Manage Deployment schedules
Source: https://docs-3.prefect.io/v3/how-to-guides/deployments/manage-schedules
Learn how to pause and resume deployment schedules using the Prefect CLI.
You can pause and resume deployment schedules individually or in bulk.
This can be useful for maintenance windows, migration scenarios, or organizational changes.
## Prerequisites
To manage deployment schedules, you need:
* A Prefect server or [Prefect Cloud](/v3/get-started/quickstart) workspace
* One or more [deployments](/v3/how-to-guides/deployments/create-deployments) with [schedules](/v3/how-to-guides/deployments/create-schedules)
* [Prefect installed](/v3/get-started/install)
## Manage specific schedules
To pause or resume individual deployment schedules, you need the deployment name and schedule ID.
### List schedules for a deployment
First, list the schedules to get the schedule ID:
```bash
prefect deployment schedule ls my-flow/my-deployment
```
### Pause a specific schedule
```bash
prefect deployment schedule pause my-flow/my-deployment
```
### Resume a specific schedule
```bash
prefect deployment schedule resume my-flow/my-deployment
```
## Manage schedules in bulk
When you have many deployments with active schedules, you can pause or resume all of them at once using the `--all` flag.
### Pause all schedules
Use the `--all` flag with the `pause` command to pause all active schedules across all deployments:
```bash
prefect deployment schedule pause --all
```
This command pauses all active schedules across deployments in the current workspace. In interactive mode, you'll be asked to confirm.
Example output:
```
Paused schedule for deployment my-flow/daily-sync
Paused schedule for deployment data-pipeline/hourly-update
Paused schedule for deployment ml-model/weekly-training
Paused 3 deployment schedule(s).
```
### Resume all schedules
Similarly, use the `--all` flag with the `resume` command to resume all paused schedules:
```bash
prefect deployment schedule resume --all
```
This command resumes all paused schedules across deployments in the current workspace. In interactive mode, you'll be asked to confirm.
Example output:
```
Resumed schedule for deployment my-flow/daily-sync
Resumed schedule for deployment data-pipeline/hourly-update
Resumed schedule for deployment ml-model/weekly-training
Resumed 3 deployment schedule(s).
```
### Skip confirmation prompt
To skip the interactive confirmation (useful for CI/CD pipelines or scripts), use the `--no-prompt` flag:
```bash
prefect --no-prompt deployment schedule pause --all
prefect --no-prompt deployment schedule resume --all
```
## Use cases
### Maintenance windows
Pause all schedules during system maintenance:
```bash
# Before maintenance
prefect deployment schedule pause --all
# Perform maintenance tasks...
# After maintenance
prefect deployment schedule resume --all
```
### Development environment management
Quickly pause all schedules in a development environment:
```bash
# Pause all dev schedules
prefect --profile dev deployment schedule pause --all
# Resume when ready
prefect --profile dev deployment schedule resume --all
```
## Important notes
**Use caution with bulk operations**
The `--all` flag affects all deployment schedules in your workspace.
In interactive mode, you'll be prompted to confirm the operation showing the exact number of schedules that will be affected.
Always verify you're in the correct workspace/profile before running bulk operations.
## See also
* [Create schedules](/v3/how-to-guides/deployments/create-schedules) - Learn how to create schedules for your deployments
* [Run deployments](/v3/how-to-guides/deployments/run-deployments) - Learn how to trigger deployment runs manually
* [Deployment concepts](/v3/concepts/deployments) - Understand deployments and their schedules
# How to define deployments with YAML
Source: https://docs-3.prefect.io/v3/how-to-guides/deployments/prefect-yaml
Use YAML to schedule and trigger flow runs and manage your code and deployments.
The `prefect.yaml` file is a YAML file describing base settings for your deployments, procedural steps for preparing deployments,
and instructions for preparing the execution environment for a deployment run.
Initialize your deployment configuration, which creates the `prefect.yaml` file, with the CLI command `prefect init`
in any directory or repository that stores your flow code.
**Deployment configuration recipes**
Prefect ships with many off-the-shelf "recipes" that allow you to get started with more structure within
your `prefect.yaml` file. Run `prefect init` to be prompted with available recipes in your installation.
You can provide a recipe name in your initialization command with the `--recipe` flag, otherwise Prefect will attempt to
guess an appropriate recipe based on the structure of your working directory (for example if you initialize within a `git`
repository, Prefect will use the `git` recipe).
The `prefect.yaml` file contains:
* deployment configuration for deployments created from this file
* default instructions for how to build and push any necessary code artifacts (such as Docker images)
* default instructions for pulling a deployment in remote execution environments (for example, cloning a GitHub repository).
You can override any deployment configuration through options available on the `prefect deploy` CLI command when creating a deployment.
**`prefect.yaml` file flexibility**
In older versions of Prefect, this file must be in the root of your repository or project directory and named `prefect.yaml`.
With Prefect 3, this file can be located in a directory outside the project or a subdirectory inside the project.
It can be named differently if the filename ends in `.yaml`. You can have multiple `prefect.yaml` files with the same name
in different directories.
By default, `prefect deploy` uses a `prefect.yaml` file in the project's root directory. To use a custom deployment
configuration file, supply the new `--prefect-file` CLI argument when running the `deploy` command from the root of your
project directory:
`prefect deploy --prefect-file path/to/my_file.yaml`
The base structure for `prefect.yaml` looks like this:
```yaml
# generic metadata
prefect-version: null
name: null
# preparation steps
build: null
push: null
# runtime steps
pull: null
# deployment configurations
deployments:
- # base metadata
name: null
version: null
tags: []
description: null
schedule: null
# flow-specific fields
entrypoint: null
parameters: {}
# infra-specific fields
work_pool:
name: null
work_queue_name: null
job_variables: {}
```
The metadata fields are always pre-populated for you. These fields are for bookkeeping purposes only. The other sections are
pre-populated based on recipe; if no recipe is provided, Prefect attempts to guess an appropriate one based on local configuration.
You can create deployments with the CLI command `prefect deploy` without altering the `deployments` section of your
`prefect.yaml` file. The `prefect deploy` command helps in deployment creation through interactive prompts. The `prefect.yaml`
file facilitates version-controlling your deployment configuration and managing multiple deployments.
## Deployment actions
Deployment actions defined in your `prefect.yaml` file control the lifecycle of the creation and execution of your deployments.
The three actions available are `build`, `push`, and `pull`.
`pull` is the only required deployment action. It defines how Prefect pulls your deployment in remote execution
environments.
Each action is defined as a list of steps executed in sequence. Each step has the following format:
```yaml
section:
- prefect_package.path.to.importable.step:
id: "step-id" # optional
requires: "pip-installable-package-spec" # optional
kwarg1: value
kwarg2: more-values
```
Every step optionally provides a `requires` field. Prefect uses this to auto-install if the step is not
found in the current environment. Each step can specify an `id` to reference outputs in
future steps. The additional fields map directly to Python keyword arguments to the step function. Within a given section,
steps always run in their order within the `prefect.yaml` file.
**Deployment instruction overrides**
You can override `build`, `push`, and `pull` sections on a per-deployment basis; define `build`, `push`, and `pull`
fields within a deployment definition in the `prefect.yaml` file.
The `prefect deploy` command uses any `build`, `push`, or `pull` instructions from the deployment's definition in the
`prefect.yaml` file.
This capability is useful for multiple deployments that require different deployment instructions.
### The build action
Use the build section of `prefect.yaml` to specify setup steps or dependencies,
(like creating a Docker image), required to run your deployments.
If you initialize with the Docker recipe, you are prompted to provide
required information, such as image name and tag:
```bash
prefect init --recipe docker
>> image_name: < insert image name here >
>> tag: < insert image tag here >
```
**Use `--field` to avoid the interactive experience**
We recommend that you only initialize a recipe when first creating your deployment structure. Then store
your configuration files within version control.
Sometimes you may need to initialize programmatically and avoid the interactive prompts.
To do this, provide all required fields for your recipe using the `--field` flag:
```bash
prefect init --recipe docker \
--field image_name=my-repo/my-image \
--field tag=my-tag
```
```yaml
build:
- prefect_docker.deployments.steps.build_docker_image:
requires: prefect-docker>=0.3.0
image_name: my-repo/my-image
tag: my-tag
dockerfile: auto
```
Once you confirm that these fields are set to their desired values, this step automatically builds a Docker image with
the provided name and tag and pushes it to the repository referenced by the image name.
This step produces optional fields for future steps, or within `prefect.yaml` as template values.
We recommend using a templated `{{ image }}` within `prefect.yaml` (specifically in the work pool's `job_variables` section).
By avoiding hardcoded values, the build step and deployment specification won't have mismatched values.
**Some steps require Prefect integrations**
In the build step example above, you relied on the `prefect-docker` package; in cases that deal with external services,
additional required packages are auto-installed for you.
**Pass output to downstream steps**
Each deployment action can be composed of multiple steps. For example, to build a Docker image tagged with the
current commit hash, use the `run_shell_script` step and feed the output into the `build_docker_image` step:
```yaml
build:
- prefect.deployments.steps.run_shell_script:
id: get-commit-hash
script: git rev-parse --short HEAD
stream_output: false
- prefect_docker.deployments.steps.build_docker_image:
requires: prefect-docker
image_name: my-image
image_tag: "{{ get-commit-hash.stdout }}"
dockerfile: auto
```
The `id` field is used in the `run_shell_script` step to reference its output in the next step.
### The push action
The push section is most critical for situations where code is not stored on persistent filesystems or in version control.
In this scenario, code is often pushed and pulled from a Cloud storage bucket (for example, S3, GCS, Azure Blobs).
The push section allows users to specify and customize the logic for pushing this code repository to arbitrary remote locations.
For example, a user who stores their code in an S3 bucket and relies on default worker settings for its runtime environment
could use the `s3` recipe:
```bash
prefect init --recipe s3
>> bucket: < insert bucket name here >
```
In your newly created`prefect.yaml` file, you should find that the `push` and `pull` sections have been templated out
as follows:
```yaml
push:
- prefect_aws.deployments.steps.push_to_s3:
id: push-code
requires: prefect-aws>=0.3.0
bucket: my-bucket
folder: project-name
credentials: null
pull:
- prefect_aws.deployments.steps.pull_from_s3:
requires: prefect-aws>=0.3.0
bucket: my-bucket
folder: "{{ push-code.folder }}"
credentials: null
```
The bucket is populated with the provided value (which also could have been provided with the `--field` flag); note that the
`folder` property of the `pull` step is a template - the `push_to_s3` step outputs both a `bucket` value as well as a `folder`
value for the template downstream steps. This helps you keep your steps consistent across edits.
As discussed above, if you use [blocks](/v3/concepts/blocks/), you can template the credentials section with
a block reference for secure and dynamic credentials access:
```yaml
push:
- prefect_aws.deployments.steps.push_to_s3:
requires: prefect-aws>=0.3.0
bucket: my-bucket
folder: project-name
credentials: "{{ prefect.blocks.aws-credentials.dev-credentials }}"
```
Anytime you run `prefect deploy`, this `push` section executes upon successful completion of your `build` section.
### The pull action
The pull section is the most important section within the `prefect.yaml` file. It contains instructions for preparing your
flows for a deployment run. These instructions execute each time a deployment in this folder is run through a worker.
There are three main types of steps that typically show up in a `pull` section:
* `set_working_directory`: this step sets the working directory for the process prior to importing your flow
* `git_clone`: this step clones the provided repository on the provided branch
* `pull_from_{cloud}`: this step pulls the working directory from a Cloud storage location (for example, S3)
**Use block and variable references**
All [block and variable references](#templating-options) within your pull step will remain unresolved until runtime and
are pulled each time your deployment runs. This avoids storing sensitive information insecurely; it
also allows you to manage certain types of configuration from the API and UI without having to rebuild your deployment every time.
Below is an example of how to use an existing `GitHubCredentials` block to clone a private GitHub repository:
```yaml
pull:
- prefect.deployments.steps.git_clone:
repository: https://github.com/org/repo.git
credentials: "{{ prefect.blocks.github-credentials.my-credentials }}"
```
Alternatively, you can specify a `BitBucketCredentials` or `GitLabCredentials` block to clone from Bitbucket or GitLab. In
lieu of a credentials block, you can also provide a GitHub, GitLab, or Bitbucket token directly to the 'access\_token\` field.
Use a Secret block to do this securely:
```yaml
pull:
- prefect.deployments.steps.git_clone:
repository: https://bitbucket.org/org/repo.git
access_token: "{{ prefect.blocks.secret.bitbucket-token }}"
```
## Utility steps
Use utility steps within a build, push, or pull action to assist in managing the deployment lifecycle:
* `run_shell_script` allows for the execution of one or more shell commands in a subprocess, and returns the standard output
and standard error of the script. This step is useful for scripts that require execution in a specific environment, or those
which have specific input and output requirements. Note that setting `stream_output: true` for `run_shell_script` writes the
output and error to stdout in the execution environment, which will not be sent to the Prefect API.
Here is an example of retrieving the short Git commit hash of the current repository to use as a Docker image tag:
```yaml
build:
- prefect.deployments.steps.run_shell_script:
id: get-commit-hash
script: git rev-parse --short HEAD
stream_output: false
- prefect_docker.deployments.steps.build_docker_image:
requires: prefect-docker>=0.3.0
image_name: my-image
tag: "{{ get-commit-hash.stdout }}"
dockerfile: auto
```
**Provided environment variables are not expanded by default**
To expand environment variables in your shell script, set `expand_env_vars: true` in your `run_shell_script` step. For example:
```yaml
- prefect.deployments.steps.run_shell_script:
id: get-user
script: echo $USER
stream_output: true
expand_env_vars: true
```
Without `expand_env_vars: true`, the above step returns a literal string `$USER` instead of the current user.
* `pip_install_requirements` installs dependencies from a `requirements.txt` file within a specified directory.
Here is an example of installing dependencies from a `requirements.txt` file after cloning:
```yaml
pull:
- prefect.deployments.steps.git_clone:
id: clone-step # needed to be referenced in subsequent steps
repository: https://github.com/org/repo.git
- prefect.deployments.steps.pip_install_requirements:
directory: "{{ clone-step.directory }}" # `clone-step` is a user-provided `id` field
requirements_file: requirements.txt
```
Here is an example that retrieves an access token from a third party key vault and uses it in a private clone step:
```yaml
pull:
- prefect.deployments.steps.run_shell_script:
id: get-access-token
script: az keyvault secret show --name --vault-name --query "value" --output tsv
stream_output: false
- prefect.deployments.steps.git_clone:
repository: https://bitbucket.org/samples/deployments.git
branch: master
access_token: "{{ get-access-token.stdout }}"
```
You can also run custom steps by packaging them. In the example below, `retrieve_secrets` is a custom python module packaged
into the default working directory of a Docker image (which is /opt/prefect by default).
`main` is the function entry point, which returns an access token (for example, `return {"access_token": access_token}`) like the
preceding example, but utilizing the Azure Python SDK for retrieval.
```yaml
- retrieve_secrets.main:
id: get-access-token
- prefect.deployments.steps.git_clone:
repository: https://bitbucket.org/samples/deployments.git
branch: master
access_token: '{{ get-access-token.access_token }}'
```
## Templating options
Values that you place within your `prefect.yaml` file can reference dynamic values in several different ways:
* **step outputs**: every step of both `build` and `push` produce named fields such as `image_name`; you can reference these
fields within `prefect.yaml` and `prefect deploy` will populate them with each call. References must be enclosed in double
brackets and in `"{{ field_name }}"` format
* **blocks**: you can reference [Prefect blocks](/v3/concepts/blocks) with the
`{{ prefect.blocks.block_type.block_slug }}` syntax. It is highly recommended that you use block references for any sensitive
information (such as a GitHub access token or any credentials) to avoid hardcoding these values in plaintext
* **variables**: you can reference [Prefect variables](/v3/concepts/variables) with the
`{{ prefect.variables.variable_name }}` syntax. Use variables to reference non-sensitive, reusable pieces of information
such as a default image name or a default work pool name.
* **environment variables**: you can also reference environment variables with the special syntax `{{ $MY_ENV_VAR }}`.
This is especially useful for referencing environment variables that are set at runtime.
Here's a `prefect.yaml` file as an example:
```yaml
build:
- prefect_docker.deployments.steps.build_docker_image:
id: build-image
requires: prefect-docker>=0.6.0
image_name: my-repo/my-image
tag: my-tag
dockerfile: auto
push:
- prefect_docker.deployments.steps.push_docker_image:
requires: prefect-docker>=0.6.0
image_name: my-repo/my-image
tag: my-tag
credentials: "{{ prefect.blocks.docker-registry-credentials.dev-registry }}"
deployments:
- # base metadata
name: null
version: "{{ build-image.tag }}"
tags:
- "{{ $my_deployment_tag }}"
- "{{ prefect.variables.some_common_tag }}"
description: null
schedule: null
concurrency_limit: null
# flow-specific fields
entrypoint: null
parameters: {}
# infra-specific fields
work_pool:
name: "my-k8s-work-pool"
work_queue_name: null
job_variables:
image: "{{ build-image.image }}"
cluster_config: "{{ prefect.blocks.kubernetes-cluster-config.my-favorite-config }}"
```
So long as your `build` steps produce fields called `image_name` and `tag`, every time you deploy a new version of our deployment,
the `{{ build-image.image }}` variable is dynamically populated with the relevant values.
**Docker step**
The most commonly used build step is `prefect_docker.deployments.steps.build_docker_image` which produces both the `image_name` and `tag` fields.
A `prefect.yaml` file can have multiple deployment configurations that control the behavior of several deployments.
You can manage these deployments independently of one another, allowing you to deploy the same flow with different
configurations in the same codebase.
## Work with multiple deployments with prefect.yaml
Prefect supports multiple deployment declarations within the `prefect.yaml` file. This method of declaring multiple
deployments supports version control for all deployments through a single command.
Add new deployment declarations to the `prefect.yaml` file with a new entry to the `deployments` list.
Each deployment declaration must have a unique `name` field to select deployment declarations when using the
`prefect deploy` command.
When using a `prefect.yaml` file that is in another directory or differently named, the value for
the deployment `entrypoint` must be relative to the root directory of the project.
For example, consider the following `prefect.yaml` file:
```yaml
build: ...
push: ...
pull: ...
deployments:
- name: deployment-1
entrypoint: flows/hello.py:my_flow
parameters:
number: 42,
message: Don't panic!
work_pool:
name: my-process-work-pool
work_queue_name: primary-queue
- name: deployment-2
entrypoint: flows/goodbye.py:my_other_flow
work_pool:
name: my-process-work-pool
work_queue_name: secondary-queue
- name: deployment-3
entrypoint: flows/hello.py:yet_another_flow
work_pool:
name: my-docker-work-pool
work_queue_name: tertiary-queue
```
This file has three deployment declarations, each referencing a different flow. Each deployment declaration has a unique `name`
field and can be deployed individually with the `--name` flag when deploying.
For example, to deploy `deployment-1`, run:
```bash
prefect deploy --name deployment-1
```
To deploy multiple deployments, provide multiple `--name` flags:
```bash
prefect deploy --name deployment-1 --name deployment-2
```
To deploy multiple deployments with the same name, prefix the deployment name with its flow name:
```bash
prefect deploy --name my_flow/deployment-1 --name my_other_flow/deployment-1
```
To deploy all deployments, use the `--all` flag:
```bash
prefect deploy --all
```
To deploy deployments that match a pattern, run:
```bash
prefect deploy -n my-flow/* -n *dev/my-deployment -n dep*prod
```
The above command deploys:
* all deployments from the flow `my-flow`
* all flows ending in `dev` with a deployment named
`my-deployment`
* all deployments starting with `dep` and ending in `prod`.
### Non-interactive deployment
For CI/CD pipelines and automated environments, use the `--no-prompt` flag to skip interactive prompts:
```bash
prefect --no-prompt deploy --name my-deployment
```
This prevents the command from hanging on prompts and will fail clearly if required information is missing.
**CLI Options When deploying multiple deployments**
When deploying more than one deployment with a single `prefect deploy` command, any additional attributes provided are ignored.
To provide overrides to a deployment through the CLI, you must deploy that deployment individually.
### Reuse configuration across deployments
Because a `prefect.yaml` file is a standard YAML file, you can use [YAML aliases](https://yaml.org/spec/1.2.2/#71-alias-nodes)
to reuse configuration across deployments.
This capability allows multiple deployments to share the work pool configuration, deployment actions, or other
configurations.
Declare a YAML alias with the `&{alias_name}` syntax and insert that alias elsewhere in the file with the `*{alias_name}`
syntax. When aliasing YAML maps, you can override specific fields of the aliased map with the `<<: *{alias_name}` syntax and
adding additional fields below.
We recommend adding a `definitions` section to your `prefect.yaml` file at the same level as the `deployments` section to store your
aliases.
For example:
```yaml
build: ...
push: ...
pull: ...
definitions:
work_pools:
my_docker_work_pool: &my_docker_work_pool
name: my-docker-work-pool
work_queue_name: default
job_variables:
image: "{{ build-image.image }}"
schedules:
every_ten_minutes: &every_10_minutes
interval: 600
actions:
docker_build: &docker_build
- prefect_docker.deployments.steps.build_docker_image: &docker_build_config
id: build-image
requires: prefect-docker>=0.3.0
image_name: my-example-image
tag: dev
dockerfile: auto
docker_push: &docker_push
- prefect_docker.deployments.steps.push_docker_image: &docker_push_config
requires: prefect-docker>=0.6.0
image_name: my-example-image
tag: dev
credentials: "{{ prefect.blocks.docker-registry-credentials.dev-registry }}"
deployments:
- name: deployment-1
entrypoint: flows/hello.py:my_flow
schedule: *every_10_minutes
parameters:
number: 42,
message: Don't panic!
work_pool: *my_docker_work_pool
build: *docker_build # Uses the full docker_build action with no overrides
push: *docker_push
- name: deployment-2
entrypoint: flows/goodbye.py:my_other_flow
work_pool: *my_docker_work_pool
build:
- prefect_docker.deployments.steps.build_docker_image:
<<: *docker_build_config # Uses the docker_build_config alias and overrides the dockerfile field
dockerfile: Dockerfile.custom
push: *docker_push
- name: deployment-3
entrypoint: flows/hello.py:yet_another_flow
schedule: *every_10_minutes
work_pool:
name: my-process-work-pool
work_queue_name: primary-queue
```
In the above example, YAML aliases reuse work pool, schedule, and build configuration across multiple deployments:
* `deployment-1` and `deployment-2` use the same work pool configuration
* `deployment-1` and `deployment-3` use the same schedule
* `deployment-1` and `deployment-2` use the same build deployment action, but `deployment-2` overrides the `dockerfile` field to use a custom Dockerfile
## Deployment declaration reference
### Deployment fields
These are fields you can add to each deployment declaration.
| Property | Description |
| ------------------------------------------------------- | ----------------------------------------------------------------------------------------------------------------------------------------------------------------------------------------------------------------------------------- |
| `name` | The name to give to the created deployment. Used with the `prefect deploy` command to create or update specific deployments. |
| `version` | An optional version for the deployment. |
| `tags` | A list of strings to assign to the deployment as tags. |
| `description` | An optional description for the deployment. |
| `schedule` | An optional [schedule](/v3/how-to-guides/deployments/create-schedules) to assign to the deployment. Fields for this section are documented in the [Schedule Fields](#schedule-fields) section. |
| `concurrency_limit` | An optional [deployment concurrency limit](/v3/deploy/index#concurrency-limiting). Fields for this section are documented in the [Concurrency Limit Fields](#concurrency-limit-fields) section. |
| `triggers` | An optional array of [triggers](/v3/how-to-guides/automations/creating-deployment-triggers) to assign to the deployment |
| `entrypoint` | Required path to the `.py` file containing the flow you want to deploy (relative to the root directory of your development folder) combined with the name of the flow function. In the format `path/to/file.py:flow_function_name`. |
| `parameters` | Optional default values to provide for the parameters of the deployed flow. Should be an object with key/value pairs. |
| `enforce_parameter_schema` | Boolean flag that determines whether the API should validate the parameters passed to a flow run against the parameter schema generated for the deployed flow. |
| `work_pool` | Information of where to schedule flow runs for the deployment. Fields for this section are documented in the [Work Pool Fields](#work-pool-fields) section. |
### Schedule fields
These are fields you can add to a deployment declaration's `schedule` section.
| Property | Description |
| ------------------------------------------ | ------------------------------------------------------------------------------------------------------------------------------------------------------------------------------------------------------------------------ |
| `interval` | Number of seconds indicating the time between flow runs. Cannot use them in conjunction with `cron` or `rrule`. |
| `anchor_date` | Datetime string indicating the starting or "anchor" date to begin the schedule. If no `anchor_date` is supplied, the current UTC time is used. Can only use with `interval`. |
| `timezone` | String name of a time zone, used to enforce localization behaviors like DST boundaries. See the [IANA Time Zone Database](https://www.iana.org/time-zones) for valid time zones. |
| `cron` | A valid cron string. Cannot use in conjunction with `interval` or `rrule`. |
| `day_or` | Boolean indicating how croniter handles day and day\_of\_week entries. Must use with `cron`. Defaults to `True`. |
| `rrule` | String representation of an RRule schedule. See the [`rrulestr` examples](https://dateutil.readthedocs.io/en/stable/rrule.html#rrulestr-examples) for syntax. Cannot used them in conjunction with `interval` or `cron`. |
### Concurrency limit fields
These are fields you can add to a deployment declaration's `concurrency_limit` section.
| Property | Description |
| -------------------- | -------------------------------------------------------------------------------------------------------------------------------------- |
| `limit` | The maximum number of concurrent flow runs for the deployment. |
| `collision_strategy` | Configure the behavior for runs once the concurrency limit is reached. Options are `ENQUEUE`, and `CANCEL_NEW`. Defaults to `ENQUEUE`. |
### Work pool fields
These are fields you can add to a deployment declaration's `work_pool` section.
| Property | Description |
| ---------------------------------------------- | ------------------------------------------------------------------------------------------------------------------------------------------------------------------------------------------------------------ |
| `name` | The name of the work pool to schedule flow runs in for the deployment. |
| `work_queue_name` | The name of the work queue within the specified work pool to schedule flow runs in for the deployment. If not provided, the default queue for the specified work pool is used. |
| `job_variables` | Values used to override the default values in the specified work pool's [base job template](/v3/concepts/work-pools/#base-job-template). Maps directly to a created deployments `infra_overrides` attribute. |
### Deployment mechanics
Anytime you run `prefect deploy` in a directory that contains a `prefect.yaml` file, the following actions take place in order:
* The `prefect.yaml` file load. First, the `build` section loads and all variable and block references resolve. The steps then run in the order provided.
* Next, the `push` section loads and all variable and block references resolve; the steps within this section then run in the order provided.
* Next, the `pull` section is templated with any step outputs but *is not run*. Block references are *not* hydrated for security purposes: they are always resolved at runtime.
* Next, all variable and block references resolve with the deployment declaration. All flags provided through the `prefect deploy` CLI are then overlaid on the values loaded from the file.
* The final step occurs when the fully realized deployment specification is registered with the Prefect API.
**Deployment instruction overrides**
The `build`, `push`, and `pull` sections in deployment definitions take precedence over the corresponding sections above them in
`prefect.yaml`.
Each time a step runs, the following actions take place in order:
* The step's inputs and block / variable references resolve.
* The step's function is imported; if it cannot be found, the special `requires` keyword installs the necessary packages.
* The step's function is called with the resolved inputs.
* The step's output is returned and used to resolve inputs for subsequent steps.
## Update a deployment
To update a deployment, make any desired changes to the `prefect.yaml` file, and run `prefect deploy`. Running just this command will prompt you to select a deployment interactively, or you may specify the deployment to update with `--name your-deployment`.
## Further reading
Now that you are familiar with creating deployments, you can explore infrastructure options for running your deployments:
* [Managed work pools](/v3/how-to-guides/deployment_infra/managed/)
* [Push work pools](/v3/how-to-guides/deployment_infra/serverless/)
* [Kubernetes work pools](/v3/how-to-guides/deployment_infra/kubernetes/)
# Trigger ad-hoc deployment runs
Source: https://docs-3.prefect.io/v3/how-to-guides/deployments/run-deployments
Learn how to trigger deployment runs using the Prefect CLI and Python SDK.
[Deployments](/v3/concepts/deployments) are server-side representations of flows that can be executed:
* on a [schedule](/v3/how-to-guides/deployments/create-schedules)
* when [triggered by events](/v3/how-to-guides/automations/creating-deployment-triggers)
* programmatically, on demand
This guide covers how to trigger deployments on demand.
## Prerequisites
In order to run a deployment, you need to have:
* [created a deployment](/v3/how-to-guides/deployments/create-deployments)
* started a process ([`serve`](/v3/how-to-guides/deployment_infra/run-flows-in-local-processes) or a [worker](/v3/concepts/workers)) listening for scheduled runs of that deployment
## Run a deployment from the CLI
The simplest way to trigger a deployment run is using the Prefect CLI:
```bash
prefect deployment run my-flow/my-deployment
```
### CLI options
Add parameters and customize the run, including setting a custom flow run name using the new --flow-run-name option:
```bash
# Pass parameters
prefect deployment run my-flow/my-deployment \
--param my_param=42 \
--param another_param="hello"
# Schedule for later
prefect deployment run my-flow/my-deployment --start-in "2 hours"
# Watch the run until completion
prefect deployment run my-flow/my-deployment --watch
# Set custom run name
Use `--flow-run-name` to set a static or templated name for the flow run.
prefect deployment run my-flow/my-deployment --flow-run-name "custom-run-name"
# Set a custom flow run name using templating
prefect deployment run my-flow/my-deployment \
--param customer_id=1234 \
--param run_date="2025-07-14" \
--flow-run-name "customer-{customer_id}-run-{run_date}"
> Note: You can use `{parameter}` syntax to template the flow run name.
> The values will be substituted from the `--param` values.
# Add tags to the run
prefect deployment run my-flow/my-deployment --tag production --tag critical
```
## Run a deployment from Python
Use the `run_deployment` function for programmatic control:
{/* pmd-metadata: notest */}
```python
from prefect.deployments import run_deployment
# Basic usage
flow_run = run_deployment(
name="my-flow/my-deployment"
)
# With parameters
flow_run = run_deployment(
name="my-flow/my-deployment",
parameters={
"my_param": 42,
"another_param": "hello"
}
)
# With job variables (environment variables, etc.)
flow_run = run_deployment(
name="my-flow/my-deployment",
parameters={"my_param": 42},
job_variables={"env": {"MY_ENV_VAR": "production"}}
)
# Don't wait for completion
flow_run = run_deployment(
name="my-flow/my-deployment",
timeout=0 # returns immediately
)
# Wait with custom timeout (seconds)
flow_run = run_deployment(
name="my-flow/my-deployment",
timeout=300 # wait up to 5 minutes
)
# Schedule for later
from datetime import datetime, timedelta
flow_run = run_deployment(
name="my-flow/my-deployment",
scheduled_time=datetime.now() + timedelta(hours=2)
)
# With custom tags
flow_run = run_deployment(
name="my-flow/my-deployment",
tags=["production", "critical"]
)
```
By default, deployments triggered via `run_deployment` *from within another flow* will be treated as a subflow of the parent flow in the UI. To disable this, set `as_subflow=False`.
### Async usage
In an async context, you can use the `run_deployment` function as a coroutine:
{/* pmd-metadata: notest */}
```python
import asyncio
from prefect.deployments import run_deployment
async def trigger_deployment():
flow_run = await run_deployment(
name="my-flow/my-deployment",
parameters={"my_param": 42}
)
return flow_run
# Run it
flow_run = asyncio.run(trigger_deployment())
```
## Further reading
* Learn about [deployment schedules](/v3/how-to-guides/deployments/create-schedules)
* Explore [deployment triggers and automations](/v3/how-to-guides/automations/creating-deployment-triggers)
* Understand [work pools and workers](/v3/concepts/work-pools)
# How to retrieve code from storage
Source: https://docs-3.prefect.io/v3/how-to-guides/deployments/store-flow-code
Learn about code storage as it relates to execution of deployments
When a deployment runs, the execution environment needs access to the flow code.
Flow code is not stored directly in Prefect server or Prefect Cloud; instead, it must be made available to the execution environment. There are two main ways to achieve this:
1. **Include source code directly in your runtime:** Often, this means [building your code into a Docker image](/v3/how-to-guides/deployment_infra/docker/#automatically-build-a-custom-docker-image-with-a-local-dockerfile).
2. **Retrieve code from storage at runtime:** The [worker](/v3/concepts/workers/) pulls code from a specified location before starting the flow run.
This page focuses on the second approach: retrieving code from a storage location at runtime.
You have several options for where your code can be stored and pulled from:
* Local filesystem
* Git-based storage (GitHub, GitLab, Bitbucket)
* Blob storage (AWS S3, Azure Blob Storage, GCP GCS)
The ideal choice depends on your team's needs and tools.
In the examples below, we show how to create a deployment configured to run on [dynamic infrastructure](/v3/concepts/work-pools) for each of these storage options.
## Deployment creation options
As detailed in the [Deployment overview](/v3/deploy), you can create a deployment in one of two main ways:
* [Python code with the `flow.deploy` method](/v3/how-to-guides/deployments/deploy-via-python)
* When using `.deploy`, specify a storage location for your flow with the `flow.from_source` method.
* The `source` is either a URL to a git repository or a storage object. For example:
* A local directory: `source=Path(__file__).parent` or `source="/path/to/file"`
* A URL to a git repository: `source="https://github.com/org/my-repo.git"`
* A storage object: `source=GitRepository(url="https://github.com/org/my-repo.git")`
* The `entrypoint` is the path to the file the flow is located in and the function name, separated by a colon.
* [YAML specification defined in a `prefect.yaml` file](/v3/how-to-guides/deployments/prefect-yaml)
* To create a `prefect.yaml` file interactively, run `prefect deploy` from the CLI and follow the prompts.
* The `prefect.yaml` file may define a `pull` section that specifies the storage location for your flow. For example:
* Set the working directory:
```yaml
pull:
- prefect.deployments.steps.set_working_directory:
directory: /path/to/directory
```
* Clone a git repository:
```yaml
pull:
- prefect.deployments.steps.git_clone:
repository: https://github.com/org/my-repo.git
```
* Pull from blob storage:
```yaml
pull:
- prefect.deployments.steps.pull_from_blob_storage:
container: my-container
folder: my-folder
```
Whether you use `from_source` or `prefect.yaml` to specify the storage location for your flow code, the resulting deployment will have a set of `pull` steps that your worker will use to retrieve the flow code at runtime.
## Store code locally
If using a Process work pool, you can use one of the remote code storage options shown above, or you can store your flow code in a local folder.
Here is an example of how to create a deployment with flow code stored locally:
```python local_process_deploy_local_code.py
from prefect import flow
from pathlib import Path
@flow(log_prints=True)
def my_flow(name: str = "World"):
print(f"Hello {name}!")
if __name__ == "__main__":
my_flow.from_source(
source=str(Path(__file__).parent), # code stored in local directory
entrypoint="local_process_deploy_local_code.py:my_flow",
).deploy(
name="local-process-deploy-local-code",
work_pool_name="my-process-pool",
)
```
```yaml prefect.yaml
pull:
- prefect.deployments.steps.set_working_directory:
directory: /my_directory
deployments:
- name: local-process-deploy-local-code
entrypoint: local_process_deploy_local_code.py:my_flow
work_pool:
name: my-process-pool
```
## Git-based storage
Git-based version control platforms provide redundancy, version control, and collaboration capabilities. Prefect supports:
* [GitHub](https://github.com/)
* [GitLab](https://www.gitlab.com)
* [Bitbucket](https://bitbucket.org/)
For a public repository, you can use the repository URL directly.
If you are using a private repository and are authenticated in your environment at deployment creation and deployment execution, you can use the repository URL directly.
Alternatively, for a private repository, you can create a `Secret` block or `git`-platform-specific credentials [block](/v3/develop/blocks/) to store your credentials:
* [`GitHubCredentials`](https://docs.prefect.io/integrations/prefect-github/)
* [`BitBucketCredentials`](https://docs.prefect.io/integrations/prefect-bitbucket/)
* [`GitLabCredentials`](https://docs.prefect.io/integrations/prefect-gitlab/)
Then you can reference this block in the Python `deploy` method or the `prefect.yaml` file pull step.
If using the Python `deploy` method with a private repository that references a block, provide a [`GitRepository`](https://reference.prefect.io/prefect/flows/#prefect.runner.storage.GitRepository) object instead of a URL, as shown below.
```python gh_public_repo.py
from prefect import flow
if __name__ == "__main__":
flow.from_source(
source="https://github.com/org/my-public-repo.git",
entrypoint="gh_public_repo.py:my_flow",
).deploy(
name="my-github-deployment",
work_pool_name="my_pool",
)
```
```python gh_private_repo_credentials_block.py
from prefect import flow
from prefect.runner.storage import GitRepository
from prefect_github import GitHubCredentials
if __name__ == "__main__":
github_repo = GitRepository(
url="https://github.com/org/my-private-repo.git",
credentials=GitHubCredentials.load("my-github-credentials-block"),
)
flow.from_source(
source=github_repo,
entrypoint="gh_private_repo_credentials_block.py:my_flow",
).deploy(
name="private-github-deploy",
work_pool_name="my_pool",
)
```
```python gh_private_repo_secret_block.py
from prefect import flow
from prefect.runner.storage import GitRepository
from prefect.blocks.system import Secret
if __name__ == "__main__":
github_repo = GitRepository(
url="https://github.com/org/my-private-repo.git",
credentials={
"access_token": Secret.load("my-secret-block-with-my-gh-credentials")
},
)
flow.from_source(
source=github_repo,
entrypoint="gh_private_repo_secret_block.py:my_flow",
).deploy(
name="private-github-deploy",
work_pool_name="my_pool",
)
```
```yaml prefect.yaml
# relevant section of the file:
pull:
- prefect.deployments.steps.git_clone:
repository: https://gitlab.com/org/my-repo.git
# Uncomment the following line if using a credentials block
# credentials: "{{ prefect.blocks.github-credentials.my-github-credentials-block }}"
# Uncomment the following line if using a Secret block
# access_token: "{{ prefect.blocks.secret.my-block-name }}"
```
For accessing a private repository, we suggest creating a [Personal Access Tokens (PATs)](https://docs.github.com/en/github/authenticating-to-github/creating-a-personal-access-token).
We recommend using HTTPS with [fine-grained Personal Access Tokens](https://docs.github.com/en/authentication/keeping-your-account-and-data-secure/managing-your-personal-access-tokens#creating-a-fine-grained-personal-access-token) to limit access by repository.
**Personal Access Token Permissions**
When using a fine-grained token, ensure to add permissions to the token prior to saving. Per least privilege, we recommend granting the token the ability to read **Contents** and **Metadata** for your repository.
If using a `Secret` block, you can create it through code or the UI ahead of time and reference it at deployment creation as shown above.
If using a `GitHubCredentials` block to store your credentials, you can create it ahead of time and reference it at deployment creation.
1. Install `prefect-github` with `pip install -U prefect-github`
2. Register all block types defined in `prefect-github` with `prefect block register -m prefect_github`
3. Create a `GitHubCredentials` block through code or the Prefect UI and reference it at deployment creation as shown above.
```python bb_public_repo.py
from prefect import flow
if __name__ == "__main__":
flow.from_source(
source="https://bitbucket.com/org/my-public-repo.git",
entrypoint="bb_public_repo.py:my_flow",
).deploy(
name="my-bitbucket-deployment",
work_pool_name="my_pool",
)
```
```python bb_private_repo_credentials_block.py
from prefect import flow
from prefect.runner.storage import GitRepository
from prefect_bitbucket import BitBucketCredentials
if __name__ == "__main__":
github_repo = GitRepository(
url="https://bitbucket.com/org/my-private-repo.git",
credentials=BitBucketCredentials.load("my-bitbucket-credentials-block")
)
flow.from_source(
source=source,
entrypoint="bb_private_repo_credentials_block.py:my_flow",
).deploy(
name="private-bitbucket-deploy",
work_pool_name="my_pool",
)
```
```python bb_private_repo_secret_block.py
from prefect import flow
from prefect.runner.storage import GitRepository
from prefect.blocks.system import Secret
if __name__ == "__main__":
github_repo=GitRepository(
url="https://bitbucket.com/org/my-private-repo.git",
credentials={
"access_token": Secret.load("my-secret-block-with-my-bb-credentials")
},
)
flow.from_source(
source=github_repo,
entrypoint="bb_private_repo_secret_block.py:my_flow",
).deploy(
name="private-bitbucket-deploy",
work_pool_name="my_pool",
)
```
```yaml prefect.yaml
# relevant section of the file:
pull:
- prefect.deployments.steps.git_clone:
repository: https://bitbucket.org/org/my-private-repo.git
# Uncomment the following line if using a credentials block
# credentials: "{{ prefect.blocks.bitbucket-credentials.my-bitbucket-credentials-block }}"
# Uncomment the following line if using a Secret block
# access_token: "{{ prefect.blocks.secret.my-block-name }}"
```
For accessing a private repository, we recommend using HTTPS with Repository, Project, or Workspace [Access Tokens](https://support.atlassian.com/bitbucket-cloud/docs/access-tokens/).
[Create a token](https://support.atlassian.com/bitbucket-cloud/docs/create-a-repository-access-token/) with **read** access to the repository.
Bitbucket requires you prepend the token string with `x-token-auth:` The full string looks like this: `x-token-auth:abc_123_this_is_a_token`.
If using a `Secret` block, you can create it through code or the UI ahead of time and reference it at deployment creation as shown above.
If using a `BitBucketCredentials` block to store your credentials, you can create it ahead of time and reference it at deployment creation.
1. Install `prefect-bitbucket` with `pip install -U prefect-bitbucket`
2. Register all block types defined in `prefect-bitbucket` with `prefect block register -m prefect_bitbucket`
3. Create a `BitBucketCredentials` block in code or the Prefect UI and reference at deployment creation as shown above.
```python gl_public_repo.py
from prefect import flow
if __name__ == "__main__":
gitlab_repo = "https://gitlab.com/org/my-public-repo.git"
flow.from_source(
source=gitlab_repo,
entrypoint="gl_public_repo.py:my_flow"
).deploy(
name="my-gitlab-deployment",
work_pool_name="my_pool",
)
```
```python gl_private_repo_credentials_block.py
from prefect import flow
from prefect.runner.storage import GitRepository
from prefect_gitlab import GitLabCredentials
if __name__ == "__main__":
gitlab_repo = GitRepository(
url="https://gitlab.com/org/my-private-repo.git",
credentials=GitLabCredentials.load("my-gitlab-credentials-block")
)
flow.from_source(
source=gitlab_repo,
entrypoint="gl_private_repo_credentials_block.py:my_flow",
).deploy(
name="private-gitlab-deploy",
work_pool_name="my_pool",
)
```
```python gl_private_repo_secret_block.py
from prefect import flow
from prefect.runner.storage import GitRepository
from prefect.blocks.system import Secret
if __name__ == "__main__":
gitlab_repo = GitRepository(
url="https://gitlab.com/org/my-private-repo.git",
credentials={
"access_token": Secret.load("my-secret-block-with-my-gl-credentials")
},
)
flow.from_source(
source=gitlab_repo,
entrypoint="gl_private_repo_secret_block.py:my_flow",
).deploy(
name="private-gitlab-deploy",
work_pool_name="my_pool",
)
```
```yaml prefect.yaml
# relevant section of the file:
pull:
- prefect.deployments.steps.git_clone:
repository: https://gitlab.com/org/my-private-repo.git
# Uncomment the following line if using a credentials block
# credentials: "{{ prefect.blocks.gitlab-credentials.my-gitlab-credentials-block }}"
# Uncomment the following line if using a Secret block
# access_token: "{{ prefect.blocks.secret.my-block-name }}"
```
For accessing a private repository, we recommend using HTTPS with [Project Access Tokens](https://docs.gitlab.com/ee/user/profile/personal_access_tokens.html).
[Create a token](https://docs.gitlab.com/ee/user/profile/personal_access_tokens.html) with the **read\_repository** scope.
If using a `Secret` block, you can create it through code or the UI ahead of time and reference it at deployment creation as shown above.
If using a `GitLabCredentials` block to store your credentials, you can create it ahead of time and reference it at deployment creation.
1. Install `prefect-gitlab` with `pip install -U prefect-gitlab`
2. Register all block types defined in `prefect-gitlab` with `prefect block register -m prefect_gitlab`
3. Create a `GitLabCredentials` block in code or the Prefect UI and reference it at deployment creation as shown above.
Note that you can specify a `branch` if creating a `GitRepository` object.
The default is `"main"`.
**Push your code**
When you make a change to your code, Prefect does not push your code to your `git`-based version control platform.
This is intentional to avoid confusion about the `git` history and push process.
### Prefect Cloud GitHub Integration
If you're using Prefect Cloud you can use the Prefect Cloud GitHub App
to authenticate to GitHub at runtime and access private repositories without creating a block and storing long
lived credentials.
1. [Install the Prefect Cloud GitHub App](https://github.com/apps/prefect-cloud/installations/new?) and select the
repositories you want to be able to access.
2. Add the following pull steps to your `prefect.yaml` file. Make sure to replace `owner/repository` with the name of your repository:
```yaml
pull:
- prefect.deployments.steps.run_shell_script:
id: get-github-token
script: uv tool run prefect-cloud github token owner/repository
- prefect.deployments.steps.git_clone:
id: git-clone
repository: https://x-access-token:{{ get-github-token.stdout }}@github.com/owner/repository.git
```
## Docker-based storage
Another popular flow code storage option is to include it in a Docker image.
All work pool options except **Process** and **Prefect Managed** allow you to bake your code into a Docker image.
To create a deployment with Docker-based flow code storage use the Python `deploy` method or create a `prefect.yaml` file.
If you use the Python `deploy` method to store the flow code in a Docker image, you don't need to use the `from_source` method.
The `prefect.yaml` file below was generated by running `prefect deploy` from the CLI (a few lines of metadata were excluded from the top of the file output for brevity).
Note that the `build` section is necessary if baking your flow code into a Docker image.
```python docker_deploy.py
from prefect import flow
@flow
def my_flow():
print("Hello from inside a Docker container!")
if __name__ == "__main__":
my_flow.deploy(
name="my-docker-deploy",
work_pool_name="my_pool",
image="my-docker-image:latest",
push=False
)
```
```yaml prefect.yaml
# build section allows you to manage and build docker images
build:
- prefect_docker.deployments.steps.build_docker_image:
requires: prefect-docker>=0.6.1
id: build-image
dockerfile: auto
image_name: my-registry/my-image
tag: latest
# push section allows you to manage if and how this project is uploaded to remote locations
push: null
# pull section allows you to provide instructions for cloning this project in remote locations
pull:
- prefect.deployments.steps.set_working_directory:
directory: /opt/prefect/my_directory
# the deployments section allows you to provide configuration for deploying flows
deployments:
- name: my-docker-deployment
entrypoint: my_file.py:my_flow
work_pool:
name: my_pool
job_variables:
image: '{{ build-image.image }}'
```
By default, `.deploy` will build a Docker image that includes your flow code and any `pip` packages specified in a `requirements.txt` file.
In the examples above, we elected not to push the resulting image to a remote registry.
To push the image to a remote registry, pass `push=True` in the Python `deploy` method or add a `push_docker_image` step to the `push` section of the `prefect.yaml` file.
### Custom Docker image
If an `image` is not specified by one of the methods above, deployment flow runs associated with a Docker work pool will use the base Prefect image (e.g. `prefecthq/prefect:3-latest`) when executing.
Alternatively, you can create a custom Docker image outside of Prefect by running `docker build` && `docker push` elsewhere (e.g. in your CI/CD pipeline) and then reference the resulting `image` in the `job_variables` section of your deployment definition, or set the `image` as a default directly on the work pool.
For more information, see [this discussion of custom Docker images](/v3/how-to-guides/deployment_infra/docker/#automatically-build-a-custom-docker-image-with-a-local-dockerfile).
## Blob storage
Another option for flow code storage is any [fsspec](https://filesystem-spec.readthedocs.io/en/latest/)-supported storage location, such as AWS S3, Azure Blob Storage, or GCP GCS.
If the storage location is publicly available, or if you are authenticated in the environment where you are creating and running your deployment, you can reference the storage location directly.
You don't need to pass credentials explicitly.
To pass credentials explicitly to authenticate to your storage location, you can use either of the following block types:
* Prefect integration library storage blocks, such as the `prefect-aws` library's `S3Bucket` block, which can use a `AWSCredentials` block when it is created.
* `Secret` blocks
If you use a storage block such as the `S3Bucket` block, you need to have the `prefect-aws` library available in the environment where your flow code runs.
You can do any of the following to make the library available:
1. Install the library into the execution environment directly
2. Specify the library in the work pool's Base Job Template in the **Environment Variables** section like this:`{"EXTRA_PIP_PACKAGES":"prefect-aws"}`
3. Specify the library in the environment variables of the `deploy` method as shown in the examples below
4. Specify the library in a `requirements.txt` file and reference the file in the `pull` step of the `prefect.yaml` file like this:
```yaml
- prefect.deployments.steps.pip_install_requirements:
directory: "{{ pull_code.directory }}"
requirements_file: requirements.txt
```
The examples below show how to create a deployment with flow code in a cloud provider storage location.
For each example, we show how to access code that is publicly available.
The `prefect.yaml` example includes an additional line to reference a credentials block if authenticating to a private storage location through that option.
We also include Python code that shows how to use an existing storage block and an example of that creates, but doesn't save, a storage block that references an existing nested credentials block.
```python s3_no_block.py
from prefect import flow
if __name__ == "__main__":
flow.from_source(
source="s3://my-bucket/my-folder",
entrypoint="my_file.py:my_flow",
).deploy(
name="my-aws-s3-deployment",
work_pool_name="my-work-pool"
)
```
```python s3_block.py
from prefect import flow
from prefect_aws.s3 import S3Bucket
if __name__ == "__main__":
s3_bucket_block = S3Bucket.load("my-code-storage-block")
# or:
# s3_bucket_block = S3Bucket(
# bucket="my-bucket",
# folder="my-folder",
# credentials=AWSCredentials.load("my-credentials-block")
# )
flow.from_source(
source=s3_bucket_block,
entrypoint="my_file.py:my_flow"
).deploy(
name="my-aws-s3-deployment",
work_pool_name="my-work-pool"
job_variables={"env": {"EXTRA_PIP_PACKAGES": "prefect-aws"} },
)
```
```yaml prefect.yaml
build: null
push:
- prefect_aws.deployments.steps.push_to_s3:
id: push_code
requires: prefect-aws>=0.5
bucket: my-bucket
folder: my-folder
credentials: "{{ prefect.blocks.aws-credentials.my-credentials-block }}" # if explicit authentication is required
pull:
- prefect_aws.deployments.steps.pull_from_s3:
id: pull_code
requires: prefect-aws>=0.5
bucket: '{{ push_code.bucket }}'
folder: '{{ push_code.folder }}'
credentials: "{{ prefect.blocks.aws-credentials.my-credentials-block }}" # if explicit authentication is required
deployments:
- name: my-aws-deployment
version: null
tags: []
concurrency_limit: null
description: null
entrypoint: my_file.py:my_flow
parameters: {}
work_pool:
name: my-work-pool
work_queue_name: null
job_variables: {}
enforce_parameter_schema: true
schedules: []
```
To create an `AwsCredentials` block:
1. Install the [prefect-aws](/integrations/prefect-aws) library with `pip install -U prefect-aws`
2. Register the blocks in prefect-aws with `prefect block register -m prefect_aws`
3. Create a user with a role with read and write permissions to access the bucket. If using the UI, create an access key pair with *IAM -> Users -> Security credentials -> Access keys -> Create access key*. Choose *Use case -> Other* and then copy the *Access key* and *Secret access key* values.
4. Create an [`AWSCredentials` block](/integrations/prefect-aws/index#save-credentials-to-an-aws-credentials-block) in code or the Prefect UI. In addition to the block name, most users will fill in the *AWS Access Key ID* and *AWS Access Key Secret* fields.
5. Reference the block as shown above.
```python azure_no_block.py
from prefect import flow
if __name__ == "__main__":
flow.from_source(
source="az://mycontainer/myfolder",
entrypoint="my_file.py:my_flow",
).deploy(
name="my-azure-deployment",
work_pool_name="my-work-pool",
job_variables={"env": {"EXTRA_PIP_PACKAGES": "prefect-azure"} },
)
```
```python azure_block.py
from prefect import flow
from prefect_azure import AzureBlobCredentials, AzureBlobStorage
if __name__ == "__main__":
azure_blob_storage_block = AzureBlobStorage.load("my-code-storage-block")
# or
# azure_blob_storage_block = AzureBlobStorage(
# container="my-prefect-azure-container",
# folder="my-folder",
# credentials=AzureBlobCredentials.load("my-credentials-block")
# )
flow.from_source(source=azure_blob_storage_block, entrypoint="my_file.py:my_flow").deploy(
name="my-azure-deployment", work_pool_name="my-work-pool"
)
```
```yaml prefect.yaml
build: null
push:
- prefect_azure.deployments.steps.push_to_azure_blob_storage:
id: push_code
requires: prefect-azure>=0.4
container: my-prefect-azure-container
folder: my-folder
credentials: "{{ prefect.blocks.azure-blob-storage-credentials.my-credentials-block }}"
# if explicit authentication is required
pull:
- prefect_azure.deployments.steps.pull_from_azure_blob_storage:
id: pull_code
requires: prefect-azure>=0.4
container: '{{ push_code.container }}'
folder: '{{ push_code.folder }}'
credentials: "{{ prefect.blocks.azure-blob-storage-credentials.my-credentials-block }}" # if explicit authentication is required
deployments:
- name: my-azure-deployment
version: null
tags: []
concurrency_limit: null
description: null
entrypoint: my_file.py:my_flow
parameters: {}
work_pool:
name: my-work-pool
work_queue_name: null
job_variables: {}
enforce_parameter_schema: true
schedules: []
```
To create an `AzureBlobCredentials` block:
1. Install the [prefect-azure](/integrations/prefect-azure/) library with `pip install -U prefect-azure`
2. Register the blocks in prefect-azure with `prefect block register -m prefect_azure`
3. Create an access key for a role with sufficient (read and write) permissions to access the blob.
You can create a connection string containing all required information in the UI under *Storage Account -> Access keys*.
4. Create an Azure Blob Storage Credentials block in code or the Prefect UI. Enter a name for the block and paste the
connection string into the *Connection String* field.
5. Reference the block as shown above.
```python gcs_no_block.py
from prefect import flow
if __name__ == "__main__":
flow.from_source(
source="gs://my-bucket/my-folder",
entrypoint="my_file.py:my_flow",
).deploy(
name="my-gcs-deployment",
work_pool_name="my-work-pool"
)
```
```python gcs_block.py
from prefect import flow
from prefect_gcp import GcpCredentials, GCSBucket
if __name__ == "__main__":
gcs_bucket_block = GCSBucket.load("my-code-storage-block")
# or
# gcs_bucket_block = GCSBucket(
# bucket="my-bucket",
# folder="my-folder",
# credentials=GcpCredentials.load("my-credentials-block")
# )
flow.from_source(
source=gcs_bucket_block,
entrypoint="my_file.py:my_flow",
).deploy(
name="my-gcs-deployment",
work_pool_name="my_pool",
job_variables={"env": {"EXTRA_PIP_PACKAGES": "prefect-gcp"} },
)
```
```yaml prefect.yaml
build: null
push:
- prefect_gcp.deployment.steps.push_to_gcs:
id: push_code
requires: prefect-gcp>=0.6
bucket: my-bucket
folder: my-folder
credentials: "{{ prefect.blocks.gcp-credentials.my-credentials-block }}" # if explicit authentication is required
pull:
- prefect_gcp.deployment.steps.pull_from_gcs:
id: pull_code
requires: prefect-gcp>=0.6
bucket: '{{ push_code.bucket }}'
folder: '{{ pull_code.folder }}'
credentials: "{{ prefect.blocks.gcp-credentials.my-credentials-block }}" # if explicit authentication is required
deployments:
- name: my-gcs-deployment
version: null
tags: []
concurrency_limit: null
description: null
entrypoint: my_file.py:my_flow
parameters: {}
work_pool:
name: my-work-pool
work_queue_name: null
job_variables: {}
enforce_parameter_schema: true
schedules: []
```
To create a `GcpCredentials` block:
1. Install the [prefect-gcp](/integrations/prefect-gcp/) library with `pip install -U prefect-gcp`
2. Register the blocks in prefect-gcp with `prefect block register -m prefect_gcp`
3. Create a service account in GCP for a role with read and write permissions to access the bucket contents.
If using the GCP console, go to *IAM & Admin -> Service accounts -> Create service account*.
After choosing a role with the required permissions,
see your service account and click on the three dot menu in the *Actions* column.
Select *Manage Keys -> ADD KEY -> Create new key -> JSON*. Download the JSON file.
4. Create a GCP Credentials block in code or the Prefect UI. Enter a name for the block and paste the entire contents of the JSON key file into the *Service Account Info* field.
5. Reference the block as shown above.
Another authentication option is to give the worker access to the storage location at runtime through SSH keys.
# How to version deployments
Source: https://docs-3.prefect.io/v3/how-to-guides/deployments/versioning
Track changes to your deployments and roll back to previous versions
In Prefect Cloud, deployments have a version history.
The **live** deployment version is the runnable version of a deployment.
A previous deployment version can be made live by **rolling back** to it.
When a previous deployment version is live, a newer deployment version can be made live by **promoting** it.
When a new version of a deployment is created, it is automatically set as the live version.
## What's included in a deployment version
Deployment versions are a history of changes to a deployment's configuration.
While the majority of deployment properties are included in a deployment's version, some properties cannot be versioned.
Persisting these properties across all versions helps prevent unexpected execution behavior when rolling back or promoting versions.
These properties are pinned to each deployment version.
| Deployment Property | Versioned |
| -------------------------- | -------------------------------------- |
| `description` | |
| `tags` | |
| `labels` | |
| `entrypoint` | |
| `pull_steps` | |
| `parameters` | |
| `parameter_openapi_schema` | |
| `enforce_parameter_schema` | |
| `work_queue_id` | |
| `work_pool_name` | |
| `job_variables` | |
| `created_by` | |
| `updated_by` | |
| `version_info` | |
These properties persist across version rollbacks and promotions.
| Deployment Property | Versioned |
| --------------------- | ------------------------------------------------------------------ |
| `name` | (immutable) |
| `schedules` | |
| `is_schedule_active` | |
| `paused` | |
| `disabled` | |
| `concurrency_limit` | |
| `concurrency_options` | |
## How to create and manage versions
A new deployment version is created every time a deployment is updated, whether from the CLI, from Python, or from the UI.
If you're deploying from a supported source code management platform or from inside a Git repository, Prefect automatically collects the **repository name**, **repository URL**, the currently checked out **branch**, the **commit SHA**, and the **first line of your commit message** from your environment.
This information is used to help create a record of which code versions produced which deployment versions, and does not affect deployment execution.
### Supported source code management platforms
Prefect searches for environment variables in each supported platform's CI environment in order to collect information about the current state of the repository from which deployment versions are created.
It may be useful to access these environment variables in other stages of your deployment process for constructing version identifiers.
Prefect's automatic version information collection currently supports GitHub Actions, GitLab CI, Bitbucket Pipelines, and Azure Pipelines.
If deploying from a Git repository not on one of these platforms, Prefect will use `git` CLI commands as a best effort to discover these values.
| Environment Variable | Value |
| -------------------- | ---------------------------------- |
| `GITHUB_SHA` | Commit SHA |
| `GITHUB_REF_NAME` | Branch name |
| `GITHUB_REPOSITORY` | Repository name |
| `GITHUB_SERVER_URL` | Github account or organization URL |
| Environment Variable | Value |
| -------------------- | --------------- |
| `CI_COMMIT_SHA` | Commit SHA |
| `CI_COMMIT_REF_NAME` | Branch name |
| `CI_PROJECT_NAME` | Repository name |
| `CI_PROJECT_URL` | Repository URL |
| Environment Variable | Value |
| --------------------------- | ------------------------------------- |
| `BITBUCKET_COMMIT` | Commit SHA |
| `BITBUCKET_BRANCH` | Branch name |
| `BITBUCKET_REPO_SLUG` | Repository name |
| `BITBUCKET_GIT_HTTP_ORIGIN` | Bitbucket account or organization URL |
| Environment Variable | Value |
| ------------------------ | --------------- |
| `BUILD_SOURCEVERSION` | Commit SHA |
| `BUILD_SOURCEBRANCHNAME` | Branch name |
| `BUILD_REPOSITORY_NAME` | Repository name |
| `BUILD_REPOSITORY_URI` | Repository URL |
### Using the `version` deployment property
Supplying a `version` to your deployment is not required, but using human-readable version names helps give meaning to each change you make.
It's also valuable for quickly finding or communicating the version you want to roll back to or promote.
For additional details on how Prefect handles the value of `version`, see [deployment metadata for bookkeeping](/v3/deploy#metadata-for-bookkeeping).
### Executing specific code versions
It's possible to synchronize code changes to deployment versions so each deployment version executes the exact commit that was checked out when it was created.
Since `pull_steps` and `job_variables` define what repository or image to pull when a flow runs, updating their contents with each code change keeps deployment versions in step with your codebase.
Which of these configurations to use depends on whether you are pulling code from Git or storing code in Docker images.
The examples in this section use GitHub as their source control management and CI platform, so be sure to replace URLs, environment variables, and CI workflows with the ones relevant to your platform.
You can check out complete example repositories on GitHub for executing specific code versions when [pulling from Git](https://github.com/kevingrismore/version-testing) and [pulling Docker images](https://github.com/kevingrismore/version-testing-docker/tree/main).
#### Pulling from Git
The `git_clone` deployment pull step and `GitRepository` deployment storage class offer a `commit_sha` field.
When deploying from a Git repository, provide the commit SHA from your environment to your deployment.
Both approaches below will result in a deployment pull step that clones your repository and checks out a specific commit.
```yaml With prefect.yaml
pull:
- prefect.deployments.steps.git_clone:
repository: https://github.com/my-org/my-repo.git
commit_sha: "{{ $GITHUB_SHA }}"
deployments:
- name: my-deployment
version: 0.0.1
entrypoint: example.py:my_flow
work_pool:
name: my-work-pool
```
```python With .deploy()
import os
from prefect import flow
from prefect.runner.storage import GitRepository
@flow(log_prints=True)
def my_flow():
print("Hello world!")
if __name__ == "__main__":
my_flow.from_source(
source=GitRepository(
repo_url="https://github.com/my-org/my-repo.git",
commit_sha=os.getenv("GITHUB_SHA"),
)
).deploy(
name="my-deployment",
version="0.0.1",
work_pool_name="my-work-pool",
)
```
#### Pulling Docker images
When baking code into Docker images, use the image digest to pin exact code versions to deployment versions.
An image digest uniquely and immutably identifies a container image.
First, build your image in your CI job and pass the image digest as an environment variable to the Prefect deploy step.
```yaml Github Actions
...
- name: Set up Docker Buildx
uses: docker/setup-buildx-action@v3
- name: Log in to Docker Hub
uses: docker/login-action@v3
with:
username: ${{ vars.DOCKERHUB_USERNAME }}
password: ${{ secrets.DOCKERHUB_TOKEN }}
- name: Build and push
id: build-docker-image
uses: docker/build-push-action@v6
with:
platforms: linux/amd64,linux/arm64
push: true
tags: my-registry/my-example-image:my-tag
cache-from: type=gha
cache-to: type=gha,mode=max
- name: Deploy a Prefect flow
env:
IMAGE_DIGEST: ${{ steps.build-docker-image.outputs.digest }}
PREFECT_API_KEY: ${{ secrets.PREFECT_API_KEY }}
PREFECT_API_URL: ${{ secrets.PREFECT_API_URL }}
... # your deployment action here
```
Then, refer to that digest in the image name you provide to this deployment version's job variables.
```yaml With prefect.yaml
deployments:
- name: my-deployment
version: 0.0.1
entrypoint: example.py:my_flow
work_pool:
name: my-work-pool
job_variables:
image: "my-registry/my-image@{{ $IMAGE_DIGEST }}"
```
```python With .deploy()
import os
from prefect import flow
@flow(log_prints=True)
def my_flow():
print("Hello world!")
if __name__ == "__main__":
my_flow.deploy(
name="my-deployment",
version="0.0.1",
work_pool_name="my-work-pool",
image=f"my-registry/my-image@{os.getenv('IMAGE_DIGEST')}",
build=False,
)
```
# How-to Guides
Source: https://docs-3.prefect.io/v3/how-to-guides/index
## Sections
Learn how to write and customize your Prefect workflows.
Learn how to deploy and manage your workflows as Prefect deployments.
Learn how to configure your Prefect environment.
Learn how to work with events, triggers, and automations.
Learn how to deploy your workflows to specific infrastructure.
Learn how to set up your Prefect Cloud account.
Learn how to host your own Prefect server.
Learn how to migrate from other platforms and upgrade to the latest versions of Prefect.
# How to Migrate from Airflow
Source: https://docs-3.prefect.io/v3/how-to-guides/migrate/airflow
Migration from Apache Airflow to Prefect: A Comprehensive How-To Guide
Migrating from Apache Airflow to Prefect simplifies orchestration, reduces overhead, and enables a more Pythonic workflow.
Prefect's flexible **library-based approach** lets you write, test, and run workflows with regular code—without the complexity of schedulers, executors, or metadata databases.
This guide will walk you through a **step-by-step migration**, helping you transition from Airflow DAGs to Prefect flows while mapping key concepts, adapting infrastructure, and optimizing deployments. By the end, you'll have a streamlined, scalable orchestration system that lets your team focus on engineering rather than maintaining workflow infrastructure.
**Airflow to Prefect Mapping**
This table provides a quick reference for migrating key Airflow concepts to their Prefect equivalents. Click on each concept to jump to a detailed explanation.
| **Airflow Concept** | **Prefect Equivalent** | **Key Differences** |
| ---------------------------------------------------------- | ------------------------------------------------------------ | --------------------------------------------------------------------------------------------- |
| [**DAGs**](#choose-a-dag-to-convert) | [**Flows**](#define-a-prefect-flow) | Prefect flows are standard Python functions (`@flow`). No DAG classes or `>>` dependencies. |
| [**Operators**](#create-equivalent-prefect-tasks) | [**Tasks**](#create-equivalent-prefect-tasks) | Prefect tasks (`@task`) replace Airflow Operators, removing the need for specialized classes. |
| [**Executors**](#airflow-executors) | [**Work Pools & Workers**](#airflow-executors) | Prefect decouples task execution using lightweight **workers** polling **work pools**. |
| [**Scheduling**](#prefect-deployment) | [**Deployments**](#prefect-deployment) | Scheduling is separate from flow code and configured externally. |
| [**XComs**](#define-a-prefect-flow) | [**Return Values**](#define-a-prefect-flow) | Prefect tasks return data directly; no need for XComs or metadata storage. |
| [**Hooks & Connections**](#airflow-hooks-and-integrations) | [**Blocks & Integrations**](#airflow-hooks-and-integrations) | Prefect replaces Hooks with **Blocks** for secure resource management. |
| [**Sensors**](#airflow-sensors) | [**Triggers & Event-Driven Flows**](#airflow-sensors) | Prefect uses external event triggers or lightweight polling flows. |
| [**Airflow UI**](#observability) | [**Prefect UI**](#observability) | Prefect provides real-time monitoring, task logs, and automation features. |
There are also so key differences when it comes to task execution, resource control, data passing, and parallelism. We'll cover these in more detail below.
| **Feature** | **Airflow** | **Prefect** |
| --------------------- | ----------------------------------------- | ------------------------------------------ |
| **Task Execution** | Tasks run as independent processes/pods | Tasks execute in single flow runtime |
| **Resource Control** | Task-level via executor settings | Flow-level via work pools & task runners |
| **Data Passing** | Requires XComs or external storage | Direct in-memory data passing |
| **Parallelism** | Managed by executor configuration | Managed by work pools and task runners |
| **Task Dependencies** | Uses `>>` operators and `set_upstream()` | Implicit via Python function calls |
| **DAG Parsing** | Pre-parsed with global variable execution | Standard Python function execution |
| **State & Retries** | Individual task retries, manual DAG fixes | Built-in flow & task retry handling |
| **Scheduling** | Tightly coupled with DAG code | Decoupled via deployments |
| **Infrastructure** | Requires scheduler, metadata DB, workers | Lightweight API server with optional cloud |
## Preparing for migration
Before jumping into code conversion, set the stage for a smooth migration. Preparation includes auditing your existing Airflow DAGs, setting up a Prefect environment for testing, and mapping Airflow concepts to their Prefect equivalents.
**Audit your Airflow DAGs and dependencies:** Catalog all DAGs, schedules, task counts, and dependencies (databases, APIs, cloud services). Identify **high-priority pipelines** (business-critical, failure-prone, frequently updated) and **simpler DAGs** for pilot migration. Start with a small, non-critical DAG to gain confidence before tackling complex workflows.
**Set up Prefect for testing:** Before fully migrating, set up a parallel Prefect environment to test your flows. Prefect provides a managed execution environment out of the box, so you can get started without configuring infrastructure.
1. [**Install Prefect**](/v3/get-started/install) (`pip install prefect`).
2. **Start a Prefect server locally** (`prefect server start`) or sign up for [**Prefect Cloud**](https://app.prefect.cloud/) to run flows immediately.
3. **Run initial flows without infrastructure setup**: Run flows locally or using Prefect Cloud Managed Exxecution - allowing you to test without configuring work pools or Kubernetes.
Prefect Cloud provides a managed execution environment out of the box, so you can get started without configuring infrastructure.
Once you've validated basic functionality, you can explore configuring an [**execution environment**](/v3/deploy/infrastructure-concepts/work-pools) (e.g., Docker, Kubernetes) for production, which we cover later in this tutorial.
For each Airflow DAG, you can outline its Prefect flow structure (tasks and control flow), where its schedule will live, and what execution infrastructure it needs. With preparation done, it's time to start converting code.
## Converting DAGs to Prefect Flows
In this phase, you will **rewrite your Airflow DAGs as Prefect flows and tasks**. The goal is to replicate each workflow's logic in Prefect, while simplifying wherever possible.
Prefect's API is quite ergonomic - many Airflow users find they can express the same logic with *less code* and *more flexibility*
Let's break down the conversion process step-by-step, and walk through a concrete example.
### Choose a DAG to convert
Start with one of your simpler DAGs (perhaps one of those identified in the audit as an easy win). For illustration, suppose we have an Airflow DAG that runs a simple ETL: it **extracts data**, **transforms** it, and then **loads** the results. In Airflow, this might be defined as:
{/* pmd-metadata: notest */}
```python
# Airflow DAG example (simplified ETL)
from airflow import DAG
from airflow.operators.python import PythonOperator
from datetime import datetime
# Airflow task functions (to be used by PythonOperator)
def extract_fn():
# ... (extract data, e.g., query an API or database)
return data
def transform_fn(data):
# ... (transform the data)
return processed_data
def load_fn(processed_data):
# ... (load data to target, e.g., save to DB or file)
with DAG("etl_pipeline", start_date=datetime(2023,1,1), schedule_interval="@daily", catchup=False) as dag:
extract = PythonOperator(task_id='extract_data', python_callable=extract_fn)
transform = PythonOperator(task_id='transform_data', python_callable=transform_fn)
load = PythonOperator(task_id='load_data', python_callable=load_fn)
# Set task dependencies
extract >> transform >> load
```
In this Airflow DAG, we define three tasks using `PythonOperator`, then specify that they run sequentially (`extract` then `transform` then `load`).
### Create equivalent Prefect tasks
In Prefect, we'll take the core logic of `extract_fn`, `transform_fn`, `load_fn` and turn each into a `@task` decorated function. The code inside can remain largely the same (minus any Airflow-specific cruft). For example:
{/* pmd-metadata: notest */}
```python
# Prefect tasks for ETL
from prefect import task, flow
@task
def extract_data():
# ... (extract data as before)
return data
@task
def transform_data(data):
# ... (transform data as before)
return processed_data
@task
def load_data(processed_data):
# ... (load data as before)
```
Notice we simply applied `@task` to each function. No need for a special operator class or task IDs - the function name serves as an identifier, and Prefect will handle the orchestration.
### Define a Prefect flow
Now we write a `@flow` function that calls these tasks in the required order:
{/* pmd-metadata: notest */}
```python
@flow
def etl_pipeline():
data = extract_data() # calls extract_data task
processed = transform_data(data) # uses output of extract_data
load_data(processed) # calls load_data with result of transform_data
```
This Prefect flow function replaces the Airflow DAG. No need for `>>` dependencies or XComs. **Task results can be stored in variables that are passed directly to other tasks as arguments**. By default, tasks are automatically executed in the order they are called.
Unlike Airflow, where testing often requires an Airflow context, Prefect flows run like standard Python code. You can execute `etl_pipeline()` in an interpreter, import it elsewhere, or test tasks individually (`transform_data.fn(sample_data)`).
* **Airflow:** Defines operators, sets dependencies (`>>`), and relies on XCom for data passing.
* **Prefect:** Calls tasks like functions, with execution order determined by data flow, making workflows more intuitive and testable.
### Branching and conditional logic
In Airflow, conditional branching is typically handled using BranchPythonOperator, ShortCircuitOperator, or trigger rules, requiring explicit DAG constructs to determine execution paths. Prefect simplifies branching by leveraging standard Python if/else logic directly within flows.
**Implementing Branching in Prefect**
Instead of using BranchPythonOperator and dummy tasks for joining paths, you can structure conditional execution using native Python control flow:
{/* pmd-metadata: notest */}
```python
@flow
def my_flow():
result = extract_data()
if some_condition(result):
outcome = branch_task_a() # a task or subflow for branch A
else:
outcome = branch_task_b() # branch B
final_task(outcome)
```
**Key Differences from Airflow**
| **Feature** | **Airflow (BranchPythonOperator)** | **Prefect (`if/else` logic)** |
| -------------------- | --------------------------------------------------------- | ----------------------------------------------------------------------- |
| **Branching Method** | Often uses specialized operators (`BranchPythonOperator`) | Uses native Python conditionals (`if/else`) |
| **Skipped Tasks** | Unselected branches are explicitly **skipped** | Prefect **only runs** the executed branch—no skipping needed |
| **Join Behavior** | Uses **DummyOperator** to rejoin paths | Downstream tasks execute **automatically** after the conditional branch |
**Advantages of Prefect’s Approach**
* **No special operators** — branching is simpler and more intuitive
* **Cleaner code** — fewer unnecessary tasks like `DummyOperator`
* **No explicit skipping required** — Prefect only executes the called tasks
By using standard Python control flow, Prefect **eliminates complexity** and makes conditional execution more **readable, maintainable, and testable**.
### Retries and error handling
Airflow DAGs often have retry settings either at the DAG level (`default_args`) or per task (e.g., `retries=3`). In Prefect, you can specify [retries](/v3/develop/write-flows#retries) for any task or flow.
Use `@task(retries=2, retry_delay_seconds=60)` to retry a task twice on failure, or `@flow(retries=1)` to retry the entire flow once. Prefect **distinguishes flow and task retries**—flow retries rerun all tasks, while task retries rerun only the failed task. Replace Airflow-specific error handling (`on_failure_callback`, sensors) with Prefect's **Retry**, **State Handlers**, or built-in failure notifications.
### Remove Airflow-specific code
Go through the DAG code and strip out anything that doesn't apply in Prefect.
This includes: DAG declarations (`DAG(...)` blocks), default\_args, Airflow imports (`from airflow...`), XCom push/pull calls (replace with return values), Jinja templating in operator arguments (you can often just compute those values in Python directly or use [Prefect parameters](/v3/deploy/index#workflow-scheduling-and-parametrization)).
If your DAG used Airflow Variables or Connections (Airflow's way to store config in the Metastore), you'll need to supply those to Prefect tasks via another means - for example, as [environment variables](/v3/develop/settings-and-profiles#environment-variables) or using [Prefect Blocks](/integrations/integrations) (like a Block for a database connection string). Essentially, your Prefect flow code should look like a regular Python script with functions, not like an Airflow DAG file.
As an illustration, here's how our example **ETL pipeline** looks after conversion:
{/* pmd-metadata: notest */}
```python
from prefect import flow, task
@task(retries=1, log_prints=True)
def extract_data():
# fetch data from API (simulated)
data = get_data_from_api()
return data
@task
def transform_data(data):
# process the data
processed = transform(data)
return processed
@task
def load_data(data):
# load data to database
load_into_db(data)
@flow(name="etl_pipeline")
def etl_pipeline_flow():
raw = extract_data()
processed = transform_data(raw)
load_data(processed)
if __name__ == "__main__":
# For local testing
etl_pipeline_flow()
```
Key improvements in this converted code:
* **Direct execution for testing** - `if __name__ == "__main__": etl_pipeline_flow()` allows running the flow locally during development. In production, Prefect handles scheduling.
* **Built-in retries and logging** - `retries=1` ensures one retry on failure, and `log_prints=True` sends `print()` output to Prefect's UI.
* **Pure Python** - No Airflow imports or context, making the flow easy to test, debug, and run consistently across environments (IDE, CI, or production).
### Validate functional equivalence
Once a DAG has been rewritten as a Prefect flow, execute the flow and compare its results with the Airflow DAG to ensure expected outcomes. If discrepancies arise, modify the flow accordingly. Keep in mind the original DAG may have depended on XComs or global variables that you will need to account for.
For each task and special case, including [subDAGs](https://airflow.apache.org/docs/apache-airflow/stable/core-concepts/dags.html#concepts-subdags) and [TaskGroups](https://airflow.apache.org/docs/apache-airflow/stable/core-concepts/dags.html#taskgroups), implement them as subflows or Python functions in Prefect. When transitioning from Airflow's TaskFlow API, keep in mind that Prefect's `@task` decorator serves a similar purpose but does not rely on XComs.
After completing these steps, the Prefect flow should accurately replicate the functionality of the Airflow DAG while being more modular and testable. The migration is now complete, and the next step is to focus on deploying and optimizing the new workflows.
## Infrastructure Migration Considerations
Migrating your code is a big step, but ensuring your workflows run smoothly in Prefect is just as important. Prefect's **flexible execution** makes this easier, supporting Prefect managed execution, local machines, VMs, containers, and Kubernetes with less setup. This section maps Airflowss executors to **Prefect Work Pools and Workers**, while also covering sensors, hooks, logging, and state management to complete your migration.
### Leveraging Prefect Managed Execution
**Running Flows Without Infrastructure Setup**
Prefect Cloud offers [Managed Execution](/v3/how-to-guides/deployment_infra/serverless), allowing you to run flows **without setting up infrastructure or maintaining workers**. With Prefect Managed work pools, Prefect handles compute, execution, and scheduling, eliminating the need for a cloud provider account or on-premises infrastructure.
**Getting Started with Prefect Managed Execution**
```bash
prefect work-pool create my-managed-pool --type prefect:managed
```
{/* pmd-metadata: notest */}
```python
from prefect import flow
if __name__ == "__main__":
flow.from_source(
source="https://github.com/prefecthq/demo.git",
entrypoint="flow.py:my_flow",
).deploy(
name="test-managed-flow",
work_pool_name="my-managed-pool",
)
```
```bash
python managed-execution.py
```
This will allow your flow to run remotely without provisioning workers, setting up Kubernetes, or maintaining cloud infrastructure.
**When to Use Prefect Managed Execution**
Ideal for testing and running flows without infrastructure setup, especially for teams that want managed execution without a cloud provider.
If you need custom images, heavy dependencies, private networking, or higher concurrency limits than Prefect's tiers allow.
**Next Steps**
If you require self-hosted execution, the next sections cover how to migrate Airflow Executors to Prefect Work Pools across different infrastructure types (Kubernetes, Docker, Celery, etc.).
For full details on Prefect Managed Execution, refer to the [Managed Execution documentation](/v3/how-to-guides/deployment_infra/serverless).
### Airflow Executors
**Airflow Executors vs Prefect Work Pools/Workers:** Airflow's executor setting determines how tasks are distributed. Prefect's equivalent concept is the [**work pool**](/v3/deploy/infrastructure-concepts/work-pools) (with one or more [**workers**](/v3/deploy/infrastructure-concepts/workers) polling it).
In Airflow, each task executes independently, regardless of the executor used. Whether running with LocalExecutor, CeleryExecutor, or KubernetesExecutor, every task runs as an isolated process or pod. Executors control how and where these tasks are executed, but the core execution model remains task-by-task.
In contrast, Prefect executes an entire flow run within a single execution environment (e.g., a local process, Docker container, or Kubernetes pod). Tasks within a flow execute within the same runtime context, reducing fragmentation and improving performance. Prefect's execution model simplifies resource management, allowing for in-memory data passing between tasks rather than relying on external storage or metadata databases.
Here's a mapping of typical setups:
#### Airflow LocalExecutor
With the **Airflow LocalExecutor** tasks run as subprocesses on the same machine. In Prefect, the default behavior is similar - you can run the flow in a local Python process, and tasks will execute sequentially by default. That does not *have* to be the same machine that is running your Prefect UI and scheduler.
For parallelism on a single machine, use [**`DaskTaskRunner`**](/integrations/prefect-dask/index) to enable multi-process execution:
{/* pmd-metadata: notest */}
```python
@flow(task_runner=DaskTaskRunner())
```
By default, Prefect's **Process work pool** runs flows as subprocesses. A basic **Airflow LocalExecutor** setup can be replaced with a **Prefect worker** on the same VM using a **process work pool**, eliminating the need for a separate scheduler.
#### Airflow CeleryExecutor
**Airflow CeleryExecutor** where distributed workers run across multiple machines, using a message broker like RabbitMQ/Redis.
Prefect eliminates the need for a **message broker** or **results backend**, as its API server manages work distribution. To replicate an Airflow **CeleryExecutor** setup, deploy **multiple Prefect workers** across machines, all polling from a shared **work pool**.
**Setting Up a Work Pool and Workers**
1. **Create a work pool** (e.g., `"prod-work-pool"`):
```bash
prefect work-pool create prod-work-pool --type process
```
2. **Start a worker on each node**, assigning it to the work pool:
```bash
prefect worker start -p prod-work-pool
```
3. **Workers poll the work pool** and execute assigned flow runs.
Prefect **work pools** function similarly to **Celery queues**, allowing multiple workers to process tasks concurrently.
#### Airflow KubernetesExecutor
In Airflow, the **KubernetesExecutor** follows the per-task execution model, launching each task in its own Kubernetes pod. Prefect, instead, uses a Kubernetes Work Pool, where each flow run executes in a single Kubernetes pod. This approach reduces fragmentation, as tasks run within the same execution environment rather than spawning separate pods.
**Configuring a Kubernetes Work Pool**
For detailed instructions, see [Prefect's Kubernetes Work Pool documentation](/v3/how-to-guides/deployment_infra/kubernetes). But the general steps to take are:
1. **Create a Kubernetes work pool** with the desired pod template (e.g., image, resources):
```bash
prefect work-pool create k8s-pool --type kubernetes
```
2. **Deploy a flow to the Kubernetes work pool**:
{/* pmd-metadata: notest */}
```python
from prefect import flow
@flow(log_prints=True)
def buy():
print("Buying securities")
if __name__ == "__main__":
buy.deploy(
name="my-code-baked-into-an-image-deployment",
work_pool_name="k8s-pool",
image="my_registry/my_image:my_image_tag"
)
```
Alternatively, you can use a [prefect.yaml](/v3/how-to-guides/deployment_infra/kubernetes#define-a-prefect-deployment) file to deploy your flow to the Kubernetes work pool.
3. [**Run a Kubernetes worker in-cluster**](/v3/how-to-guides/deployment_infra/kubernetes#deploy-a-worker-using-helm) to execute flow runs.
4. **Execution Flow**:
* The worker **picks up a scheduled flow run**.
* It **creates a new pod**, which executes the entire flow.
* The **pod terminates automatically** after execution.
This setup eliminates the need for a long-running scheduler, reducing operational complexity while leveraging Kubernetes for **on-demand, containerized execution**.
#### Airflow CeleryKubernetes
**Airflow + Celery + Kubernetes (CeleryKubernetes Executor)** or other hybrid: Some Airflow deployments use Celery for distributed scheduling but run tasks in containers or on Kubernetes.
Prefect's model can handle these as well by combining approaches - e.g., use a Kubernetes work pool with multiple worker processes distributed as needed. The general principle is that Prefect **work pools** can cover all these patterns (local, multi-machine, containers, serverless) via configuration, not code, and you manage them via Prefect's UI/CLI.
#### Using Serverless compute
Prefect supports [**serverless execution**](/v3/how-to-guides/deployment_infra/serverless) on various cloud platforms, eliminating the need for dedicated infrastructure. Instead of provisioning long-running workers, flows can be executed **on-demand** in ephemeral environments. Prefect's push-based work pools allow flows to be submitted to serverless services, where they run in isolated containers and automatically scale with demand.
**Serverless Platforms**
Prefect flows can run on:
* **AWS ECS** (Fargate or EC2-backed containers)
* **Azure Container Instances (ACI)**
* **Google Cloud Run**
* **Modal** (serverless compute for AI/ML workloads)
* **Coiled** (serverless Dask clusters for parallel workloads)
**Configuring a Serverless Work Pool**
To run flows on a serverless platform, create a **push-based work pool** and configure it to submit jobs to the desired service.
Example: Creating an **ECS work pool**:
```bash
prefect work-pool create --type ecs:push --provision-infra my-ecs-pool
```
Deployments can then be configured to use the serverless work pool, allowing Prefect to submit flow runs without maintaining long-lived infrastructure.
For setup details, refer to [Prefect's serverless execution documentation](/v3/how-to-guides/deployment_infra/serverless).
### Airflow Sensors
Airflow Sensors continuously poll for external conditions, such as file availability or database changes, which can tie up resources. Prefect replaces this with an **event-driven approach**, where external systems trigger flow execution when conditions are met.
**Using External Triggers**
Instead of using an Airflow `S3KeySensor`, configure an AWS Lambda or EventBridge rule to call the Prefect API when an S3 file is uploaded. Prefect Cloud and Server provide API endpoints to start flows on demand. Prefect's **Automations** can also trigger flows based on specific conditions.
**Handling Polling Scenarios**
If an external system lacks event-driven capabilities, implement a lightweight **polling flow** that runs on a schedule (e.g., every 5 minutes), checks the condition, and triggers the main flow if met. This approach minimizes idle resource consumption compared to Airflow's persistent sensors.
Prefect's model eliminates long-running sensor tasks, making workflows **more efficient, scalable, and event-driven**.
### Airflow Hooks and Integrations
Airflow provides hooks and operators for interacting with external systems (e.g., **JDBC, cloud services, databases**). In Prefect, these integrations are handled through [**Prefect Integrations**](/integrations/integrations) (e.g., `prefect-snowflake`, `prefect-gcp`, `prefect-dbt`) or by directly using the relevant **Python libraries** within tasks.
**Migrating Airflow Hooks to Prefect**
1. **Identify Airflow hooks** used in your DAGs (e.g., `PostgresHook`, `GoogleCloudStorageHook`).
2. **Replace them with equivalent Prefect integrations** or direct Python library calls.
**Example:** Instead of
{/* pmd-metadata: notest */}
```python
hook = PostgresHook(postgres_conn_id=my_conn_id)
engine = hook.get_sqlalchemy_engine()
session = sessionmaker(bind=engine)()
```
Use Prefect Blocks for secure credential management:
{/* pmd-metadata: notest */}
```python
from prefect_sqlalchemy import SqlAlchemyConnector
SqlAlchemyConnector.load("BLOCK_NAME-PLACEHOLDER")
```
3. **Use Prefect Blocks for secrets management**, similar to Airflow Connections, to separate credentials from code.
**Replacing Airflow Operators with Prefect Tasks**
* **Prefect tasks** can call any Python library, eliminating the need for custom Airflow operators.
* Example: Instead of using a **BashOperator** to call an API via a shell script, install the necessary package in the flow's environment and call it directly in a task.
Prefect's approach **removes unnecessary abstraction layers**, allowing direct access to the full Python ecosystem without Airflow-specific constraints.
Basically: **anything done with a custom Airflow operator or hook can be replaced in Prefect with a task using the appropriate Python library.** Prefect removes Airflow's constraints, allowing direct use of the full Python ecosystem. For example, instead of using a **BashOperator** to call an API via a shell script, install the required package in your environment and call it directly from a task, eliminating unnecessary workarounds.
### Observability
#### State and logging
**Task and Flow State Management**
In Airflow, task states (`success`, `failed`, `skipped`, etc.) are stored in a metadata database and displayed in the Airflow UI's DAG run view. Prefect also tracks state for **each task and flow run**, but these states are managed by the **Prefect backend** (Prefect Server or Cloud API) and can be accessed via the **Prefect UI, API, or CLI**.
After migration, similar visibility is available in Prefect's UI, where you can track which flows and tasks succeeded or failed. Prefect also includes additional state management features such as:
* Cancel a flow run (`Cancelling` state).
* Retry a failed flow run (with manual steps).
* **Task caching** between runs to avoid redundant computations.
**Logging Differences**
Airflow logs task execution output to files (stored on executor machines or remote storage), viewable through the UI. Prefect **captures stdout, stderr, and Python logging** from tasks and sends them to the Prefect backend, making logs accessible in the **Prefect UI, API, and CLI**.
To ensure logs appear correctly in Prefect's UI, use `@flow(log_prints=True)` or `@task(log_prints=True)`
These flags route `print()` statements to Prefect logs automatically.
For centralized logging (e.g., ElasticSearch, Stackdriver), Prefect supports [**custom logging handlers**](/v3/advanced/logging-customization) and **third-party integrations**. Logs can be forwarded similarly to how Airflow handled external logging.
**Debugging and Troubleshooting**
Prefect simplifies debugging because tasks are **standard Python functions**. Instead of analyzing scheduler or worker logs, you can:
* **Re-run individual tasks or flows locally** to reproduce issues.
* **Test flows interactively** in an IDE before deploying.
This direct execution model eliminates the need to troubleshoot failures through a scheduling system, making debugging faster and more intuitive than in Airflow.
#### Monitoring
**Notifications and Alerts**
In Airflow, monitoring is typically managed through the UI, email alerts on task failures, and external monitoring of the scheduler.
Prefect provides similar capabilities through *Automations*, which can be configured to trigger alerts via Slack, email, or webhooks based on specific events.
To replicate Airflow's alerting (e.g., failures or SLA misses), configure [**Prefect Automations**](/v3/automate/events/automations-triggers) to:
* Notify on **flow or task failures**.
* Alert when a **flow run exceeds a specified runtime**.
* Trigger **custom actions** based on state changes.
**Service Level Agreements (SLAs)**
Prefect Cloud supports Service Level Agreements (SLAs) to monitor and enforce performance expectations for flow runs. SLAs automatically trigger alerts when predefined thresholds are violated.
SLAs can be defined via the Prefect UI, prefect.yaml, `.deploy()` method, or CLI. Violations generate `prefect.sla.violation` events, which can trigger Automations to send notifications or take corrective actions.
For full configuration details, refer to the [Measure reliability with Service Level Agreements](/v3/automate/events/slas) documentation.
**Implementation Considerations**
Prefect allows flexible logging and alerting adjustments to match existing monitoring workflows. Logging handlers can integrate with **third-party services** (e.g., ElasticSearch, Datadog), and **Prefect's API and UI provide real-time state visibility** for proactive monitoring.
## Deployment & CI/CD Changes
Deploying workflows in Prefect differs from Airflow's approach of “drop DAG files in a folder.” In Prefect, a **Deployment** is the unit of deployment: it associates a flow (Python function) with infrastructure (how/where to run) and optional schedule or triggers. Migrating to Prefect means adopting a new way to package and release your workflows, as well as updating any CI/CD pipelines that automated your Airflow deployments.
### Prefect Deployment
**From Airflow DAG schedules to Prefect Deployment:** In Airflow, deployment usually meant placing your DAG code on the Airflow scheduler (e.g., by committing to a Git repo that the scheduler reads, or copying files to the DAGs directory). There isn't a formal deployment artifact beyond the Python files. Prefect, by contrast, treats deployments as first-class objects. You will create a deployment for each flow (or for each distinct configuration of a flow you want to run). This can be done via code (calling `flow.deploy()`), via CLI (`prefect deployment`), or by writing a YAML (`prefect.yaml`) that describes the deployment.
Key things a **Prefect deployment** defines:
* **Target flow** (which function, and which file or import path it comes from).
* **Infrastructure configuration**: e.g., use the “Kubernetes work pool” or “process” type, possibly the docker image to use, resource settings, etc.
* **Storage of code**: e.g., whether the code is stored in the image, pulled from Git, etc. (Prefect can package code into a Docker image or rely on an existing image).
* **Schedule** (optional): e.g., Cron or interval schedule for automatic runs, or you can leave it manual.
* **Parameters** (optional): default parameter values for the flow, if any.
To migrate each Airflow DAG, you will create a Prefect deployment for its flow. For example, if we converted `etl_pipeline` DAG to `etl_pipeline_flow` in Prefect, we might write a `prefect.yaml` like:
```yaml
# prefect.yaml
deployments:
- name: etl-pipeline-prod
flow_name: etl_pipeline_flow
entrypoint: etl_flow.py:etl_pipeline_flow # file and function where the flow is defined
parameters: {}
schedule: "@daily"
work_pool:
name: prod-k8s-pool
# other infra settings like image, etc., if needed
```
This YAML can define multiple deployments, but in this case we have one named “etl-pipeline-prod” which runs daily via the `prod-k8s-pool` (a Kubernetes pool perhaps). In Airflow, these details were all intertwined in the DAG file (the schedule was in code, the infrastructure maybe in the executor config or the DAG via `executor_config`). In Prefect, there is a separation of these concerns.
### Automation via CI/CD
Many organizations use CI/CD to deploy Airflow DAGs (for example, a Git push triggers a Jenkins job that lints DAGs and copies them to the Airflow server). With Prefect, you'll likely adjust your CI/CD to **register Prefect deployments** whenever you update the flow code. Prefect's CLI is your friend here. A common pattern is:
1. On merge to main, build a Docker image with your flow code, push it to a registry
2. Then run `prefect deployment build -n -p --cron "" -q default -o deployment.yaml` (or use `prefect.yaml`) and apply it.
This can all be scripted. In fact, Prefect provides guidance on using [GitHub Actions or similar tooling to do this](/v3/advanced/deploy-ci-cd). By integrating Prefect's deployment steps into CI, you ensure that any change in your flow code gets reflected in Prefect's orchestrator, much like updating DAG code in Airflow.
Alternatively, if your deployment is set to pull the workflow code from your git repository each time, you only need to push the latest workflow code, and automatically next time your deployment runs it will pull the latest workflow code.
This CI pipeline approach allows versioning and automating your flows deployment, treating them similarly to application code deployments. It's a shift from Airflow where deployment could be syncing a folder - Prefect's method is more **controlled** and **atomic** (you create a deployment manifest and apply it, which registers everything with Prefect).
### Prefect in Production
Once deployed, Prefect schedules and orchestrates flows based on your **deployments**. Follow these best practices to ensure a reliable production setup:
* **High Availability**: If self-hosting, use PostgreSQL and consider running **multiple API replicas** behind a load balancer. [**Prefect Cloud**](https://prefect.io/cloud) handles availability automatically.
* **Keep Workers Active**: Ensure Prefect workers are always running, whether as systemd services, Docker containers, or Kubernetes deployments.
* **Logging & Observability**: Use Prefect's UI for logs or configure external storage (e.g., S3, Elasticsearch) for **long-term retention**.
* **Notifications & Alerts**: Set up failure alerts via Slack, email, or Twilio using [**Prefect Automations**](/v3/automate/events/automations-triggers) to ensure timely issue resolution.
* **CI/CD & Testing**: Validate deployment YAMLs in CI (`prefect deployment build --skip-upload`), and unit test tasks as regular Python functions.
* **Configuration Management**: Replace Airflow Variables/Connections with [**Prefect Blocks**](/v3/develop/variables), storing secrets via CLI, UI, or version-controlled JSON.
* **Security & Access Control**: Prefect Cloud includes built-in authentication & role-based access; self-hosted setups should secure API and workers accordingly.
* **Decommissioning Airflow**: Once migration is complete, disable DAGs, archive the code, and shut down Airflow components to reduce operational overhead.
For more details on operating Prefect in production, see the [How-To Guides](/v3/how-to-guides).
## Testing & Validation
Thorough testing ensures your Prefect flows perform like their Airflow equivalents. Since this is a **full migration**, validation is essential before decommissioning Airflow.
**Testing Prefect Flows in Isolation**
* **Unit test task logic** - Write tests for tasks as regular Python functions.
* **Run flows locally** - Run the script that calls your flow function - just like a normal Python script.
* **Use Prefect's local orchestration** - Start a Prefect server (`prefect server start`), register a deployment, and trigger flows via Prefect UI to mirror production behavior.
* **Compare outputs** - Run both Airflow and Prefect for the same input and validate results (e.g., database rows, file outputs). Debug discrepancies early.
**Validation Phase: Temporary Parallel Running (Shadow Mode)**
* **Keep the Airflow DAG inactive** but available for testing.
* **Manually trigger** both Airflow and Prefect flows for the same execution date.
* **Write test outputs separately** to prevent conflicts, ensuring parity before stopping Airflow runs.
For batch jobs, this phase should be **brief**, ensuring correctness without long-term dual maintenance.
**Decommissioning Airflow**
Once a Prefect flow is stable, **disable the corresponding Airflow DAG** to prevent accidental execution. Clearly document Prefect as the new source of truth. Avoid keeping inactive DAGs indefinitely, as they can cause confusion—**archive or remove them once the migration is complete**.
### Common issues and troubleshooting
* **Missing dependencies:** If a Prefect flow fails with `ImportError`, ensure all required libraries are installed in the execution environment (Docker image, VM, etc.), not just locally.
* **Credentials & access:** Verify that Prefect workers have the same permissions as Airflow (e.g., service accounts, IAM roles). If using Kubernetes, ensure pods can access necessary databases and APIs.
* **Scheduling differences:** Airflow schedules may trigger at the end of an interval, while Prefect runs in real-time. Align Cron schedules and time zones if needed.
* **Concurrency & parallelism:** Configure **work pool and flow run concurrency limits** to prevent overlapping jobs. If too many tasks run in parallel, use Prefect's **tags and concurrency controls** to throttle execution.
* **Error handling & retries:** Test retries by forcing failures. If Airflow used `trigger_rule="all_done"`, implement equivalent logic in Prefect with `try/except`.
* **Performance monitoring:** Compare Prefect vs. Airflow run times. If slower, check if tasks are running sequentially instead of in parallel (enable mapping, async, or parallel task runners). If too much parallelism, adjust concurrency settings.
For some help with troubleshooting, you can see articles on:
* [Configuring logging](/v3/how-to-guides/workflows/add-logging)
* [Tracking activity](/v3/concepts/events)
Throughout testing, keep an eye on the Prefect UI's **Flow Run and Task Run views** - they will show you the execution steps, logs, and any exceptions. The UI can be very helpful for pinpointing where a flow failed or hung. It's analogous to Airflow's Graph view and log view but with the benefit of real-time state updates (no need to refresh for state changes).
You might also consider joining the [Prefect Slack community](https://prefect.io/slack) to get help from the community and Prefect team.
**Debugging tips:**
* If a flow run gets stuck, you can cancel it via UI/CLI.
* Utilize the fact that you can re-run a Prefect flow easily. For example, if a specific task fails consistently, you can add some debug `print` statements, re-deploy (which is quick with Prefect CLI), and re-run to see output.
* Leverage Prefect's task state inspection. In the UI, you can often see the exception message and stack trace for a failed task, which helps identify the problem in code.
* Read the results from MarvinAI's analysis of your code to help identify potential issues.
# How to deploy flows with Python
Source: https://docs-3.prefect.io/v3/how-to-guides/deployments/deploy-via-python
Learn how to use the Python SDK to deploy flows to run in work pools.
As an alternative to defining deployments in a `prefect.yaml` file, you can use the Python SDK to create deployments with [dynamic infrastructure](/v3/concepts/work-pools).
This can be more flexible if you have to programmatically gather configuration at deployment time.
## When to use `flow.deploy` instead of `flow.serve`
The `flow.serve` method is one [simple way to create a deployment with the Python SDK](/v3/how-to-guides/deployment_infra/run-flows-in-local-processes#serve-a-flow). It's ideal when you have readily available, static infrastructure for your flow runs and you don't need the dynamic dispatch of infrastructure per flow run offered by work pools.
However, you might want to consider using `flow.deploy` to associate your flow with a work pool that enables dynamic dispatch of infrastructure per flow run for the following reasons:
1. **Cost optimization:** Dynamic infrastructure can help reduce costs by scaling resources up or down based on demand.
2. **Resource scarcity:** If you have limited persistent infrastructure, dynamic provisioning can help manage resource allocation more efficiently.
3. **Varying workloads:** For workflows with inconsistent resource needs, dynamic infrastructure can adapt to changing requirements.
4. **Cloud-native deployments:** When working with cloud providers that offer serverless or auto-scaling options.
Let's explore how to create a deployment using the Python SDK and leverage dynamic infrastructure through work pools.
## Prerequisites
Before deploying your flow using `flow.deploy`, ensure you have the following:
1. **A running Prefect server or Prefect Cloud workspace:** You can either run a Prefect server locally or use a Prefect Cloud workspace.
To start a local server, run `prefect server start`. To use Prefect Cloud, sign up for an account at [app.prefect.cloud](https://app.prefect.cloud)
and follow the [Connect to Prefect Cloud](/v3/manage/cloud/connect-to-cloud/) guide.
2. **A Prefect flow:** You should have a flow defined in your Python script. If you haven't created a flow yet, refer to the
[Write Workflows](/v3/how-to-guides/workflows/write-and-run) guide.
3. **A work pool:** You need a work pool to manage the infrastructure for running your flow. If you haven't created a work pool, you can do so through
the Prefect UI or using the Prefect CLI. For more information, see the [Work Pools](/v3/concepts/work-pools/) guide.
For examples in this guide, we'll use a Docker work pool created by running:
```bash
prefect work-pool create --type docker my-work-pool
```
4. **Docker:** Docker will be used to build and store the image containing your flow code. You can download and install
Docker from the [official Docker website](https://www.docker.com/get-started/). If you don't want to use Docker, you
can see other options in the [Use remote code storage](#use-remote-code-storage) section.
5. **(Optional) A Docker registry:** While not strictly necessary for local development, having an account with a Docker registry (such as
Docker Hub) is recommended for storing and sharing your Docker images.
With these prerequisites in place, you're ready to deploy your flow using `flow.deploy`.
## Deploy a flow with `flow.deploy`
To deploy a flow using `flow.deploy` and Docker, follow these steps:
Ensure your flow is defined in a Python file. Let's use a simple example:
```python example.py
from prefect import flow
@flow(log_prints=True)
def my_flow(name: str = "world"):
print(f"Hello, {name}!")
```
Add a call to `flow.deploy` to tell Prefect how to deploy your flow.
```python example.py
from prefect import flow
@flow(log_prints=True)
def my_flow(name: str = "world"):
print(f"Hello, {name}!")
if __name__ == "__main__":
my_flow.deploy(
name="my-deployment",
work_pool_name="my-work-pool",
image="my-registry.com/my-docker-image:my-tag",
push=False # switch to True to push to your image registry
)
```
Run your script to deploy your flow.
```bash
python example.py
```
Running this script will:
1. Build a Docker image containing your flow code and dependencies.
2. Create a deployment associated with the specified work pool and image.
Building a Docker image for our flow allows us to have a consistent environment for our flow to run in. Workers for our work pool will use the image to run our flow.
In this example, we set `push=False` to skip pushing the image to a registry. This is useful for local development, and you can push your image to a registry such as Docker Hub in a production environment.
**Where's the Dockerfile?**
In the above example, we didn't specify a Dockerfile. By default, Prefect will generate a Dockerfile for us that copies the flow code into an image and installs
any additional dependencies.
If you want to write and use your own Dockerfile, you can do so by passing a `dockerfile` parameter to `flow.deploy`.
### Trigger a run
Now that we have our flow deployed, we can trigger a run via either the Prefect CLI or UI.
First, we need to start a worker to run our flow:
```bash
prefect worker start --pool my-work-pool
```
Then, we can trigger a run of our flow using the Prefect CLI:
```bash
prefect deployment run 'my-flow/my-deployment'
```
After a few seconds, you should see logs from your worker showing that the flow run has started and see the state update in the UI.
## Deploy with a schedule
To deploy a flow with a schedule, you can use one of the following options:
* `interval`
Defines the interval at which the flow should run. Accepts an integer or float value representing the number of seconds between runs or a `datetime.timedelta` object.
```python interval.py
from datetime import timedelta
from prefect import flow
@flow(log_prints=True)
def my_flow(name: str = "world"):
print(f"Hello, {name}!")
if __name__ == "__main__":
my_flow.deploy(
name="my-deployment",
work_pool_name="my-work-pool",
image="my-registry.com/my-docker-image:my-tag",
push=False,
# Run once a minute
interval=timedelta(minutes=1)
)
```
* `cron`
Defines when a flow should run using a cron string.
```python cron.py
from prefect import flow
@flow(log_prints=True)
def my_flow(name: str = "world"):
print(f"Hello, {name}!")
if __name__ == "__main__":
my_flow.deploy(
name="my-deployment",
work_pool_name="my-work-pool",
image="my-registry.com/my-docker-image:my-tag",
push=False,
# Run once a day at midnight
cron="0 0 * * *"
)
```
* `rrule`
Defines a complex schedule using an `rrule` string.
```python rrule.py
from prefect import flow
@flow(log_prints=True)
def my_flow(name: str = "world"):
print(f"Hello, {name}!")
if __name__ == "__main__":
my_flow.deploy(
name="my-deployment",
work_pool_name="my-work-pool",
image="my-registry.com/my-docker-image:my-tag",
push=False,
# Run every weekday at 9 AM
rrule="FREQ=WEEKLY;BYDAY=MO,TU,WE,TH,FR;BYHOUR=9;BYMINUTE=0"
)
```
* `schedules`
Defines multiple schedules for a deployment. This option provides flexibility for:
* Setting up various recurring schedules
* Implementing complex scheduling logic
* Applying timezone offsets to schedules
```python schedules.py
from datetime import datetime, timedelta
from prefect import flow
from prefect.schedules import Interval
@flow(log_prints=True)
def my_flow(name: str = "world"):
print(f"Hello, {name}!")
if __name__ == "__main__":
my_flow.deploy(
name="my-deployment",
work_pool_name="my-work-pool",
image="my-registry.com/my-docker-image:my-tag",
push=False,
# Run every 10 minutes starting from January 1, 2023
# at 00:00 Central Time
schedules=[
Interval(
timedelta(minutes=10),
anchor_date=datetime(2023, 1, 1, 0, 0),
timezone="America/Chicago"
)
]
)
```
Learn more about schedules [here](/v3/how-to-guides/deployments/create-schedules).
## Use remote code storage
In addition to storing your code in a Docker image, Prefect also supports deploying your code to remote storage. This approach allows you to
store your flow code in a remote location, such as a Git repository or cloud storage service.
Using remote storage for your code has several advantages:
1. Faster iterations: You can update your flow code without rebuilding Docker images.
2. Reduced storage requirements: You don't need to store large Docker images for each code version.
3. Flexibility: You can use different storage backends based on your needs and infrastructure.
Using an existing remote Git repository like GitHub, GitLab, or Bitbucket works really well as remote code storage because:
1. Your code is already there.
2. You can deploy to multiple environments via branches and tags.
3. You can roll back to previous versions of your flows.
To deploy using remote storage, you'll need to specify where your code is stored by using `flow.from_source` to first load your flow code from a remote location.
Here's an example of loading a flow from a Git repository and deploying it:
```python git-deploy.py
from prefect import flow
if __name__ == "__main__":
flow.from_source(
source="https://github.com/username/repository.git",
entrypoint="path/to/your/flow.py:your_flow_function"
).deploy(
name="my-deployment",
work_pool_name="my-work-pool",
)
```
The `source` parameter can accept a variety of remote storage options including:
* Git repositories
* S3 buckets (using the `s3://` scheme)
* Google Cloud Storage buckets (using the `gs://` scheme)
* Azure Blob Storage (using the `az://` scheme)
The `entrypoint` parameter is the path to the flow function within your repository combined with the name of the flow function.
Learn more about remote code storage [here](/v3/deploy/infrastructure-concepts/store-flow-code/).
## Set default parameters
You can set default parameters for a deployment using the `parameters` keyword argument in `flow.deploy`.
```python default-parameters.py
from prefect import flow
@flow
def my_flow(name: str = "world"):
print(f"Hello, {name}!")
if __name__ == "__main__":
my_flow.deploy(
name="my-deployment",
work_pool_name="my-work-pool",
# Will print "Hello, Marvin!" by default instead of "Hello, world!"
parameters={"name": "Marvin"},
image="my-registry.com/my-docker-image:my-tag",
push=False,
)
```
Note these parameters can still be overridden on a per-deployment basis.
## Set job variables
You can set default job variables for a deployment using the `job_variables` keyword argument in `flow.deploy`.
The job variables provided will override the values set on the work pool.
```python job-variables.py
import os
from prefect import flow
@flow
def my_flow():
name = os.getenv("NAME", "world")
print(f"Hello, {name}!")
if __name__ == "__main__":
my_flow.deploy(
name="my-deployment",
work_pool_name="my-work-pool",
# Will print "Hello, Marvin!" by default instead of "Hello, world!"
job_variables={"env": {"NAME": "Marvin"}},
image="my-registry.com/my-docker-image:my-tag",
push=False,
)
```
Job variables can be used to customize environment variables, resources limits, and other infrastructure options, allowing fine-grained control over your infrastructure on a per-deployment or per-flow-run basis.
Any variable defined in the base job template of the associated work pool can be overridden by a job variable.
You can learn more about job variables [here](/v3/how-to-guides/deployments/customize-job-variables).
## Deploy multiple flows
To deploy multiple flows at once, use the `deploy` function.
```python multi-deploy.py
from prefect import flow, deploy
@flow
def my_flow_1():
print("I'm number one!")
@flow
def my_flow_2():
print("Always second...")
if __name__ == "__main__":
deploy(
# Use the `to_deployment` method to specify configuration
#specific to each deployment
my_flow_1.to_deployment("my-deployment-1"),
my_flow_2.to_deployment("my-deployment-2"),
# Specify shared configuration for both deployments
image="my-registry.com/my-docker-image:my-tag",
push=False,
work_pool_name="my-work-pool",
)
```
When we run the above script, it will build a single Docker image for both deployments.
This approach offers the following benefits:
* Saves time and resources by avoiding redundant image builds.
* Simplifies management by maintaining a single image for multiple flows.
## Further reading
* [Work Pools](/v3/concepts/work-pools/)
* [Store Flow Code](/v3/deploy/infrastructure-concepts/store-flow-code/)
* [Customize Infrastructure](/v3/how-to-guides/deployments/customize-job-variables)
* [Schedules](/v3/how-to-guides/deployments/create-schedules)
* [Write Workflows](/v3/how-to-guides/workflows/write-and-run)
# Manage Deployment schedules
Source: https://docs-3.prefect.io/v3/how-to-guides/deployments/manage-schedules
Learn how to pause and resume deployment schedules using the Prefect CLI.
You can pause and resume deployment schedules individually or in bulk.
This can be useful for maintenance windows, migration scenarios, or organizational changes.
## Prerequisites
To manage deployment schedules, you need:
* A Prefect server or [Prefect Cloud](/v3/get-started/quickstart) workspace
* One or more [deployments](/v3/how-to-guides/deployments/create-deployments) with [schedules](/v3/how-to-guides/deployments/create-schedules)
* [Prefect installed](/v3/get-started/install)
## Manage specific schedules
To pause or resume individual deployment schedules, you need the deployment name and schedule ID.
### List schedules for a deployment
First, list the schedules to get the schedule ID:
```bash
prefect deployment schedule ls my-flow/my-deployment
```
### Pause a specific schedule
```bash
prefect deployment schedule pause my-flow/my-deployment
```
### Resume a specific schedule
```bash
prefect deployment schedule resume my-flow/my-deployment
```
## Manage schedules in bulk
When you have many deployments with active schedules, you can pause or resume all of them at once using the `--all` flag.
### Pause all schedules
Use the `--all` flag with the `pause` command to pause all active schedules across all deployments:
```bash
prefect deployment schedule pause --all
```
This command pauses all active schedules across deployments in the current workspace. In interactive mode, you'll be asked to confirm.
Example output:
```
Paused schedule for deployment my-flow/daily-sync
Paused schedule for deployment data-pipeline/hourly-update
Paused schedule for deployment ml-model/weekly-training
Paused 3 deployment schedule(s).
```
### Resume all schedules
Similarly, use the `--all` flag with the `resume` command to resume all paused schedules:
```bash
prefect deployment schedule resume --all
```
This command resumes all paused schedules across deployments in the current workspace. In interactive mode, you'll be asked to confirm.
Example output:
```
Resumed schedule for deployment my-flow/daily-sync
Resumed schedule for deployment data-pipeline/hourly-update
Resumed schedule for deployment ml-model/weekly-training
Resumed 3 deployment schedule(s).
```
### Skip confirmation prompt
To skip the interactive confirmation (useful for CI/CD pipelines or scripts), use the `--no-prompt` flag:
```bash
prefect --no-prompt deployment schedule pause --all
prefect --no-prompt deployment schedule resume --all
```
## Use cases
### Maintenance windows
Pause all schedules during system maintenance:
```bash
# Before maintenance
prefect deployment schedule pause --all
# Perform maintenance tasks...
# After maintenance
prefect deployment schedule resume --all
```
### Development environment management
Quickly pause all schedules in a development environment:
```bash
# Pause all dev schedules
prefect --profile dev deployment schedule pause --all
# Resume when ready
prefect --profile dev deployment schedule resume --all
```
## Important notes
**Use caution with bulk operations**
The `--all` flag affects all deployment schedules in your workspace.
In interactive mode, you'll be prompted to confirm the operation showing the exact number of schedules that will be affected.
Always verify you're in the correct workspace/profile before running bulk operations.
## See also
* [Create schedules](/v3/how-to-guides/deployments/create-schedules) - Learn how to create schedules for your deployments
* [Run deployments](/v3/how-to-guides/deployments/run-deployments) - Learn how to trigger deployment runs manually
* [Deployment concepts](/v3/concepts/deployments) - Understand deployments and their schedules
# How to define deployments with YAML
Source: https://docs-3.prefect.io/v3/how-to-guides/deployments/prefect-yaml
Use YAML to schedule and trigger flow runs and manage your code and deployments.
The `prefect.yaml` file is a YAML file describing base settings for your deployments, procedural steps for preparing deployments,
and instructions for preparing the execution environment for a deployment run.
Initialize your deployment configuration, which creates the `prefect.yaml` file, with the CLI command `prefect init`
in any directory or repository that stores your flow code.
**Deployment configuration recipes**
Prefect ships with many off-the-shelf "recipes" that allow you to get started with more structure within
your `prefect.yaml` file. Run `prefect init` to be prompted with available recipes in your installation.
You can provide a recipe name in your initialization command with the `--recipe` flag, otherwise Prefect will attempt to
guess an appropriate recipe based on the structure of your working directory (for example if you initialize within a `git`
repository, Prefect will use the `git` recipe).
The `prefect.yaml` file contains:
* deployment configuration for deployments created from this file
* default instructions for how to build and push any necessary code artifacts (such as Docker images)
* default instructions for pulling a deployment in remote execution environments (for example, cloning a GitHub repository).
You can override any deployment configuration through options available on the `prefect deploy` CLI command when creating a deployment.
**`prefect.yaml` file flexibility**
In older versions of Prefect, this file must be in the root of your repository or project directory and named `prefect.yaml`.
With Prefect 3, this file can be located in a directory outside the project or a subdirectory inside the project.
It can be named differently if the filename ends in `.yaml`. You can have multiple `prefect.yaml` files with the same name
in different directories.
By default, `prefect deploy` uses a `prefect.yaml` file in the project's root directory. To use a custom deployment
configuration file, supply the new `--prefect-file` CLI argument when running the `deploy` command from the root of your
project directory:
`prefect deploy --prefect-file path/to/my_file.yaml`
The base structure for `prefect.yaml` looks like this:
```yaml
# generic metadata
prefect-version: null
name: null
# preparation steps
build: null
push: null
# runtime steps
pull: null
# deployment configurations
deployments:
- # base metadata
name: null
version: null
tags: []
description: null
schedule: null
# flow-specific fields
entrypoint: null
parameters: {}
# infra-specific fields
work_pool:
name: null
work_queue_name: null
job_variables: {}
```
The metadata fields are always pre-populated for you. These fields are for bookkeeping purposes only. The other sections are
pre-populated based on recipe; if no recipe is provided, Prefect attempts to guess an appropriate one based on local configuration.
You can create deployments with the CLI command `prefect deploy` without altering the `deployments` section of your
`prefect.yaml` file. The `prefect deploy` command helps in deployment creation through interactive prompts. The `prefect.yaml`
file facilitates version-controlling your deployment configuration and managing multiple deployments.
## Deployment actions
Deployment actions defined in your `prefect.yaml` file control the lifecycle of the creation and execution of your deployments.
The three actions available are `build`, `push`, and `pull`.
`pull` is the only required deployment action. It defines how Prefect pulls your deployment in remote execution
environments.
Each action is defined as a list of steps executed in sequence. Each step has the following format:
```yaml
section:
- prefect_package.path.to.importable.step:
id: "step-id" # optional
requires: "pip-installable-package-spec" # optional
kwarg1: value
kwarg2: more-values
```
Every step optionally provides a `requires` field. Prefect uses this to auto-install if the step is not
found in the current environment. Each step can specify an `id` to reference outputs in
future steps. The additional fields map directly to Python keyword arguments to the step function. Within a given section,
steps always run in their order within the `prefect.yaml` file.
**Deployment instruction overrides**
You can override `build`, `push`, and `pull` sections on a per-deployment basis; define `build`, `push`, and `pull`
fields within a deployment definition in the `prefect.yaml` file.
The `prefect deploy` command uses any `build`, `push`, or `pull` instructions from the deployment's definition in the
`prefect.yaml` file.
This capability is useful for multiple deployments that require different deployment instructions.
### The build action
Use the build section of `prefect.yaml` to specify setup steps or dependencies,
(like creating a Docker image), required to run your deployments.
If you initialize with the Docker recipe, you are prompted to provide
required information, such as image name and tag:
```bash
prefect init --recipe docker
>> image_name: < insert image name here >
>> tag: < insert image tag here >
```
**Use `--field` to avoid the interactive experience**
We recommend that you only initialize a recipe when first creating your deployment structure. Then store
your configuration files within version control.
Sometimes you may need to initialize programmatically and avoid the interactive prompts.
To do this, provide all required fields for your recipe using the `--field` flag:
```bash
prefect init --recipe docker \
--field image_name=my-repo/my-image \
--field tag=my-tag
```
```yaml
build:
- prefect_docker.deployments.steps.build_docker_image:
requires: prefect-docker>=0.3.0
image_name: my-repo/my-image
tag: my-tag
dockerfile: auto
```
Once you confirm that these fields are set to their desired values, this step automatically builds a Docker image with
the provided name and tag and pushes it to the repository referenced by the image name.
This step produces optional fields for future steps, or within `prefect.yaml` as template values.
We recommend using a templated `{{ image }}` within `prefect.yaml` (specifically in the work pool's `job_variables` section).
By avoiding hardcoded values, the build step and deployment specification won't have mismatched values.
**Some steps require Prefect integrations**
In the build step example above, you relied on the `prefect-docker` package; in cases that deal with external services,
additional required packages are auto-installed for you.
**Pass output to downstream steps**
Each deployment action can be composed of multiple steps. For example, to build a Docker image tagged with the
current commit hash, use the `run_shell_script` step and feed the output into the `build_docker_image` step:
```yaml
build:
- prefect.deployments.steps.run_shell_script:
id: get-commit-hash
script: git rev-parse --short HEAD
stream_output: false
- prefect_docker.deployments.steps.build_docker_image:
requires: prefect-docker
image_name: my-image
image_tag: "{{ get-commit-hash.stdout }}"
dockerfile: auto
```
The `id` field is used in the `run_shell_script` step to reference its output in the next step.
### The push action
The push section is most critical for situations where code is not stored on persistent filesystems or in version control.
In this scenario, code is often pushed and pulled from a Cloud storage bucket (for example, S3, GCS, Azure Blobs).
The push section allows users to specify and customize the logic for pushing this code repository to arbitrary remote locations.
For example, a user who stores their code in an S3 bucket and relies on default worker settings for its runtime environment
could use the `s3` recipe:
```bash
prefect init --recipe s3
>> bucket: < insert bucket name here >
```
In your newly created`prefect.yaml` file, you should find that the `push` and `pull` sections have been templated out
as follows:
```yaml
push:
- prefect_aws.deployments.steps.push_to_s3:
id: push-code
requires: prefect-aws>=0.3.0
bucket: my-bucket
folder: project-name
credentials: null
pull:
- prefect_aws.deployments.steps.pull_from_s3:
requires: prefect-aws>=0.3.0
bucket: my-bucket
folder: "{{ push-code.folder }}"
credentials: null
```
The bucket is populated with the provided value (which also could have been provided with the `--field` flag); note that the
`folder` property of the `pull` step is a template - the `push_to_s3` step outputs both a `bucket` value as well as a `folder`
value for the template downstream steps. This helps you keep your steps consistent across edits.
As discussed above, if you use [blocks](/v3/concepts/blocks/), you can template the credentials section with
a block reference for secure and dynamic credentials access:
```yaml
push:
- prefect_aws.deployments.steps.push_to_s3:
requires: prefect-aws>=0.3.0
bucket: my-bucket
folder: project-name
credentials: "{{ prefect.blocks.aws-credentials.dev-credentials }}"
```
Anytime you run `prefect deploy`, this `push` section executes upon successful completion of your `build` section.
### The pull action
The pull section is the most important section within the `prefect.yaml` file. It contains instructions for preparing your
flows for a deployment run. These instructions execute each time a deployment in this folder is run through a worker.
There are three main types of steps that typically show up in a `pull` section:
* `set_working_directory`: this step sets the working directory for the process prior to importing your flow
* `git_clone`: this step clones the provided repository on the provided branch
* `pull_from_{cloud}`: this step pulls the working directory from a Cloud storage location (for example, S3)
**Use block and variable references**
All [block and variable references](#templating-options) within your pull step will remain unresolved until runtime and
are pulled each time your deployment runs. This avoids storing sensitive information insecurely; it
also allows you to manage certain types of configuration from the API and UI without having to rebuild your deployment every time.
Below is an example of how to use an existing `GitHubCredentials` block to clone a private GitHub repository:
```yaml
pull:
- prefect.deployments.steps.git_clone:
repository: https://github.com/org/repo.git
credentials: "{{ prefect.blocks.github-credentials.my-credentials }}"
```
Alternatively, you can specify a `BitBucketCredentials` or `GitLabCredentials` block to clone from Bitbucket or GitLab. In
lieu of a credentials block, you can also provide a GitHub, GitLab, or Bitbucket token directly to the 'access\_token\` field.
Use a Secret block to do this securely:
```yaml
pull:
- prefect.deployments.steps.git_clone:
repository: https://bitbucket.org/org/repo.git
access_token: "{{ prefect.blocks.secret.bitbucket-token }}"
```
## Utility steps
Use utility steps within a build, push, or pull action to assist in managing the deployment lifecycle:
* `run_shell_script` allows for the execution of one or more shell commands in a subprocess, and returns the standard output
and standard error of the script. This step is useful for scripts that require execution in a specific environment, or those
which have specific input and output requirements. Note that setting `stream_output: true` for `run_shell_script` writes the
output and error to stdout in the execution environment, which will not be sent to the Prefect API.
Here is an example of retrieving the short Git commit hash of the current repository to use as a Docker image tag:
```yaml
build:
- prefect.deployments.steps.run_shell_script:
id: get-commit-hash
script: git rev-parse --short HEAD
stream_output: false
- prefect_docker.deployments.steps.build_docker_image:
requires: prefect-docker>=0.3.0
image_name: my-image
tag: "{{ get-commit-hash.stdout }}"
dockerfile: auto
```
**Provided environment variables are not expanded by default**
To expand environment variables in your shell script, set `expand_env_vars: true` in your `run_shell_script` step. For example:
```yaml
- prefect.deployments.steps.run_shell_script:
id: get-user
script: echo $USER
stream_output: true
expand_env_vars: true
```
Without `expand_env_vars: true`, the above step returns a literal string `$USER` instead of the current user.
* `pip_install_requirements` installs dependencies from a `requirements.txt` file within a specified directory.
Here is an example of installing dependencies from a `requirements.txt` file after cloning:
```yaml
pull:
- prefect.deployments.steps.git_clone:
id: clone-step # needed to be referenced in subsequent steps
repository: https://github.com/org/repo.git
- prefect.deployments.steps.pip_install_requirements:
directory: "{{ clone-step.directory }}" # `clone-step` is a user-provided `id` field
requirements_file: requirements.txt
```
Here is an example that retrieves an access token from a third party key vault and uses it in a private clone step:
```yaml
pull:
- prefect.deployments.steps.run_shell_script:
id: get-access-token
script: az keyvault secret show --name --vault-name --query "value" --output tsv
stream_output: false
- prefect.deployments.steps.git_clone:
repository: https://bitbucket.org/samples/deployments.git
branch: master
access_token: "{{ get-access-token.stdout }}"
```
You can also run custom steps by packaging them. In the example below, `retrieve_secrets` is a custom python module packaged
into the default working directory of a Docker image (which is /opt/prefect by default).
`main` is the function entry point, which returns an access token (for example, `return {"access_token": access_token}`) like the
preceding example, but utilizing the Azure Python SDK for retrieval.
```yaml
- retrieve_secrets.main:
id: get-access-token
- prefect.deployments.steps.git_clone:
repository: https://bitbucket.org/samples/deployments.git
branch: master
access_token: '{{ get-access-token.access_token }}'
```
## Templating options
Values that you place within your `prefect.yaml` file can reference dynamic values in several different ways:
* **step outputs**: every step of both `build` and `push` produce named fields such as `image_name`; you can reference these
fields within `prefect.yaml` and `prefect deploy` will populate them with each call. References must be enclosed in double
brackets and in `"{{ field_name }}"` format
* **blocks**: you can reference [Prefect blocks](/v3/concepts/blocks) with the
`{{ prefect.blocks.block_type.block_slug }}` syntax. It is highly recommended that you use block references for any sensitive
information (such as a GitHub access token or any credentials) to avoid hardcoding these values in plaintext
* **variables**: you can reference [Prefect variables](/v3/concepts/variables) with the
`{{ prefect.variables.variable_name }}` syntax. Use variables to reference non-sensitive, reusable pieces of information
such as a default image name or a default work pool name.
* **environment variables**: you can also reference environment variables with the special syntax `{{ $MY_ENV_VAR }}`.
This is especially useful for referencing environment variables that are set at runtime.
Here's a `prefect.yaml` file as an example:
```yaml
build:
- prefect_docker.deployments.steps.build_docker_image:
id: build-image
requires: prefect-docker>=0.6.0
image_name: my-repo/my-image
tag: my-tag
dockerfile: auto
push:
- prefect_docker.deployments.steps.push_docker_image:
requires: prefect-docker>=0.6.0
image_name: my-repo/my-image
tag: my-tag
credentials: "{{ prefect.blocks.docker-registry-credentials.dev-registry }}"
deployments:
- # base metadata
name: null
version: "{{ build-image.tag }}"
tags:
- "{{ $my_deployment_tag }}"
- "{{ prefect.variables.some_common_tag }}"
description: null
schedule: null
concurrency_limit: null
# flow-specific fields
entrypoint: null
parameters: {}
# infra-specific fields
work_pool:
name: "my-k8s-work-pool"
work_queue_name: null
job_variables:
image: "{{ build-image.image }}"
cluster_config: "{{ prefect.blocks.kubernetes-cluster-config.my-favorite-config }}"
```
So long as your `build` steps produce fields called `image_name` and `tag`, every time you deploy a new version of our deployment,
the `{{ build-image.image }}` variable is dynamically populated with the relevant values.
**Docker step**
The most commonly used build step is `prefect_docker.deployments.steps.build_docker_image` which produces both the `image_name` and `tag` fields.
A `prefect.yaml` file can have multiple deployment configurations that control the behavior of several deployments.
You can manage these deployments independently of one another, allowing you to deploy the same flow with different
configurations in the same codebase.
## Work with multiple deployments with prefect.yaml
Prefect supports multiple deployment declarations within the `prefect.yaml` file. This method of declaring multiple
deployments supports version control for all deployments through a single command.
Add new deployment declarations to the `prefect.yaml` file with a new entry to the `deployments` list.
Each deployment declaration must have a unique `name` field to select deployment declarations when using the
`prefect deploy` command.
When using a `prefect.yaml` file that is in another directory or differently named, the value for
the deployment `entrypoint` must be relative to the root directory of the project.
For example, consider the following `prefect.yaml` file:
```yaml
build: ...
push: ...
pull: ...
deployments:
- name: deployment-1
entrypoint: flows/hello.py:my_flow
parameters:
number: 42,
message: Don't panic!
work_pool:
name: my-process-work-pool
work_queue_name: primary-queue
- name: deployment-2
entrypoint: flows/goodbye.py:my_other_flow
work_pool:
name: my-process-work-pool
work_queue_name: secondary-queue
- name: deployment-3
entrypoint: flows/hello.py:yet_another_flow
work_pool:
name: my-docker-work-pool
work_queue_name: tertiary-queue
```
This file has three deployment declarations, each referencing a different flow. Each deployment declaration has a unique `name`
field and can be deployed individually with the `--name` flag when deploying.
For example, to deploy `deployment-1`, run:
```bash
prefect deploy --name deployment-1
```
To deploy multiple deployments, provide multiple `--name` flags:
```bash
prefect deploy --name deployment-1 --name deployment-2
```
To deploy multiple deployments with the same name, prefix the deployment name with its flow name:
```bash
prefect deploy --name my_flow/deployment-1 --name my_other_flow/deployment-1
```
To deploy all deployments, use the `--all` flag:
```bash
prefect deploy --all
```
To deploy deployments that match a pattern, run:
```bash
prefect deploy -n my-flow/* -n *dev/my-deployment -n dep*prod
```
The above command deploys:
* all deployments from the flow `my-flow`
* all flows ending in `dev` with a deployment named
`my-deployment`
* all deployments starting with `dep` and ending in `prod`.
### Non-interactive deployment
For CI/CD pipelines and automated environments, use the `--no-prompt` flag to skip interactive prompts:
```bash
prefect --no-prompt deploy --name my-deployment
```
This prevents the command from hanging on prompts and will fail clearly if required information is missing.
**CLI Options When deploying multiple deployments**
When deploying more than one deployment with a single `prefect deploy` command, any additional attributes provided are ignored.
To provide overrides to a deployment through the CLI, you must deploy that deployment individually.
### Reuse configuration across deployments
Because a `prefect.yaml` file is a standard YAML file, you can use [YAML aliases](https://yaml.org/spec/1.2.2/#71-alias-nodes)
to reuse configuration across deployments.
This capability allows multiple deployments to share the work pool configuration, deployment actions, or other
configurations.
Declare a YAML alias with the `&{alias_name}` syntax and insert that alias elsewhere in the file with the `*{alias_name}`
syntax. When aliasing YAML maps, you can override specific fields of the aliased map with the `<<: *{alias_name}` syntax and
adding additional fields below.
We recommend adding a `definitions` section to your `prefect.yaml` file at the same level as the `deployments` section to store your
aliases.
For example:
```yaml
build: ...
push: ...
pull: ...
definitions:
work_pools:
my_docker_work_pool: &my_docker_work_pool
name: my-docker-work-pool
work_queue_name: default
job_variables:
image: "{{ build-image.image }}"
schedules:
every_ten_minutes: &every_10_minutes
interval: 600
actions:
docker_build: &docker_build
- prefect_docker.deployments.steps.build_docker_image: &docker_build_config
id: build-image
requires: prefect-docker>=0.3.0
image_name: my-example-image
tag: dev
dockerfile: auto
docker_push: &docker_push
- prefect_docker.deployments.steps.push_docker_image: &docker_push_config
requires: prefect-docker>=0.6.0
image_name: my-example-image
tag: dev
credentials: "{{ prefect.blocks.docker-registry-credentials.dev-registry }}"
deployments:
- name: deployment-1
entrypoint: flows/hello.py:my_flow
schedule: *every_10_minutes
parameters:
number: 42,
message: Don't panic!
work_pool: *my_docker_work_pool
build: *docker_build # Uses the full docker_build action with no overrides
push: *docker_push
- name: deployment-2
entrypoint: flows/goodbye.py:my_other_flow
work_pool: *my_docker_work_pool
build:
- prefect_docker.deployments.steps.build_docker_image:
<<: *docker_build_config # Uses the docker_build_config alias and overrides the dockerfile field
dockerfile: Dockerfile.custom
push: *docker_push
- name: deployment-3
entrypoint: flows/hello.py:yet_another_flow
schedule: *every_10_minutes
work_pool:
name: my-process-work-pool
work_queue_name: primary-queue
```
In the above example, YAML aliases reuse work pool, schedule, and build configuration across multiple deployments:
* `deployment-1` and `deployment-2` use the same work pool configuration
* `deployment-1` and `deployment-3` use the same schedule
* `deployment-1` and `deployment-2` use the same build deployment action, but `deployment-2` overrides the `dockerfile` field to use a custom Dockerfile
## Deployment declaration reference
### Deployment fields
These are fields you can add to each deployment declaration.
| Property | Description |
| ------------------------------------------------------- | ----------------------------------------------------------------------------------------------------------------------------------------------------------------------------------------------------------------------------------- |
| `name` | The name to give to the created deployment. Used with the `prefect deploy` command to create or update specific deployments. |
| `version` | An optional version for the deployment. |
| `tags` | A list of strings to assign to the deployment as tags. |
| `description` | An optional description for the deployment. |
| `schedule` | An optional [schedule](/v3/how-to-guides/deployments/create-schedules) to assign to the deployment. Fields for this section are documented in the [Schedule Fields](#schedule-fields) section. |
| `concurrency_limit` | An optional [deployment concurrency limit](/v3/deploy/index#concurrency-limiting). Fields for this section are documented in the [Concurrency Limit Fields](#concurrency-limit-fields) section. |
| `triggers` | An optional array of [triggers](/v3/how-to-guides/automations/creating-deployment-triggers) to assign to the deployment |
| `entrypoint` | Required path to the `.py` file containing the flow you want to deploy (relative to the root directory of your development folder) combined with the name of the flow function. In the format `path/to/file.py:flow_function_name`. |
| `parameters` | Optional default values to provide for the parameters of the deployed flow. Should be an object with key/value pairs. |
| `enforce_parameter_schema` | Boolean flag that determines whether the API should validate the parameters passed to a flow run against the parameter schema generated for the deployed flow. |
| `work_pool` | Information of where to schedule flow runs for the deployment. Fields for this section are documented in the [Work Pool Fields](#work-pool-fields) section. |
### Schedule fields
These are fields you can add to a deployment declaration's `schedule` section.
| Property | Description |
| ------------------------------------------ | ------------------------------------------------------------------------------------------------------------------------------------------------------------------------------------------------------------------------ |
| `interval` | Number of seconds indicating the time between flow runs. Cannot use them in conjunction with `cron` or `rrule`. |
| `anchor_date` | Datetime string indicating the starting or "anchor" date to begin the schedule. If no `anchor_date` is supplied, the current UTC time is used. Can only use with `interval`. |
| `timezone` | String name of a time zone, used to enforce localization behaviors like DST boundaries. See the [IANA Time Zone Database](https://www.iana.org/time-zones) for valid time zones. |
| `cron` | A valid cron string. Cannot use in conjunction with `interval` or `rrule`. |
| `day_or` | Boolean indicating how croniter handles day and day\_of\_week entries. Must use with `cron`. Defaults to `True`. |
| `rrule` | String representation of an RRule schedule. See the [`rrulestr` examples](https://dateutil.readthedocs.io/en/stable/rrule.html#rrulestr-examples) for syntax. Cannot used them in conjunction with `interval` or `cron`. |
### Concurrency limit fields
These are fields you can add to a deployment declaration's `concurrency_limit` section.
| Property | Description |
| -------------------- | -------------------------------------------------------------------------------------------------------------------------------------- |
| `limit` | The maximum number of concurrent flow runs for the deployment. |
| `collision_strategy` | Configure the behavior for runs once the concurrency limit is reached. Options are `ENQUEUE`, and `CANCEL_NEW`. Defaults to `ENQUEUE`. |
### Work pool fields
These are fields you can add to a deployment declaration's `work_pool` section.
| Property | Description |
| ---------------------------------------------- | ------------------------------------------------------------------------------------------------------------------------------------------------------------------------------------------------------------ |
| `name` | The name of the work pool to schedule flow runs in for the deployment. |
| `work_queue_name` | The name of the work queue within the specified work pool to schedule flow runs in for the deployment. If not provided, the default queue for the specified work pool is used. |
| `job_variables` | Values used to override the default values in the specified work pool's [base job template](/v3/concepts/work-pools/#base-job-template). Maps directly to a created deployments `infra_overrides` attribute. |
### Deployment mechanics
Anytime you run `prefect deploy` in a directory that contains a `prefect.yaml` file, the following actions take place in order:
* The `prefect.yaml` file load. First, the `build` section loads and all variable and block references resolve. The steps then run in the order provided.
* Next, the `push` section loads and all variable and block references resolve; the steps within this section then run in the order provided.
* Next, the `pull` section is templated with any step outputs but *is not run*. Block references are *not* hydrated for security purposes: they are always resolved at runtime.
* Next, all variable and block references resolve with the deployment declaration. All flags provided through the `prefect deploy` CLI are then overlaid on the values loaded from the file.
* The final step occurs when the fully realized deployment specification is registered with the Prefect API.
**Deployment instruction overrides**
The `build`, `push`, and `pull` sections in deployment definitions take precedence over the corresponding sections above them in
`prefect.yaml`.
Each time a step runs, the following actions take place in order:
* The step's inputs and block / variable references resolve.
* The step's function is imported; if it cannot be found, the special `requires` keyword installs the necessary packages.
* The step's function is called with the resolved inputs.
* The step's output is returned and used to resolve inputs for subsequent steps.
## Update a deployment
To update a deployment, make any desired changes to the `prefect.yaml` file, and run `prefect deploy`. Running just this command will prompt you to select a deployment interactively, or you may specify the deployment to update with `--name your-deployment`.
## Further reading
Now that you are familiar with creating deployments, you can explore infrastructure options for running your deployments:
* [Managed work pools](/v3/how-to-guides/deployment_infra/managed/)
* [Push work pools](/v3/how-to-guides/deployment_infra/serverless/)
* [Kubernetes work pools](/v3/how-to-guides/deployment_infra/kubernetes/)
# Trigger ad-hoc deployment runs
Source: https://docs-3.prefect.io/v3/how-to-guides/deployments/run-deployments
Learn how to trigger deployment runs using the Prefect CLI and Python SDK.
[Deployments](/v3/concepts/deployments) are server-side representations of flows that can be executed:
* on a [schedule](/v3/how-to-guides/deployments/create-schedules)
* when [triggered by events](/v3/how-to-guides/automations/creating-deployment-triggers)
* programmatically, on demand
This guide covers how to trigger deployments on demand.
## Prerequisites
In order to run a deployment, you need to have:
* [created a deployment](/v3/how-to-guides/deployments/create-deployments)
* started a process ([`serve`](/v3/how-to-guides/deployment_infra/run-flows-in-local-processes) or a [worker](/v3/concepts/workers)) listening for scheduled runs of that deployment
## Run a deployment from the CLI
The simplest way to trigger a deployment run is using the Prefect CLI:
```bash
prefect deployment run my-flow/my-deployment
```
### CLI options
Add parameters and customize the run, including setting a custom flow run name using the new --flow-run-name option:
```bash
# Pass parameters
prefect deployment run my-flow/my-deployment \
--param my_param=42 \
--param another_param="hello"
# Schedule for later
prefect deployment run my-flow/my-deployment --start-in "2 hours"
# Watch the run until completion
prefect deployment run my-flow/my-deployment --watch
# Set custom run name
Use `--flow-run-name` to set a static or templated name for the flow run.
prefect deployment run my-flow/my-deployment --flow-run-name "custom-run-name"
# Set a custom flow run name using templating
prefect deployment run my-flow/my-deployment \
--param customer_id=1234 \
--param run_date="2025-07-14" \
--flow-run-name "customer-{customer_id}-run-{run_date}"
> Note: You can use `{parameter}` syntax to template the flow run name.
> The values will be substituted from the `--param` values.
# Add tags to the run
prefect deployment run my-flow/my-deployment --tag production --tag critical
```
## Run a deployment from Python
Use the `run_deployment` function for programmatic control:
{/* pmd-metadata: notest */}
```python
from prefect.deployments import run_deployment
# Basic usage
flow_run = run_deployment(
name="my-flow/my-deployment"
)
# With parameters
flow_run = run_deployment(
name="my-flow/my-deployment",
parameters={
"my_param": 42,
"another_param": "hello"
}
)
# With job variables (environment variables, etc.)
flow_run = run_deployment(
name="my-flow/my-deployment",
parameters={"my_param": 42},
job_variables={"env": {"MY_ENV_VAR": "production"}}
)
# Don't wait for completion
flow_run = run_deployment(
name="my-flow/my-deployment",
timeout=0 # returns immediately
)
# Wait with custom timeout (seconds)
flow_run = run_deployment(
name="my-flow/my-deployment",
timeout=300 # wait up to 5 minutes
)
# Schedule for later
from datetime import datetime, timedelta
flow_run = run_deployment(
name="my-flow/my-deployment",
scheduled_time=datetime.now() + timedelta(hours=2)
)
# With custom tags
flow_run = run_deployment(
name="my-flow/my-deployment",
tags=["production", "critical"]
)
```
By default, deployments triggered via `run_deployment` *from within another flow* will be treated as a subflow of the parent flow in the UI. To disable this, set `as_subflow=False`.
### Async usage
In an async context, you can use the `run_deployment` function as a coroutine:
{/* pmd-metadata: notest */}
```python
import asyncio
from prefect.deployments import run_deployment
async def trigger_deployment():
flow_run = await run_deployment(
name="my-flow/my-deployment",
parameters={"my_param": 42}
)
return flow_run
# Run it
flow_run = asyncio.run(trigger_deployment())
```
## Further reading
* Learn about [deployment schedules](/v3/how-to-guides/deployments/create-schedules)
* Explore [deployment triggers and automations](/v3/how-to-guides/automations/creating-deployment-triggers)
* Understand [work pools and workers](/v3/concepts/work-pools)
# How to retrieve code from storage
Source: https://docs-3.prefect.io/v3/how-to-guides/deployments/store-flow-code
Learn about code storage as it relates to execution of deployments
When a deployment runs, the execution environment needs access to the flow code.
Flow code is not stored directly in Prefect server or Prefect Cloud; instead, it must be made available to the execution environment. There are two main ways to achieve this:
1. **Include source code directly in your runtime:** Often, this means [building your code into a Docker image](/v3/how-to-guides/deployment_infra/docker/#automatically-build-a-custom-docker-image-with-a-local-dockerfile).
2. **Retrieve code from storage at runtime:** The [worker](/v3/concepts/workers/) pulls code from a specified location before starting the flow run.
This page focuses on the second approach: retrieving code from a storage location at runtime.
You have several options for where your code can be stored and pulled from:
* Local filesystem
* Git-based storage (GitHub, GitLab, Bitbucket)
* Blob storage (AWS S3, Azure Blob Storage, GCP GCS)
The ideal choice depends on your team's needs and tools.
In the examples below, we show how to create a deployment configured to run on [dynamic infrastructure](/v3/concepts/work-pools) for each of these storage options.
## Deployment creation options
As detailed in the [Deployment overview](/v3/deploy), you can create a deployment in one of two main ways:
* [Python code with the `flow.deploy` method](/v3/how-to-guides/deployments/deploy-via-python)
* When using `.deploy`, specify a storage location for your flow with the `flow.from_source` method.
* The `source` is either a URL to a git repository or a storage object. For example:
* A local directory: `source=Path(__file__).parent` or `source="/path/to/file"`
* A URL to a git repository: `source="https://github.com/org/my-repo.git"`
* A storage object: `source=GitRepository(url="https://github.com/org/my-repo.git")`
* The `entrypoint` is the path to the file the flow is located in and the function name, separated by a colon.
* [YAML specification defined in a `prefect.yaml` file](/v3/how-to-guides/deployments/prefect-yaml)
* To create a `prefect.yaml` file interactively, run `prefect deploy` from the CLI and follow the prompts.
* The `prefect.yaml` file may define a `pull` section that specifies the storage location for your flow. For example:
* Set the working directory:
```yaml
pull:
- prefect.deployments.steps.set_working_directory:
directory: /path/to/directory
```
* Clone a git repository:
```yaml
pull:
- prefect.deployments.steps.git_clone:
repository: https://github.com/org/my-repo.git
```
* Pull from blob storage:
```yaml
pull:
- prefect.deployments.steps.pull_from_blob_storage:
container: my-container
folder: my-folder
```
Whether you use `from_source` or `prefect.yaml` to specify the storage location for your flow code, the resulting deployment will have a set of `pull` steps that your worker will use to retrieve the flow code at runtime.
## Store code locally
If using a Process work pool, you can use one of the remote code storage options shown above, or you can store your flow code in a local folder.
Here is an example of how to create a deployment with flow code stored locally:
```python local_process_deploy_local_code.py
from prefect import flow
from pathlib import Path
@flow(log_prints=True)
def my_flow(name: str = "World"):
print(f"Hello {name}!")
if __name__ == "__main__":
my_flow.from_source(
source=str(Path(__file__).parent), # code stored in local directory
entrypoint="local_process_deploy_local_code.py:my_flow",
).deploy(
name="local-process-deploy-local-code",
work_pool_name="my-process-pool",
)
```
```yaml prefect.yaml
pull:
- prefect.deployments.steps.set_working_directory:
directory: /my_directory
deployments:
- name: local-process-deploy-local-code
entrypoint: local_process_deploy_local_code.py:my_flow
work_pool:
name: my-process-pool
```
## Git-based storage
Git-based version control platforms provide redundancy, version control, and collaboration capabilities. Prefect supports:
* [GitHub](https://github.com/)
* [GitLab](https://www.gitlab.com)
* [Bitbucket](https://bitbucket.org/)
For a public repository, you can use the repository URL directly.
If you are using a private repository and are authenticated in your environment at deployment creation and deployment execution, you can use the repository URL directly.
Alternatively, for a private repository, you can create a `Secret` block or `git`-platform-specific credentials [block](/v3/develop/blocks/) to store your credentials:
* [`GitHubCredentials`](https://docs.prefect.io/integrations/prefect-github/)
* [`BitBucketCredentials`](https://docs.prefect.io/integrations/prefect-bitbucket/)
* [`GitLabCredentials`](https://docs.prefect.io/integrations/prefect-gitlab/)
Then you can reference this block in the Python `deploy` method or the `prefect.yaml` file pull step.
If using the Python `deploy` method with a private repository that references a block, provide a [`GitRepository`](https://reference.prefect.io/prefect/flows/#prefect.runner.storage.GitRepository) object instead of a URL, as shown below.
```python gh_public_repo.py
from prefect import flow
if __name__ == "__main__":
flow.from_source(
source="https://github.com/org/my-public-repo.git",
entrypoint="gh_public_repo.py:my_flow",
).deploy(
name="my-github-deployment",
work_pool_name="my_pool",
)
```
```python gh_private_repo_credentials_block.py
from prefect import flow
from prefect.runner.storage import GitRepository
from prefect_github import GitHubCredentials
if __name__ == "__main__":
github_repo = GitRepository(
url="https://github.com/org/my-private-repo.git",
credentials=GitHubCredentials.load("my-github-credentials-block"),
)
flow.from_source(
source=github_repo,
entrypoint="gh_private_repo_credentials_block.py:my_flow",
).deploy(
name="private-github-deploy",
work_pool_name="my_pool",
)
```
```python gh_private_repo_secret_block.py
from prefect import flow
from prefect.runner.storage import GitRepository
from prefect.blocks.system import Secret
if __name__ == "__main__":
github_repo = GitRepository(
url="https://github.com/org/my-private-repo.git",
credentials={
"access_token": Secret.load("my-secret-block-with-my-gh-credentials")
},
)
flow.from_source(
source=github_repo,
entrypoint="gh_private_repo_secret_block.py:my_flow",
).deploy(
name="private-github-deploy",
work_pool_name="my_pool",
)
```
```yaml prefect.yaml
# relevant section of the file:
pull:
- prefect.deployments.steps.git_clone:
repository: https://gitlab.com/org/my-repo.git
# Uncomment the following line if using a credentials block
# credentials: "{{ prefect.blocks.github-credentials.my-github-credentials-block }}"
# Uncomment the following line if using a Secret block
# access_token: "{{ prefect.blocks.secret.my-block-name }}"
```
For accessing a private repository, we suggest creating a [Personal Access Tokens (PATs)](https://docs.github.com/en/github/authenticating-to-github/creating-a-personal-access-token).
We recommend using HTTPS with [fine-grained Personal Access Tokens](https://docs.github.com/en/authentication/keeping-your-account-and-data-secure/managing-your-personal-access-tokens#creating-a-fine-grained-personal-access-token) to limit access by repository.
**Personal Access Token Permissions**
When using a fine-grained token, ensure to add permissions to the token prior to saving. Per least privilege, we recommend granting the token the ability to read **Contents** and **Metadata** for your repository.
If using a `Secret` block, you can create it through code or the UI ahead of time and reference it at deployment creation as shown above.
If using a `GitHubCredentials` block to store your credentials, you can create it ahead of time and reference it at deployment creation.
1. Install `prefect-github` with `pip install -U prefect-github`
2. Register all block types defined in `prefect-github` with `prefect block register -m prefect_github`
3. Create a `GitHubCredentials` block through code or the Prefect UI and reference it at deployment creation as shown above.
```python bb_public_repo.py
from prefect import flow
if __name__ == "__main__":
flow.from_source(
source="https://bitbucket.com/org/my-public-repo.git",
entrypoint="bb_public_repo.py:my_flow",
).deploy(
name="my-bitbucket-deployment",
work_pool_name="my_pool",
)
```
```python bb_private_repo_credentials_block.py
from prefect import flow
from prefect.runner.storage import GitRepository
from prefect_bitbucket import BitBucketCredentials
if __name__ == "__main__":
github_repo = GitRepository(
url="https://bitbucket.com/org/my-private-repo.git",
credentials=BitBucketCredentials.load("my-bitbucket-credentials-block")
)
flow.from_source(
source=source,
entrypoint="bb_private_repo_credentials_block.py:my_flow",
).deploy(
name="private-bitbucket-deploy",
work_pool_name="my_pool",
)
```
```python bb_private_repo_secret_block.py
from prefect import flow
from prefect.runner.storage import GitRepository
from prefect.blocks.system import Secret
if __name__ == "__main__":
github_repo=GitRepository(
url="https://bitbucket.com/org/my-private-repo.git",
credentials={
"access_token": Secret.load("my-secret-block-with-my-bb-credentials")
},
)
flow.from_source(
source=github_repo,
entrypoint="bb_private_repo_secret_block.py:my_flow",
).deploy(
name="private-bitbucket-deploy",
work_pool_name="my_pool",
)
```
```yaml prefect.yaml
# relevant section of the file:
pull:
- prefect.deployments.steps.git_clone:
repository: https://bitbucket.org/org/my-private-repo.git
# Uncomment the following line if using a credentials block
# credentials: "{{ prefect.blocks.bitbucket-credentials.my-bitbucket-credentials-block }}"
# Uncomment the following line if using a Secret block
# access_token: "{{ prefect.blocks.secret.my-block-name }}"
```
For accessing a private repository, we recommend using HTTPS with Repository, Project, or Workspace [Access Tokens](https://support.atlassian.com/bitbucket-cloud/docs/access-tokens/).
[Create a token](https://support.atlassian.com/bitbucket-cloud/docs/create-a-repository-access-token/) with **read** access to the repository.
Bitbucket requires you prepend the token string with `x-token-auth:` The full string looks like this: `x-token-auth:abc_123_this_is_a_token`.
If using a `Secret` block, you can create it through code or the UI ahead of time and reference it at deployment creation as shown above.
If using a `BitBucketCredentials` block to store your credentials, you can create it ahead of time and reference it at deployment creation.
1. Install `prefect-bitbucket` with `pip install -U prefect-bitbucket`
2. Register all block types defined in `prefect-bitbucket` with `prefect block register -m prefect_bitbucket`
3. Create a `BitBucketCredentials` block in code or the Prefect UI and reference at deployment creation as shown above.
```python gl_public_repo.py
from prefect import flow
if __name__ == "__main__":
gitlab_repo = "https://gitlab.com/org/my-public-repo.git"
flow.from_source(
source=gitlab_repo,
entrypoint="gl_public_repo.py:my_flow"
).deploy(
name="my-gitlab-deployment",
work_pool_name="my_pool",
)
```
```python gl_private_repo_credentials_block.py
from prefect import flow
from prefect.runner.storage import GitRepository
from prefect_gitlab import GitLabCredentials
if __name__ == "__main__":
gitlab_repo = GitRepository(
url="https://gitlab.com/org/my-private-repo.git",
credentials=GitLabCredentials.load("my-gitlab-credentials-block")
)
flow.from_source(
source=gitlab_repo,
entrypoint="gl_private_repo_credentials_block.py:my_flow",
).deploy(
name="private-gitlab-deploy",
work_pool_name="my_pool",
)
```
```python gl_private_repo_secret_block.py
from prefect import flow
from prefect.runner.storage import GitRepository
from prefect.blocks.system import Secret
if __name__ == "__main__":
gitlab_repo = GitRepository(
url="https://gitlab.com/org/my-private-repo.git",
credentials={
"access_token": Secret.load("my-secret-block-with-my-gl-credentials")
},
)
flow.from_source(
source=gitlab_repo,
entrypoint="gl_private_repo_secret_block.py:my_flow",
).deploy(
name="private-gitlab-deploy",
work_pool_name="my_pool",
)
```
```yaml prefect.yaml
# relevant section of the file:
pull:
- prefect.deployments.steps.git_clone:
repository: https://gitlab.com/org/my-private-repo.git
# Uncomment the following line if using a credentials block
# credentials: "{{ prefect.blocks.gitlab-credentials.my-gitlab-credentials-block }}"
# Uncomment the following line if using a Secret block
# access_token: "{{ prefect.blocks.secret.my-block-name }}"
```
For accessing a private repository, we recommend using HTTPS with [Project Access Tokens](https://docs.gitlab.com/ee/user/profile/personal_access_tokens.html).
[Create a token](https://docs.gitlab.com/ee/user/profile/personal_access_tokens.html) with the **read\_repository** scope.
If using a `Secret` block, you can create it through code or the UI ahead of time and reference it at deployment creation as shown above.
If using a `GitLabCredentials` block to store your credentials, you can create it ahead of time and reference it at deployment creation.
1. Install `prefect-gitlab` with `pip install -U prefect-gitlab`
2. Register all block types defined in `prefect-gitlab` with `prefect block register -m prefect_gitlab`
3. Create a `GitLabCredentials` block in code or the Prefect UI and reference it at deployment creation as shown above.
Note that you can specify a `branch` if creating a `GitRepository` object.
The default is `"main"`.
**Push your code**
When you make a change to your code, Prefect does not push your code to your `git`-based version control platform.
This is intentional to avoid confusion about the `git` history and push process.
### Prefect Cloud GitHub Integration
If you're using Prefect Cloud you can use the Prefect Cloud GitHub App
to authenticate to GitHub at runtime and access private repositories without creating a block and storing long
lived credentials.
1. [Install the Prefect Cloud GitHub App](https://github.com/apps/prefect-cloud/installations/new?) and select the
repositories you want to be able to access.
2. Add the following pull steps to your `prefect.yaml` file. Make sure to replace `owner/repository` with the name of your repository:
```yaml
pull:
- prefect.deployments.steps.run_shell_script:
id: get-github-token
script: uv tool run prefect-cloud github token owner/repository
- prefect.deployments.steps.git_clone:
id: git-clone
repository: https://x-access-token:{{ get-github-token.stdout }}@github.com/owner/repository.git
```
## Docker-based storage
Another popular flow code storage option is to include it in a Docker image.
All work pool options except **Process** and **Prefect Managed** allow you to bake your code into a Docker image.
To create a deployment with Docker-based flow code storage use the Python `deploy` method or create a `prefect.yaml` file.
If you use the Python `deploy` method to store the flow code in a Docker image, you don't need to use the `from_source` method.
The `prefect.yaml` file below was generated by running `prefect deploy` from the CLI (a few lines of metadata were excluded from the top of the file output for brevity).
Note that the `build` section is necessary if baking your flow code into a Docker image.
```python docker_deploy.py
from prefect import flow
@flow
def my_flow():
print("Hello from inside a Docker container!")
if __name__ == "__main__":
my_flow.deploy(
name="my-docker-deploy",
work_pool_name="my_pool",
image="my-docker-image:latest",
push=False
)
```
```yaml prefect.yaml
# build section allows you to manage and build docker images
build:
- prefect_docker.deployments.steps.build_docker_image:
requires: prefect-docker>=0.6.1
id: build-image
dockerfile: auto
image_name: my-registry/my-image
tag: latest
# push section allows you to manage if and how this project is uploaded to remote locations
push: null
# pull section allows you to provide instructions for cloning this project in remote locations
pull:
- prefect.deployments.steps.set_working_directory:
directory: /opt/prefect/my_directory
# the deployments section allows you to provide configuration for deploying flows
deployments:
- name: my-docker-deployment
entrypoint: my_file.py:my_flow
work_pool:
name: my_pool
job_variables:
image: '{{ build-image.image }}'
```
By default, `.deploy` will build a Docker image that includes your flow code and any `pip` packages specified in a `requirements.txt` file.
In the examples above, we elected not to push the resulting image to a remote registry.
To push the image to a remote registry, pass `push=True` in the Python `deploy` method or add a `push_docker_image` step to the `push` section of the `prefect.yaml` file.
### Custom Docker image
If an `image` is not specified by one of the methods above, deployment flow runs associated with a Docker work pool will use the base Prefect image (e.g. `prefecthq/prefect:3-latest`) when executing.
Alternatively, you can create a custom Docker image outside of Prefect by running `docker build` && `docker push` elsewhere (e.g. in your CI/CD pipeline) and then reference the resulting `image` in the `job_variables` section of your deployment definition, or set the `image` as a default directly on the work pool.
For more information, see [this discussion of custom Docker images](/v3/how-to-guides/deployment_infra/docker/#automatically-build-a-custom-docker-image-with-a-local-dockerfile).
## Blob storage
Another option for flow code storage is any [fsspec](https://filesystem-spec.readthedocs.io/en/latest/)-supported storage location, such as AWS S3, Azure Blob Storage, or GCP GCS.
If the storage location is publicly available, or if you are authenticated in the environment where you are creating and running your deployment, you can reference the storage location directly.
You don't need to pass credentials explicitly.
To pass credentials explicitly to authenticate to your storage location, you can use either of the following block types:
* Prefect integration library storage blocks, such as the `prefect-aws` library's `S3Bucket` block, which can use a `AWSCredentials` block when it is created.
* `Secret` blocks
If you use a storage block such as the `S3Bucket` block, you need to have the `prefect-aws` library available in the environment where your flow code runs.
You can do any of the following to make the library available:
1. Install the library into the execution environment directly
2. Specify the library in the work pool's Base Job Template in the **Environment Variables** section like this:`{"EXTRA_PIP_PACKAGES":"prefect-aws"}`
3. Specify the library in the environment variables of the `deploy` method as shown in the examples below
4. Specify the library in a `requirements.txt` file and reference the file in the `pull` step of the `prefect.yaml` file like this:
```yaml
- prefect.deployments.steps.pip_install_requirements:
directory: "{{ pull_code.directory }}"
requirements_file: requirements.txt
```
The examples below show how to create a deployment with flow code in a cloud provider storage location.
For each example, we show how to access code that is publicly available.
The `prefect.yaml` example includes an additional line to reference a credentials block if authenticating to a private storage location through that option.
We also include Python code that shows how to use an existing storage block and an example of that creates, but doesn't save, a storage block that references an existing nested credentials block.
```python s3_no_block.py
from prefect import flow
if __name__ == "__main__":
flow.from_source(
source="s3://my-bucket/my-folder",
entrypoint="my_file.py:my_flow",
).deploy(
name="my-aws-s3-deployment",
work_pool_name="my-work-pool"
)
```
```python s3_block.py
from prefect import flow
from prefect_aws.s3 import S3Bucket
if __name__ == "__main__":
s3_bucket_block = S3Bucket.load("my-code-storage-block")
# or:
# s3_bucket_block = S3Bucket(
# bucket="my-bucket",
# folder="my-folder",
# credentials=AWSCredentials.load("my-credentials-block")
# )
flow.from_source(
source=s3_bucket_block,
entrypoint="my_file.py:my_flow"
).deploy(
name="my-aws-s3-deployment",
work_pool_name="my-work-pool"
job_variables={"env": {"EXTRA_PIP_PACKAGES": "prefect-aws"} },
)
```
```yaml prefect.yaml
build: null
push:
- prefect_aws.deployments.steps.push_to_s3:
id: push_code
requires: prefect-aws>=0.5
bucket: my-bucket
folder: my-folder
credentials: "{{ prefect.blocks.aws-credentials.my-credentials-block }}" # if explicit authentication is required
pull:
- prefect_aws.deployments.steps.pull_from_s3:
id: pull_code
requires: prefect-aws>=0.5
bucket: '{{ push_code.bucket }}'
folder: '{{ push_code.folder }}'
credentials: "{{ prefect.blocks.aws-credentials.my-credentials-block }}" # if explicit authentication is required
deployments:
- name: my-aws-deployment
version: null
tags: []
concurrency_limit: null
description: null
entrypoint: my_file.py:my_flow
parameters: {}
work_pool:
name: my-work-pool
work_queue_name: null
job_variables: {}
enforce_parameter_schema: true
schedules: []
```
To create an `AwsCredentials` block:
1. Install the [prefect-aws](/integrations/prefect-aws) library with `pip install -U prefect-aws`
2. Register the blocks in prefect-aws with `prefect block register -m prefect_aws`
3. Create a user with a role with read and write permissions to access the bucket. If using the UI, create an access key pair with *IAM -> Users -> Security credentials -> Access keys -> Create access key*. Choose *Use case -> Other* and then copy the *Access key* and *Secret access key* values.
4. Create an [`AWSCredentials` block](/integrations/prefect-aws/index#save-credentials-to-an-aws-credentials-block) in code or the Prefect UI. In addition to the block name, most users will fill in the *AWS Access Key ID* and *AWS Access Key Secret* fields.
5. Reference the block as shown above.
```python azure_no_block.py
from prefect import flow
if __name__ == "__main__":
flow.from_source(
source="az://mycontainer/myfolder",
entrypoint="my_file.py:my_flow",
).deploy(
name="my-azure-deployment",
work_pool_name="my-work-pool",
job_variables={"env": {"EXTRA_PIP_PACKAGES": "prefect-azure"} },
)
```
```python azure_block.py
from prefect import flow
from prefect_azure import AzureBlobCredentials, AzureBlobStorage
if __name__ == "__main__":
azure_blob_storage_block = AzureBlobStorage.load("my-code-storage-block")
# or
# azure_blob_storage_block = AzureBlobStorage(
# container="my-prefect-azure-container",
# folder="my-folder",
# credentials=AzureBlobCredentials.load("my-credentials-block")
# )
flow.from_source(source=azure_blob_storage_block, entrypoint="my_file.py:my_flow").deploy(
name="my-azure-deployment", work_pool_name="my-work-pool"
)
```
```yaml prefect.yaml
build: null
push:
- prefect_azure.deployments.steps.push_to_azure_blob_storage:
id: push_code
requires: prefect-azure>=0.4
container: my-prefect-azure-container
folder: my-folder
credentials: "{{ prefect.blocks.azure-blob-storage-credentials.my-credentials-block }}"
# if explicit authentication is required
pull:
- prefect_azure.deployments.steps.pull_from_azure_blob_storage:
id: pull_code
requires: prefect-azure>=0.4
container: '{{ push_code.container }}'
folder: '{{ push_code.folder }}'
credentials: "{{ prefect.blocks.azure-blob-storage-credentials.my-credentials-block }}" # if explicit authentication is required
deployments:
- name: my-azure-deployment
version: null
tags: []
concurrency_limit: null
description: null
entrypoint: my_file.py:my_flow
parameters: {}
work_pool:
name: my-work-pool
work_queue_name: null
job_variables: {}
enforce_parameter_schema: true
schedules: []
```
To create an `AzureBlobCredentials` block:
1. Install the [prefect-azure](/integrations/prefect-azure/) library with `pip install -U prefect-azure`
2. Register the blocks in prefect-azure with `prefect block register -m prefect_azure`
3. Create an access key for a role with sufficient (read and write) permissions to access the blob.
You can create a connection string containing all required information in the UI under *Storage Account -> Access keys*.
4. Create an Azure Blob Storage Credentials block in code or the Prefect UI. Enter a name for the block and paste the
connection string into the *Connection String* field.
5. Reference the block as shown above.
```python gcs_no_block.py
from prefect import flow
if __name__ == "__main__":
flow.from_source(
source="gs://my-bucket/my-folder",
entrypoint="my_file.py:my_flow",
).deploy(
name="my-gcs-deployment",
work_pool_name="my-work-pool"
)
```
```python gcs_block.py
from prefect import flow
from prefect_gcp import GcpCredentials, GCSBucket
if __name__ == "__main__":
gcs_bucket_block = GCSBucket.load("my-code-storage-block")
# or
# gcs_bucket_block = GCSBucket(
# bucket="my-bucket",
# folder="my-folder",
# credentials=GcpCredentials.load("my-credentials-block")
# )
flow.from_source(
source=gcs_bucket_block,
entrypoint="my_file.py:my_flow",
).deploy(
name="my-gcs-deployment",
work_pool_name="my_pool",
job_variables={"env": {"EXTRA_PIP_PACKAGES": "prefect-gcp"} },
)
```
```yaml prefect.yaml
build: null
push:
- prefect_gcp.deployment.steps.push_to_gcs:
id: push_code
requires: prefect-gcp>=0.6
bucket: my-bucket
folder: my-folder
credentials: "{{ prefect.blocks.gcp-credentials.my-credentials-block }}" # if explicit authentication is required
pull:
- prefect_gcp.deployment.steps.pull_from_gcs:
id: pull_code
requires: prefect-gcp>=0.6
bucket: '{{ push_code.bucket }}'
folder: '{{ pull_code.folder }}'
credentials: "{{ prefect.blocks.gcp-credentials.my-credentials-block }}" # if explicit authentication is required
deployments:
- name: my-gcs-deployment
version: null
tags: []
concurrency_limit: null
description: null
entrypoint: my_file.py:my_flow
parameters: {}
work_pool:
name: my-work-pool
work_queue_name: null
job_variables: {}
enforce_parameter_schema: true
schedules: []
```
To create a `GcpCredentials` block:
1. Install the [prefect-gcp](/integrations/prefect-gcp/) library with `pip install -U prefect-gcp`
2. Register the blocks in prefect-gcp with `prefect block register -m prefect_gcp`
3. Create a service account in GCP for a role with read and write permissions to access the bucket contents.
If using the GCP console, go to *IAM & Admin -> Service accounts -> Create service account*.
After choosing a role with the required permissions,
see your service account and click on the three dot menu in the *Actions* column.
Select *Manage Keys -> ADD KEY -> Create new key -> JSON*. Download the JSON file.
4. Create a GCP Credentials block in code or the Prefect UI. Enter a name for the block and paste the entire contents of the JSON key file into the *Service Account Info* field.
5. Reference the block as shown above.
Another authentication option is to give the worker access to the storage location at runtime through SSH keys.
# How to version deployments
Source: https://docs-3.prefect.io/v3/how-to-guides/deployments/versioning
Track changes to your deployments and roll back to previous versions
In Prefect Cloud, deployments have a version history.
The **live** deployment version is the runnable version of a deployment.
A previous deployment version can be made live by **rolling back** to it.
When a previous deployment version is live, a newer deployment version can be made live by **promoting** it.
When a new version of a deployment is created, it is automatically set as the live version.
## What's included in a deployment version
Deployment versions are a history of changes to a deployment's configuration.
While the majority of deployment properties are included in a deployment's version, some properties cannot be versioned.
Persisting these properties across all versions helps prevent unexpected execution behavior when rolling back or promoting versions.
These properties are pinned to each deployment version.
| Deployment Property | Versioned |
| -------------------------- | -------------------------------------- |
| `description` | |
| `tags` | |
| `labels` | |
| `entrypoint` | |
| `pull_steps` | |
| `parameters` | |
| `parameter_openapi_schema` | |
| `enforce_parameter_schema` | |
| `work_queue_id` | |
| `work_pool_name` | |
| `job_variables` | |
| `created_by` | |
| `updated_by` | |
| `version_info` | |
These properties persist across version rollbacks and promotions.
| Deployment Property | Versioned |
| --------------------- | ------------------------------------------------------------------ |
| `name` | (immutable) |
| `schedules` | |
| `is_schedule_active` | |
| `paused` | |
| `disabled` | |
| `concurrency_limit` | |
| `concurrency_options` | |
## How to create and manage versions
A new deployment version is created every time a deployment is updated, whether from the CLI, from Python, or from the UI.
If you're deploying from a supported source code management platform or from inside a Git repository, Prefect automatically collects the **repository name**, **repository URL**, the currently checked out **branch**, the **commit SHA**, and the **first line of your commit message** from your environment.
This information is used to help create a record of which code versions produced which deployment versions, and does not affect deployment execution.
### Supported source code management platforms
Prefect searches for environment variables in each supported platform's CI environment in order to collect information about the current state of the repository from which deployment versions are created.
It may be useful to access these environment variables in other stages of your deployment process for constructing version identifiers.
Prefect's automatic version information collection currently supports GitHub Actions, GitLab CI, Bitbucket Pipelines, and Azure Pipelines.
If deploying from a Git repository not on one of these platforms, Prefect will use `git` CLI commands as a best effort to discover these values.
| Environment Variable | Value |
| -------------------- | ---------------------------------- |
| `GITHUB_SHA` | Commit SHA |
| `GITHUB_REF_NAME` | Branch name |
| `GITHUB_REPOSITORY` | Repository name |
| `GITHUB_SERVER_URL` | Github account or organization URL |
| Environment Variable | Value |
| -------------------- | --------------- |
| `CI_COMMIT_SHA` | Commit SHA |
| `CI_COMMIT_REF_NAME` | Branch name |
| `CI_PROJECT_NAME` | Repository name |
| `CI_PROJECT_URL` | Repository URL |
| Environment Variable | Value |
| --------------------------- | ------------------------------------- |
| `BITBUCKET_COMMIT` | Commit SHA |
| `BITBUCKET_BRANCH` | Branch name |
| `BITBUCKET_REPO_SLUG` | Repository name |
| `BITBUCKET_GIT_HTTP_ORIGIN` | Bitbucket account or organization URL |
| Environment Variable | Value |
| ------------------------ | --------------- |
| `BUILD_SOURCEVERSION` | Commit SHA |
| `BUILD_SOURCEBRANCHNAME` | Branch name |
| `BUILD_REPOSITORY_NAME` | Repository name |
| `BUILD_REPOSITORY_URI` | Repository URL |
### Using the `version` deployment property
Supplying a `version` to your deployment is not required, but using human-readable version names helps give meaning to each change you make.
It's also valuable for quickly finding or communicating the version you want to roll back to or promote.
For additional details on how Prefect handles the value of `version`, see [deployment metadata for bookkeeping](/v3/deploy#metadata-for-bookkeeping).
### Executing specific code versions
It's possible to synchronize code changes to deployment versions so each deployment version executes the exact commit that was checked out when it was created.
Since `pull_steps` and `job_variables` define what repository or image to pull when a flow runs, updating their contents with each code change keeps deployment versions in step with your codebase.
Which of these configurations to use depends on whether you are pulling code from Git or storing code in Docker images.
The examples in this section use GitHub as their source control management and CI platform, so be sure to replace URLs, environment variables, and CI workflows with the ones relevant to your platform.
You can check out complete example repositories on GitHub for executing specific code versions when [pulling from Git](https://github.com/kevingrismore/version-testing) and [pulling Docker images](https://github.com/kevingrismore/version-testing-docker/tree/main).
#### Pulling from Git
The `git_clone` deployment pull step and `GitRepository` deployment storage class offer a `commit_sha` field.
When deploying from a Git repository, provide the commit SHA from your environment to your deployment.
Both approaches below will result in a deployment pull step that clones your repository and checks out a specific commit.
```yaml With prefect.yaml
pull:
- prefect.deployments.steps.git_clone:
repository: https://github.com/my-org/my-repo.git
commit_sha: "{{ $GITHUB_SHA }}"
deployments:
- name: my-deployment
version: 0.0.1
entrypoint: example.py:my_flow
work_pool:
name: my-work-pool
```
```python With .deploy()
import os
from prefect import flow
from prefect.runner.storage import GitRepository
@flow(log_prints=True)
def my_flow():
print("Hello world!")
if __name__ == "__main__":
my_flow.from_source(
source=GitRepository(
repo_url="https://github.com/my-org/my-repo.git",
commit_sha=os.getenv("GITHUB_SHA"),
)
).deploy(
name="my-deployment",
version="0.0.1",
work_pool_name="my-work-pool",
)
```
#### Pulling Docker images
When baking code into Docker images, use the image digest to pin exact code versions to deployment versions.
An image digest uniquely and immutably identifies a container image.
First, build your image in your CI job and pass the image digest as an environment variable to the Prefect deploy step.
```yaml Github Actions
...
- name: Set up Docker Buildx
uses: docker/setup-buildx-action@v3
- name: Log in to Docker Hub
uses: docker/login-action@v3
with:
username: ${{ vars.DOCKERHUB_USERNAME }}
password: ${{ secrets.DOCKERHUB_TOKEN }}
- name: Build and push
id: build-docker-image
uses: docker/build-push-action@v6
with:
platforms: linux/amd64,linux/arm64
push: true
tags: my-registry/my-example-image:my-tag
cache-from: type=gha
cache-to: type=gha,mode=max
- name: Deploy a Prefect flow
env:
IMAGE_DIGEST: ${{ steps.build-docker-image.outputs.digest }}
PREFECT_API_KEY: ${{ secrets.PREFECT_API_KEY }}
PREFECT_API_URL: ${{ secrets.PREFECT_API_URL }}
... # your deployment action here
```
Then, refer to that digest in the image name you provide to this deployment version's job variables.
```yaml With prefect.yaml
deployments:
- name: my-deployment
version: 0.0.1
entrypoint: example.py:my_flow
work_pool:
name: my-work-pool
job_variables:
image: "my-registry/my-image@{{ $IMAGE_DIGEST }}"
```
```python With .deploy()
import os
from prefect import flow
@flow(log_prints=True)
def my_flow():
print("Hello world!")
if __name__ == "__main__":
my_flow.deploy(
name="my-deployment",
version="0.0.1",
work_pool_name="my-work-pool",
image=f"my-registry/my-image@{os.getenv('IMAGE_DIGEST')}",
build=False,
)
```
# How-to Guides
Source: https://docs-3.prefect.io/v3/how-to-guides/index
## Sections
Learn how to write and customize your Prefect workflows.
Learn how to deploy and manage your workflows as Prefect deployments.
Learn how to configure your Prefect environment.
Learn how to work with events, triggers, and automations.
Learn how to deploy your workflows to specific infrastructure.
Learn how to set up your Prefect Cloud account.
Learn how to host your own Prefect server.
Learn how to migrate from other platforms and upgrade to the latest versions of Prefect.
# How to Migrate from Airflow
Source: https://docs-3.prefect.io/v3/how-to-guides/migrate/airflow
Migration from Apache Airflow to Prefect: A Comprehensive How-To Guide
Migrating from Apache Airflow to Prefect simplifies orchestration, reduces overhead, and enables a more Pythonic workflow.
Prefect's flexible **library-based approach** lets you write, test, and run workflows with regular code—without the complexity of schedulers, executors, or metadata databases.
This guide will walk you through a **step-by-step migration**, helping you transition from Airflow DAGs to Prefect flows while mapping key concepts, adapting infrastructure, and optimizing deployments. By the end, you'll have a streamlined, scalable orchestration system that lets your team focus on engineering rather than maintaining workflow infrastructure.
**Airflow to Prefect Mapping**
This table provides a quick reference for migrating key Airflow concepts to their Prefect equivalents. Click on each concept to jump to a detailed explanation.
| **Airflow Concept** | **Prefect Equivalent** | **Key Differences** |
| ---------------------------------------------------------- | ------------------------------------------------------------ | --------------------------------------------------------------------------------------------- |
| [**DAGs**](#choose-a-dag-to-convert) | [**Flows**](#define-a-prefect-flow) | Prefect flows are standard Python functions (`@flow`). No DAG classes or `>>` dependencies. |
| [**Operators**](#create-equivalent-prefect-tasks) | [**Tasks**](#create-equivalent-prefect-tasks) | Prefect tasks (`@task`) replace Airflow Operators, removing the need for specialized classes. |
| [**Executors**](#airflow-executors) | [**Work Pools & Workers**](#airflow-executors) | Prefect decouples task execution using lightweight **workers** polling **work pools**. |
| [**Scheduling**](#prefect-deployment) | [**Deployments**](#prefect-deployment) | Scheduling is separate from flow code and configured externally. |
| [**XComs**](#define-a-prefect-flow) | [**Return Values**](#define-a-prefect-flow) | Prefect tasks return data directly; no need for XComs or metadata storage. |
| [**Hooks & Connections**](#airflow-hooks-and-integrations) | [**Blocks & Integrations**](#airflow-hooks-and-integrations) | Prefect replaces Hooks with **Blocks** for secure resource management. |
| [**Sensors**](#airflow-sensors) | [**Triggers & Event-Driven Flows**](#airflow-sensors) | Prefect uses external event triggers or lightweight polling flows. |
| [**Airflow UI**](#observability) | [**Prefect UI**](#observability) | Prefect provides real-time monitoring, task logs, and automation features. |
There are also so key differences when it comes to task execution, resource control, data passing, and parallelism. We'll cover these in more detail below.
| **Feature** | **Airflow** | **Prefect** |
| --------------------- | ----------------------------------------- | ------------------------------------------ |
| **Task Execution** | Tasks run as independent processes/pods | Tasks execute in single flow runtime |
| **Resource Control** | Task-level via executor settings | Flow-level via work pools & task runners |
| **Data Passing** | Requires XComs or external storage | Direct in-memory data passing |
| **Parallelism** | Managed by executor configuration | Managed by work pools and task runners |
| **Task Dependencies** | Uses `>>` operators and `set_upstream()` | Implicit via Python function calls |
| **DAG Parsing** | Pre-parsed with global variable execution | Standard Python function execution |
| **State & Retries** | Individual task retries, manual DAG fixes | Built-in flow & task retry handling |
| **Scheduling** | Tightly coupled with DAG code | Decoupled via deployments |
| **Infrastructure** | Requires scheduler, metadata DB, workers | Lightweight API server with optional cloud |
## Preparing for migration
Before jumping into code conversion, set the stage for a smooth migration. Preparation includes auditing your existing Airflow DAGs, setting up a Prefect environment for testing, and mapping Airflow concepts to their Prefect equivalents.
**Audit your Airflow DAGs and dependencies:** Catalog all DAGs, schedules, task counts, and dependencies (databases, APIs, cloud services). Identify **high-priority pipelines** (business-critical, failure-prone, frequently updated) and **simpler DAGs** for pilot migration. Start with a small, non-critical DAG to gain confidence before tackling complex workflows.
**Set up Prefect for testing:** Before fully migrating, set up a parallel Prefect environment to test your flows. Prefect provides a managed execution environment out of the box, so you can get started without configuring infrastructure.
1. [**Install Prefect**](/v3/get-started/install) (`pip install prefect`).
2. **Start a Prefect server locally** (`prefect server start`) or sign up for [**Prefect Cloud**](https://app.prefect.cloud/) to run flows immediately.
3. **Run initial flows without infrastructure setup**: Run flows locally or using Prefect Cloud Managed Exxecution - allowing you to test without configuring work pools or Kubernetes.
Prefect Cloud provides a managed execution environment out of the box, so you can get started without configuring infrastructure.
Once you've validated basic functionality, you can explore configuring an [**execution environment**](/v3/deploy/infrastructure-concepts/work-pools) (e.g., Docker, Kubernetes) for production, which we cover later in this tutorial.
For each Airflow DAG, you can outline its Prefect flow structure (tasks and control flow), where its schedule will live, and what execution infrastructure it needs. With preparation done, it's time to start converting code.
## Converting DAGs to Prefect Flows
In this phase, you will **rewrite your Airflow DAGs as Prefect flows and tasks**. The goal is to replicate each workflow's logic in Prefect, while simplifying wherever possible.
Prefect's API is quite ergonomic - many Airflow users find they can express the same logic with *less code* and *more flexibility*
Let's break down the conversion process step-by-step, and walk through a concrete example.
### Choose a DAG to convert
Start with one of your simpler DAGs (perhaps one of those identified in the audit as an easy win). For illustration, suppose we have an Airflow DAG that runs a simple ETL: it **extracts data**, **transforms** it, and then **loads** the results. In Airflow, this might be defined as:
{/* pmd-metadata: notest */}
```python
# Airflow DAG example (simplified ETL)
from airflow import DAG
from airflow.operators.python import PythonOperator
from datetime import datetime
# Airflow task functions (to be used by PythonOperator)
def extract_fn():
# ... (extract data, e.g., query an API or database)
return data
def transform_fn(data):
# ... (transform the data)
return processed_data
def load_fn(processed_data):
# ... (load data to target, e.g., save to DB or file)
with DAG("etl_pipeline", start_date=datetime(2023,1,1), schedule_interval="@daily", catchup=False) as dag:
extract = PythonOperator(task_id='extract_data', python_callable=extract_fn)
transform = PythonOperator(task_id='transform_data', python_callable=transform_fn)
load = PythonOperator(task_id='load_data', python_callable=load_fn)
# Set task dependencies
extract >> transform >> load
```
In this Airflow DAG, we define three tasks using `PythonOperator`, then specify that they run sequentially (`extract` then `transform` then `load`).
### Create equivalent Prefect tasks
In Prefect, we'll take the core logic of `extract_fn`, `transform_fn`, `load_fn` and turn each into a `@task` decorated function. The code inside can remain largely the same (minus any Airflow-specific cruft). For example:
{/* pmd-metadata: notest */}
```python
# Prefect tasks for ETL
from prefect import task, flow
@task
def extract_data():
# ... (extract data as before)
return data
@task
def transform_data(data):
# ... (transform data as before)
return processed_data
@task
def load_data(processed_data):
# ... (load data as before)
```
Notice we simply applied `@task` to each function. No need for a special operator class or task IDs - the function name serves as an identifier, and Prefect will handle the orchestration.
### Define a Prefect flow
Now we write a `@flow` function that calls these tasks in the required order:
{/* pmd-metadata: notest */}
```python
@flow
def etl_pipeline():
data = extract_data() # calls extract_data task
processed = transform_data(data) # uses output of extract_data
load_data(processed) # calls load_data with result of transform_data
```
This Prefect flow function replaces the Airflow DAG. No need for `>>` dependencies or XComs. **Task results can be stored in variables that are passed directly to other tasks as arguments**. By default, tasks are automatically executed in the order they are called.
Unlike Airflow, where testing often requires an Airflow context, Prefect flows run like standard Python code. You can execute `etl_pipeline()` in an interpreter, import it elsewhere, or test tasks individually (`transform_data.fn(sample_data)`).
* **Airflow:** Defines operators, sets dependencies (`>>`), and relies on XCom for data passing.
* **Prefect:** Calls tasks like functions, with execution order determined by data flow, making workflows more intuitive and testable.
### Branching and conditional logic
In Airflow, conditional branching is typically handled using BranchPythonOperator, ShortCircuitOperator, or trigger rules, requiring explicit DAG constructs to determine execution paths. Prefect simplifies branching by leveraging standard Python if/else logic directly within flows.
**Implementing Branching in Prefect**
Instead of using BranchPythonOperator and dummy tasks for joining paths, you can structure conditional execution using native Python control flow:
{/* pmd-metadata: notest */}
```python
@flow
def my_flow():
result = extract_data()
if some_condition(result):
outcome = branch_task_a() # a task or subflow for branch A
else:
outcome = branch_task_b() # branch B
final_task(outcome)
```
**Key Differences from Airflow**
| **Feature** | **Airflow (BranchPythonOperator)** | **Prefect (`if/else` logic)** |
| -------------------- | --------------------------------------------------------- | ----------------------------------------------------------------------- |
| **Branching Method** | Often uses specialized operators (`BranchPythonOperator`) | Uses native Python conditionals (`if/else`) |
| **Skipped Tasks** | Unselected branches are explicitly **skipped** | Prefect **only runs** the executed branch—no skipping needed |
| **Join Behavior** | Uses **DummyOperator** to rejoin paths | Downstream tasks execute **automatically** after the conditional branch |
**Advantages of Prefect’s Approach**
* **No special operators** — branching is simpler and more intuitive
* **Cleaner code** — fewer unnecessary tasks like `DummyOperator`
* **No explicit skipping required** — Prefect only executes the called tasks
By using standard Python control flow, Prefect **eliminates complexity** and makes conditional execution more **readable, maintainable, and testable**.
### Retries and error handling
Airflow DAGs often have retry settings either at the DAG level (`default_args`) or per task (e.g., `retries=3`). In Prefect, you can specify [retries](/v3/develop/write-flows#retries) for any task or flow.
Use `@task(retries=2, retry_delay_seconds=60)` to retry a task twice on failure, or `@flow(retries=1)` to retry the entire flow once. Prefect **distinguishes flow and task retries**—flow retries rerun all tasks, while task retries rerun only the failed task. Replace Airflow-specific error handling (`on_failure_callback`, sensors) with Prefect's **Retry**, **State Handlers**, or built-in failure notifications.
### Remove Airflow-specific code
Go through the DAG code and strip out anything that doesn't apply in Prefect.
This includes: DAG declarations (`DAG(...)` blocks), default\_args, Airflow imports (`from airflow...`), XCom push/pull calls (replace with return values), Jinja templating in operator arguments (you can often just compute those values in Python directly or use [Prefect parameters](/v3/deploy/index#workflow-scheduling-and-parametrization)).
If your DAG used Airflow Variables or Connections (Airflow's way to store config in the Metastore), you'll need to supply those to Prefect tasks via another means - for example, as [environment variables](/v3/develop/settings-and-profiles#environment-variables) or using [Prefect Blocks](/integrations/integrations) (like a Block for a database connection string). Essentially, your Prefect flow code should look like a regular Python script with functions, not like an Airflow DAG file.
As an illustration, here's how our example **ETL pipeline** looks after conversion:
{/* pmd-metadata: notest */}
```python
from prefect import flow, task
@task(retries=1, log_prints=True)
def extract_data():
# fetch data from API (simulated)
data = get_data_from_api()
return data
@task
def transform_data(data):
# process the data
processed = transform(data)
return processed
@task
def load_data(data):
# load data to database
load_into_db(data)
@flow(name="etl_pipeline")
def etl_pipeline_flow():
raw = extract_data()
processed = transform_data(raw)
load_data(processed)
if __name__ == "__main__":
# For local testing
etl_pipeline_flow()
```
Key improvements in this converted code:
* **Direct execution for testing** - `if __name__ == "__main__": etl_pipeline_flow()` allows running the flow locally during development. In production, Prefect handles scheduling.
* **Built-in retries and logging** - `retries=1` ensures one retry on failure, and `log_prints=True` sends `print()` output to Prefect's UI.
* **Pure Python** - No Airflow imports or context, making the flow easy to test, debug, and run consistently across environments (IDE, CI, or production).
### Validate functional equivalence
Once a DAG has been rewritten as a Prefect flow, execute the flow and compare its results with the Airflow DAG to ensure expected outcomes. If discrepancies arise, modify the flow accordingly. Keep in mind the original DAG may have depended on XComs or global variables that you will need to account for.
For each task and special case, including [subDAGs](https://airflow.apache.org/docs/apache-airflow/stable/core-concepts/dags.html#concepts-subdags) and [TaskGroups](https://airflow.apache.org/docs/apache-airflow/stable/core-concepts/dags.html#taskgroups), implement them as subflows or Python functions in Prefect. When transitioning from Airflow's TaskFlow API, keep in mind that Prefect's `@task` decorator serves a similar purpose but does not rely on XComs.
After completing these steps, the Prefect flow should accurately replicate the functionality of the Airflow DAG while being more modular and testable. The migration is now complete, and the next step is to focus on deploying and optimizing the new workflows.
## Infrastructure Migration Considerations
Migrating your code is a big step, but ensuring your workflows run smoothly in Prefect is just as important. Prefect's **flexible execution** makes this easier, supporting Prefect managed execution, local machines, VMs, containers, and Kubernetes with less setup. This section maps Airflowss executors to **Prefect Work Pools and Workers**, while also covering sensors, hooks, logging, and state management to complete your migration.
### Leveraging Prefect Managed Execution
**Running Flows Without Infrastructure Setup**
Prefect Cloud offers [Managed Execution](/v3/how-to-guides/deployment_infra/serverless), allowing you to run flows **without setting up infrastructure or maintaining workers**. With Prefect Managed work pools, Prefect handles compute, execution, and scheduling, eliminating the need for a cloud provider account or on-premises infrastructure.
**Getting Started with Prefect Managed Execution**
```bash
prefect work-pool create my-managed-pool --type prefect:managed
```
{/* pmd-metadata: notest */}
```python
from prefect import flow
if __name__ == "__main__":
flow.from_source(
source="https://github.com/prefecthq/demo.git",
entrypoint="flow.py:my_flow",
).deploy(
name="test-managed-flow",
work_pool_name="my-managed-pool",
)
```
```bash
python managed-execution.py
```
This will allow your flow to run remotely without provisioning workers, setting up Kubernetes, or maintaining cloud infrastructure.
**When to Use Prefect Managed Execution**
Ideal for testing and running flows without infrastructure setup, especially for teams that want managed execution without a cloud provider.
If you need custom images, heavy dependencies, private networking, or higher concurrency limits than Prefect's tiers allow.
**Next Steps**
If you require self-hosted execution, the next sections cover how to migrate Airflow Executors to Prefect Work Pools across different infrastructure types (Kubernetes, Docker, Celery, etc.).
For full details on Prefect Managed Execution, refer to the [Managed Execution documentation](/v3/how-to-guides/deployment_infra/serverless).
### Airflow Executors
**Airflow Executors vs Prefect Work Pools/Workers:** Airflow's executor setting determines how tasks are distributed. Prefect's equivalent concept is the [**work pool**](/v3/deploy/infrastructure-concepts/work-pools) (with one or more [**workers**](/v3/deploy/infrastructure-concepts/workers) polling it).
In Airflow, each task executes independently, regardless of the executor used. Whether running with LocalExecutor, CeleryExecutor, or KubernetesExecutor, every task runs as an isolated process or pod. Executors control how and where these tasks are executed, but the core execution model remains task-by-task.
In contrast, Prefect executes an entire flow run within a single execution environment (e.g., a local process, Docker container, or Kubernetes pod). Tasks within a flow execute within the same runtime context, reducing fragmentation and improving performance. Prefect's execution model simplifies resource management, allowing for in-memory data passing between tasks rather than relying on external storage or metadata databases.
Here's a mapping of typical setups:
#### Airflow LocalExecutor
With the **Airflow LocalExecutor** tasks run as subprocesses on the same machine. In Prefect, the default behavior is similar - you can run the flow in a local Python process, and tasks will execute sequentially by default. That does not *have* to be the same machine that is running your Prefect UI and scheduler.
For parallelism on a single machine, use [**`DaskTaskRunner`**](/integrations/prefect-dask/index) to enable multi-process execution:
{/* pmd-metadata: notest */}
```python
@flow(task_runner=DaskTaskRunner())
```
By default, Prefect's **Process work pool** runs flows as subprocesses. A basic **Airflow LocalExecutor** setup can be replaced with a **Prefect worker** on the same VM using a **process work pool**, eliminating the need for a separate scheduler.
#### Airflow CeleryExecutor
**Airflow CeleryExecutor** where distributed workers run across multiple machines, using a message broker like RabbitMQ/Redis.
Prefect eliminates the need for a **message broker** or **results backend**, as its API server manages work distribution. To replicate an Airflow **CeleryExecutor** setup, deploy **multiple Prefect workers** across machines, all polling from a shared **work pool**.
**Setting Up a Work Pool and Workers**
1. **Create a work pool** (e.g., `"prod-work-pool"`):
```bash
prefect work-pool create prod-work-pool --type process
```
2. **Start a worker on each node**, assigning it to the work pool:
```bash
prefect worker start -p prod-work-pool
```
3. **Workers poll the work pool** and execute assigned flow runs.
Prefect **work pools** function similarly to **Celery queues**, allowing multiple workers to process tasks concurrently.
#### Airflow KubernetesExecutor
In Airflow, the **KubernetesExecutor** follows the per-task execution model, launching each task in its own Kubernetes pod. Prefect, instead, uses a Kubernetes Work Pool, where each flow run executes in a single Kubernetes pod. This approach reduces fragmentation, as tasks run within the same execution environment rather than spawning separate pods.
**Configuring a Kubernetes Work Pool**
For detailed instructions, see [Prefect's Kubernetes Work Pool documentation](/v3/how-to-guides/deployment_infra/kubernetes). But the general steps to take are:
1. **Create a Kubernetes work pool** with the desired pod template (e.g., image, resources):
```bash
prefect work-pool create k8s-pool --type kubernetes
```
2. **Deploy a flow to the Kubernetes work pool**:
{/* pmd-metadata: notest */}
```python
from prefect import flow
@flow(log_prints=True)
def buy():
print("Buying securities")
if __name__ == "__main__":
buy.deploy(
name="my-code-baked-into-an-image-deployment",
work_pool_name="k8s-pool",
image="my_registry/my_image:my_image_tag"
)
```
Alternatively, you can use a [prefect.yaml](/v3/how-to-guides/deployment_infra/kubernetes#define-a-prefect-deployment) file to deploy your flow to the Kubernetes work pool.
3. [**Run a Kubernetes worker in-cluster**](/v3/how-to-guides/deployment_infra/kubernetes#deploy-a-worker-using-helm) to execute flow runs.
4. **Execution Flow**:
* The worker **picks up a scheduled flow run**.
* It **creates a new pod**, which executes the entire flow.
* The **pod terminates automatically** after execution.
This setup eliminates the need for a long-running scheduler, reducing operational complexity while leveraging Kubernetes for **on-demand, containerized execution**.
#### Airflow CeleryKubernetes
**Airflow + Celery + Kubernetes (CeleryKubernetes Executor)** or other hybrid: Some Airflow deployments use Celery for distributed scheduling but run tasks in containers or on Kubernetes.
Prefect's model can handle these as well by combining approaches - e.g., use a Kubernetes work pool with multiple worker processes distributed as needed. The general principle is that Prefect **work pools** can cover all these patterns (local, multi-machine, containers, serverless) via configuration, not code, and you manage them via Prefect's UI/CLI.
#### Using Serverless compute
Prefect supports [**serverless execution**](/v3/how-to-guides/deployment_infra/serverless) on various cloud platforms, eliminating the need for dedicated infrastructure. Instead of provisioning long-running workers, flows can be executed **on-demand** in ephemeral environments. Prefect's push-based work pools allow flows to be submitted to serverless services, where they run in isolated containers and automatically scale with demand.
**Serverless Platforms**
Prefect flows can run on:
* **AWS ECS** (Fargate or EC2-backed containers)
* **Azure Container Instances (ACI)**
* **Google Cloud Run**
* **Modal** (serverless compute for AI/ML workloads)
* **Coiled** (serverless Dask clusters for parallel workloads)
**Configuring a Serverless Work Pool**
To run flows on a serverless platform, create a **push-based work pool** and configure it to submit jobs to the desired service.
Example: Creating an **ECS work pool**:
```bash
prefect work-pool create --type ecs:push --provision-infra my-ecs-pool
```
Deployments can then be configured to use the serverless work pool, allowing Prefect to submit flow runs without maintaining long-lived infrastructure.
For setup details, refer to [Prefect's serverless execution documentation](/v3/how-to-guides/deployment_infra/serverless).
### Airflow Sensors
Airflow Sensors continuously poll for external conditions, such as file availability or database changes, which can tie up resources. Prefect replaces this with an **event-driven approach**, where external systems trigger flow execution when conditions are met.
**Using External Triggers**
Instead of using an Airflow `S3KeySensor`, configure an AWS Lambda or EventBridge rule to call the Prefect API when an S3 file is uploaded. Prefect Cloud and Server provide API endpoints to start flows on demand. Prefect's **Automations** can also trigger flows based on specific conditions.
**Handling Polling Scenarios**
If an external system lacks event-driven capabilities, implement a lightweight **polling flow** that runs on a schedule (e.g., every 5 minutes), checks the condition, and triggers the main flow if met. This approach minimizes idle resource consumption compared to Airflow's persistent sensors.
Prefect's model eliminates long-running sensor tasks, making workflows **more efficient, scalable, and event-driven**.
### Airflow Hooks and Integrations
Airflow provides hooks and operators for interacting with external systems (e.g., **JDBC, cloud services, databases**). In Prefect, these integrations are handled through [**Prefect Integrations**](/integrations/integrations) (e.g., `prefect-snowflake`, `prefect-gcp`, `prefect-dbt`) or by directly using the relevant **Python libraries** within tasks.
**Migrating Airflow Hooks to Prefect**
1. **Identify Airflow hooks** used in your DAGs (e.g., `PostgresHook`, `GoogleCloudStorageHook`).
2. **Replace them with equivalent Prefect integrations** or direct Python library calls.
**Example:** Instead of
{/* pmd-metadata: notest */}
```python
hook = PostgresHook(postgres_conn_id=my_conn_id)
engine = hook.get_sqlalchemy_engine()
session = sessionmaker(bind=engine)()
```
Use Prefect Blocks for secure credential management:
{/* pmd-metadata: notest */}
```python
from prefect_sqlalchemy import SqlAlchemyConnector
SqlAlchemyConnector.load("BLOCK_NAME-PLACEHOLDER")
```
3. **Use Prefect Blocks for secrets management**, similar to Airflow Connections, to separate credentials from code.
**Replacing Airflow Operators with Prefect Tasks**
* **Prefect tasks** can call any Python library, eliminating the need for custom Airflow operators.
* Example: Instead of using a **BashOperator** to call an API via a shell script, install the necessary package in the flow's environment and call it directly in a task.
Prefect's approach **removes unnecessary abstraction layers**, allowing direct access to the full Python ecosystem without Airflow-specific constraints.
Basically: **anything done with a custom Airflow operator or hook can be replaced in Prefect with a task using the appropriate Python library.** Prefect removes Airflow's constraints, allowing direct use of the full Python ecosystem. For example, instead of using a **BashOperator** to call an API via a shell script, install the required package in your environment and call it directly from a task, eliminating unnecessary workarounds.
### Observability
#### State and logging
**Task and Flow State Management**
In Airflow, task states (`success`, `failed`, `skipped`, etc.) are stored in a metadata database and displayed in the Airflow UI's DAG run view. Prefect also tracks state for **each task and flow run**, but these states are managed by the **Prefect backend** (Prefect Server or Cloud API) and can be accessed via the **Prefect UI, API, or CLI**.
After migration, similar visibility is available in Prefect's UI, where you can track which flows and tasks succeeded or failed. Prefect also includes additional state management features such as:
* Cancel a flow run (`Cancelling` state).
* Retry a failed flow run (with manual steps).
* **Task caching** between runs to avoid redundant computations.
**Logging Differences**
Airflow logs task execution output to files (stored on executor machines or remote storage), viewable through the UI. Prefect **captures stdout, stderr, and Python logging** from tasks and sends them to the Prefect backend, making logs accessible in the **Prefect UI, API, and CLI**.
To ensure logs appear correctly in Prefect's UI, use `@flow(log_prints=True)` or `@task(log_prints=True)`
These flags route `print()` statements to Prefect logs automatically.
For centralized logging (e.g., ElasticSearch, Stackdriver), Prefect supports [**custom logging handlers**](/v3/advanced/logging-customization) and **third-party integrations**. Logs can be forwarded similarly to how Airflow handled external logging.
**Debugging and Troubleshooting**
Prefect simplifies debugging because tasks are **standard Python functions**. Instead of analyzing scheduler or worker logs, you can:
* **Re-run individual tasks or flows locally** to reproduce issues.
* **Test flows interactively** in an IDE before deploying.
This direct execution model eliminates the need to troubleshoot failures through a scheduling system, making debugging faster and more intuitive than in Airflow.
#### Monitoring
**Notifications and Alerts**
In Airflow, monitoring is typically managed through the UI, email alerts on task failures, and external monitoring of the scheduler.
Prefect provides similar capabilities through *Automations*, which can be configured to trigger alerts via Slack, email, or webhooks based on specific events.
To replicate Airflow's alerting (e.g., failures or SLA misses), configure [**Prefect Automations**](/v3/automate/events/automations-triggers) to:
* Notify on **flow or task failures**.
* Alert when a **flow run exceeds a specified runtime**.
* Trigger **custom actions** based on state changes.
**Service Level Agreements (SLAs)**
Prefect Cloud supports Service Level Agreements (SLAs) to monitor and enforce performance expectations for flow runs. SLAs automatically trigger alerts when predefined thresholds are violated.
SLAs can be defined via the Prefect UI, prefect.yaml, `.deploy()` method, or CLI. Violations generate `prefect.sla.violation` events, which can trigger Automations to send notifications or take corrective actions.
For full configuration details, refer to the [Measure reliability with Service Level Agreements](/v3/automate/events/slas) documentation.
**Implementation Considerations**
Prefect allows flexible logging and alerting adjustments to match existing monitoring workflows. Logging handlers can integrate with **third-party services** (e.g., ElasticSearch, Datadog), and **Prefect's API and UI provide real-time state visibility** for proactive monitoring.
## Deployment & CI/CD Changes
Deploying workflows in Prefect differs from Airflow's approach of “drop DAG files in a folder.” In Prefect, a **Deployment** is the unit of deployment: it associates a flow (Python function) with infrastructure (how/where to run) and optional schedule or triggers. Migrating to Prefect means adopting a new way to package and release your workflows, as well as updating any CI/CD pipelines that automated your Airflow deployments.
### Prefect Deployment
**From Airflow DAG schedules to Prefect Deployment:** In Airflow, deployment usually meant placing your DAG code on the Airflow scheduler (e.g., by committing to a Git repo that the scheduler reads, or copying files to the DAGs directory). There isn't a formal deployment artifact beyond the Python files. Prefect, by contrast, treats deployments as first-class objects. You will create a deployment for each flow (or for each distinct configuration of a flow you want to run). This can be done via code (calling `flow.deploy()`), via CLI (`prefect deployment`), or by writing a YAML (`prefect.yaml`) that describes the deployment.
Key things a **Prefect deployment** defines:
* **Target flow** (which function, and which file or import path it comes from).
* **Infrastructure configuration**: e.g., use the “Kubernetes work pool” or “process” type, possibly the docker image to use, resource settings, etc.
* **Storage of code**: e.g., whether the code is stored in the image, pulled from Git, etc. (Prefect can package code into a Docker image or rely on an existing image).
* **Schedule** (optional): e.g., Cron or interval schedule for automatic runs, or you can leave it manual.
* **Parameters** (optional): default parameter values for the flow, if any.
To migrate each Airflow DAG, you will create a Prefect deployment for its flow. For example, if we converted `etl_pipeline` DAG to `etl_pipeline_flow` in Prefect, we might write a `prefect.yaml` like:
```yaml
# prefect.yaml
deployments:
- name: etl-pipeline-prod
flow_name: etl_pipeline_flow
entrypoint: etl_flow.py:etl_pipeline_flow # file and function where the flow is defined
parameters: {}
schedule: "@daily"
work_pool:
name: prod-k8s-pool
# other infra settings like image, etc., if needed
```
This YAML can define multiple deployments, but in this case we have one named “etl-pipeline-prod” which runs daily via the `prod-k8s-pool` (a Kubernetes pool perhaps). In Airflow, these details were all intertwined in the DAG file (the schedule was in code, the infrastructure maybe in the executor config or the DAG via `executor_config`). In Prefect, there is a separation of these concerns.
### Automation via CI/CD
Many organizations use CI/CD to deploy Airflow DAGs (for example, a Git push triggers a Jenkins job that lints DAGs and copies them to the Airflow server). With Prefect, you'll likely adjust your CI/CD to **register Prefect deployments** whenever you update the flow code. Prefect's CLI is your friend here. A common pattern is:
1. On merge to main, build a Docker image with your flow code, push it to a registry
2. Then run `prefect deployment build -n -p --cron "" -q default -o deployment.yaml` (or use `prefect.yaml`) and apply it.
This can all be scripted. In fact, Prefect provides guidance on using [GitHub Actions or similar tooling to do this](/v3/advanced/deploy-ci-cd). By integrating Prefect's deployment steps into CI, you ensure that any change in your flow code gets reflected in Prefect's orchestrator, much like updating DAG code in Airflow.
Alternatively, if your deployment is set to pull the workflow code from your git repository each time, you only need to push the latest workflow code, and automatically next time your deployment runs it will pull the latest workflow code.
This CI pipeline approach allows versioning and automating your flows deployment, treating them similarly to application code deployments. It's a shift from Airflow where deployment could be syncing a folder - Prefect's method is more **controlled** and **atomic** (you create a deployment manifest and apply it, which registers everything with Prefect).
### Prefect in Production
Once deployed, Prefect schedules and orchestrates flows based on your **deployments**. Follow these best practices to ensure a reliable production setup:
* **High Availability**: If self-hosting, use PostgreSQL and consider running **multiple API replicas** behind a load balancer. [**Prefect Cloud**](https://prefect.io/cloud) handles availability automatically.
* **Keep Workers Active**: Ensure Prefect workers are always running, whether as systemd services, Docker containers, or Kubernetes deployments.
* **Logging & Observability**: Use Prefect's UI for logs or configure external storage (e.g., S3, Elasticsearch) for **long-term retention**.
* **Notifications & Alerts**: Set up failure alerts via Slack, email, or Twilio using [**Prefect Automations**](/v3/automate/events/automations-triggers) to ensure timely issue resolution.
* **CI/CD & Testing**: Validate deployment YAMLs in CI (`prefect deployment build --skip-upload`), and unit test tasks as regular Python functions.
* **Configuration Management**: Replace Airflow Variables/Connections with [**Prefect Blocks**](/v3/develop/variables), storing secrets via CLI, UI, or version-controlled JSON.
* **Security & Access Control**: Prefect Cloud includes built-in authentication & role-based access; self-hosted setups should secure API and workers accordingly.
* **Decommissioning Airflow**: Once migration is complete, disable DAGs, archive the code, and shut down Airflow components to reduce operational overhead.
For more details on operating Prefect in production, see the [How-To Guides](/v3/how-to-guides).
## Testing & Validation
Thorough testing ensures your Prefect flows perform like their Airflow equivalents. Since this is a **full migration**, validation is essential before decommissioning Airflow.
**Testing Prefect Flows in Isolation**
* **Unit test task logic** - Write tests for tasks as regular Python functions.
* **Run flows locally** - Run the script that calls your flow function - just like a normal Python script.
* **Use Prefect's local orchestration** - Start a Prefect server (`prefect server start`), register a deployment, and trigger flows via Prefect UI to mirror production behavior.
* **Compare outputs** - Run both Airflow and Prefect for the same input and validate results (e.g., database rows, file outputs). Debug discrepancies early.
**Validation Phase: Temporary Parallel Running (Shadow Mode)**
* **Keep the Airflow DAG inactive** but available for testing.
* **Manually trigger** both Airflow and Prefect flows for the same execution date.
* **Write test outputs separately** to prevent conflicts, ensuring parity before stopping Airflow runs.
For batch jobs, this phase should be **brief**, ensuring correctness without long-term dual maintenance.
**Decommissioning Airflow**
Once a Prefect flow is stable, **disable the corresponding Airflow DAG** to prevent accidental execution. Clearly document Prefect as the new source of truth. Avoid keeping inactive DAGs indefinitely, as they can cause confusion—**archive or remove them once the migration is complete**.
### Common issues and troubleshooting
* **Missing dependencies:** If a Prefect flow fails with `ImportError`, ensure all required libraries are installed in the execution environment (Docker image, VM, etc.), not just locally.
* **Credentials & access:** Verify that Prefect workers have the same permissions as Airflow (e.g., service accounts, IAM roles). If using Kubernetes, ensure pods can access necessary databases and APIs.
* **Scheduling differences:** Airflow schedules may trigger at the end of an interval, while Prefect runs in real-time. Align Cron schedules and time zones if needed.
* **Concurrency & parallelism:** Configure **work pool and flow run concurrency limits** to prevent overlapping jobs. If too many tasks run in parallel, use Prefect's **tags and concurrency controls** to throttle execution.
* **Error handling & retries:** Test retries by forcing failures. If Airflow used `trigger_rule="all_done"`, implement equivalent logic in Prefect with `try/except`.
* **Performance monitoring:** Compare Prefect vs. Airflow run times. If slower, check if tasks are running sequentially instead of in parallel (enable mapping, async, or parallel task runners). If too much parallelism, adjust concurrency settings.
For some help with troubleshooting, you can see articles on:
* [Configuring logging](/v3/how-to-guides/workflows/add-logging)
* [Tracking activity](/v3/concepts/events)
Throughout testing, keep an eye on the Prefect UI's **Flow Run and Task Run views** - they will show you the execution steps, logs, and any exceptions. The UI can be very helpful for pinpointing where a flow failed or hung. It's analogous to Airflow's Graph view and log view but with the benefit of real-time state updates (no need to refresh for state changes).
You might also consider joining the [Prefect Slack community](https://prefect.io/slack) to get help from the community and Prefect team.
**Debugging tips:**
* If a flow run gets stuck, you can cancel it via UI/CLI.
* Utilize the fact that you can re-run a Prefect flow easily. For example, if a specific task fails consistently, you can add some debug `print` statements, re-deploy (which is quick with Prefect CLI), and re-run to see output.
* Leverage Prefect's task state inspection. In the UI, you can often see the exception message and stack trace for a failed task, which helps identify the problem in code.
* Read the results from MarvinAI's analysis of your code to help identify potential issues.
 Maintained by Prefect
 Maintained by Prefect
 Maintained by Prefect
 Maintained by Coiled
 Maintained by Prefect
 Maintained by Prefect
 Maintained by Prefect
 Maintained by Prefect
 Maintained by Prefect
 Maintained by Fivetran
 Maintained by Prefect
 Maintained by Prefect
 Maintained by Prefect
 Maintained by Prefect
 Maintained by Prefect
 Maintained by Prefect
 Maintained by Prefect
 Maintained by Prefect
 Maintained by Prefect

 ### ACRManagedIdentity
ACRManagedIdentity is required for your flow code containers to be pulled from ACR. It consists of the following:
* Identity: the same `IDENTITY_ID` as above, as a string
```
/subscriptions/
### ACRManagedIdentity
ACRManagedIdentity is required for your flow code containers to be pulled from ACR. It consists of the following:
* Identity: the same `IDENTITY_ID` as above, as a string
```
/subscriptions/ ### Subscription ID and resource group name
Both the subscription ID and resource group name can be found in the `RG_SCOPE` environment variable created earlier in the guide. View their values by running `echo $RG_SCOPE`:
```
/subscriptions/
### Subscription ID and resource group name
Both the subscription ID and resource group name can be found in the `RG_SCOPE` environment variable created earlier in the guide. View their values by running `echo $RG_SCOPE`:
```
/subscriptions/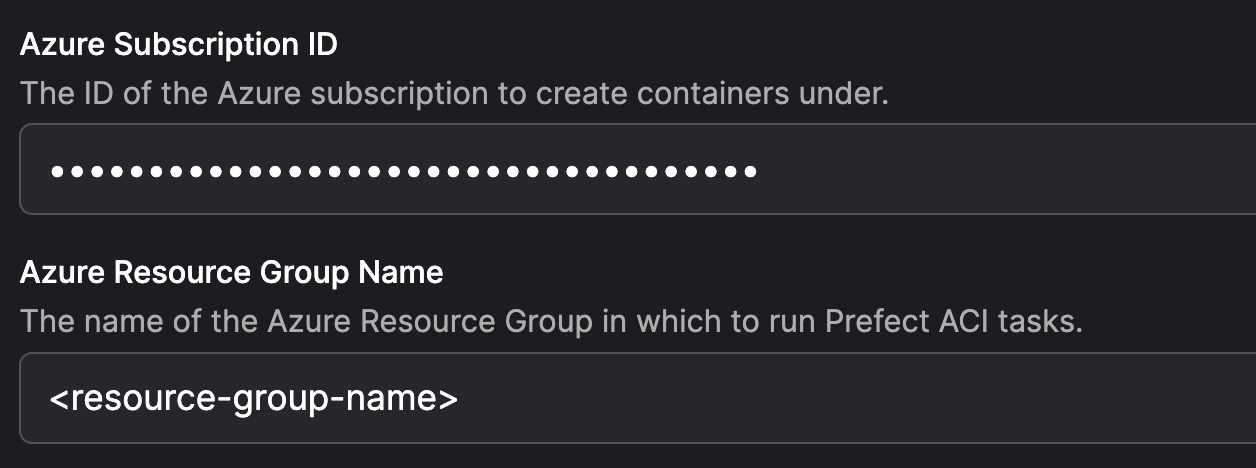 Then click Save.
## Step 6. Pick up a flow run with your new worker
This guide uses ACR to store a Docker image containing your flow code. Write a flow, then deploy it using `flow.deploy()`, which will copy flow code into a Docker image and push that image to an ACR registry.
### 1. Log in to ACR
Use the following commands to log in to ACR:
```
TOKEN=$(az acr login --name $REGISTRY_NAME --expose-token --output tsv --query accessToken)
```
```
docker login $REGISTRY_NAME.azurecr.io --username 00000000-0000-0000-0000-000000000000 --password-stdin <<< $TOKEN
```
### 2. Write and deploy a simple test flow
Create and run the following script to deploy your flow. Be sure to replace `
Then click Save.
## Step 6. Pick up a flow run with your new worker
This guide uses ACR to store a Docker image containing your flow code. Write a flow, then deploy it using `flow.deploy()`, which will copy flow code into a Docker image and push that image to an ACR registry.
### 1. Log in to ACR
Use the following commands to log in to ACR:
```
TOKEN=$(az acr login --name $REGISTRY_NAME --expose-token --output tsv --query accessToken)
```
```
docker login $REGISTRY_NAME.azurecr.io --username 00000000-0000-0000-0000-000000000000 --password-stdin <<< $TOKEN
```
### 2. Write and deploy a simple test flow
Create and run the following script to deploy your flow. Be sure to replace `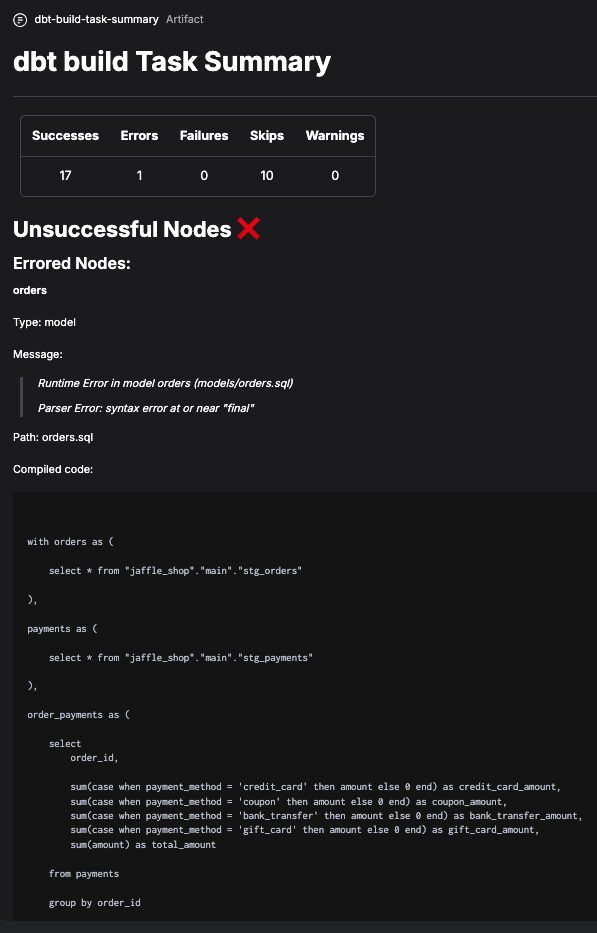 #### BigQuery CLI profile block example
To create dbt Core target config and profile blocks for BigQuery:
1. Save and load a `GcpCredentials` block.
2. Determine the schema / dataset you want to use in BigQuery.
3. Create a short script, replacing the placeholders.
```python
from prefect_gcp.credentials import GcpCredentials
from prefect_dbt.cli import BigQueryTargetConfigs, DbtCliProfile
credentials = GcpCredentials.load("CREDENTIALS-BLOCK-NAME-PLACEHOLDER")
target_configs = BigQueryTargetConfigs(
schema="SCHEMA-NAME-PLACEHOLDER", # also known as dataset
credentials=credentials,
)
target_configs.save("TARGET-CONFIGS-BLOCK-NAME-PLACEHOLDER")
dbt_cli_profile = DbtCliProfile(
name="PROFILE-NAME-PLACEHOLDER",
target="TARGET-NAME-placeholder",
target_configs=target_configs,
)
dbt_cli_profile.save("DBT-CLI-PROFILE-BLOCK-NAME-PLACEHOLDER")
```
To create a dbt Core operation block:
1. Determine the dbt commands you want to run.
2. Create a short script, replacing the placeholders.
```python
from prefect_dbt.cli import DbtCliProfile, DbtCoreOperation
dbt_cli_profile = DbtCliProfile.load("DBT-CLI-PROFILE-BLOCK-NAME-PLACEHOLDER")
dbt_core_operation = DbtCoreOperation(
commands=["DBT-CLI-COMMANDS-PLACEHOLDER"],
dbt_cli_profile=dbt_cli_profile,
overwrite_profiles=True,
)
dbt_core_operation.save("DBT-CORE-OPERATION-BLOCK-NAME-PLACEHOLDER")
```
Load the saved block that holds your credentials:
```python
from prefect_dbt.cloud import DbtCoreOperation
DbtCoreOperation.load("DBT-CORE-OPERATION-BLOCK-NAME-PLACEHOLDER")
```
## Resources
For assistance using dbt, consult the [dbt documentation](https://docs.getdbt.com/docs/building-a-dbt-project/documentation).
Refer to the `prefect-dbt` [SDK documentation](https://reference.prefect.io/prefect_dbt/) to explore all the capabilities of the `prefect-dbt` library.
### Additional installation options
Additional installation options for dbt Core with BigQuery, Snowflake, and Postgres are shown below.
#### Additional capabilities for dbt Core and Snowflake profiles
First install the main library compatible with your Prefect version:
```bash
pip install "prefect[dbt]"
```
Then install the additional capabilities you need.
```bash
pip install "prefect-dbt[snowflake]"
```
#### Additional capabilities for dbt Core and BigQuery profiles
```bash
pip install "prefect-dbt[bigquery]"
```
#### Additional capabilities for dbt Core and Postgres profiles
```bash
pip install "prefect-dbt[postgres]"
```
Or, install all of the extras.
```bash
pip install -U "prefect-dbt[all_extras]"
```
# SDK docs
Source: https://docs-3.prefect.io/integrations/prefect-dbt/sdk
# prefect-docker
Source: https://docs-3.prefect.io/integrations/prefect-docker/index
The `prefect-docker` library is required to create deployments that will submit runs to most Prefect work pool infrastructure types.
## Getting started
### Prerequisites
* [Docker installed](https://www.docker.com/) and running.
### Install `prefect-docker`
The following command will install a version of `prefect-docker` compatible with your installed version of `prefect`.
If you don't already have `prefect` installed, it will install the newest version of `prefect` as well.
```bash
pip install "prefect[docker]"
```
Upgrade to the latest versions of `prefect` and `prefect-docker`:
```bash
pip install -U "prefect[docker]"
```
### Examples
See the Prefect [Workers docs](/v3/how-to-guides/deployment_infra/docker) to learn how to create and run deployments that use Docker.
## Resources
For assistance using Docker, consult the [Docker documentation](https://docs.docker.com/).
Refer to the `prefect-docker` [SDK documentation](https://reference.prefect.io/prefect_docker/) to explore all the capabilities of the `prefect-docker` library.
# SDK docs
Source: https://docs-3.prefect.io/integrations/prefect-docker/sdk
# prefect-email
Source: https://docs-3.prefect.io/integrations/prefect-email/index
The `prefect-email` library helps you send emails from your Prefect flows.
## Getting started
### Prerequisites
* Many email services, such as Gmail, require an [App Password](https://support.google.com/accounts/answer/185833) to successfully send emails.
If you encounter an error similar to `smtplib.SMTPAuthenticationError: (535, b'5.7.8 Username and Password not accepted...`, it's likely you are not using an App Password.
### Install `prefect-email`
The following command will install a version of prefect-email compatible with your installed version of Prefect.
If you don't already have Prefect installed, it will install the newest version of Prefect as well.
```bash
pip install "prefect[email]"
```
Upgrade to the latest versions of Prefect and prefect-email:
```bash
pip install -U "prefect[email]"
```
### Register newly installed block types
Register the block types in the prefect-email module to make them available for use.
```bash
prefect block register -m prefect_email
```
## Save credentials to an EmailServerCredentials block
Save your email credentials to a block.
Replace the placeholders with your email address and password.
```python
from prefect_email import EmailServerCredentials
credentials = EmailServerCredentials(
username="EMAIL-ADDRESS-PLACEHOLDER",
password="PASSWORD-PLACEHOLDER", # must be an application password
)
credentials.save("BLOCK-NAME-PLACEHOLDER")
```
In the examples below you load a credentials block to authenticate with the email server.
## Send emails
The code below shows how to send an email using the pre-built `email_send_message` [task](https://docs.prefect.io/latest/develop/write-tasks/).
```python
from prefect import flow
from prefect_email import EmailServerCredentials, email_send_message
@flow
def example_email_send_message_flow(email_addresses):
email_server_credentials = EmailServerCredentials.load("BLOCK-NAME-PLACEHOLDER")
for email_address in email_addresses:
subject = email_send_message.with_options(name=f"email {email_address}").submit(
email_server_credentials=email_server_credentials,
subject="Example Flow Notification using Gmail",
msg="This proves email_send_message works!",
email_to=email_address,
)
if __name__ == "__main__":
example_email_send_message_flow(["EMAIL-ADDRESS-PLACEHOLDER"])
```
## Capture exceptions and send an email
This example demonstrates how to send an email notification with the details of the exception when a flow run fails.
`prefect-email` can be wrapped in an `except` statement to do just that!
```python
from prefect import flow
from prefect.context import get_run_context
from prefect_email import EmailServerCredentials, email_send_message
def notify_exc_by_email(exc):
context = get_run_context()
flow_run_name = context.flow_run.name
email_server_credentials = EmailServerCredentials.load("email-server-credentials")
email_send_message(
email_server_credentials=email_server_credentials,
subject=f"Flow run {flow_run_name!r} failed",
msg=f"Flow run {flow_run_name!r} failed due to {exc}.",
email_to=email_server_credentials.username,
)
@flow
def example_flow():
try:
1 / 0
except Exception as exc:
notify_exc_by_email(exc)
raise
if __name__ == "__main__":
example_flow()
```
## Resources
Refer to the `prefect-email` [SDK documentation](https://reference.prefect.io/prefect_email/) to explore all the capabilities of the `prefect-email` library.
# SDK docs
Source: https://docs-3.prefect.io/integrations/prefect-email/sdk
# Google Cloud Run Worker Guide
Source: https://docs-3.prefect.io/integrations/prefect-gcp/gcp-worker-guide
## Why use Google Cloud Run for flow run execution?
Google Cloud Run is a fully managed compute platform that automatically scales your containerized applications.
1. Serverless architecture: Cloud Run follows a serverless architecture, which means you don't need to manage any underlying infrastructure. Google Cloud Run automatically handles the scaling and availability of your flow run infrastructure, allowing you to focus on developing and deploying your code.
2. Scalability: Cloud Run can automatically scale your pipeline to handle varying workloads and traffic. It can quickly respond to increased demand and scale back down during low activity periods, ensuring efficient resource utilization.
3. Integration with Google Cloud services: Google Cloud Run easily integrates with other Google Cloud services, such as Google Cloud Storage, Google Cloud Pub/Sub, and Google Cloud Build. This interoperability enables you to build end-to-end data pipelines that use a variety of services.
4. Portability: Since Cloud Run uses container images, you can develop your pipelines locally using Docker and then deploy them on Google Cloud Run without significant modifications. This portability allows you to run the same pipeline in different environments.
## Google Cloud Run guide
After completing this guide, you will have:
1. Created a Google Cloud Service Account
2. Created a Prefect Work Pool
3. Deployed a Prefect Worker as a Cloud Run Service
4. Deployed a Flow
5. Executed the Flow as a Google Cloud Run Job
### Prerequisites
Before starting this guide, make sure you have:
* A [Google Cloud Platform (GCP) account](https://cloud.google.com/gcp).
* A project on your GCP account where you have the necessary permissions to create Cloud Run Services and Service Accounts.
* The `gcloud` CLI installed on your local machine. You can follow Google Cloud's [installation guide](https://cloud.google.com/sdk/docs/install). If you're using Apple (or a Linux system) you can also use [Homebrew](https://formulae.brew.sh/cask/google-cloud-sdk) for installation.
* [Docker](https://www.docker.com/get-started/) installed on your local machine.
* A Prefect server instance. You can sign up for a forever free [Prefect Cloud Account](https://app.prefect.cloud/) or, alternatively, self-host a Prefect server.
### Step 1. Create a Google Cloud service account
First, open a terminal or command prompt on your local machine where `gcloud` is installed. If you haven't already authenticated with `gcloud`, run the following command and follow the instructions to log in to your GCP account.
```bash
gcloud auth login
```
Next, you'll set your project where you'd like to create the service account. Use the following command and replace `
#### BigQuery CLI profile block example
To create dbt Core target config and profile blocks for BigQuery:
1. Save and load a `GcpCredentials` block.
2. Determine the schema / dataset you want to use in BigQuery.
3. Create a short script, replacing the placeholders.
```python
from prefect_gcp.credentials import GcpCredentials
from prefect_dbt.cli import BigQueryTargetConfigs, DbtCliProfile
credentials = GcpCredentials.load("CREDENTIALS-BLOCK-NAME-PLACEHOLDER")
target_configs = BigQueryTargetConfigs(
schema="SCHEMA-NAME-PLACEHOLDER", # also known as dataset
credentials=credentials,
)
target_configs.save("TARGET-CONFIGS-BLOCK-NAME-PLACEHOLDER")
dbt_cli_profile = DbtCliProfile(
name="PROFILE-NAME-PLACEHOLDER",
target="TARGET-NAME-placeholder",
target_configs=target_configs,
)
dbt_cli_profile.save("DBT-CLI-PROFILE-BLOCK-NAME-PLACEHOLDER")
```
To create a dbt Core operation block:
1. Determine the dbt commands you want to run.
2. Create a short script, replacing the placeholders.
```python
from prefect_dbt.cli import DbtCliProfile, DbtCoreOperation
dbt_cli_profile = DbtCliProfile.load("DBT-CLI-PROFILE-BLOCK-NAME-PLACEHOLDER")
dbt_core_operation = DbtCoreOperation(
commands=["DBT-CLI-COMMANDS-PLACEHOLDER"],
dbt_cli_profile=dbt_cli_profile,
overwrite_profiles=True,
)
dbt_core_operation.save("DBT-CORE-OPERATION-BLOCK-NAME-PLACEHOLDER")
```
Load the saved block that holds your credentials:
```python
from prefect_dbt.cloud import DbtCoreOperation
DbtCoreOperation.load("DBT-CORE-OPERATION-BLOCK-NAME-PLACEHOLDER")
```
## Resources
For assistance using dbt, consult the [dbt documentation](https://docs.getdbt.com/docs/building-a-dbt-project/documentation).
Refer to the `prefect-dbt` [SDK documentation](https://reference.prefect.io/prefect_dbt/) to explore all the capabilities of the `prefect-dbt` library.
### Additional installation options
Additional installation options for dbt Core with BigQuery, Snowflake, and Postgres are shown below.
#### Additional capabilities for dbt Core and Snowflake profiles
First install the main library compatible with your Prefect version:
```bash
pip install "prefect[dbt]"
```
Then install the additional capabilities you need.
```bash
pip install "prefect-dbt[snowflake]"
```
#### Additional capabilities for dbt Core and BigQuery profiles
```bash
pip install "prefect-dbt[bigquery]"
```
#### Additional capabilities for dbt Core and Postgres profiles
```bash
pip install "prefect-dbt[postgres]"
```
Or, install all of the extras.
```bash
pip install -U "prefect-dbt[all_extras]"
```
# SDK docs
Source: https://docs-3.prefect.io/integrations/prefect-dbt/sdk
# prefect-docker
Source: https://docs-3.prefect.io/integrations/prefect-docker/index
The `prefect-docker` library is required to create deployments that will submit runs to most Prefect work pool infrastructure types.
## Getting started
### Prerequisites
* [Docker installed](https://www.docker.com/) and running.
### Install `prefect-docker`
The following command will install a version of `prefect-docker` compatible with your installed version of `prefect`.
If you don't already have `prefect` installed, it will install the newest version of `prefect` as well.
```bash
pip install "prefect[docker]"
```
Upgrade to the latest versions of `prefect` and `prefect-docker`:
```bash
pip install -U "prefect[docker]"
```
### Examples
See the Prefect [Workers docs](/v3/how-to-guides/deployment_infra/docker) to learn how to create and run deployments that use Docker.
## Resources
For assistance using Docker, consult the [Docker documentation](https://docs.docker.com/).
Refer to the `prefect-docker` [SDK documentation](https://reference.prefect.io/prefect_docker/) to explore all the capabilities of the `prefect-docker` library.
# SDK docs
Source: https://docs-3.prefect.io/integrations/prefect-docker/sdk
# prefect-email
Source: https://docs-3.prefect.io/integrations/prefect-email/index
The `prefect-email` library helps you send emails from your Prefect flows.
## Getting started
### Prerequisites
* Many email services, such as Gmail, require an [App Password](https://support.google.com/accounts/answer/185833) to successfully send emails.
If you encounter an error similar to `smtplib.SMTPAuthenticationError: (535, b'5.7.8 Username and Password not accepted...`, it's likely you are not using an App Password.
### Install `prefect-email`
The following command will install a version of prefect-email compatible with your installed version of Prefect.
If you don't already have Prefect installed, it will install the newest version of Prefect as well.
```bash
pip install "prefect[email]"
```
Upgrade to the latest versions of Prefect and prefect-email:
```bash
pip install -U "prefect[email]"
```
### Register newly installed block types
Register the block types in the prefect-email module to make them available for use.
```bash
prefect block register -m prefect_email
```
## Save credentials to an EmailServerCredentials block
Save your email credentials to a block.
Replace the placeholders with your email address and password.
```python
from prefect_email import EmailServerCredentials
credentials = EmailServerCredentials(
username="EMAIL-ADDRESS-PLACEHOLDER",
password="PASSWORD-PLACEHOLDER", # must be an application password
)
credentials.save("BLOCK-NAME-PLACEHOLDER")
```
In the examples below you load a credentials block to authenticate with the email server.
## Send emails
The code below shows how to send an email using the pre-built `email_send_message` [task](https://docs.prefect.io/latest/develop/write-tasks/).
```python
from prefect import flow
from prefect_email import EmailServerCredentials, email_send_message
@flow
def example_email_send_message_flow(email_addresses):
email_server_credentials = EmailServerCredentials.load("BLOCK-NAME-PLACEHOLDER")
for email_address in email_addresses:
subject = email_send_message.with_options(name=f"email {email_address}").submit(
email_server_credentials=email_server_credentials,
subject="Example Flow Notification using Gmail",
msg="This proves email_send_message works!",
email_to=email_address,
)
if __name__ == "__main__":
example_email_send_message_flow(["EMAIL-ADDRESS-PLACEHOLDER"])
```
## Capture exceptions and send an email
This example demonstrates how to send an email notification with the details of the exception when a flow run fails.
`prefect-email` can be wrapped in an `except` statement to do just that!
```python
from prefect import flow
from prefect.context import get_run_context
from prefect_email import EmailServerCredentials, email_send_message
def notify_exc_by_email(exc):
context = get_run_context()
flow_run_name = context.flow_run.name
email_server_credentials = EmailServerCredentials.load("email-server-credentials")
email_send_message(
email_server_credentials=email_server_credentials,
subject=f"Flow run {flow_run_name!r} failed",
msg=f"Flow run {flow_run_name!r} failed due to {exc}.",
email_to=email_server_credentials.username,
)
@flow
def example_flow():
try:
1 / 0
except Exception as exc:
notify_exc_by_email(exc)
raise
if __name__ == "__main__":
example_flow()
```
## Resources
Refer to the `prefect-email` [SDK documentation](https://reference.prefect.io/prefect_email/) to explore all the capabilities of the `prefect-email` library.
# SDK docs
Source: https://docs-3.prefect.io/integrations/prefect-email/sdk
# Google Cloud Run Worker Guide
Source: https://docs-3.prefect.io/integrations/prefect-gcp/gcp-worker-guide
## Why use Google Cloud Run for flow run execution?
Google Cloud Run is a fully managed compute platform that automatically scales your containerized applications.
1. Serverless architecture: Cloud Run follows a serverless architecture, which means you don't need to manage any underlying infrastructure. Google Cloud Run automatically handles the scaling and availability of your flow run infrastructure, allowing you to focus on developing and deploying your code.
2. Scalability: Cloud Run can automatically scale your pipeline to handle varying workloads and traffic. It can quickly respond to increased demand and scale back down during low activity periods, ensuring efficient resource utilization.
3. Integration with Google Cloud services: Google Cloud Run easily integrates with other Google Cloud services, such as Google Cloud Storage, Google Cloud Pub/Sub, and Google Cloud Build. This interoperability enables you to build end-to-end data pipelines that use a variety of services.
4. Portability: Since Cloud Run uses container images, you can develop your pipelines locally using Docker and then deploy them on Google Cloud Run without significant modifications. This portability allows you to run the same pipeline in different environments.
## Google Cloud Run guide
After completing this guide, you will have:
1. Created a Google Cloud Service Account
2. Created a Prefect Work Pool
3. Deployed a Prefect Worker as a Cloud Run Service
4. Deployed a Flow
5. Executed the Flow as a Google Cloud Run Job
### Prerequisites
Before starting this guide, make sure you have:
* A [Google Cloud Platform (GCP) account](https://cloud.google.com/gcp).
* A project on your GCP account where you have the necessary permissions to create Cloud Run Services and Service Accounts.
* The `gcloud` CLI installed on your local machine. You can follow Google Cloud's [installation guide](https://cloud.google.com/sdk/docs/install). If you're using Apple (or a Linux system) you can also use [Homebrew](https://formulae.brew.sh/cask/google-cloud-sdk) for installation.
* [Docker](https://www.docker.com/get-started/) installed on your local machine.
* A Prefect server instance. You can sign up for a forever free [Prefect Cloud Account](https://app.prefect.cloud/) or, alternatively, self-host a Prefect server.
### Step 1. Create a Google Cloud service account
First, open a terminal or command prompt on your local machine where `gcloud` is installed. If you haven't already authenticated with `gcloud`, run the following command and follow the instructions to log in to your GCP account.
```bash
gcloud auth login
```
Next, you'll set your project where you'd like to create the service account. Use the following command and replace `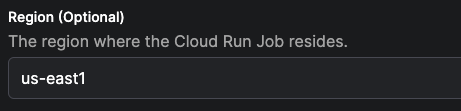 Save the name of the service account created in first step of this guide.
 Your work pool is now ready to receive scheduled flow runs!
### Step 3. Deploy a Cloud Run worker
Now you can launch a Cloud Run service to host the Cloud Run worker. This worker will poll the work pool that you created in the previous step.
Navigate back to your terminal and run the following commands to set your Prefect API key and URL as environment variables.
Be sure to replace `
Your work pool is now ready to receive scheduled flow runs!
### Step 3. Deploy a Cloud Run worker
Now you can launch a Cloud Run service to host the Cloud Run worker. This worker will poll the work pool that you created in the previous step.
Navigate back to your terminal and run the following commands to set your Prefect API key and URL as environment variables.
Be sure to replace ` # How to create custom blocks
Source: https://docs-3.prefect.io/v3/advanced/custom-blocks
### Create a new block type
To create a custom block type, define a class that subclasses `Block`. The `Block` base class builds
on Pydantic's `BaseModel`, so you can declare custom fields just like a [Pydantic model](https://pydantic-docs.helpmanual.io/usage/models/#basic-model-usage).
We've already seen an example of a `Cube` block that represents a cube and holds information about the length of each edge in inches:
{/* pmd-metadata: notest */}
```python
from prefect.blocks.core import Block
class Cube(Block):
edge_length_inches: float
Cube.register_type_and_schema()
```
### Register custom blocks
In addition to the `register_type_and_schema` method shown above, you can register blocks from a Python module with a CLI command:
```bash
prefect block register --module prefect_aws.credentials
```
This command is useful for registering all blocks found within a module in a [Prefect Integration library](/integrations/).
Alternatively, if a custom block was created in a `.py` file, you can register the block with the CLI command:
```bash
prefect block register --file my_block.py
```
Block documents can now be created with the registered block schema.
### Secret fields
All block values are encrypted before being stored.
If you have values that you would not like visible in the UI or in logs,
use the `SecretStr` field type provided by Pydantic to automatically obfuscate those values.
You can use this capability for fields that store credentials such as passwords and API tokens.
Here's an example of an `AwsCredentials` block that uses `SecretStr`:
```python
from typing import Optional
from prefect.blocks.core import Block
from pydantic import SecretStr
class AwsCredentials(Block):
aws_access_key_id: Optional[str] = None
aws_secret_access_key: Optional[SecretStr] = None
aws_session_token: Optional[str] = None
profile_name: Optional[str] = None
region_name: Optional[str] = None
```
Since `aws_secret_access_key` has the `SecretStr` type hint assigned to it,
the value of that field is not exposed if the object is logged:
{/* pmd-metadata: notest */}
```python
aws_credentials_block = AwsCredentials(
aws_access_key_id="AKIAJKLJKLJKLJKLJKLJK",
aws_secret_access_key="secret_access_key"
)
print(aws_credentials_block)
# aws_access_key_id='AKIAJKLJKLJKLJKLJKLJK' aws_secret_access_key=SecretStr('**********') aws_session_token=None profile_name=None region_name=None
```
Prefect's `SecretDict` field type allows you to add a dictionary field to your block
that automatically obfuscates values at all levels in the UI or in logs.
This capability is useful for blocks where typing or structure of secret fields is not known until configuration time.
Here's an example of a block that uses `SecretDict`:
```python
from prefect.blocks.core import Block
from prefect.blocks.fields import SecretDict
class SystemConfiguration(Block):
system_secrets: SecretDict
system_variables: dict
system_configuration_block = SystemConfiguration(
system_secrets={
"password": "p@ssw0rd",
"api_token": "token_123456789",
"private_key": "
# How to create custom blocks
Source: https://docs-3.prefect.io/v3/advanced/custom-blocks
### Create a new block type
To create a custom block type, define a class that subclasses `Block`. The `Block` base class builds
on Pydantic's `BaseModel`, so you can declare custom fields just like a [Pydantic model](https://pydantic-docs.helpmanual.io/usage/models/#basic-model-usage).
We've already seen an example of a `Cube` block that represents a cube and holds information about the length of each edge in inches:
{/* pmd-metadata: notest */}
```python
from prefect.blocks.core import Block
class Cube(Block):
edge_length_inches: float
Cube.register_type_and_schema()
```
### Register custom blocks
In addition to the `register_type_and_schema` method shown above, you can register blocks from a Python module with a CLI command:
```bash
prefect block register --module prefect_aws.credentials
```
This command is useful for registering all blocks found within a module in a [Prefect Integration library](/integrations/).
Alternatively, if a custom block was created in a `.py` file, you can register the block with the CLI command:
```bash
prefect block register --file my_block.py
```
Block documents can now be created with the registered block schema.
### Secret fields
All block values are encrypted before being stored.
If you have values that you would not like visible in the UI or in logs,
use the `SecretStr` field type provided by Pydantic to automatically obfuscate those values.
You can use this capability for fields that store credentials such as passwords and API tokens.
Here's an example of an `AwsCredentials` block that uses `SecretStr`:
```python
from typing import Optional
from prefect.blocks.core import Block
from pydantic import SecretStr
class AwsCredentials(Block):
aws_access_key_id: Optional[str] = None
aws_secret_access_key: Optional[SecretStr] = None
aws_session_token: Optional[str] = None
profile_name: Optional[str] = None
region_name: Optional[str] = None
```
Since `aws_secret_access_key` has the `SecretStr` type hint assigned to it,
the value of that field is not exposed if the object is logged:
{/* pmd-metadata: notest */}
```python
aws_credentials_block = AwsCredentials(
aws_access_key_id="AKIAJKLJKLJKLJKLJKLJK",
aws_secret_access_key="secret_access_key"
)
print(aws_credentials_block)
# aws_access_key_id='AKIAJKLJKLJKLJKLJKLJK' aws_secret_access_key=SecretStr('**********') aws_session_token=None profile_name=None region_name=None
```
Prefect's `SecretDict` field type allows you to add a dictionary field to your block
that automatically obfuscates values at all levels in the UI or in logs.
This capability is useful for blocks where typing or structure of secret fields is not known until configuration time.
Here's an example of a block that uses `SecretDict`:
```python
from prefect.blocks.core import Block
from prefect.blocks.fields import SecretDict
class SystemConfiguration(Block):
system_secrets: SecretDict
system_variables: dict
system_configuration_block = SystemConfiguration(
system_secrets={
"password": "p@ssw0rd",
"api_token": "token_123456789",
"private_key": "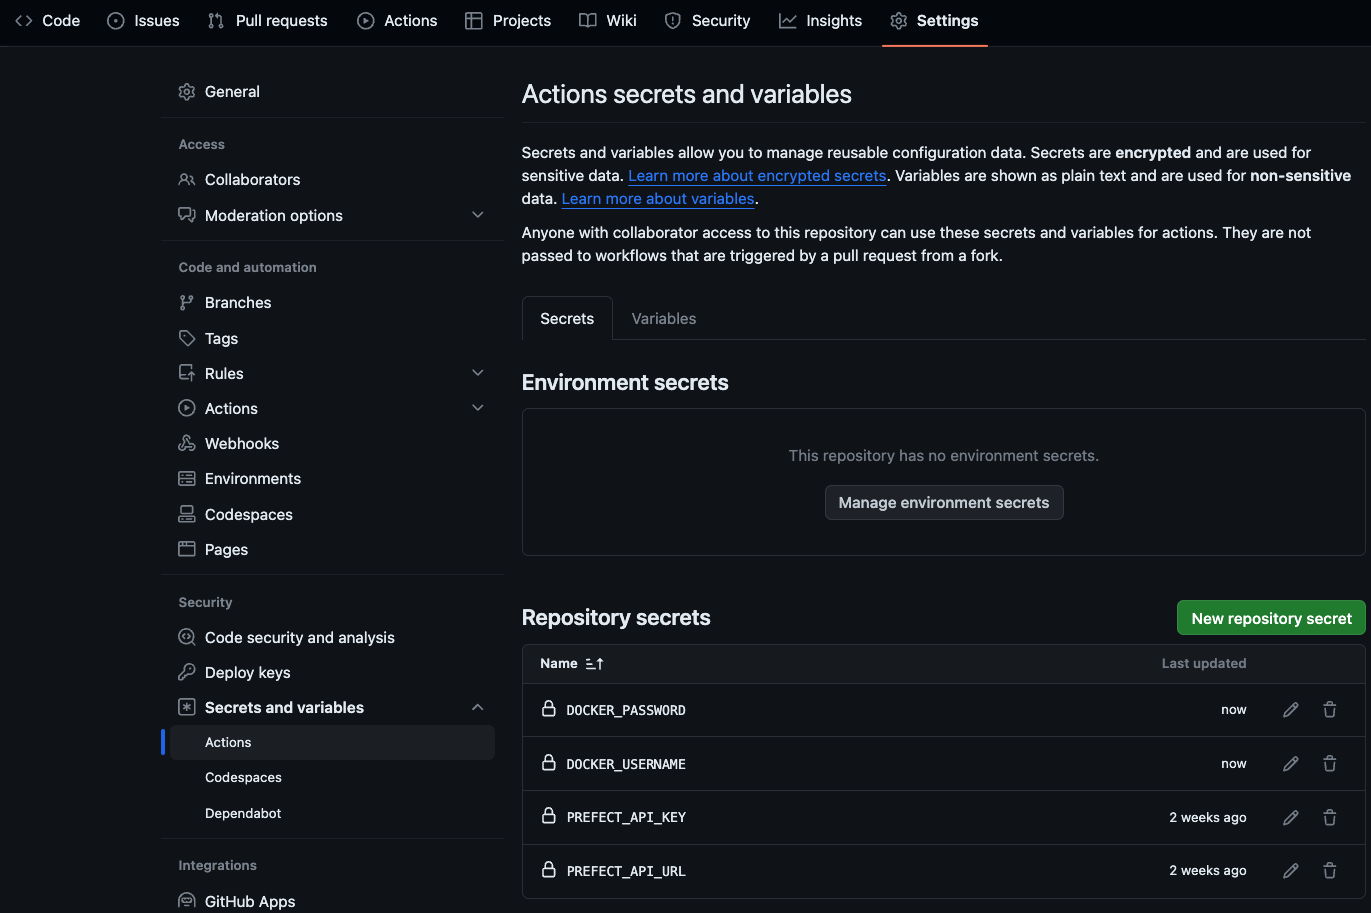 ### Write a GitHub workflow
To deploy your flow through GitHub Actions, you need a workflow YAML file. GitHub looks for workflow
YAML files in the `.github/workflows/` directory in the root of your repository. In their simplest form,
GitHub workflow files are made up of triggers and jobs.
The `on:` trigger is set to run the workflow each time a push occurs on the `main` branch of the repository.
The `deploy` job is comprised of four `steps`:
* **`Checkout`** clones your repository into the GitHub Actions runner so you can reference files or
run scripts from your repository in later steps.
* **`Log in to Docker Hub`** authenticates to DockerHub so your image can be pushed to the Docker
registry in your DockerHub account. [docker/login-action](https://github.com/docker/login-action) is an
existing GitHub action maintained by Docker. `with:` passes values into the Action, similar to passing
parameters to a function.
* **`Setup Python`** installs your selected version of Python.
* **`Prefect Deploy`** installs the dependencies used in your flow, then deploys your flow. `env:` makes
the `PREFECT_API_KEY` and `PREFECT_API_URL` secrets from your repository available as environment variables during this step's execution.
For reference, the examples below live in their respective branches of
[this repository](https://github.com/prefecthq/cicd-example).
### Write a GitHub workflow
To deploy your flow through GitHub Actions, you need a workflow YAML file. GitHub looks for workflow
YAML files in the `.github/workflows/` directory in the root of your repository. In their simplest form,
GitHub workflow files are made up of triggers and jobs.
The `on:` trigger is set to run the workflow each time a push occurs on the `main` branch of the repository.
The `deploy` job is comprised of four `steps`:
* **`Checkout`** clones your repository into the GitHub Actions runner so you can reference files or
run scripts from your repository in later steps.
* **`Log in to Docker Hub`** authenticates to DockerHub so your image can be pushed to the Docker
registry in your DockerHub account. [docker/login-action](https://github.com/docker/login-action) is an
existing GitHub action maintained by Docker. `with:` passes values into the Action, similar to passing
parameters to a function.
* **`Setup Python`** installs your selected version of Python.
* **`Prefect Deploy`** installs the dependencies used in your flow, then deploys your flow. `env:` makes
the `PREFECT_API_KEY` and `PREFECT_API_URL` secrets from your repository available as environment variables during this step's execution.
For reference, the examples below live in their respective branches of
[this repository](https://github.com/prefecthq/cicd-example).
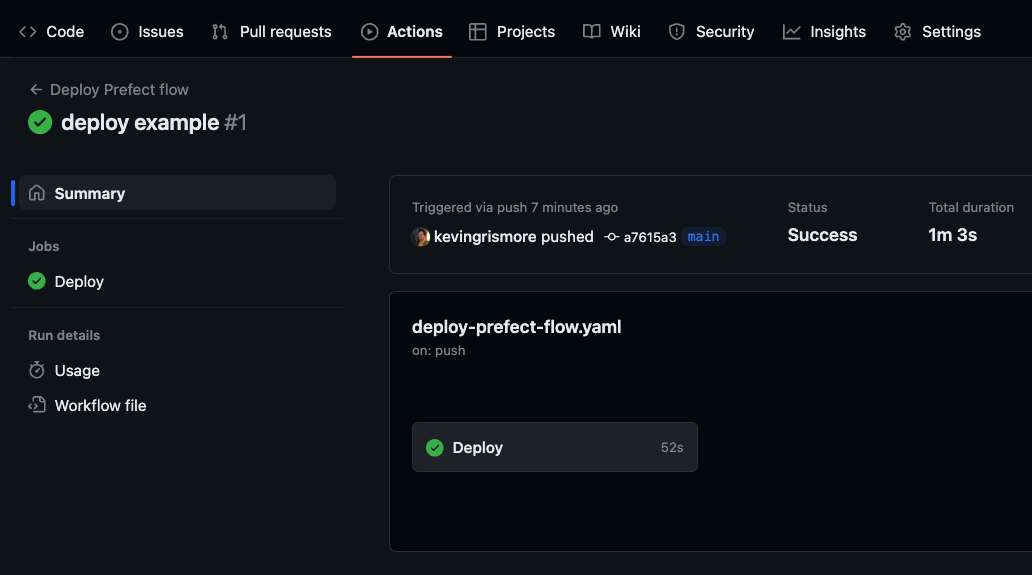 View the logs from each workflow step as they run. The `Prefect Deploy` step includes output about
your image build and push, and the creation/update of your deployment.
```bash
Successfully built image '***/cicd-example:latest'
Successfully pushed image '***/cicd-example:latest'
Successfully created/updated all deployments!
Deployments
|-----------------------------------------|
| Name | Status Details |
|---------------------|---------|---------|
| hello/my-deployment | applied | |
|-----------------------------------------|
```
## Advanced example
In more complex scenarios, CI/CD processes often need to accommodate several additional
considerations to enable a smooth development workflow:
* Making code available in different environments as it advances through stages of development
* Handling independent deployment of distinct groupings of work, as in a monorepo
* Efficiently using build time to avoid repeated work
This [example repository](https://github.com/prefecthq/cicd-example-workspaces) addresses each of these
considerations with a combination of Prefect's and GitHub's capabilities.
### Deploy to multiple workspaces
The deployment processes to run are automatically selected when changes are pushed, depending on
two conditions:
```yaml
on:
push:
branches:
- stg
- main
paths:
- "project_1/**"
```
* **`branches:`** - which branch has changed. This ultimately selects which Prefect workspace a
deployment is created or updated in. In this example, changes on the `stg` branch deploy flows to a
staging workspace, and changes on the `main` branch deploy flows to a production workspace.
* **`paths:`** - which project folders' files have changed. Since each project folder contains its own flows,
dependencies, and `prefect.yaml`, it represents a complete set of logic and configuration that can deploy
independently. Each project in this repository gets its own GitHub Actions workflow YAML file.
The `prefect.yaml` file in each project folder depends on environment variables dictated by the
selected job in each CI/CD workflow; enabling external code storage for Prefect deployments that is clearly
separated across projects and environments.
```
.
|--- cicd-example-workspaces-prod # production bucket
| |--- project_1
| |---project_2
|---cicd-example-workspaces-stg # staging bucket
|--- project_1
|---project_2
```
Deployments in this example use S3 for code storage. So it's important that push steps place flow files
in separate locations depending upon their respective environment and project—so no deployment overwrites another
deployment's files.
### Caching build dependencies
Since building Docker images and installing Python dependencies are essential parts of the deployment process,
it's useful to rely on caching to skip repeated build steps.
The `setup-python` action offers [caching options](https://github.com/actions/setup-python#caching-packages-dependencies)
so Python packages do not have to be downloaded on repeat workflow runs.
```yaml
- name: Setup Python
uses: actions/setup-python@v5
with:
python-version: "3.12"
cache: "pip"
```
The `build-push-action` for building Docker images also offers
[caching options for GitHub Actions](https://docs.docker.com/build/cache/backends/gha/).
If you are not using GitHub, other remote [cache backends](https://docs.docker.com/build/cache/backends/)
are available as well.
```yaml
- name: Build and push
id: build-docker-image
env:
GITHUB_SHA: ${{ steps.get-commit-hash.outputs.COMMIT_HASH }}
uses: docker/build-push-action@v5
with:
context: ${{ env.PROJECT_NAME }}/
push: true
tags: ${{ secrets.DOCKER_USERNAME }}/${{ env.PROJECT_NAME }}:${{ env.GITHUB_SHA }}-stg
cache-from: type=gha
cache-to: type=gha,mode=max
```
```
importing cache manifest from gha:***
DONE 0.1s
[internal] load build context
transferring context: 70B done
DONE 0.0s
[2/3] COPY requirements.txt requirements.txt
CACHED
[3/3] RUN pip install -r requirements.txt
CACHED
```
## Prefect GitHub Actions
Prefect provides its own GitHub Actions for [authentication](https://github.com/PrefectHQ/actions-prefect-auth)
and [deployment creation](https://github.com/PrefectHQ/actions-prefect-deploy).
These actions simplify deploying with CI/CD when using `prefect.yaml`,
especially in cases where a repository contains flows used in multiple deployments across multiple
Prefect Cloud workspaces.
Here's an example of integrating these actions into the workflow above:
```yaml
name: Deploy Prefect flow
on:
push:
branches:
- main
jobs:
deploy:
name: Deploy
runs-on: ubuntu-latest
steps:
- name: Checkout
uses: actions/checkout@v4
- name: Log in to Docker Hub
uses: docker/login-action@v3
with:
username: ${{ secrets.DOCKER_USERNAME }}
password: ${{ secrets.DOCKER_PASSWORD }}
- name: Setup Python
uses: actions/setup-python@v5
with:
python-version: "3.12"
- name: Prefect Auth
uses: PrefectHQ/actions-prefect-auth@v1
with:
prefect-api-key: ${{ secrets.PREFECT_API_KEY }}
prefect-workspace: ${{ secrets.PREFECT_WORKSPACE }}
- name: Run Prefect Deploy
uses: PrefectHQ/actions-prefect-deploy@v4
with:
deployment-names: my-deployment
requirements-file-paths: requirements.txt
```
## Authenticate to other Docker image registries
The `docker/login-action` GitHub Action supports pushing images to a wide variety of image registries.
For example, if you are storing Docker images in AWS Elastic Container Registry, you can add your ECR
registry URL to the `registry` key in the `with:` part of the action and use an `AWS_ACCESS_KEY_ID` and
`AWS_SECRET_ACCESS_KEY` as your `username` and `password`.
```yaml
- name: Login to ECR
uses: docker/login-action@v3
with:
registry:
View the logs from each workflow step as they run. The `Prefect Deploy` step includes output about
your image build and push, and the creation/update of your deployment.
```bash
Successfully built image '***/cicd-example:latest'
Successfully pushed image '***/cicd-example:latest'
Successfully created/updated all deployments!
Deployments
|-----------------------------------------|
| Name | Status Details |
|---------------------|---------|---------|
| hello/my-deployment | applied | |
|-----------------------------------------|
```
## Advanced example
In more complex scenarios, CI/CD processes often need to accommodate several additional
considerations to enable a smooth development workflow:
* Making code available in different environments as it advances through stages of development
* Handling independent deployment of distinct groupings of work, as in a monorepo
* Efficiently using build time to avoid repeated work
This [example repository](https://github.com/prefecthq/cicd-example-workspaces) addresses each of these
considerations with a combination of Prefect's and GitHub's capabilities.
### Deploy to multiple workspaces
The deployment processes to run are automatically selected when changes are pushed, depending on
two conditions:
```yaml
on:
push:
branches:
- stg
- main
paths:
- "project_1/**"
```
* **`branches:`** - which branch has changed. This ultimately selects which Prefect workspace a
deployment is created or updated in. In this example, changes on the `stg` branch deploy flows to a
staging workspace, and changes on the `main` branch deploy flows to a production workspace.
* **`paths:`** - which project folders' files have changed. Since each project folder contains its own flows,
dependencies, and `prefect.yaml`, it represents a complete set of logic and configuration that can deploy
independently. Each project in this repository gets its own GitHub Actions workflow YAML file.
The `prefect.yaml` file in each project folder depends on environment variables dictated by the
selected job in each CI/CD workflow; enabling external code storage for Prefect deployments that is clearly
separated across projects and environments.
```
.
|--- cicd-example-workspaces-prod # production bucket
| |--- project_1
| |---project_2
|---cicd-example-workspaces-stg # staging bucket
|--- project_1
|---project_2
```
Deployments in this example use S3 for code storage. So it's important that push steps place flow files
in separate locations depending upon their respective environment and project—so no deployment overwrites another
deployment's files.
### Caching build dependencies
Since building Docker images and installing Python dependencies are essential parts of the deployment process,
it's useful to rely on caching to skip repeated build steps.
The `setup-python` action offers [caching options](https://github.com/actions/setup-python#caching-packages-dependencies)
so Python packages do not have to be downloaded on repeat workflow runs.
```yaml
- name: Setup Python
uses: actions/setup-python@v5
with:
python-version: "3.12"
cache: "pip"
```
The `build-push-action` for building Docker images also offers
[caching options for GitHub Actions](https://docs.docker.com/build/cache/backends/gha/).
If you are not using GitHub, other remote [cache backends](https://docs.docker.com/build/cache/backends/)
are available as well.
```yaml
- name: Build and push
id: build-docker-image
env:
GITHUB_SHA: ${{ steps.get-commit-hash.outputs.COMMIT_HASH }}
uses: docker/build-push-action@v5
with:
context: ${{ env.PROJECT_NAME }}/
push: true
tags: ${{ secrets.DOCKER_USERNAME }}/${{ env.PROJECT_NAME }}:${{ env.GITHUB_SHA }}-stg
cache-from: type=gha
cache-to: type=gha,mode=max
```
```
importing cache manifest from gha:***
DONE 0.1s
[internal] load build context
transferring context: 70B done
DONE 0.0s
[2/3] COPY requirements.txt requirements.txt
CACHED
[3/3] RUN pip install -r requirements.txt
CACHED
```
## Prefect GitHub Actions
Prefect provides its own GitHub Actions for [authentication](https://github.com/PrefectHQ/actions-prefect-auth)
and [deployment creation](https://github.com/PrefectHQ/actions-prefect-deploy).
These actions simplify deploying with CI/CD when using `prefect.yaml`,
especially in cases where a repository contains flows used in multiple deployments across multiple
Prefect Cloud workspaces.
Here's an example of integrating these actions into the workflow above:
```yaml
name: Deploy Prefect flow
on:
push:
branches:
- main
jobs:
deploy:
name: Deploy
runs-on: ubuntu-latest
steps:
- name: Checkout
uses: actions/checkout@v4
- name: Log in to Docker Hub
uses: docker/login-action@v3
with:
username: ${{ secrets.DOCKER_USERNAME }}
password: ${{ secrets.DOCKER_PASSWORD }}
- name: Setup Python
uses: actions/setup-python@v5
with:
python-version: "3.12"
- name: Prefect Auth
uses: PrefectHQ/actions-prefect-auth@v1
with:
prefect-api-key: ${{ secrets.PREFECT_API_KEY }}
prefect-workspace: ${{ secrets.PREFECT_WORKSPACE }}
- name: Run Prefect Deploy
uses: PrefectHQ/actions-prefect-deploy@v4
with:
deployment-names: my-deployment
requirements-file-paths: requirements.txt
```
## Authenticate to other Docker image registries
The `docker/login-action` GitHub Action supports pushing images to a wide variety of image registries.
For example, if you are storing Docker images in AWS Elastic Container Registry, you can add your ECR
registry URL to the `registry` key in the `with:` part of the action and use an `AWS_ACCESS_KEY_ID` and
`AWS_SECRET_ACCESS_KEY` as your `username` and `password`.
```yaml
- name: Login to ECR
uses: docker/login-action@v3
with:
registry: 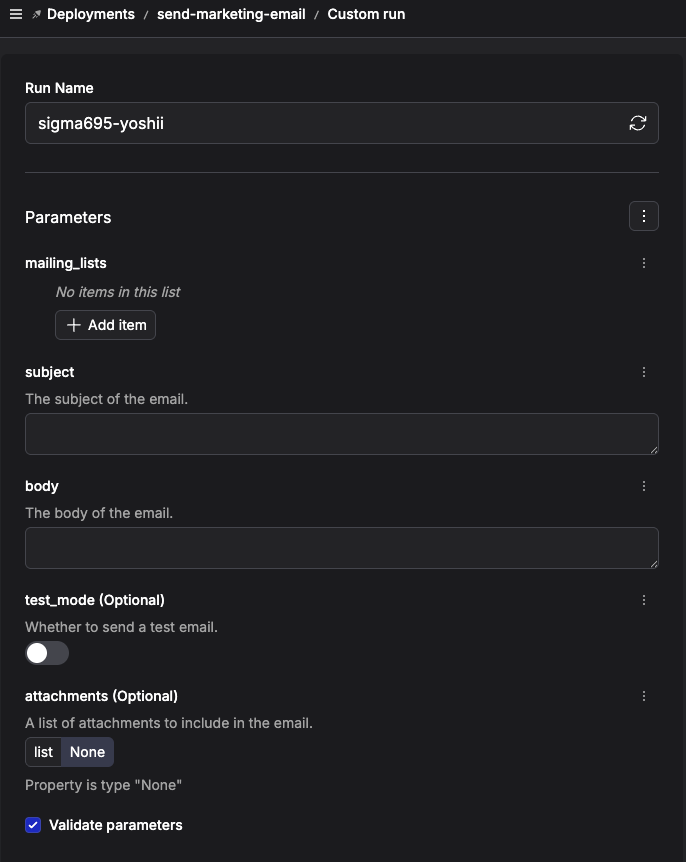 This is good enough for many cases, but consider these additional constraints that could arise from business needs or tech stack restrictions:
* there are only a few valid values for `mailing_lists`
* the `subject` must not exceed 30 characters
* no more than 5 `attachments` are allowed
You *can* simply check these constraints in the body of your flow function:
{/* pmd-metadata: notest */}
```python
@flow
def send_marketing_email(...):
if len(subject) > 30:
raise ValueError("Subject must be less than 30 characters")
if mailing_lists not in ["newsletter", "customers", "beta-testers"]:
raise ValueError("Invalid list to email")
if len(attachments) > 5:
raise ValueError("Too many attachments")
# etc...
```
but there are several downsides to this:
* you have to spin up the infrastructure associated with your flow in order to check the constraints, which is wasteful if it turns out that bad parameters were provided
* this might get duplicative, especially if you have similarly constrained parameters for different workflows
To improve on this, we will use `pydantic` to build a convenient, self-documenting, and reusable flow signature that the Prefect UI can build a better form from.
## Building a convenient flow signature
Let's address the constraints on `mailing_lists`, `subject`, and `attachments`.
### Using `Literal` to restrict valid values
> there are only a few valid values for `mailing_lists`
Say our valid mailing lists are: `["newsletter", "customers", "beta-testers"]`
We can define a `Literal` to specify the valid values for the `mailing_lists` parameter.
```python
from typing import Literal
MailingList = Literal["newsletter", "customers", "beta-testers"]
```
This is good enough for many cases, but consider these additional constraints that could arise from business needs or tech stack restrictions:
* there are only a few valid values for `mailing_lists`
* the `subject` must not exceed 30 characters
* no more than 5 `attachments` are allowed
You *can* simply check these constraints in the body of your flow function:
{/* pmd-metadata: notest */}
```python
@flow
def send_marketing_email(...):
if len(subject) > 30:
raise ValueError("Subject must be less than 30 characters")
if mailing_lists not in ["newsletter", "customers", "beta-testers"]:
raise ValueError("Invalid list to email")
if len(attachments) > 5:
raise ValueError("Too many attachments")
# etc...
```
but there are several downsides to this:
* you have to spin up the infrastructure associated with your flow in order to check the constraints, which is wasteful if it turns out that bad parameters were provided
* this might get duplicative, especially if you have similarly constrained parameters for different workflows
To improve on this, we will use `pydantic` to build a convenient, self-documenting, and reusable flow signature that the Prefect UI can build a better form from.
## Building a convenient flow signature
Let's address the constraints on `mailing_lists`, `subject`, and `attachments`.
### Using `Literal` to restrict valid values
> there are only a few valid values for `mailing_lists`
Say our valid mailing lists are: `["newsletter", "customers", "beta-testers"]`
We can define a `Literal` to specify the valid values for the `mailing_lists` parameter.
```python
from typing import Literal
MailingList = Literal["newsletter", "customers", "beta-testers"]
```
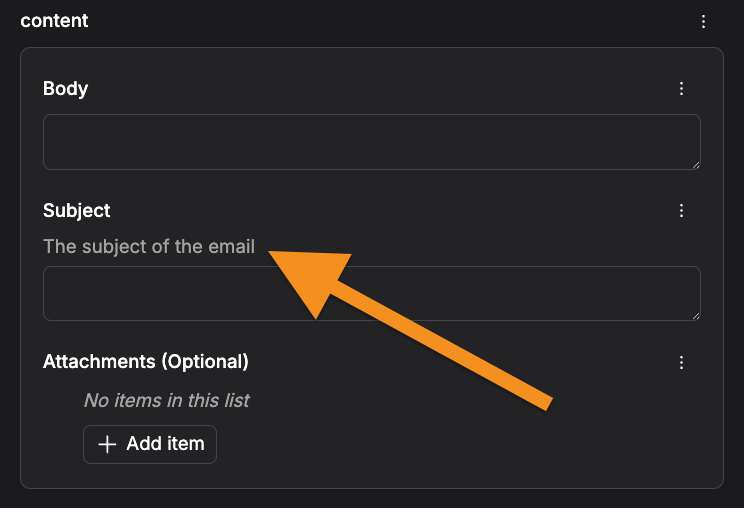 Similarly, you can:
* pass `title` to `Field` to override the field name in the form
* define a docstring for `EmailContent` to add a description to this group of parameters in the form
Similarly, you can:
* pass `title` to `Field` to override the field name in the form
* define a docstring for `EmailContent` to add a description to this group of parameters in the form
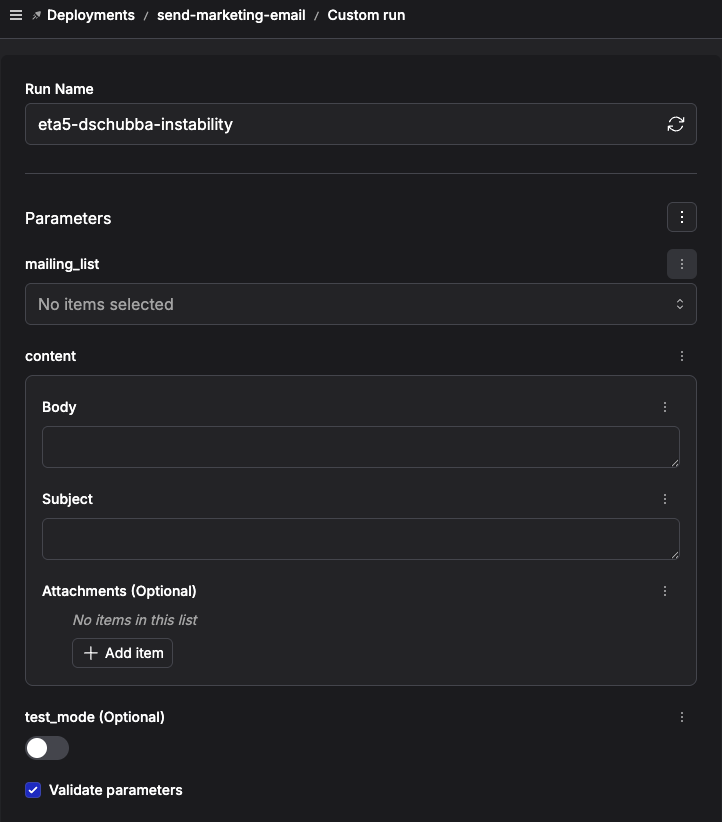 where the `mailing_lists` parameter renders as a multi-select dropdown that only allows the `Literal` values from our `MailingList` type.
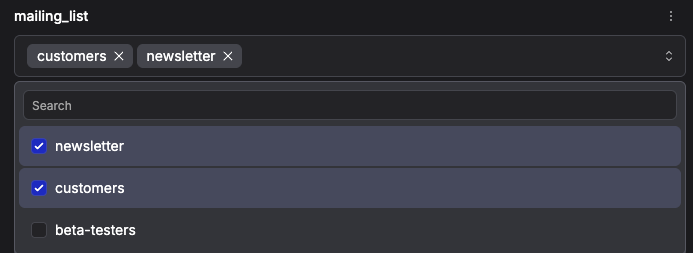 and any constraints you've defined on the `EmailContent` fields will be enforced before the run is submitted.
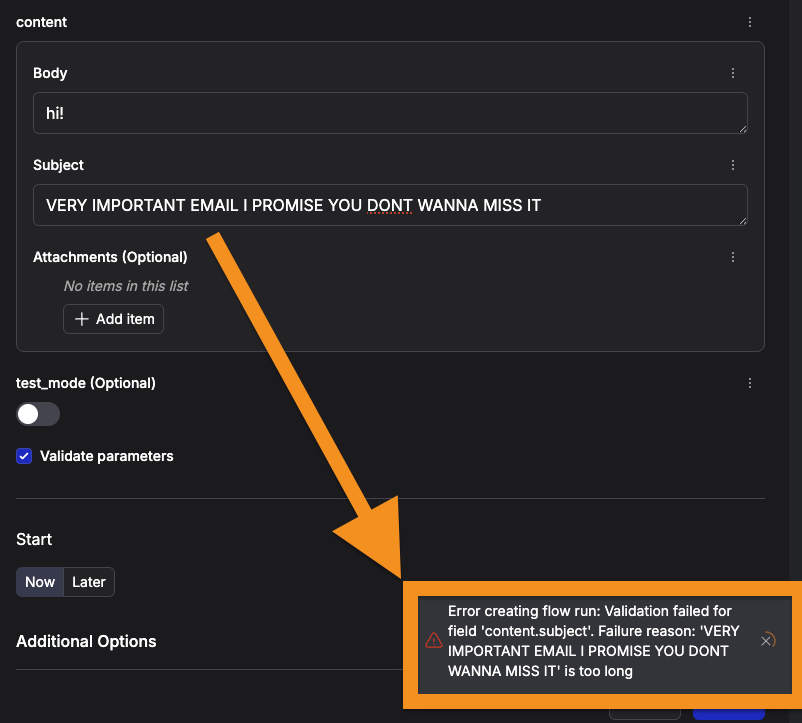
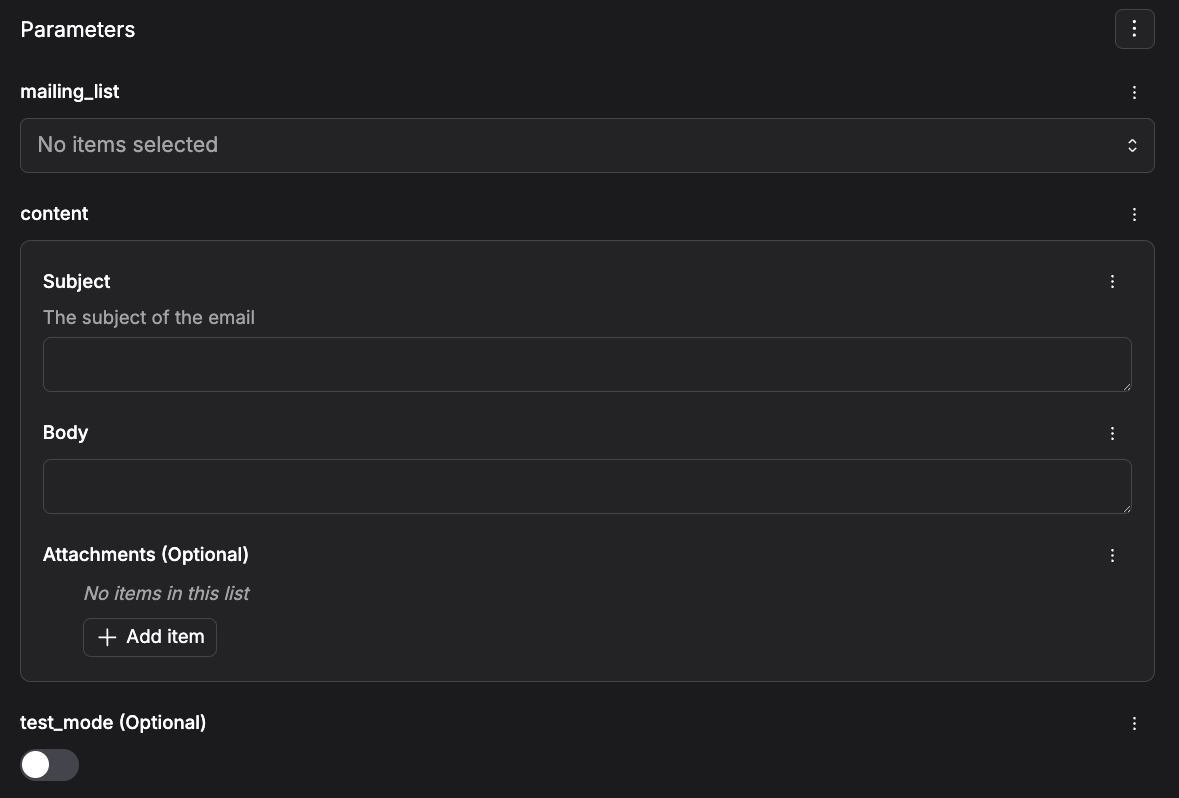 ## Recap
We have now embedded the constraints on our parameters in the types that describe our flow signature, which means:
* the UI can enforce these constraints before the run is submitted - **less wasted infra cycles**
* workflow inputs are **self-documenting**, both in the UI and in the code defining your workflow
* the types used in this signature can be **easily reused** for other similar workflows
## Debugging and related resources
As you craft a schema for your flow signature, you may want to inspect the raw OpenAPI schema that `pydantic` generates, as it is what the Prefect UI uses to build the form.
Call `model_json_schema()` on your `BaseModel` subclass to inspect the raw schema.
{/* pmd-metadata: notest */}
```python
from rich import print as pprint
from pydantic import BaseModel, Field
class EmailContent(BaseModel):
subject: str = Field(max_length=30)
body: str = Field(default=...)
attachments: list[str] = Field(default_factory=list, max_length=5)
pprint(EmailContent.model_json_schema())
```
```
{
'properties': {
'subject': {'maxLength': 30, 'title': 'Subject', 'type': 'string'},
'body': {'title': 'Body', 'type': 'string'},
'attachments': {'items': {'type': 'string'}, 'maxItems': 5, 'title': 'Attachments', 'type': 'array'}
},
'required': ['subject', 'body'],
'title': 'EmailContent',
'type': 'object'
}
```
For more on constrained types and validation features available in `pydantic`, see their documentation on [models](https://docs.pydantic.dev/latest/concepts/models/) and [types](https://docs.pydantic.dev/latest/concepts/types/).
# Advanced
Source: https://docs-3.prefect.io/v3/advanced/index
## Sections
## Recap
We have now embedded the constraints on our parameters in the types that describe our flow signature, which means:
* the UI can enforce these constraints before the run is submitted - **less wasted infra cycles**
* workflow inputs are **self-documenting**, both in the UI and in the code defining your workflow
* the types used in this signature can be **easily reused** for other similar workflows
## Debugging and related resources
As you craft a schema for your flow signature, you may want to inspect the raw OpenAPI schema that `pydantic` generates, as it is what the Prefect UI uses to build the form.
Call `model_json_schema()` on your `BaseModel` subclass to inspect the raw schema.
{/* pmd-metadata: notest */}
```python
from rich import print as pprint
from pydantic import BaseModel, Field
class EmailContent(BaseModel):
subject: str = Field(max_length=30)
body: str = Field(default=...)
attachments: list[str] = Field(default_factory=list, max_length=5)
pprint(EmailContent.model_json_schema())
```
```
{
'properties': {
'subject': {'maxLength': 30, 'title': 'Subject', 'type': 'string'},
'body': {'title': 'Body', 'type': 'string'},
'attachments': {'items': {'type': 'string'}, 'maxItems': 5, 'title': 'Attachments', 'type': 'array'}
},
'required': ['subject', 'body'],
'title': 'EmailContent',
'type': 'object'
}
```
For more on constrained types and validation features available in `pydantic`, see their documentation on [models](https://docs.pydantic.dev/latest/concepts/models/) and [types](https://docs.pydantic.dev/latest/concepts/types/).
# Advanced
Source: https://docs-3.prefect.io/v3/advanced/index
## Sections
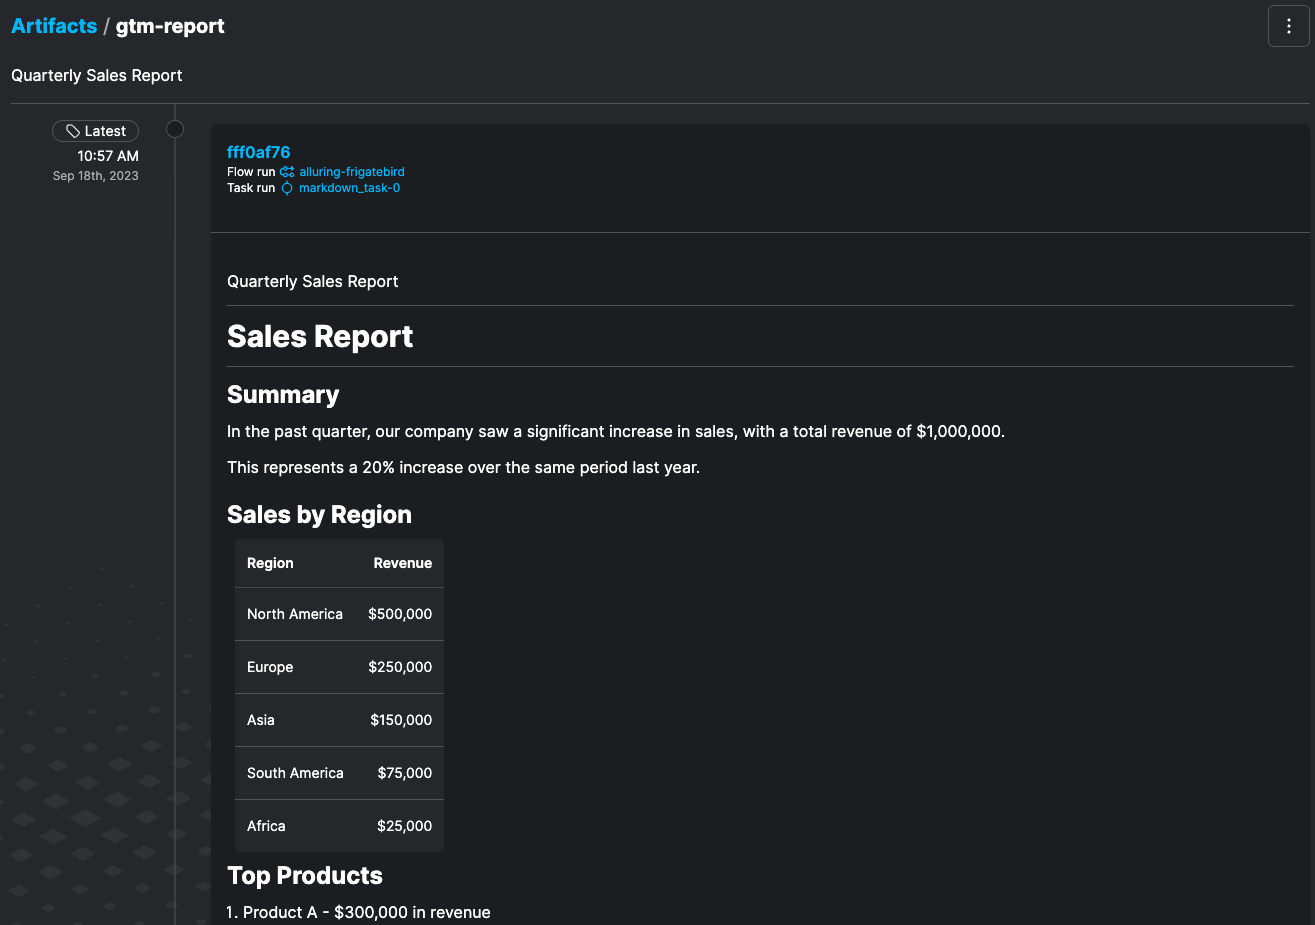 Common use cases for artifacts include:
* **Progress** indicators: Publish progress indicators for long-running tasks. This helps monitor the progress of your tasks and flows and ensure they are running as expected.
* **Debugging**: Publish data that you care about in the UI to easily see when and where your results were written. If an artifact doesn't look the way you expect, you can find out which flow run last updated it, and you can click through a link in the artifact to a storage location (such as an S3 bucket).
* **Data quality checks**: Publish data quality checks from in-progress tasks to ensure that data quality is maintained throughout a pipeline. Artifacts make for great performance graphs. For example, you can visualize a long-running machine learning model training run. You can also track artifact versions, making it easier to identify changes in your data.
* **Documentation**: Publish documentation and sample data to help you keep track of your work and share information.
For example, add a description to signify why a piece of data is important.
## Artifact types
There are five artifact types:
* links
* Markdown
* progress
* images
* tables
Common use cases for artifacts include:
* **Progress** indicators: Publish progress indicators for long-running tasks. This helps monitor the progress of your tasks and flows and ensure they are running as expected.
* **Debugging**: Publish data that you care about in the UI to easily see when and where your results were written. If an artifact doesn't look the way you expect, you can find out which flow run last updated it, and you can click through a link in the artifact to a storage location (such as an S3 bucket).
* **Data quality checks**: Publish data quality checks from in-progress tasks to ensure that data quality is maintained throughout a pipeline. Artifacts make for great performance graphs. For example, you can visualize a long-running machine learning model training run. You can also track artifact versions, making it easier to identify changes in your data.
* **Documentation**: Publish documentation and sample data to help you keep track of your work and share information.
For example, add a description to signify why a piece of data is important.
## Artifact types
There are five artifact types:
* links
* Markdown
* progress
* images
* tables
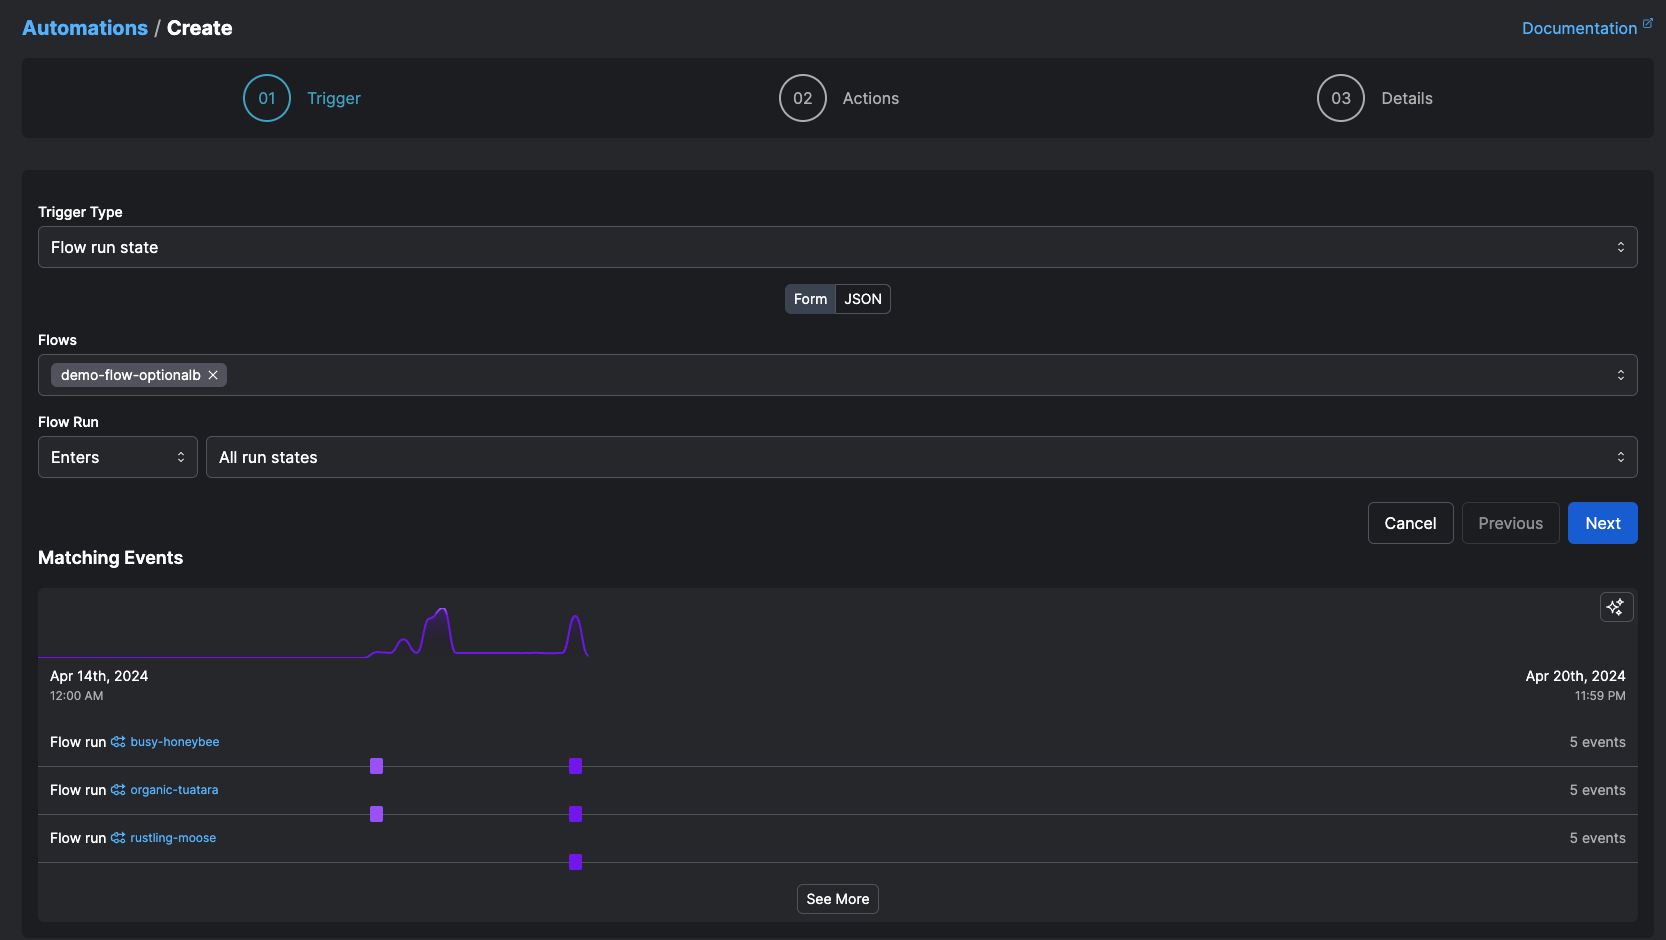 For example, in the case of flow run state change triggers, you might expect production flows to finish in no longer
than thirty minutes. But transient infrastructure or network issues could cause your flow to get “stuck” in a running state.
A trigger could kick off an action if the flow stays in a running state for more than 30 minutes.
This action could be taken on the flow itself, such as cancelling or restarting it. Or the action could take the form of a
notification for someone to take manual remediation steps. Or you could set both actions to take place when the trigger occurs.
### Actions
Actions specify what your automation does when its trigger criteria are met. Current action types include:
* Cancel a flow run
* Pause or resume a schedule
* Run a deployment
* Pause or resume a deployment schedule
* Pause or resume a work pool
* Pause or resume a work queue
* Pause or resume an automation
* Send a [notification](#sending-notifications-with-automations)
* Call a webhook
* Suspend a flow run
* Change the state of a flow run
For example, in the case of flow run state change triggers, you might expect production flows to finish in no longer
than thirty minutes. But transient infrastructure or network issues could cause your flow to get “stuck” in a running state.
A trigger could kick off an action if the flow stays in a running state for more than 30 minutes.
This action could be taken on the flow itself, such as cancelling or restarting it. Or the action could take the form of a
notification for someone to take manual remediation steps. Or you could set both actions to take place when the trigger occurs.
### Actions
Actions specify what your automation does when its trigger criteria are met. Current action types include:
* Cancel a flow run
* Pause or resume a schedule
* Run a deployment
* Pause or resume a deployment schedule
* Pause or resume a work pool
* Pause or resume a work queue
* Pause or resume an automation
* Send a [notification](#sending-notifications-with-automations)
* Call a webhook
* Suspend a flow run
* Change the state of a flow run
 ### Selected and inferred action targets
Some actions require you to either select the target of the action, or specify that the target of the action should be
inferred. Selected targets are simple and useful for when you know exactly what object your action should act on. For
example, the case of a cleanup flow you want to run or a specific notification you want to send.
Inferred targets are deduced from the trigger itself.
For example, if a trigger fires on a flow run that is stuck in a running state, and the action is to cancel an inferred
flow run—the flow run that caused the trigger to fire.
Similarly, if a trigger fires on a work queue event and the corresponding action is to pause an inferred work queue, the
inferred work queue is the one that emitted the event.
Prefect infers the relevant event whenever possible, but sometimes one does not exist.
Specify a name and, optionally, a description for the automation.
## Sending notifications with automations
Automations support sending notifications through any predefined block that is capable of and configured
to send a message, including:
* Slack message to a channel
* Microsoft Teams message to a channel
* Email to an email address
### Selected and inferred action targets
Some actions require you to either select the target of the action, or specify that the target of the action should be
inferred. Selected targets are simple and useful for when you know exactly what object your action should act on. For
example, the case of a cleanup flow you want to run or a specific notification you want to send.
Inferred targets are deduced from the trigger itself.
For example, if a trigger fires on a flow run that is stuck in a running state, and the action is to cancel an inferred
flow run—the flow run that caused the trigger to fire.
Similarly, if a trigger fires on a work queue event and the corresponding action is to pause an inferred work queue, the
inferred work queue is the one that emitted the event.
Prefect infers the relevant event whenever possible, but sometimes one does not exist.
Specify a name and, optionally, a description for the automation.
## Sending notifications with automations
Automations support sending notifications through any predefined block that is capable of and configured
to send a message, including:
* Slack message to a channel
* Microsoft Teams message to a channel
* Email to an email address
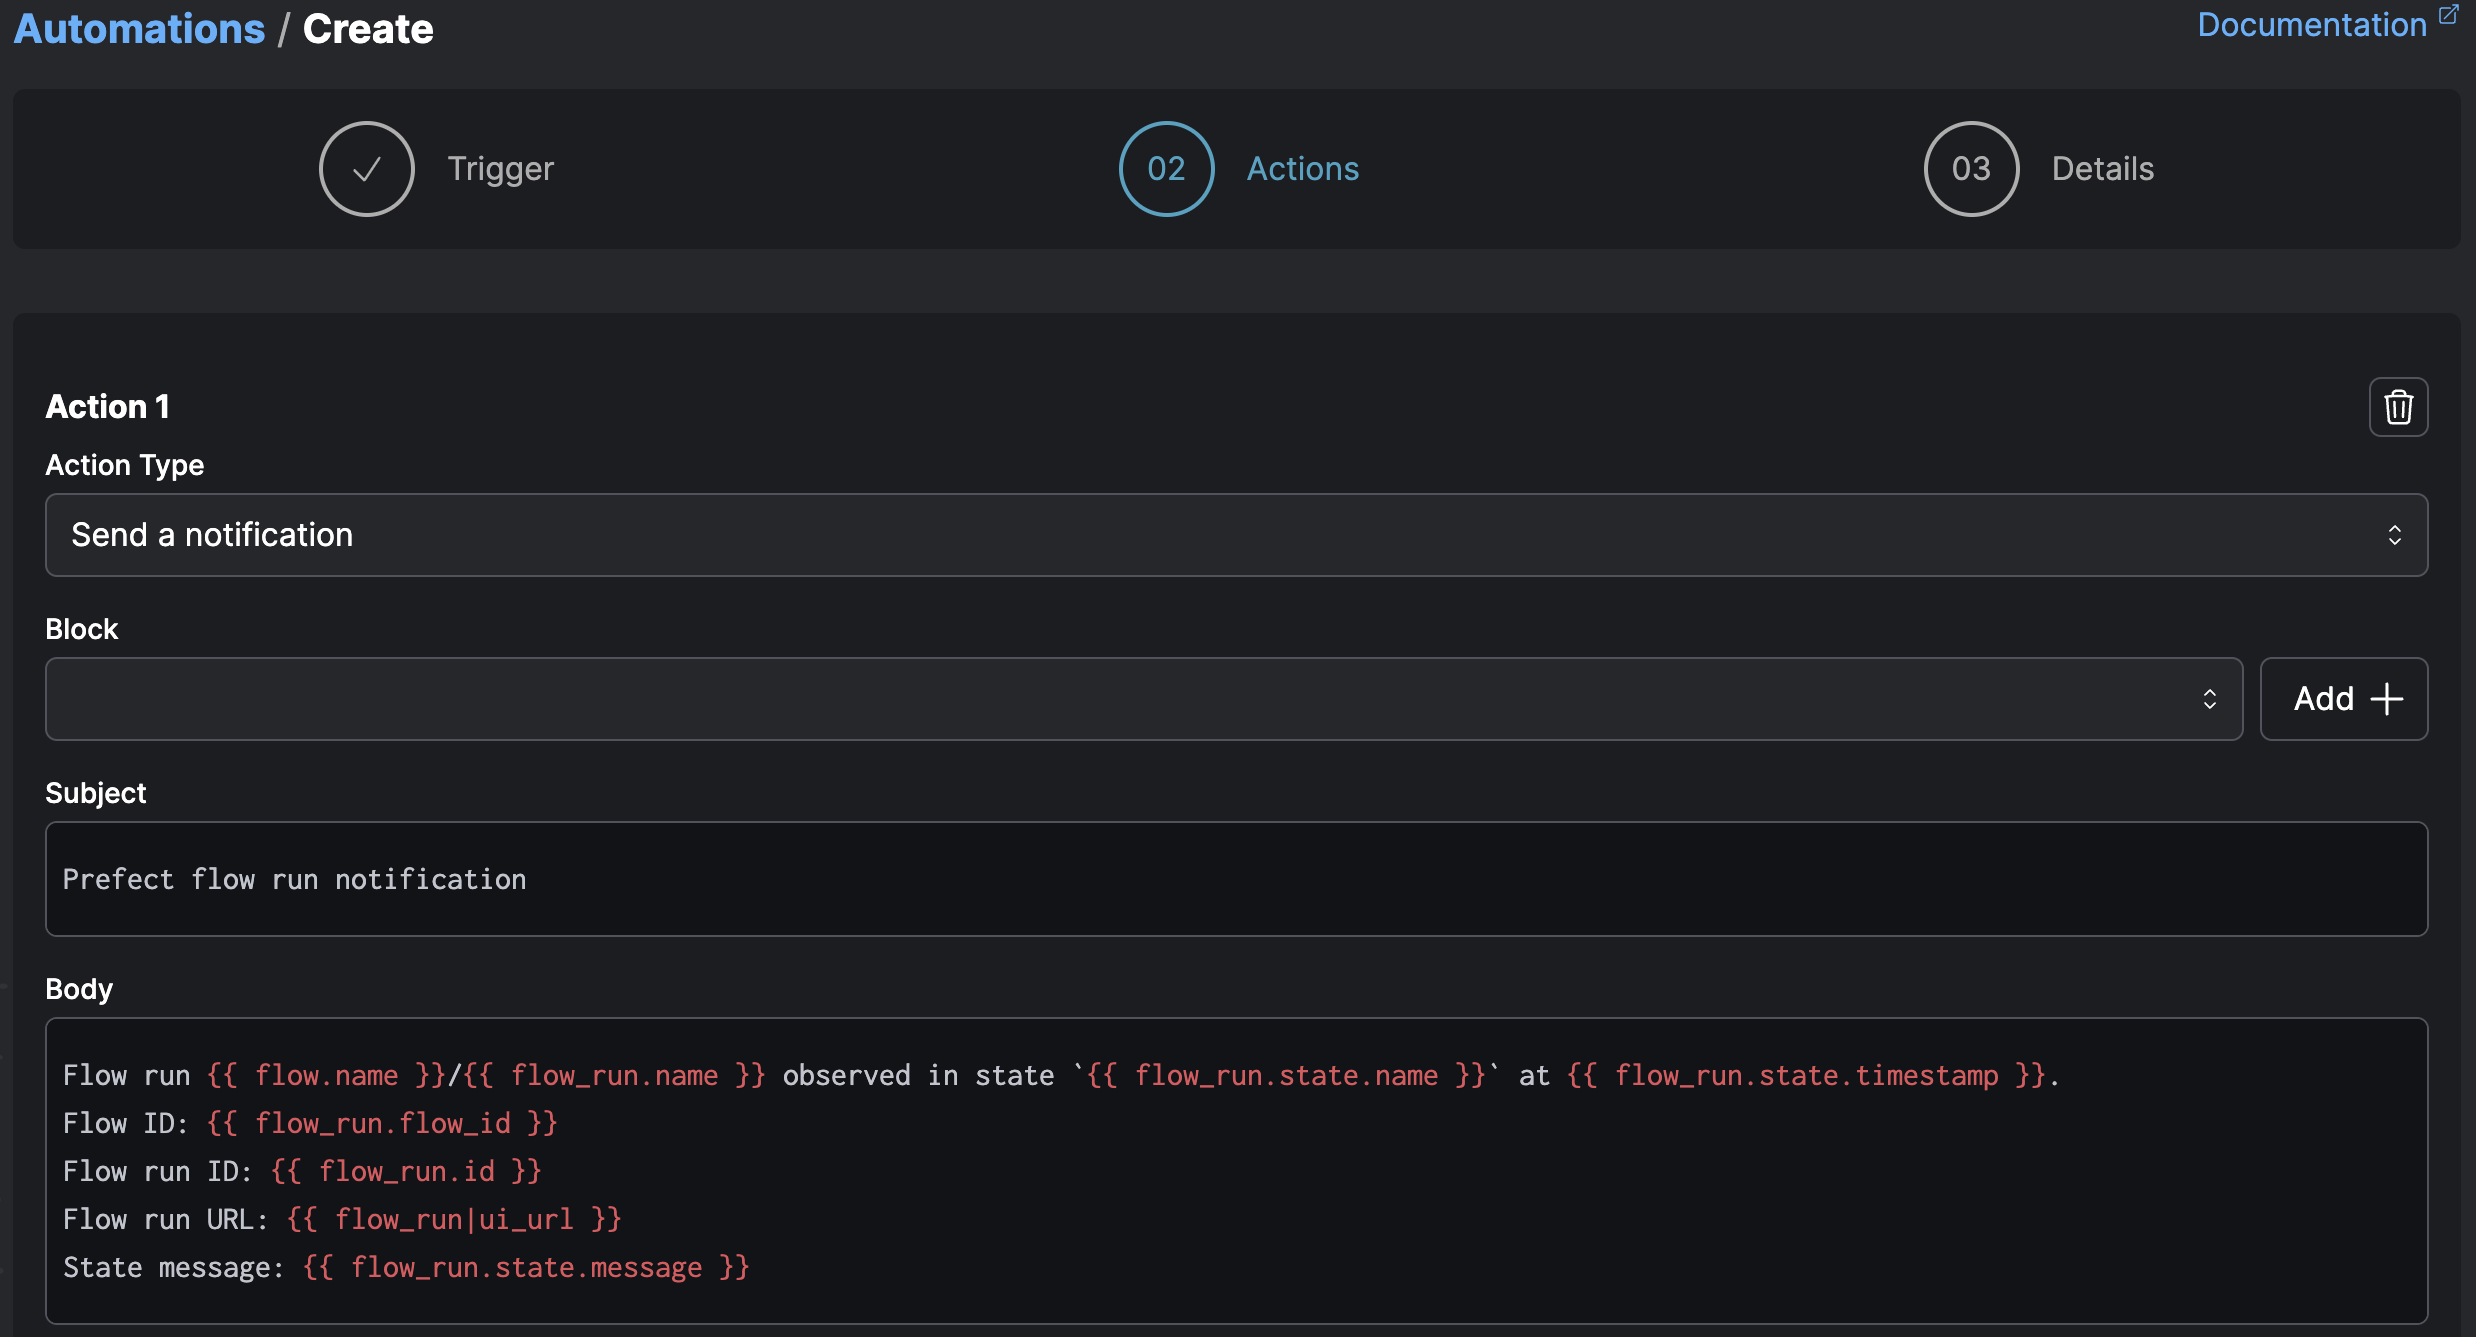 ## Templating with Jinja
You can access templated variables with automation actions through [Jinja](https://palletsprojects.com/p/jinja/) syntax.
Templated variables enable you to dynamically include details from an automation trigger, such as a flow or pool name.
Jinja templated variable syntax wraps the variable name in double curly brackets, like this: `{{ variable }}`.
You can access properties of the underlying flow run objects including:
* [flow\_run](https://reference.prefect.io/prefect/server/schemas/core/#prefect.server.schemas.core.FlowRun)
* [flow](https://reference.prefect.io/prefect/server/schemas/core/#prefect.server.schemas.core.Flow)
* [deployment](https://reference.prefect.io/prefect/server/schemas/core/#prefect.server.schemas.core.Deployment)
* [work\_queue](https://reference.prefect.io/prefect/server/schemas/core/#prefect.server.schemas.core.WorkQueue)
* [work\_pool](https://reference.prefect.io/prefect/server/schemas/core/#prefect.server.schemas.core.WorkPool)
In addition to its native properties, each object includes an `id` along with `created` and `updated` timestamps.
The `flow_run|ui_url` token returns the URL to view the flow run in the UI.
Here's an example relevant to a flow run state-based notification:
```
Flow run {{ flow_run.name }} entered state {{ flow_run.state.name }}.
Timestamp: {{ flow_run.state.timestamp }}
Flow ID: {{ flow_run.flow_id }}
Flow Run ID: {{ flow_run.id }}
State message: {{ flow_run.state.message }}
```
The resulting Slack webhook notification looks something like this:
## Templating with Jinja
You can access templated variables with automation actions through [Jinja](https://palletsprojects.com/p/jinja/) syntax.
Templated variables enable you to dynamically include details from an automation trigger, such as a flow or pool name.
Jinja templated variable syntax wraps the variable name in double curly brackets, like this: `{{ variable }}`.
You can access properties of the underlying flow run objects including:
* [flow\_run](https://reference.prefect.io/prefect/server/schemas/core/#prefect.server.schemas.core.FlowRun)
* [flow](https://reference.prefect.io/prefect/server/schemas/core/#prefect.server.schemas.core.Flow)
* [deployment](https://reference.prefect.io/prefect/server/schemas/core/#prefect.server.schemas.core.Deployment)
* [work\_queue](https://reference.prefect.io/prefect/server/schemas/core/#prefect.server.schemas.core.WorkQueue)
* [work\_pool](https://reference.prefect.io/prefect/server/schemas/core/#prefect.server.schemas.core.WorkPool)
In addition to its native properties, each object includes an `id` along with `created` and `updated` timestamps.
The `flow_run|ui_url` token returns the URL to view the flow run in the UI.
Here's an example relevant to a flow run state-based notification:
```
Flow run {{ flow_run.name }} entered state {{ flow_run.state.name }}.
Timestamp: {{ flow_run.state.timestamp }}
Flow ID: {{ flow_run.flow_id }}
Flow Run ID: {{ flow_run.id }}
State message: {{ flow_run.state.message }}
```
The resulting Slack webhook notification looks something like this:
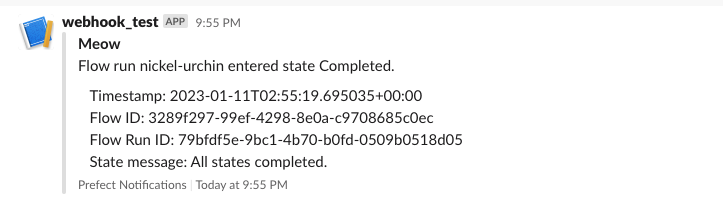 You could include `flow` and `deployment` properties:
```
Flow run {{ flow_run.name }} for flow {{ flow.name }}
entered state {{ flow_run.state.name }}
with message {{ flow_run.state.message }}
Flow tags: {{ flow_run.tags }}
Deployment name: {{ deployment.name }}
Deployment version: {{ deployment.version }}
Deployment parameters: {{ deployment.parameters }}
```
An automation that reports on work pool status might include notifications using `work_pool` properties:
```
Work pool status alert!
Name: {{ work_pool.name }}
Last polled: {{ work_pool.last_polled }}
```
In addition to those shortcuts for flows, deployments, and work pools, you have access to the automation and the
event that triggered the automation. See the [Automations API](https://app.prefect.cloud/api/docs#tag/Automations)
for additional details.
```
Automation: {{ automation.name }}
Description: {{ automation.description }}
Event: {{ event.id }}
Resource:
{% for label, value in event.resource %}
{{ label }}: {{ value }}
{% endfor %}
Related Resources:
{% for related in event.related %}
Role: {{ related.role }}
{% for label, value in related %}
{{ label }}: {{ value }}
{% endfor %}
{% endfor %}
```
Note that this example also illustrates the ability to use Jinja features such as iterator and for loop
[control structures](https://jinja.palletsprojects.com/en/3.1.x/templates/#list-of-control-structures) when
templating notifications.
For more on the common use case of passing an upstream flow run's parameters to the flow run invoked by the automation, see the [Passing parameters to a flow run](/v3/how-to-guides/automations/access-parameters-in-templates/) guide.
## Further reading
* To learn more about Prefect events, which can trigger automations, see the [events docs](/v3/concepts/events/).
* See the [webhooks guide](/v3/how-to-guides/cloud/create-a-webhook/)
to learn how to create webhooks and receive external events.
# Blocks
Source: https://docs-3.prefect.io/v3/concepts/blocks
Prefect blocks allow you to manage configuration schemas, infrastructure, and secrets for use with deployments or flow scripts.
export const blocks = {
cli: "https://docs.prefect.io/v3/api-ref/cli/block",
api: "https://app.prefect.cloud/api/docs#tag/Blocks",
tf: "https://registry.terraform.io/providers/PrefectHQ/prefect/latest/docs/resources/block"
};
export const TF = ({name, href}) =>
You could include `flow` and `deployment` properties:
```
Flow run {{ flow_run.name }} for flow {{ flow.name }}
entered state {{ flow_run.state.name }}
with message {{ flow_run.state.message }}
Flow tags: {{ flow_run.tags }}
Deployment name: {{ deployment.name }}
Deployment version: {{ deployment.version }}
Deployment parameters: {{ deployment.parameters }}
```
An automation that reports on work pool status might include notifications using `work_pool` properties:
```
Work pool status alert!
Name: {{ work_pool.name }}
Last polled: {{ work_pool.last_polled }}
```
In addition to those shortcuts for flows, deployments, and work pools, you have access to the automation and the
event that triggered the automation. See the [Automations API](https://app.prefect.cloud/api/docs#tag/Automations)
for additional details.
```
Automation: {{ automation.name }}
Description: {{ automation.description }}
Event: {{ event.id }}
Resource:
{% for label, value in event.resource %}
{{ label }}: {{ value }}
{% endfor %}
Related Resources:
{% for related in event.related %}
Role: {{ related.role }}
{% for label, value in related %}
{{ label }}: {{ value }}
{% endfor %}
{% endfor %}
```
Note that this example also illustrates the ability to use Jinja features such as iterator and for loop
[control structures](https://jinja.palletsprojects.com/en/3.1.x/templates/#list-of-control-structures) when
templating notifications.
For more on the common use case of passing an upstream flow run's parameters to the flow run invoked by the automation, see the [Passing parameters to a flow run](/v3/how-to-guides/automations/access-parameters-in-templates/) guide.
## Further reading
* To learn more about Prefect events, which can trigger automations, see the [events docs](/v3/concepts/events/).
* See the [webhooks guide](/v3/how-to-guides/cloud/create-a-webhook/)
to learn how to create webhooks and receive external events.
# Blocks
Source: https://docs-3.prefect.io/v3/concepts/blocks
Prefect blocks allow you to manage configuration schemas, infrastructure, and secrets for use with deployments or flow scripts.
export const blocks = {
cli: "https://docs.prefect.io/v3/api-ref/cli/block",
api: "https://app.prefect.cloud/api/docs#tag/Blocks",
tf: "https://registry.terraform.io/providers/PrefectHQ/prefect/latest/docs/resources/block"
};
export const TF = ({name, href}) => 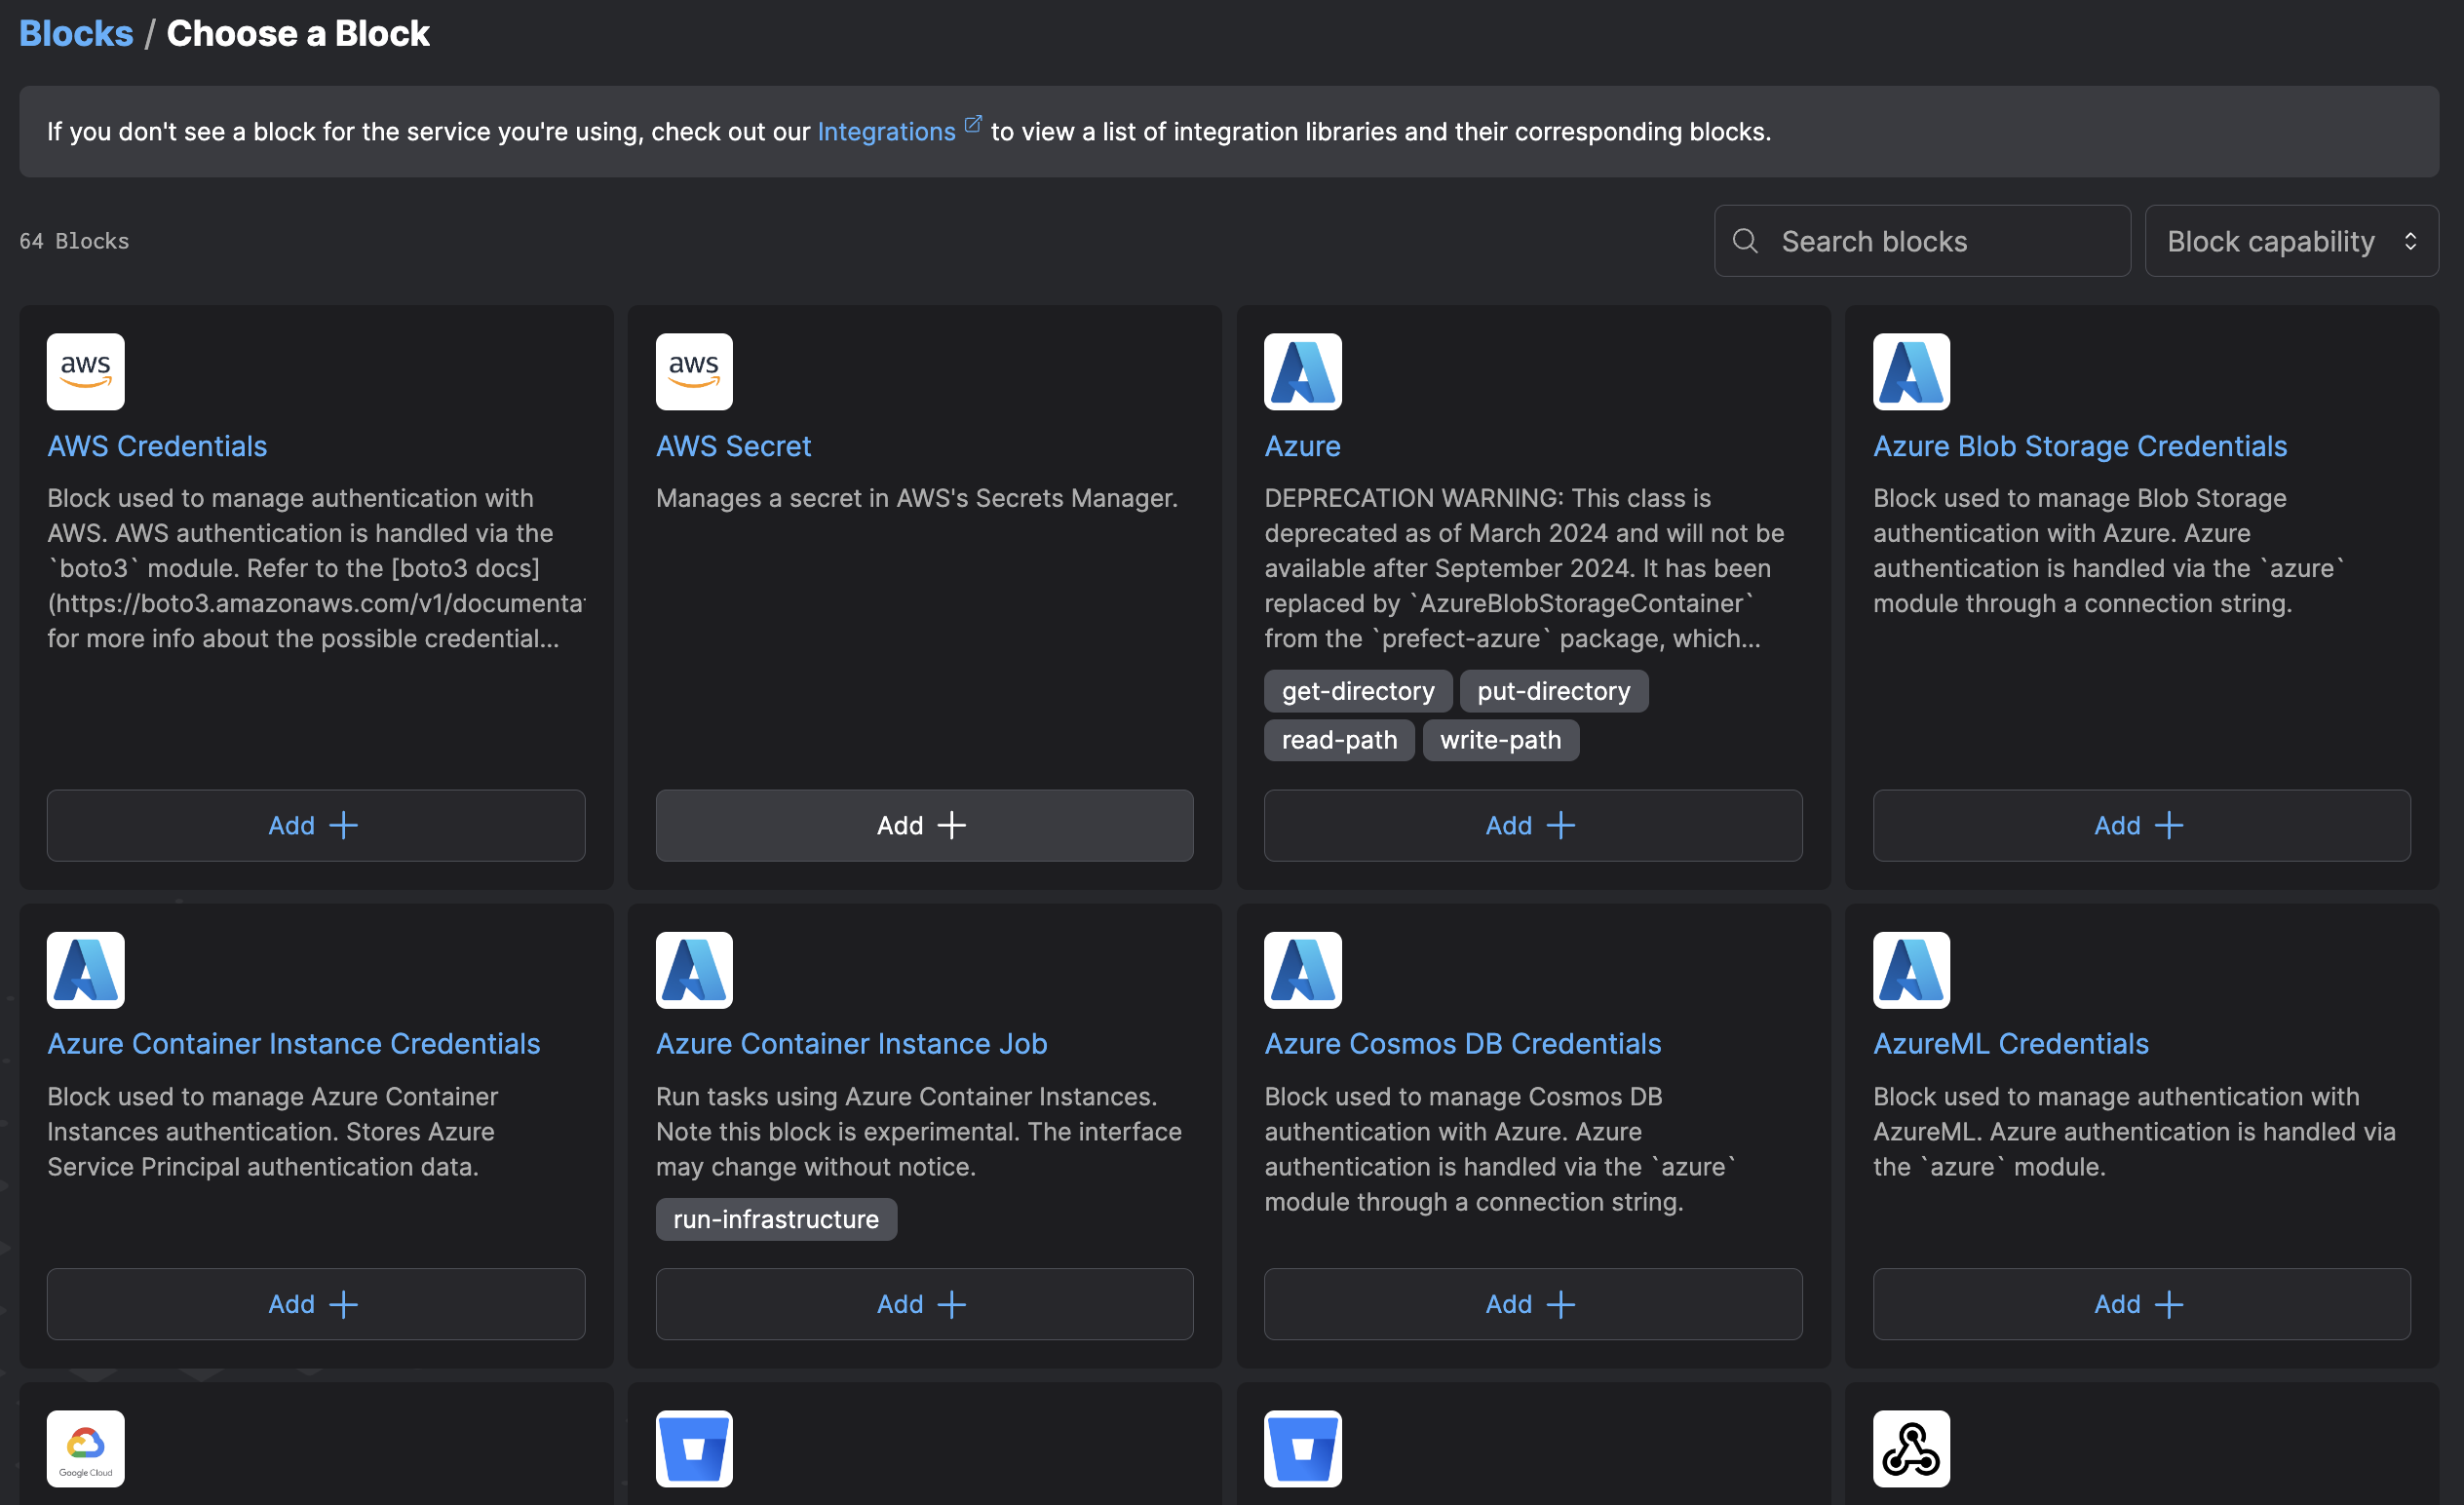 These types separate blocks from [Prefect variables](/v3/develop/variables/), which are unstructured JSON documents.
In addition, block schemas allow for fields of `SecretStr` type which are stored with additional encryption and not displayed by default in the UI.
Block types are identified by a *slug* that is not configurable.
{/* pmd-metadata: notest */}
```python
from prefect.blocks.core import Block
class Cube(Block):
edge_length_inches: float
# register the block type under the slug 'cube'
Cube.register_type_and_schema()
```
These types separate blocks from [Prefect variables](/v3/develop/variables/), which are unstructured JSON documents.
In addition, block schemas allow for fields of `SecretStr` type which are stored with additional encryption and not displayed by default in the UI.
Block types are identified by a *slug* that is not configurable.
{/* pmd-metadata: notest */}
```python
from prefect.blocks.core import Block
class Cube(Block):
edge_length_inches: float
# register the block type under the slug 'cube'
Cube.register_type_and_schema()
```
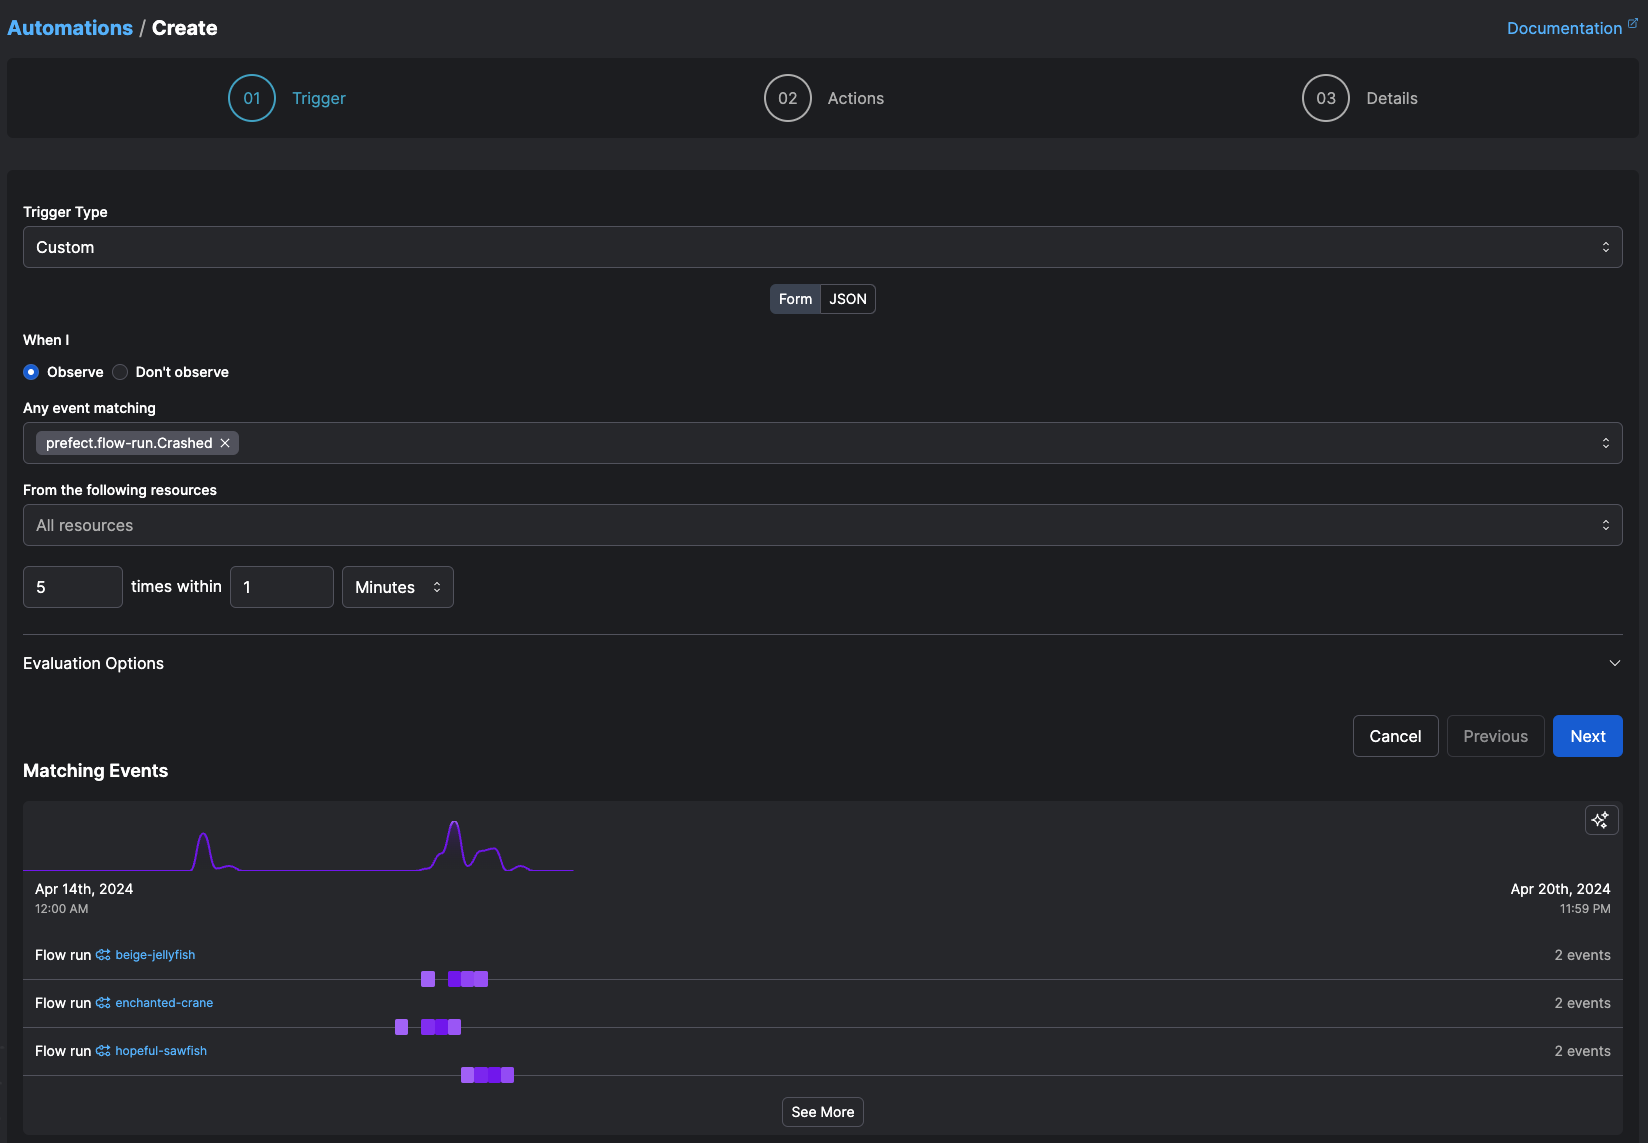 This is the schema that defines an event trigger:
| Name | Type | Supports trailing wildcards | Description |
| ------------------ | ------------------------- | --------------------------- | ---------------------------------------------------------------------------------------------------------------------------------------------------------------------------------------------------------------------------------------------------------------------------------------------------------------------------------------------------- |
| **match** | object | ✅ | Labels for resources which this Automation will match. |
| **match\_related** | object OR array of object | ✅ | Labels for related resources which this Automation will match. |
| **posture** | string enum | N/A | The posture of this Automation, either Reactive or Proactive. Reactive automations respond to the presence of the expected events, while Proactive automations respond to the absence of those expected events. |
| **after** | array of strings | ✅ | Event(s), one of which must have first been seen to start this automation. |
| **expect** | array of strings | ✅ | The event(s) this automation expects to see. If empty, this automation will evaluate any matched event. |
| **for\_each** | array of strings | ❌ | Evaluate the Automation separately for each distinct value of these labels on the resource. By default, labels refer to the primary resource of the triggering event. You may also refer to labels from related resources by specifying `related:
This is the schema that defines an event trigger:
| Name | Type | Supports trailing wildcards | Description |
| ------------------ | ------------------------- | --------------------------- | ---------------------------------------------------------------------------------------------------------------------------------------------------------------------------------------------------------------------------------------------------------------------------------------------------------------------------------------------------- |
| **match** | object | ✅ | Labels for resources which this Automation will match. |
| **match\_related** | object OR array of object | ✅ | Labels for related resources which this Automation will match. |
| **posture** | string enum | N/A | The posture of this Automation, either Reactive or Proactive. Reactive automations respond to the presence of the expected events, while Proactive automations respond to the absence of those expected events. |
| **after** | array of strings | ✅ | Event(s), one of which must have first been seen to start this automation. |
| **expect** | array of strings | ✅ | The event(s) this automation expects to see. If empty, this automation will evaluate any matched event. |
| **for\_each** | array of strings | ❌ | Evaluate the Automation separately for each distinct value of these labels on the resource. By default, labels refer to the primary resource of the triggering event. You may also refer to labels from related resources by specifying `related: